Page 358 of 582

5-19
Driving your vehicle
5
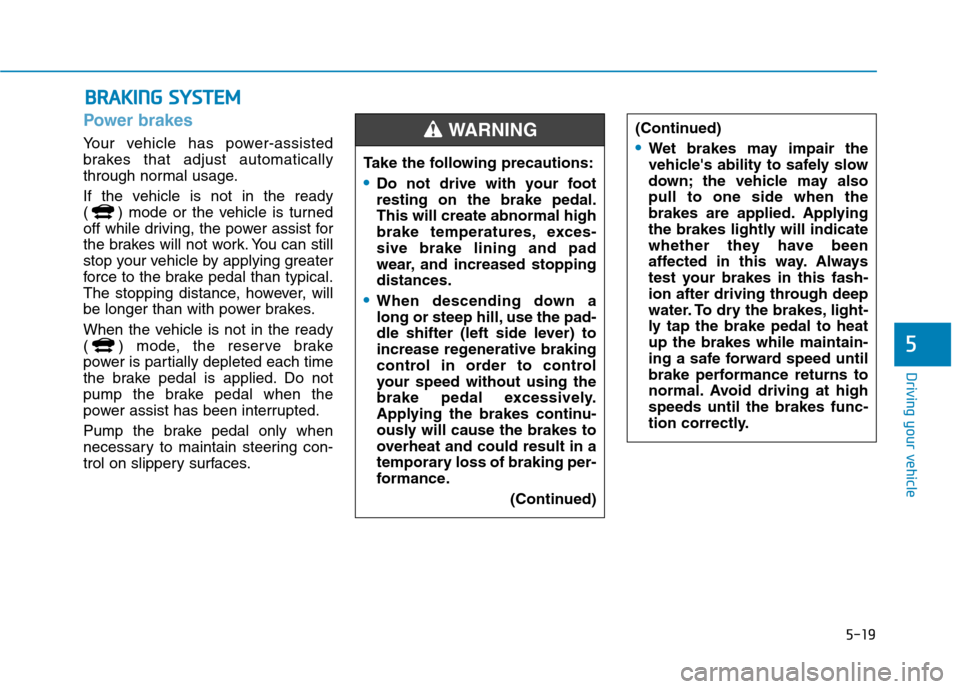
Power brakes
Your vehicle has power-assisted
brakes that adjust automatically
through normal usage.
If the vehicle is not in the ready
( ) mode or the vehicle is turned
off while driving, the power assist for
the brakes will not work. You can still
stop your vehicle by applying greater
force to the brake pedal than typical.
The stopping distance, however, will
be longer than with power brakes.
When the vehicle is not in the ready
( ) mode, the reserve brake
power is partially depleted each time
the brake pedal is applied. Do not
pump the brake pedal when the
power assist has been interrupted.
Pump the brake pedal only when
necessary to maintain steering con-
trol on slippery surfaces.
BBRRAA KKIINN GG SS YY SSTT EEMM
Take the following precautions:
Do not drive with your foot resting on the brake pedal.This will create abnormal high
brake temperatures, exces-sive brake lining and pad
wear, and increased stoppingdistances.
When descending down a
long or steep hill, use the pad-
dle shifter (left side lever) to
increase regenerative braking
control in order to control
your speed without using the
brake pedal excessively.
Applying the brakes continu-
ously will cause the brakes to
overheat and could result in a
temporary loss of braking per-
formance.
(Continued)
(Continued)
Wet brakes may impair the
vehicle's ability to safely slow
down; the vehicle may alsopull to one side when the
brakes are applied. Applying
the brakes lightly will indicate
whether they have been
affected in this way. Always
test your brakes in this fash-
ion after driving through deep
water. To dry the brakes, light-
ly tap the brake pedal to heatup the brakes while maintain-
ing a safe forward speed until
brake performance returns to
normal. Avoid driving at highspeeds until the brakes func-
tion correctly.
WARNING
Page 437 of 582

5-98
Driving your vehicle
Chain Installation
When installing tire chains, follow the
manufacturer's instructions and
mount them as tightly possible. Drive
slowly (less than 30 km/h (20 mph))
with chains installed. If you hear thechains contacting the body or chas-
sis, stop and tighten them. If they still
make contact, slow down until the
noise stops. Remove the tire chains
as soon as you begin driving on
cleared roads.
When mounting snow chains, park
the vehicle on level ground away
from traffic. Turn on the vehicle
Hazard Warning Flasher and place a
triangular emergency warning device
behind the vehicle (if available).
Always place the vehicle in P (Park),
apply the parking brake and turn off
the vehicle before installing snow
chains.When using tire chains:
Wrong size chains or improperly
installed chains can damage
your vehicle's brake lines, sus-
pension, body and wheels.
Use SAE "S" class or wire chains.
If you hear noise caused by chains contacting the body,
retighten the chain to prevent
contact with the vehicle body.
To prevent body damage, retighten the chains after driving0.5~1.0 km (0.3~0.6 miles).
Do not use tire chains on vehi- cles equipped with aluminum
wheels. If unavoidable, use a
wire type chain.
Use wire chains less than 12 mm (0.47 in) thick to prevent damage
to the chain's connection.
Winter precautions
Use high quality ethylene glycol coolant
Your vehicle is delivered with high
quality ethylene glycol coolant in the
cooling system. It is the only type ofcoolant that should be used because
it helps prevent corrosion in the cool-
ing system, lubricates the water
pump and prevents freezing. Be sure
to replace or replenish your coolantin accordance with the maintenance
schedule in section 7. Before winter,
have your coolant tested to assure
that its freezing point is sufficient for
the temperatures anticipated during
the winter.
NOTICE
Page 513 of 582

7-47
7
Maintenance
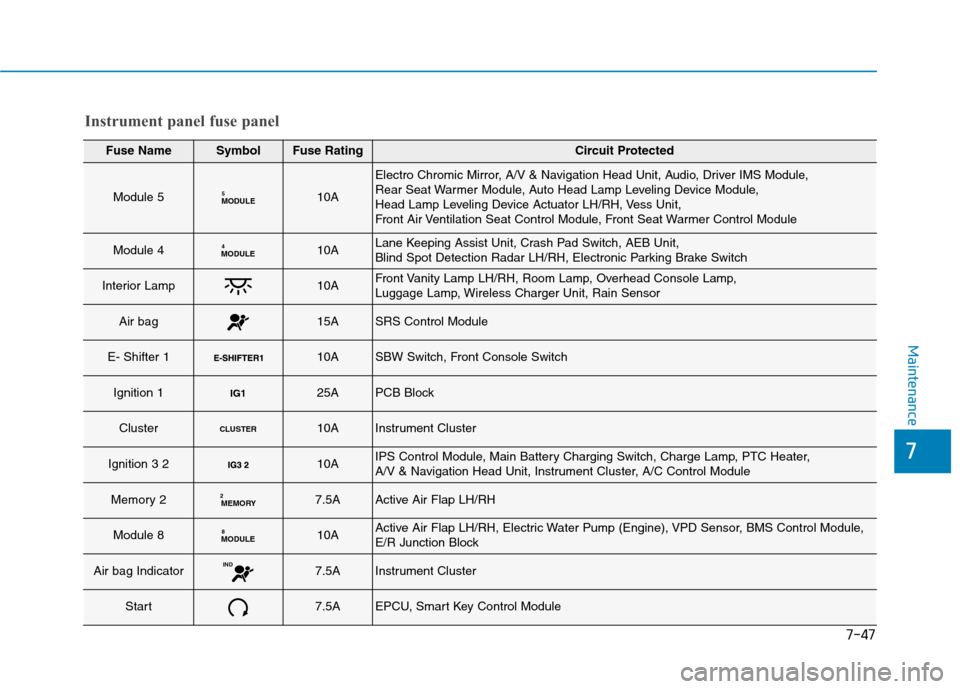
Instrument panel fuse panel
Fuse NameSymbolFuse RatingCircuit Protected
Module 5MODULE510A
Electro Chromic Mirror, A/V & Navigation Head Unit, Audio, Driver IMS Module,
Rear Seat Warmer Module, Auto Head Lamp Leveling Device Module,
Head Lamp Leveling Device Actuator LH/RH, Vess Unit,
Front Air Ventilation Seat Control Module, Front Seat Warmer Control Module
Module 4MODULE410ALane Keeping Assist Unit, Crash Pad Switch, AEB Unit,
Blind Spot Detection Radar LH/RH, Electronic Parking Brake Switch
Interior Lamp10AFront Vanity Lamp LH/RH, Room Lamp, Overhead Console Lamp,
Luggage Lamp, Wireless Charger Unit, Rain Sensor
Air bag15ASRS Control Module
E- Shifter 1 10ASBW Switch, Front Console Switch
Ignition 1IG125APCB Block
ClusterCLUSTER10AInstrument Cluster
Ignition 3 2 10AIPS Control Module, Main Battery Charging Switch, Charge Lamp, PTC Heater,
A/V & Navigation Head Unit, Instrument Cluster, A/C Control Module
Memory 2MEMORY
27.5AActive Air Flap LH/RH
Module 8MODULE 810AActive Air Flap LH/RH, Electric Water Pump (Engine), VPD Sensor, BMS Control Module,
E/R Junction Block
Air bag IndicatorIND7.5AInstrument Cluster
Start7.5AEPCU, Smart Key Control Module
Page 520 of 582
7-54
Maintenance
TypeSymbolFuse RatingCircuit Protected
Fuse
10ASCU, SBW Switch, Front Console Switch
10AEngine Room Junction Block, Electronic A/C Compressor
10AElectric Water Pump (EV)
15AICM Relay Box
15AActive Air Flap, E/R Junction Block
15ABMS Control Module
10ABurglar Alarm Horn Relay
10AEPCU
10AMultipurpose Check Connector, IBAU
10AEPCU, OBC, VPD Relay, BMS Control Module
Motor compartment fuse panel