Page 71 of 582
H64
DDRRIIVV IINN GG EE LLEE CCTT RR IICC VV EEHH IICC LLEE (( CC OO NNTT..))
How to Stop the Vehicle
1. Hold down the brake pedal while
the vehicle is parked.
2. While depressing the brake pedal, shift to P (Park).
3. While depressing the brake pedal, engage the parking brake.
4. While depressing the brake pedal, press the POWER button and turn
off the vehicle.
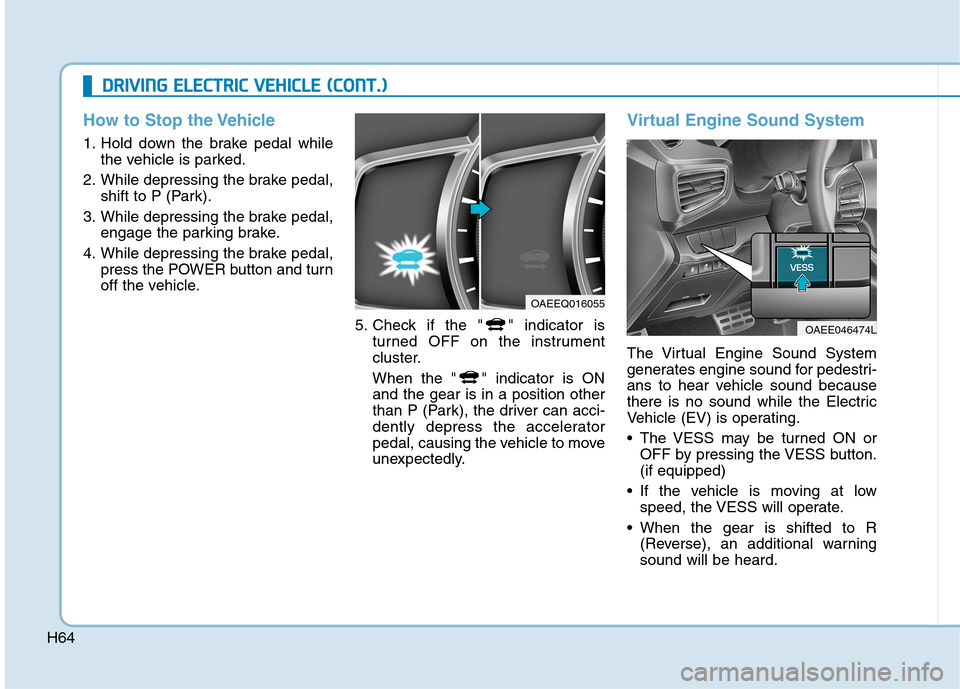
5. Check if the " " indicator isturned OFF on the instrument
cluster.
When the " " indicator is ON and the gear is in a position other
than P (Park), the driver can acci-
dently depress the accelerator
pedal, causing the vehicle to move
unexpectedly.
Virtual Engine Sound System
The Virtual Engine Sound System
generates engine sound for pedestri-
ans to hear vehicle sound because
there is no sound while the Electric
Vehicle (EV) is operating.
The VESS may be turned ON orOFF by pressing the VESS button. (if equipped)
If the vehicle is moving at low speed, the VESS will operate.
When the gear is shifted to R (Reverse), an additional warningsound will be heard.
OAEEQ016055
OAEE046474L
Page 73 of 582
H66
DDRRIIVV IINN GG EE LLEE CCTT RR IICC VV EEHH IICC LLEE (( CC OO NNTT..))
Distance to empty that is displayed
on the instrument cluster after
completing a recharge may vary
significantly depending on previ-
ous operating patterns.
When previous driving patterns
include high speed driving, result-
ing in the high voltage battery
using more electricity than usual,the estimated distance to empty is
reduced. When the high voltage
battery uses little electricity in ECO
mode, the estimated distance to
empty increases.
Distance to empty may depend on many factors such as the charge
amount of the high voltage battery,
weather, temperature, durability of
the battery, geographical features,
and driving style.
Natural degradation may occur with the high voltage battery
depending on the number of years
the vehicle is used. This may
reduce the distance to empty.When destination is set
When the destination is set, the dis-
tance to empty may change. The dis-tance to empty is recalculated using
the information of the destination.
However, the distance to empty may
vary significantly based on traffic
conditions, driving habits, and condi-
tion of the vehicle.
Tips for Improving Distance to Empty
If you operate the air conditioner/heater too much, the driving bat-
tery uses too much electricity. This
may reduce the distance to empty.
Therefore, it is recommended that
you set the cabin temperature to
22°C AUTO. This setting that has
been certified by various assess-ment tests to maintain optimal
energy consumption rates while
keeping the temperature fresh.
Turn OFF the heater and air condi-
tioner if you do not need them.
Depress and hold the accelerator pedal to maintain speed and drive
economically.
Gradually depress and release the accelerator pedal when accelerat-
ing or decelerating.
Always maintain specified tire pressures.
Do not use unnecessary electrical components while driving.
Do not load unnecessary items in the vehicle.
Do not mount parts that may increase air resistance.
Page 79 of 582
H72
DDRRIIVV IINN GG EE LLEE CCTT RR IICC VV EEHH IICC LLEE (( CC OO NNTT..))
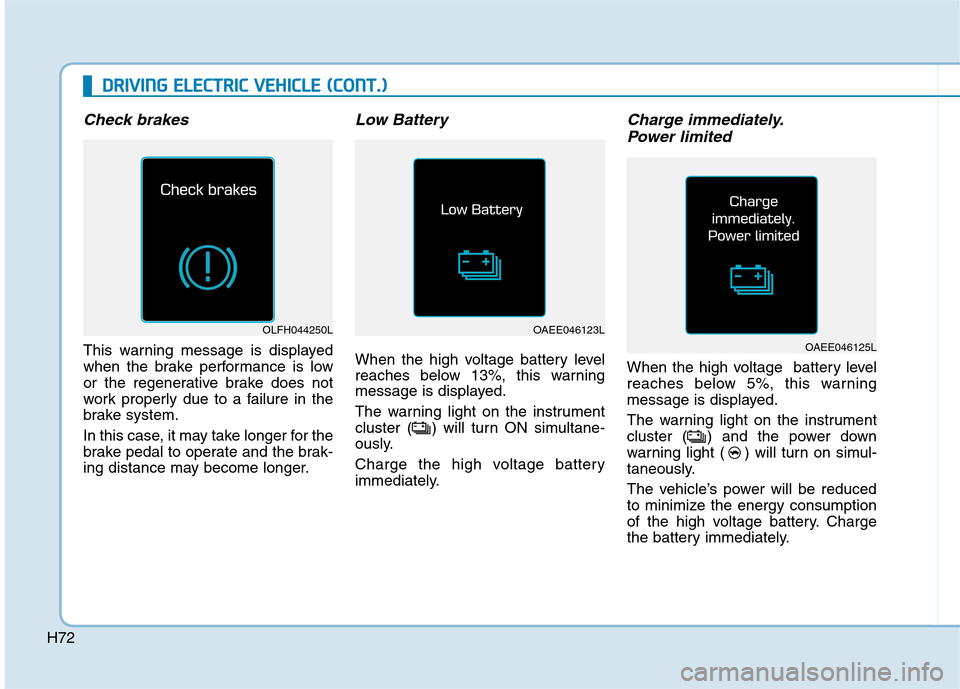
Check brakes
This warning message is displayed
when the brake performance is low
or the regenerative brake does not
work properly due to a failure in the
brake system.
In this case, it may take longer for the
brake pedal to operate and the brak-
ing distance may become longer.
Low Battery
When the high voltage battery level
reaches below 13%, this warning
message is displayed.
The warning light on the instrument
cluster ( ) will turn ON simultane-
ously.
Charge the high voltage battery
immediately.
Charge immediately.
Power limited
When the high voltage battery level
reaches below 5%, this warning
message is displayed.
The warning light on the instrument
cluster ( ) and the power down
warning light ( ) will turn on simul-
taneously.
The vehicle’s power will be reduced
to minimize the energy consumption
of the high voltage battery. Charge
the battery immediately.
OAEE046123L
OAEE046125L
OLFH044250L
Page 80 of 582
H73
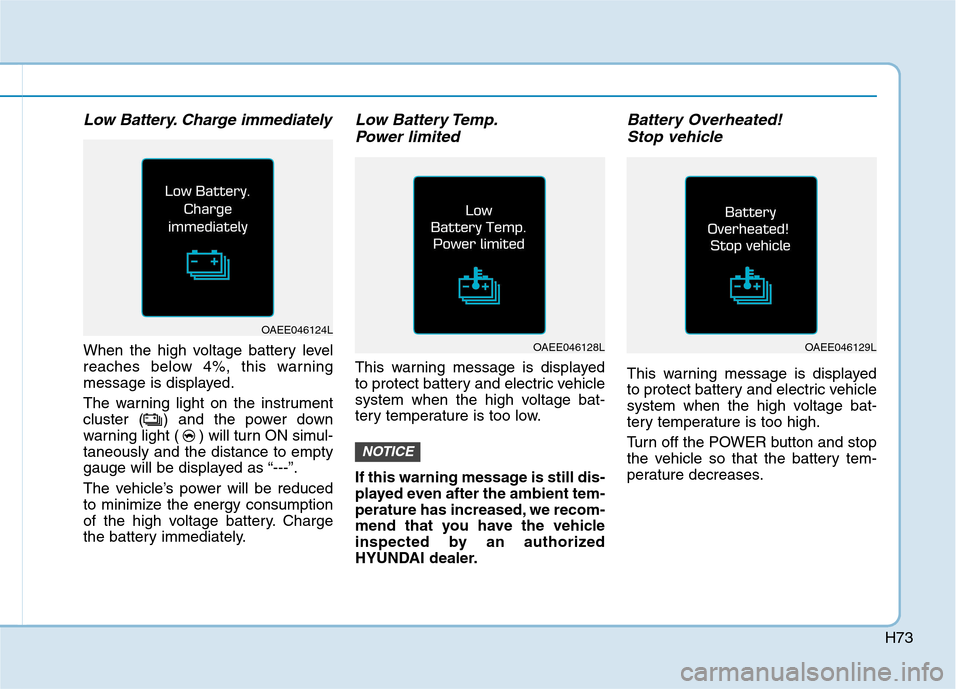
Low Battery. Charge immediately
When the high voltage battery level
reaches below 4%, this warning
message is displayed.
The warning light on the instrument
cluster ( ) and the power down
warning light ( ) will turn ON simul-taneously and the distance to empty
gauge will be displayed as “---”.
The vehicle’s power will be reduced
to minimize the energy consumption
of the high voltage battery. Charge
the battery immediately.
Low Battery Temp.Power limited
This warning message is displayed
to protect battery and electric vehicle
system when the high voltage bat-
tery temperature is too low.
If this warning message is still dis-
played even after the ambient tem-
perature has increased, we recom-
mend that you have the vehicle
inspected by an authorized
HYUNDAI dealer.
Battery Overheated! Stop vehicle
This warning message is displayed
to protect battery and electric vehicle
system when the high voltage bat-
tery temperature is too high.
Turn off the POWER button and stop
the vehicle so that the battery tem-
perature decreases.
NOTICE
OAEE046128LOAEE046129L
OAEE046124L
Page 84 of 582
H77
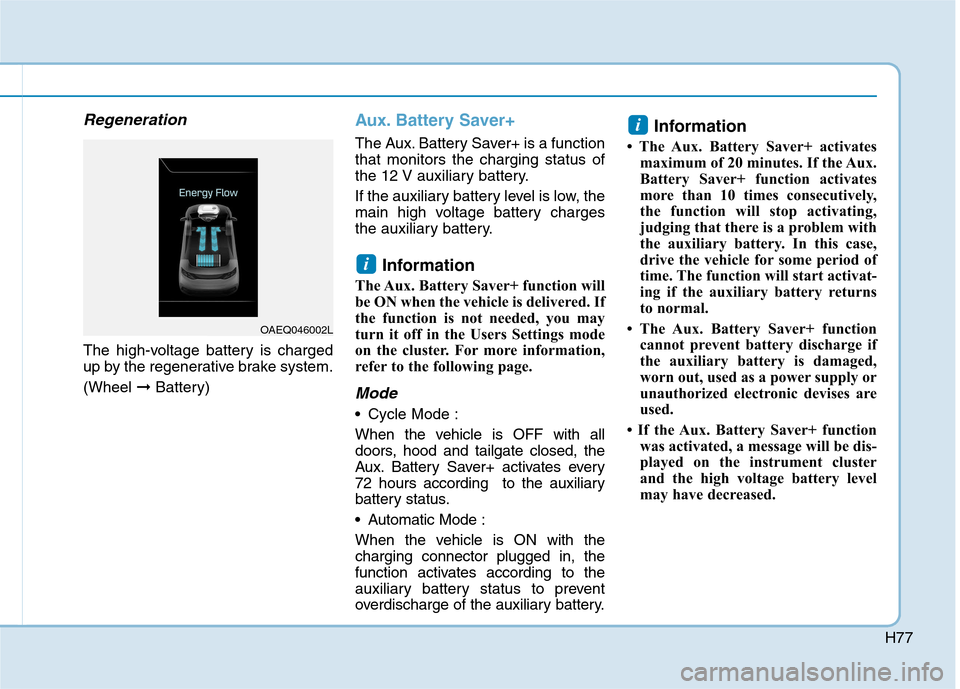
Regeneration
The high-voltage battery is charged
up by the regenerative brake system. (Wheel ➞Battery)
Aux. Battery Saver+
The Aux. Battery Saver+ is a function that monitors the charging status of
the 12 V auxiliary battery.
If the auxiliary battery level is low, the
main high voltage battery charges
the auxiliary battery.
Information
The Aux. Battery Saver+ function will
be ON when the vehicle is delivered. If
the function is not needed, you may
turn it off in the Users Settings mode
on the cluster. For more information,
refer to the following page.
Mode
• Cycle Mode :
When the vehicle is OFF with all
doors, hood and tailgate closed, the
Aux. Battery Saver+ activates every
72 hours according to the auxiliary
battery status.
Automatic Mode :
When the vehicle is ON with the charging connector plugged in, the
function activates according to the
auxiliary battery status to prevent
overdischarge of the auxiliary battery. Information
The Aux. Battery Saver+ activates maximum of 20 minutes. If the Aux.
Battery Saver+ function activates
more than 10 times consecutively,
the function will stop activating,
judging that there is a problem with
the auxiliary battery. In this case,
drive the vehicle for some period of
time. The function will start activat-
ing if the auxiliary battery returns
to normal.
The Aux. Battery Saver+ function cannot prevent battery discharge if
the auxiliary battery is damaged,
worn out, used as a power supply or
unauthorized electronic devises are
used.
If the Aux. Battery Saver+ function was activated, a message will be dis-
played on the instrument cluster
and the high voltage battery level
may have decreased.
i
i
OAEQ046002L
Page 96 of 582
1-8
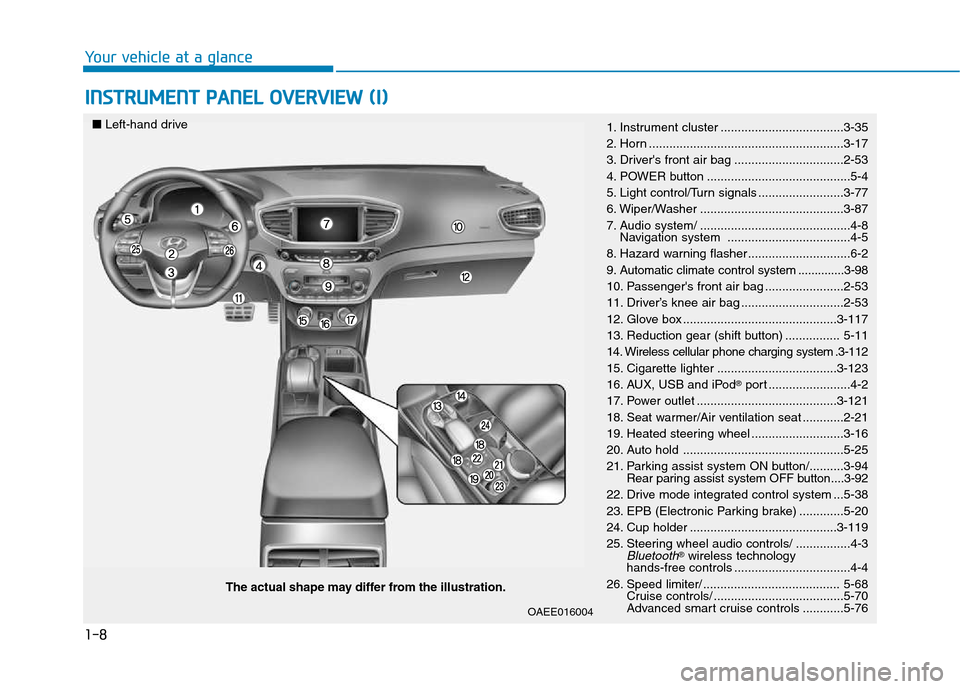
INSTRUMENT PANEL OVERVIEW (I)
Your vehicle at a glance
The actual shape may differ from the illustration.
■
Left-hand drive
1. Instrument cluster ....................................3-35
2. Horn .........................................................3-17
3. Driver's front air bag ................................2-53
4. POWER button ..........................................5-4
5. Light control/Turn signals .........................3-77
6. Wiper/Washer ..........................................3-87
7. Audio system/ ............................................4-8
Navigation system ....................................4-5
8. Hazard warning flasher ..............................6-2
9. Automatic climate control system ..............3-98
10. Passenger's front air bag .......................2-53
11. Driver’s knee air bag ..............................2-53
12. Glove box .............................................3-117
13. Reduction gear (shift button) ................ 5-11
14. Wireless cellular phone charging system .3-112
15. Cigarette lighter ...................................3-123
16. AUX, USB and iPod
Page 97 of 582
1-9
Your vehicle at a glance
1
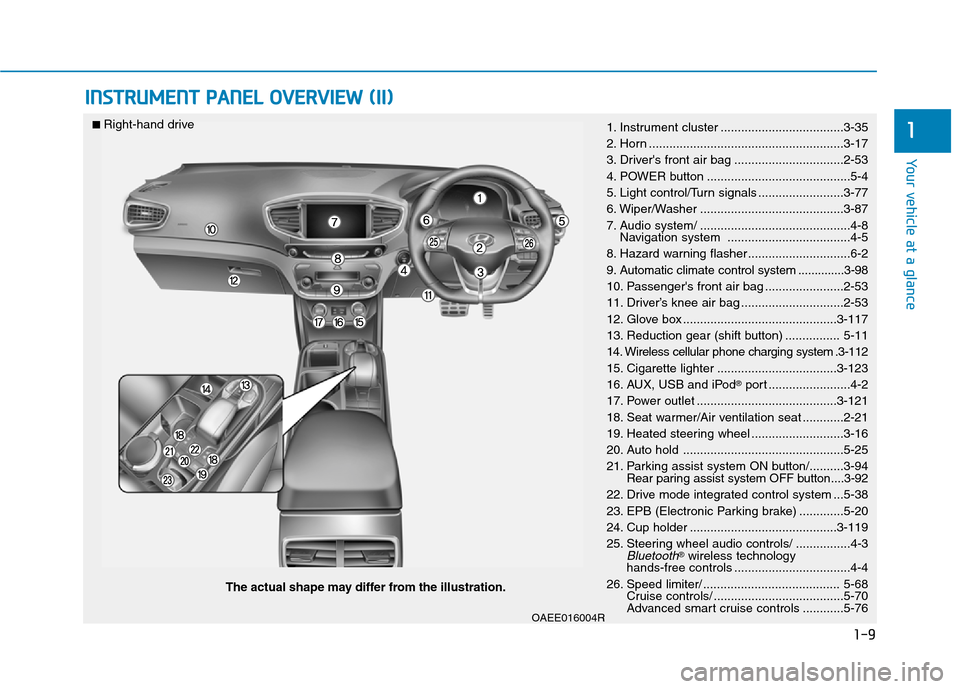
INSTRUMENT PANEL OVERVIEW (II)
OAEE016004R
The actual shape may differ from the illustration.
■
Right-hand drive
1. Instrument cluster ....................................3-35
2. Horn .........................................................3-17
3. Driver's front air bag ................................2-53
4. POWER button ..........................................5-4
5. Light control/Turn signals .........................3-77
6. Wiper/Washer ..........................................3-87
7. Audio system/ ............................................4-8
Navigation system ....................................4-5
8. Hazard warning flasher ..............................6-2
9. Automatic climate control system ..............3-98
10. Passenger's front air bag .......................2-53
11. Driver’s knee air bag ..............................2-53
12. Glove box .............................................3-117
13. Reduction gear (shift button) ................ 5-11
14. Wireless cellular phone charging system .3-112
15. Cigarette lighter ...................................3-123
16. AUX, USB and iPod
Page 160 of 582
2-62
Safety system of your vehicle
What to expect after an air bag inflates
After a frontal or side air bag inflates,
it will deflate very quickly. Air bag
inflation will not prevent the driverfrom seeing out of the windshield or
being able to steer. Curtain air bags
may remain partially inflated for
some time after they deploy.After an air bag inflates, take
the following precautions:
Open your windows and doors
as soon as possible after
impact to reduce prolonged
exposure to the smoke and
powder released by the inflat-
ing air bag.
Do not touch the air bag stor-
age area’s internal compo-
nents immediately after an air
bag has inflated. The partsthat come into contact with an
inflating air bag may be veryhot.
Always wash exposed skin
areas thoroughly with coldwater and mild soap.
We recommend that an author-
ized HYUNDAI dealer replace
the air bag immediately after
deployment. Air bags are
designed to be used only once.
WARNING
To prevent objects from becom-
ing dangerous projectiles when
the passenger's air bag inflates:
Do not install or place any
objects (drink holder, CD hold-
er, stickers, etc.) on the front
passenger's panel above the
glove box where the passen-
ger's air bag is located.
Do not install a container of liquid air freshener near the
instrument cluster or on the
instrument panel surface.
WARNING