Page 315 of 586
![HYUNDAI ELANTRA SE 2017 Owners Manual 4-63
Multimedia System
4
Pairing a New Device
Press the [SETUP/CLOCK] button
� Select [Phone]
�Select [Pair
Phone]
Bluetooth®Wireless Technology
devices can be paired with the audio
system.
For more](/manual-img/35/56090/w960_56090-314.png "HYUNDAI ELANTRA SE 2017 Owners Manual 4-63
Multimedia System
4
Pairing a New Device
Press the [SETUP/CLOCK] button
� Select [Phone]
�Select [Pair
Phone]
Bluetooth®Wireless Technology
devices can be paired with the audio
system.
For more")
4-63
Multimedia System
4
Pairing a New Device
Press the [SETUP/CLOCK] button
� Select [Phone]
�Select [Pair
Phone]
Bluetooth®Wireless Technology
devices can be paired with the audio
system.
For more information, refer to the
“Pairing through Phone Setup” sec-
tion within
Bluetooth®Wireless
Technology.
Viewing Paired Phone List
Press the [SETUP/CLOCK] button
� Select [Phone]
�Select [Phone
List]
This feature is used to view mobile
phones that have been paired with
the audio system. Upon selecting a
paired phone, the setup menu is dis-
played.
For more information, refer to the
“Setting
Bluetooth®Wireless Technology
Connection” section within
Bluetooth®
Wireless Technology. 1) Connect/Disconnect Phone :
Connect/Disconnects currently
selected phone
2) Change Priority : Sets currently selected phone to highest connec-
tion priority
3) Delete : Deletes the currently selected phone
4) Return : Moves to the previous screen
To learn more about whether your mobile phone supports contact
downloads, refer to your mobile
phone user’s manual.
The contacts for only the connect- ed phone can be downloaded
Page 316 of 586
![HYUNDAI ELANTRA SE 2017 Owners Manual 4-64
Multimedia System
Downloading Contacts
Press the [SETUP/CLOCK] button
� Select [Phone]
�Select [Contacts
Download]
As the contacts are downloaded
from the mobile phone, a download
progress bar is](/manual-img/35/56090/w960_56090-315.png "HYUNDAI ELANTRA SE 2017 Owners Manual 4-64
Multimedia System
Downloading Contacts
Press the [SETUP/CLOCK] button
� Select [Phone]
�Select [Contacts
Download]
As the contacts are downloaded
from the mobile phone, a download
progress bar is")
4-64
Multimedia System
Downloading Contacts
Press the [SETUP/CLOCK] button
� Select [Phone]
�Select [Contacts
Download]
As the contacts are downloaded
from the mobile phone, a download
progress bar is displayed.
Upon downloading phone con- tacts, the previous corresponding
data is deleted.
This feature may not be supported in some mobile phones.
Voice Recognition may not operate while contacts are being down-
loaded.
Outgoing Volume
Press the [SETUP/CLOCK] button
� Select [Phone]
�Select
[Outgoing Volume]
Use
TUNEknob to adjust the outgo-
ing volume level.
While on a call, the volume can be
changed by using the [SEEK
TRACK] button.
Turning Bluetooth System Off
Press the [SETUP/CLOCK] button
� Select [Phone]
�Select
[Bluetooth System Off]
Once
Bluetooth®Wireless Technology
is turned off,
Bluetooth®Wireless
Technology related features will not
be supported within the audio sys-
tem.
To turn
Bluetooth®Wireless
Technology back on, go to
[SETUP/CLOCK] �[Phone] and
select “Yes”.
Page 317 of 586
4-65
Multimedia System
4
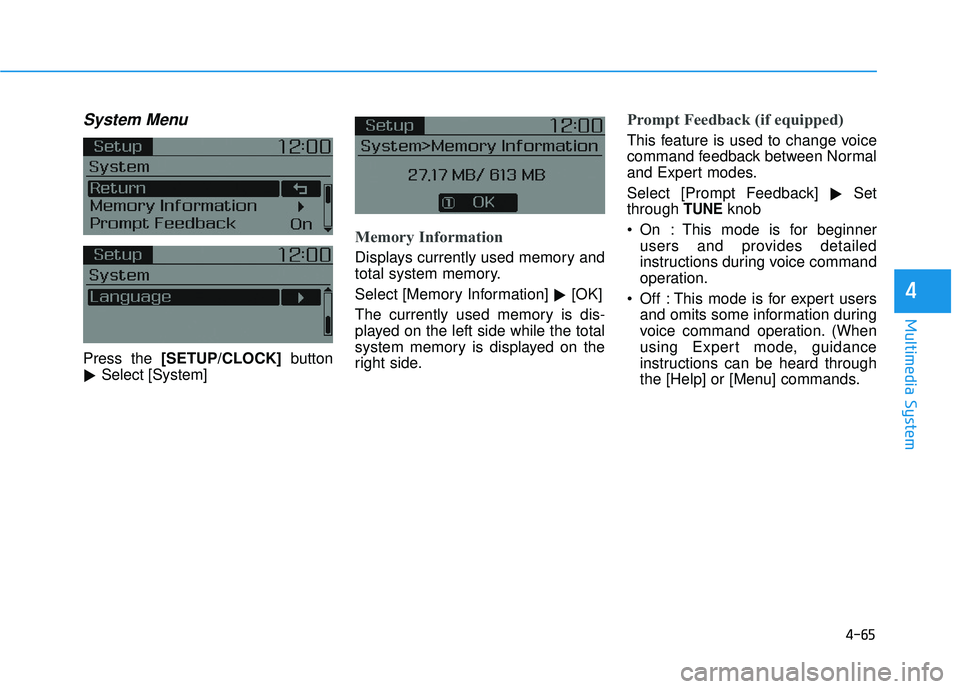
System Menu
Press the [SETUP/CLOCK] button
� Select [System]
Memory Information
Displays currently used memory and
total system memory.
Select [Memory Information]
�[OK]
The currently used memory is dis-
played on the left side while the total
system memory is displayed on the
right side.
Prompt Feedback (if equipped)
This feature is used to change voice
command feedback between Normal
and Expert modes.
Select [Prompt Feedback] �Set
through
TUNEknob
On : This mode is for beginner users and provides detailed
instructions during voice command
operation.
Off : This mode is for expert users and omits some information during
voice command operation. (When
using Expert mode, guidance
instructions can be heard through
the [Help] or [Menu] commands.
Page 433 of 586

6-8
What to do in an emergency6. If you cannot find the cause of theoverheating, wait until the engine
temperature has returned to nor-
mal. Then, if coolant has been
lost, carefully add coolant to the
reservoir to bring the fluid level in
the reservoir up to the halfway
mark.
7. Proceed with caution, keeping alert for further signs of overheat-
ing. If overheating happens again,
call an authorized HYUNDAI deal-
er for assistance.
Serious loss of coolant indi-
cates a leak in the cooling sys-
tem and should be checked as
soon as possible by an author-
ized HYUNDAI dealer.
CAUTION
Your vehicle is
equipped with a pres-
surized coolant
reserve tank. NEVER
remove the coolant
reserve tank cap or the radiator
drain plug while the engine and
radiator are HOT. Hot coolant
and steam may blow out under
pressure, causing serious
injury.
Turn the engine off and wait
until the engine cools down.
Use extreme care when remov-
ing the coolant reserve tank
cap. Wrap a towel or thick rag
around it, and turn it counter-
clockwise slowly to release
some of the pressure from the
system. Step back while the
pressure is released.
When you are sure all the pres-
sure has been released, contin-
ue turning the cap counter-
clockwise to remove it.
WARNING
Page 440 of 586
6-15
What to do in an emergency
6
With Spare Tire (if equipped)Jack and tools
➀Jack handle
② Jack
③ Wheel nut wrench
The jack, jack handle, and wheel lug
nut wrench are stored in the luggage
compartment under the luggage box
cover.
The jack is provided for emergency
tire changing only. Turn the winged hold down bolt
counterclockwise to remove the
spare tire.
Store the spare tire in the same com-
partment by turning the winged hold
down bolt clockwise.
To prevent the spare tire and tools
from "rattling", store them in their
proper location.
I I
F
F
Y
Y O
O U
U
H
H A
AV
VE
E
A
A
F
F L
LA
A T
T
T
T I
IR
R E
E
Changing a tire can be danger-
ous. Follow the instructions in
this section when changing a
tire to reduce the risk of serious
injury or death.
WARNING
OLF064004N
OLF064031N
Be careful as you use the jack
handle to stay clear of the flat
end. The flat end has sharp
edges that could cause cuts.
CAUTION
Page 441 of 586
 inside of the tire hold-down w")
6-16
What to do in an emergency
If it is hard to loosen the tire hold-
down wing bolt by hand, you can
loosen it easily using the jack handle.
1. Put the jack handle (1) inside of the tire hold-down wing bolt.
2. Turn the tire hold-down wing bolt counterclockwise with the jack
handle.
Changing tires
A vehicle can slip or roll off of a
jack causing serious injury or
death to you or those nearby.
Take the following safety pre-
cautions:
Never place any portion of
your body under a vehicle that
is supported by a jack.
NEVER attempt to change a
tire in the lane of traffic.
ALWAYS move the vehicle
completely off the road on
level, firm ground away from
traffic before trying to change
a tire. If you cannot find a
level, firm place off the road,
call a towing service for assis-
tance.
Be sure to use the jack pro-
vided with the vehicle.
(Continued)
(Continued)
ALWAYS place the jack on the
designated jacking positions
on the vehicle and NEVER on
the bumpers or any other part
of the vehicle for jacking sup-
port.
Do not start or run the engine
while the vehicle is on the
jack.
Do not allow anyone to remain
in the vehicle while it is on the
jack.
Keep children away from the
road and the vehicle.
WARNING
Page 442 of 586
6-17
What to do in an emergency
Follow these steps to change your
vehicle's tire:
1. Park on a level, firm surface.
2. Move the shift lever into P (Park),apply the parking brake, and place
the ignition switch in the LOCK/
OFF position.
3. Press the hazard warning flasher button.
4. Remove the wheel lug nut wrench, jack, jack handle, and spare tire
from the vehicle. 5. Block both the front and rear of the
tire diagonally opposite of the tire
you are changing. 6. Loosen the wheel lug nuts coun-
terclockwise one turn each in the
order shown above, but do not
remove any lug nuts until the tire
has been raised off of the ground.
6
OAD065006
B
B
B
B
l
l
l
l
o
o
o
o
c
c
c
c
k
k
k
kOAD065007
Page 443 of 586

6-18
What to do in an emergency
7. Place the jack at the designated jacking position under the frame
closest to the tire you are chang-
ing. The jacking positions are
plates welded to the frame with
two notches and two dimples.
Never jack any other position or
part of the vehicle. Doing so may
damage the side seal molding or
other parts of the vehicle. 8. Insert the jack handle into the jack
and turn it clockwise, raising the
vehicle until the tire clears the
ground. Make sure the vehicle is
stable on the jack. 9. Loosen the lug nuts with the wheel
lug nut wrench and remove them
with your fingers. Remove the
wheel from the studs and lay it flat
on the ground out of the way.
Remove any dirt or debris from
the studs, mounting surfaces, and
wheel.
10. Install the spare tire onto the studs of the hub.
11. Tighten the lug nuts with your fin- gers onto the studs with the
smaller end of the lug nuts clos-
est to the wheel.
12. Lower the vehicle to the ground by turning the jack handle coun-
terclockwise.
OAD065008OLF064012
■Front■Rear
Jack and tools
➀Jack handle
② Jack
③ Wheel nut wrench
The jack, jack handle, and wheel lug
nut wrench are stored in the luggage
com")
,apply the parking brake, and place
the ignitio")