Page 161 of 543
159
uuOperating the Switches Around the Steering Wheel uBrightness Control
Controls
Brightness Control
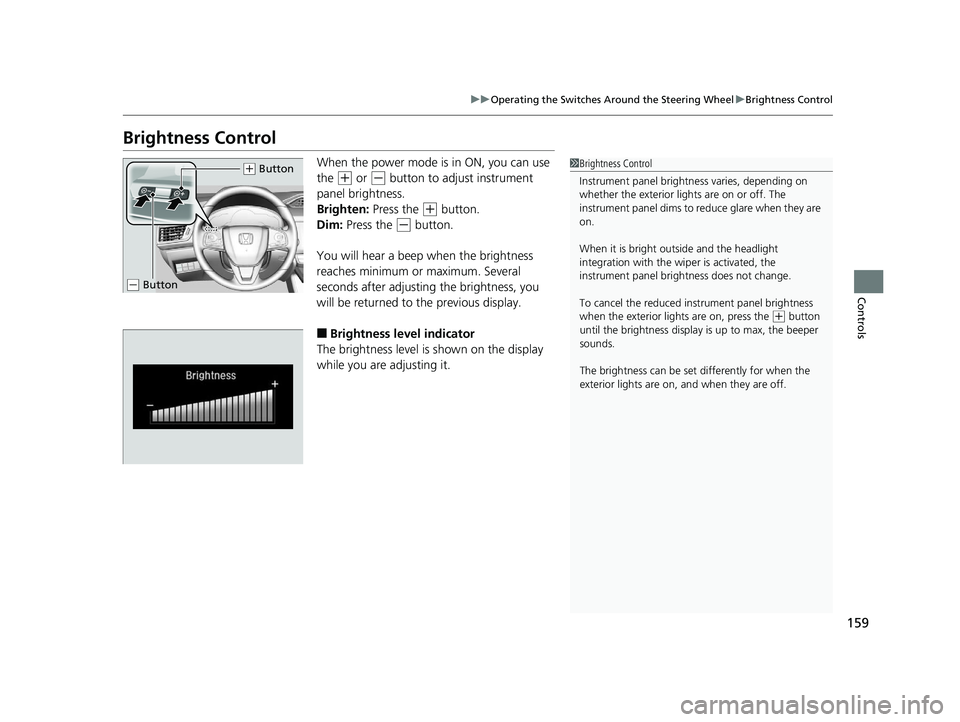
When the power mode is in ON, you can use
the
(+ or (- button to adjust instrument
panel brightness.
Brighten: Press the
(+ button.
Dim: Press the
(- button.
You will hear a beep when the brightness
reaches minimum or maximum. Several
seconds after adjusting the brightness, you
will be returned to the previous display.
■Brightness level indicator
The brightness level is shown on the display
while you are adjusting it.
1 Brightness Control
Instrument panel brightne ss varies, depending on
whether the exterior lights are on or off. The
instrument panel dims to reduce glare when they are
on.
When it is bright out side and the headlight
integration with the wi per is activated, the
instrument panel bri ghtness does not change.
To cancel the reduced in strument panel brightness
when the exterior lights are on, press the
( + button
until the brightness display is up to max, the beeper
sounds.
The brightness can be set differently for when the
exterior lights are on, and when they are off.
( + Button
( - Button
17 CLARITY BEV CSS-31TRV6000.book 159 ページ 2017年4月14日 金曜日 午前11 時8分
Page 162 of 543
160
uuOperating the Switches Around the Steering Wheel uRear Defogger/Heated Door Mirror Button
Controls
Rear Defogger/Heated Door Mirror Button
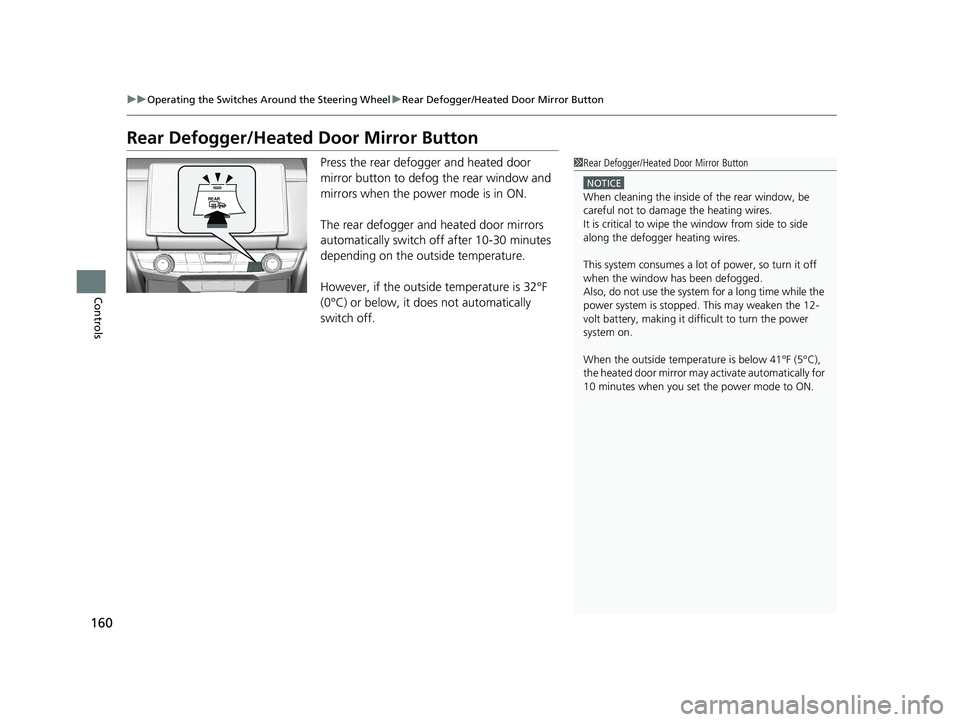
Press the rear defogger and heated door
mirror button to defog the rear window and
mirrors when the power mode is in ON.
The rear defogger and heated door mirrors
automatically switch off after 10-30 minutes
depending on the outside temperature.
However, if the outside temperature is 32°F
(0°C) or below, it does not automatically
switch off.1Rear Defogger/Heated Door Mirror Button
NOTICE
When cleaning the inside of the rear window, be
careful not to damage the heating wires.
It is critical to wipe the window from side to side
along the defogger heating wires.
This system consumes a lot of power, so turn it off
when the window has been defogged.
Also, do not use the system for a long time while the
power system is stopped. This may weaken the 12-
volt battery, making it di fficult to turn the power
system on.
When the outside temperature is below 41°F (5°C),
the heated door mirror may activate automatically for
10 minutes when you set the power mode to ON.
17 CLARITY BEV CSS-31TRV6000.book 160 ページ 2017年4月14日 金曜日 午前11 時8分
Page 164 of 543
uuOperating the Switches Around the Steering Wheel uDriving Position Memory System
162
Controls
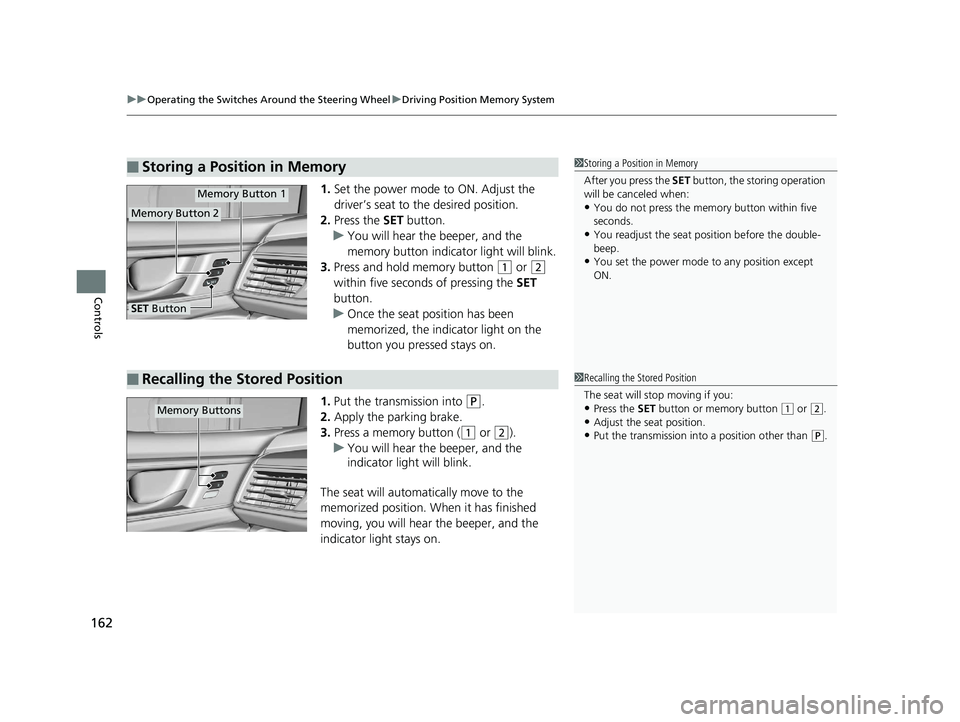
1. Set the power mode to ON. Adjust the
driver’s seat to the desired position.
2. Press the SET button.
u You will hear the beeper, and the
memory button indicator light will blink.
3. Press and hold memory button
(1 or (2
within five seconds of pressing the SET
button.
u Once the seat position has been
memorized, the indicator light on the
button you pressed stays on.
1. Put the transmission into
(P.
2. Apply the parking brake.
3. Press a memory button (
(1 or (2).
u You will hear the beeper, and the
indicator light will blink.
The seat will automatically move to the
memorized position. When it has finished
moving, you will hear the beeper, and the
indicator light stays on.
■Storing a Position in Memory1 Storing a Position in Memory
After you press the SET button, the storing operation
will be canceled when:
•You do not press the memory button within five
seconds.
•You readjust the seat position before the double-
beep.
•You set the power mode to any position except
ON.
Memory Button 1
Memory Button 2
SET Button
■Recalling the Stored Position1 Recalling the Stored Position
The seat will st op moving if you:
•Press the SET button or memory button (1 or ( 2.•Adjust the seat position.
•Put the transmission into a position other than (P.
Memory Buttons
17 CLARITY BEV CSS-31TRV6000.book 162 ページ 2017年4月14日 金曜日 午前11 時8分
Page 168 of 543
166
Controls
Adjusting the Seats
Front Seats
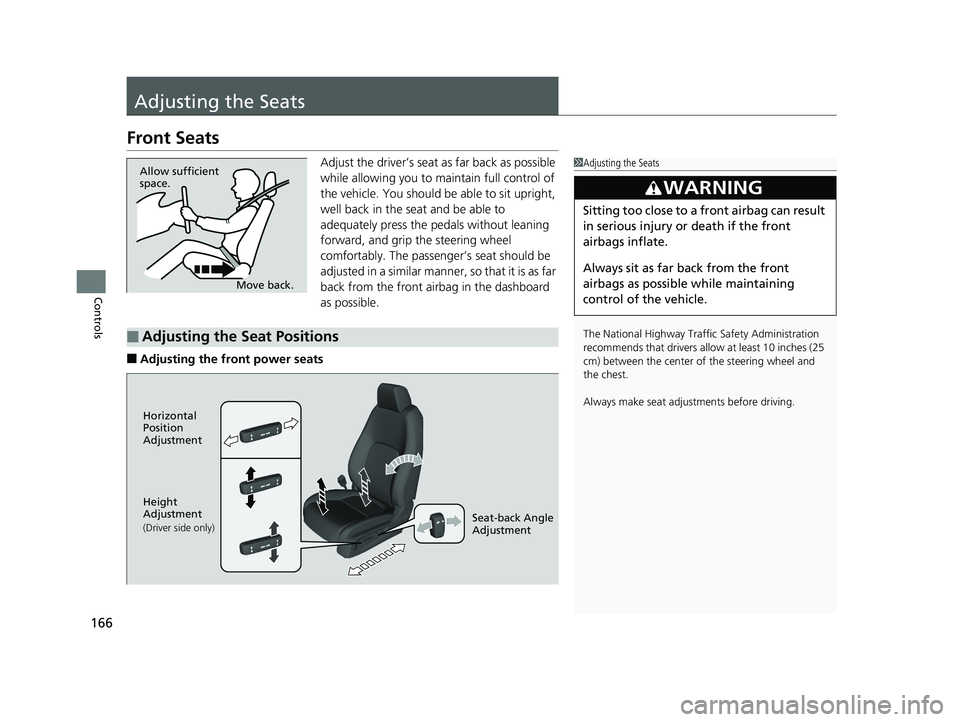
Adjust the driver’s seat as far back as possible
while allowing you to maintain full control of
the vehicle. You should be able to sit upright,
well back in the seat and be able to
adequately press the pedals without leaning
forward, and grip the steering wheel
comfortably. The passenger’s seat should be
adjusted in a similar manner, so that it is as far
back from the front airbag in the dashboard
as possible.
■Adjusting the front power seats
1Adjusting the Seats
The National Highway Traffic Safety Administration
recommends that drivers allow at least 10 inches (25
cm) between the center of the steering wheel and
the chest.
Always make seat adjustments before driving.
3WARNING
Sitting too close to a front airbag can result
in serious injury or death if the front
airbags inflate.
Always sit as far back from the front
airbags as possible while maintaining
control of the vehicle.
Move back.
Allow sufficient
space.
■Adjusting the Seat Positions
Horizontal
Position
Adjustment
Height
Adjustment
(Driver side only)Seat-back Angle
Adjustment
17 CLARITY BEV CSS-31TRV6000.book 166 ページ 2017年4月14日 金曜日 午前11
時8分
Page 355 of 543
353
uuWhen Driving uPrecautions While Driving
Continued
Driving
Precautions While Driving
Avoid driving in deep water and on flooded roads. This can damage the power
system or driveline, or caus e electrical component failure.
■In Rain1Precautions While Driving
NOTICE
Do not select a shift button while pressing the
accelerator pedal.
NOTICE
The following can damage the rear frames and rear
suspensions. Be careful when driving.
•Backing up the vehicle into a space with a parking
block or road shoulder
•Driving up or down to a different surface level
(such as a road shoulder)
•Driving on a road with potholes
NOTICE
If you repeatedly turn the steering wheel at an
extremely low speed, or hold the steering wheel in
the full left or right position for a while, the electric
power steering (EPS) system heats up. The system
goes into a protective mode, and limits its
performance. The steering wheel becomes harder
and harder to operate. Once the system cools down,
the EPS system is restored.
Repeated operation under these conditions can
eventually damage the system.
If the power mode is set to ACCESSORY while
driving, the power system will shut down and all
steering and brake power a ssist functions will stop,
making it difficult to control the vehicle.
17 CLARITY BEV CSS-31TRV6000.book 353 ページ 2017年4月14日 金曜日 午前11 時8分
Page 387 of 543
Continued385
uuWhen Driving uAdaptive Cruise Control (ACC) with Low Speed Follow (LSF)
Driving
■Automatic ca ncellation
The beeper sounds and a message appears on the driver information interface when
ACC with LSF is automatically canceled. Any of these conditions may cause the ACC
with LSF to automatically cancel:
• Bad weather (rain, fog, snow, etc.)
• When the radar sensor in the front grille gets dirty.
• An abnormal tire condition is de tected, or the tires are skidding.
• Driving on a mountainous road, or driving off road for extended periods.
• Abrupt steering wheel movement.
• When the ABS, VSA ® or CMBS
TM is activated.
• When the ABS or VSA ® system indicator comes on.
• When the vehicle is stopped on a very steep slope.
• When you manually apply the parking brake.
• When the detected vehicle within the AC C with LSF range is too close to your
vehicle.
• The camera behind the rearview mirror, or the area around the camera, including
the windshield, gets dirty.
The ACC with LSF automatic cancellation ca n be also triggered by the following
causes. In these cases, the parking brake will be automatically applied.
• The driver’s seat belt is unfastened when the vehicle is stationary.
• The vehicle stops for more than 10 minutes.
• The power system is turned off.
1Automatic cancellation
Even though ACC with LSF has been automatically
canceled, you can still resu me the prior set speed.
Wait until the condition that caused ACC with LSF to
cancel improves, then press the RES/+ button.
17 CLARITY BEV CSS-31TRV6000.book 385 ページ 2017年4月14日 金曜日 午前11 時8分
Page 391 of 543
Continued389
uuWhen Driving uLane Keeping Assist System (LKAS)
Driving
Provides assistance to keep the vehicle in the center of the lane, when the vehicle
nears a white or yellow line, steering force of the electric power steering will become
stronger.
When the vehicle enters the warning area, the LKAS alerts you with slight steering
wheel vibration as well as a warning display.
■Lane Keep Support Function1 Lane Keeping Assist System (LKAS)
The LKAS may not function as designed while driving
in frequent stop and go traf fic, or on roads with
sharp curves.
When it fails to detect lanes, the system will
temporarily be canceled. When lane is detected,
system will recover automatically.
■Lane Departure Warning Function
Warning Area
Warning Area
17 CLARITY BEV CSS-31TRV6000.book 389 ページ 2017年4月14日 金曜日 午前11 時8分
Page 400 of 543

398
uuWhen Driving uTire Pressure Monitoring System (TPMS)
Driving
Tire Pressure Monitoring System (TPMS)
Instead of directly measuring the pressu re in each tire, the TPMS on this vehicle
monitors and compares the rolling radius and rotational characteristics of each
wheel and tire while you are driving to determine if one or more tires are
significantly under-inflated. This will caus e the low tire pressure/TPMS indicator to
come on and a message to appear on the driver information interface.
You must start TPMS calibration every time you:
• Adjust the pressure in one or more tires.
• Rotate the tires.
• Replace one or more tires.
Before calibrating the TPMS:
• Set the cold tire pressu re in all four tires.
2Checking Tires P. 459
Make sure:
•The vehicle is at a complete stop.
• The gear position is in
(P.
• The power mode is in ON.
■TPMS Calibration
1Tire Pressure Monitoring System (TPMS)
The system does not monitor the tires when driving
at low speed.
Conditions such as low ambient temperature and
altitude change directly a ffect tire pressure and can
trigger the low tire pressure/TPMS indicator to come on.
Tire pressure checked and inflated in:
•Warm weather can beco me under-inflated in
colder weather.
•Cold weather can become over-inflated in warmer
weather.
The low tire pressure/TPMS indicator will not come
on as a result of over inflation.
The TPMS may not function pr operly if tire type and
size are mixed. Make sure to use the same size and
type of tire. 2 Checking and Maintaining Tires P. 459
The low tire pressure/TPMS indicator may come on
with a delay or may not come on at all when:
•You rapidly accelerate, decelerate, or turn the
steering wheel.
•You drive on snowy or slippery roads.•Snow chains are used.
The low tire pressure/TPMS indicator may come on
under the following conditions:
•There is a heavier and une ven load on the tires,
such as when towing a trailer, than the condition at
calibration.
•Snow chains are used.
17 CLARITY BEV CSS-31TRV6000.book 398 ページ 2017年4月14日 金曜日 午前11 時8分