Page 126 of 543
uuGauges and Driver Information Interface uDriver Information Interface
124
Instrument Panel
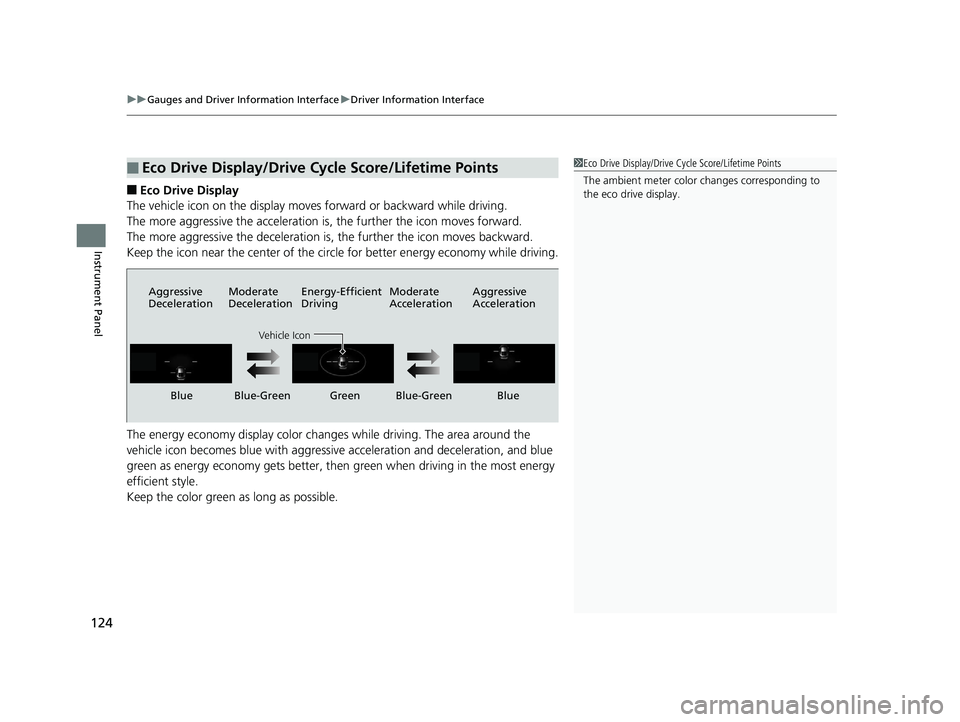
■Eco Drive Display
The vehicle icon on the display moves forward or backward while driving.
The more aggressive the acceleration is, the further the icon moves forward.
The more aggressive the deceleration is, the further the icon moves backward.
Keep the icon near the center of the circle for better energy economy while driving.
The energy economy displa y color changes while driving. The area around the
vehicle icon becomes blue with aggressive acceleration and deceleration, and blue
green as energy economy gets better, then green when driving in the most energy
efficient style.
Keep the color green as long as possible.
■Eco Drive Display/Drive Cycle Score/Lifetime Points1 Eco Drive Display/Drive Cycle Score/Lifetime Points
The ambient meter color changes corresponding to
the eco drive display.
Aggressive
Deceleration Moderate
DecelerationEnergy-Efficient
Driving Moderate
AccelerationAggressive
Acceleration
Vehicle Icon
Blue Blue-Green Green Blue-Green Blue
17 CLARITY BEV CSS-31TRV6000.book 124 ページ 2017年4月14日 金曜日 午前11
時8分
Page 127 of 543

125
uuGauges and Driver Information Interface uDriver Information Interface
Continued
Instrument Panel
■Drive Cycle Score/Lifetime Points
Appear for a few seconds when you set the power mode to VEHICLE OFF (LOCK).
Each has three stages. Depending on your driving style, the leaf icon(s) and the
gauge increase or decrease to indicate that you have reached a different stage of
energy economy.
■Resetting the Drive Cycle Score
1. Make sure the transmission is in
(P. Turn the power mode to ON.
2. If ECON mode is on, press the ECON button to turn it off.
3. Turn the power mode to VEHICLE OFF (LOCK).
4. Turn the power mode to ON again.
u Make sure to complete steps fro m 4 through 6 within 30 seconds.
5. Depress the brake pedal twice.
u The color of the ambient meter wi ll change from white to green.
u When the Fuel Efficiency Backlight setting on the audio/information display
is off, the color stays white.
6. Press the ECON button twice.
u The color of the ambient meter will turn to monochrome.
7. Turn the power mode to VEHICLE OFF (LOCK).
Drive Cycle Score
Lifetime Points Advancing to
2nd Stage
Receding to
2nd Stage Receding to
3rd Stage
Advancing to
3rd Stage
17 CLARITY BEV CSS-31TRV6000.book 125 ページ 2017年4月14日 金曜日 午前11
時8分
Page 130 of 543
128
Controls
Clock
Adjusting the Clock
The clock is automatically updated through the navigation system, so the time does
not need to be adjusted.
You can also adjust the time manually in the audio/information screen, with the
power mode in ON.
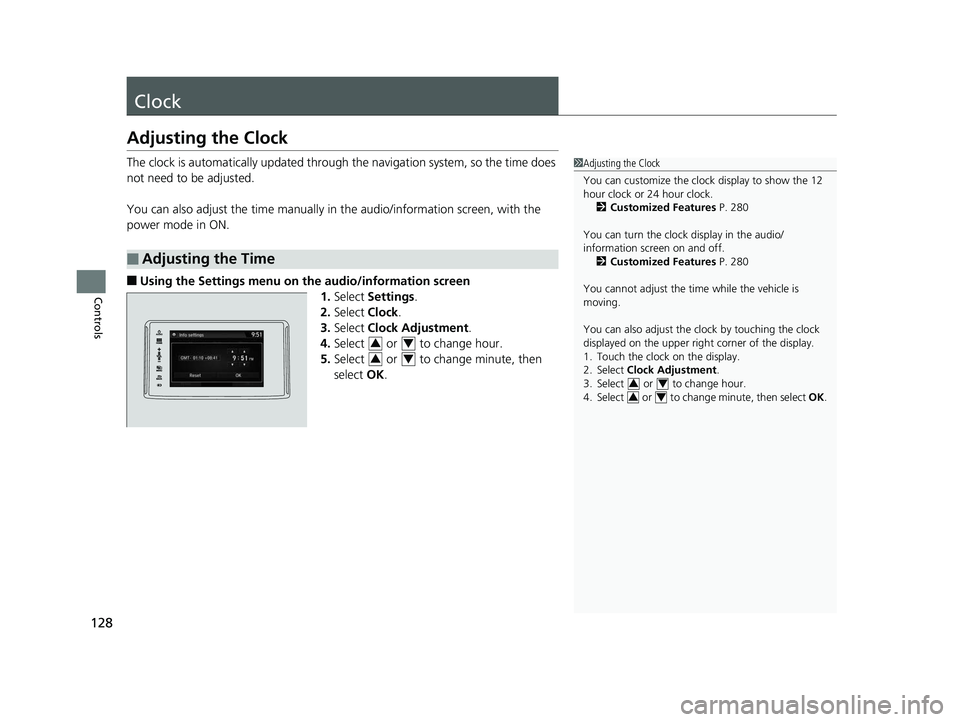
■Using the Settings menu on th e audio/information screen
1. Select Settings .
2. Select Clock.
3. Select Clock Adjustment .
4. Select or to change hour.
5. Select or to change minute, then
select OK.
■Adjusting the Time
1Adjusting the Clock
You can customize the clock display to show the 12
hour clock or 24 hour clock.
2 Customized Features P. 280
You can turn the clock display in the audio/
information screen on and off. 2 Customized Features P. 280
You cannot adjust the time while the vehicle is
moving.
You can also adjust the clock by touching the clock
displayed on the upper right corner of the display.
1. Touch the clock on the display.
2. Select Clock Adjustment .
3. Select or to change hour.
4. Select or to change minute, then select OK.
34
34
34
34
17 CLARITY BEV CSS-31TRV6000.book 128 ページ 2017年4月14日 金曜日 午前11 時8分
Page 161 of 543
159
uuOperating the Switches Around the Steering Wheel uBrightness Control
Controls
Brightness Control
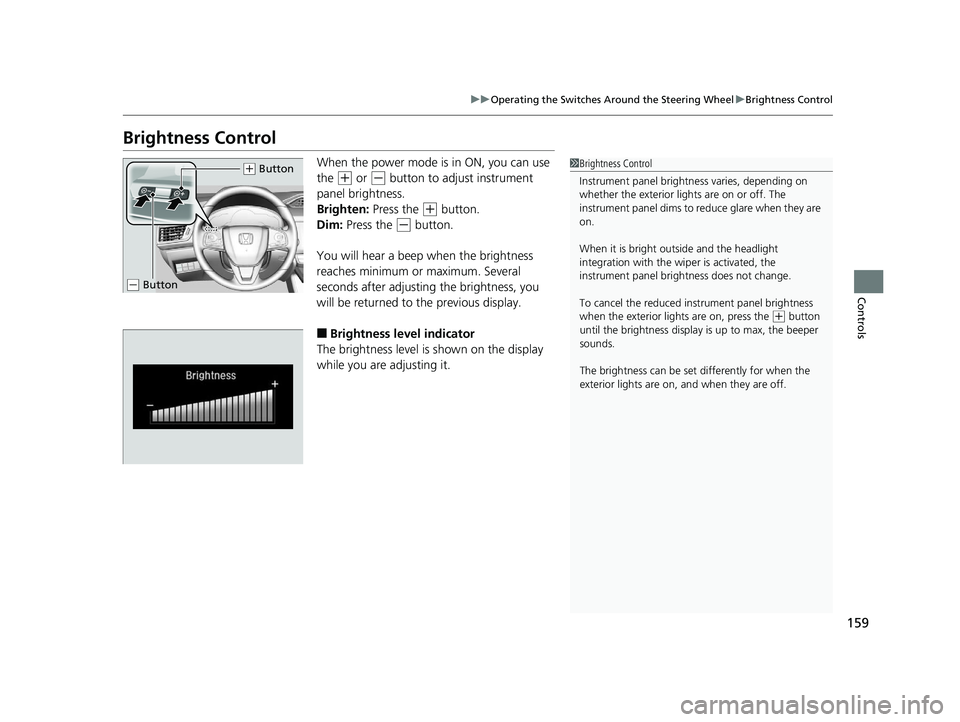
When the power mode is in ON, you can use
the
(+ or (- button to adjust instrument
panel brightness.
Brighten: Press the
(+ button.
Dim: Press the
(- button.
You will hear a beep when the brightness
reaches minimum or maximum. Several
seconds after adjusting the brightness, you
will be returned to the previous display.
■Brightness level indicator
The brightness level is shown on the display
while you are adjusting it.
1 Brightness Control
Instrument panel brightne ss varies, depending on
whether the exterior lights are on or off. The
instrument panel dims to reduce glare when they are
on.
When it is bright out side and the headlight
integration with the wi per is activated, the
instrument panel bri ghtness does not change.
To cancel the reduced in strument panel brightness
when the exterior lights are on, press the
( + button
until the brightness display is up to max, the beeper
sounds.
The brightness can be set differently for when the
exterior lights are on, and when they are off.
( + Button
( - Button
17 CLARITY BEV CSS-31TRV6000.book 159 ページ 2017年4月14日 金曜日 午前11 時8分
Page 185 of 543
183Continued
Controls
Climate Control System
Using Automatic Climate Control
The automatic climate control system maintains the interior temperature you select.
The system also selects the proper mix of heat ed or cooled air that raises or lowers
the interior temperature to your pr eference as quickly as possible.1Using Automatic Climate Control
Press the CLIMATE button to display A/C, MODE,
fan control information on the audio/information
screen to operate manually. Select ic on to turn on or
off A/C , change the vent mode , or change the fan
speed.
If any buttons/icons are pressed while using the
climate control system in auto, the function of the
button/icon that was presse d will take priority.
The AUTO indicator will go off, but functions
unrelated to the button/icon that was pressed will be
controlled automatically.
To prevent cold air from bl owing in from outside, the
fan may operate at low speed for a while after the
AUTO button has been pressed.
If the interior is very warm, you can cool it down
more rapidly by partial ly opening the windows,
turning the system on auto, and setting the
temperature to low. Change the fresh air mode to
recirculation mode until the temperature cools down.
When you set the temperature to the lower or upper
limit, Lo or Hi is displayed.
Pressing the button switches the climate
control system between on and off. When turned on,
the system returns to your last selection.
17 CLARITY BEV CSS-31TRV6000.book 183 ページ 2017年4月14日 金曜日 午前11 時8分
Page 187 of 543
Continued185
uuClimate Control System uUsing Automatic Climate Control
Controls
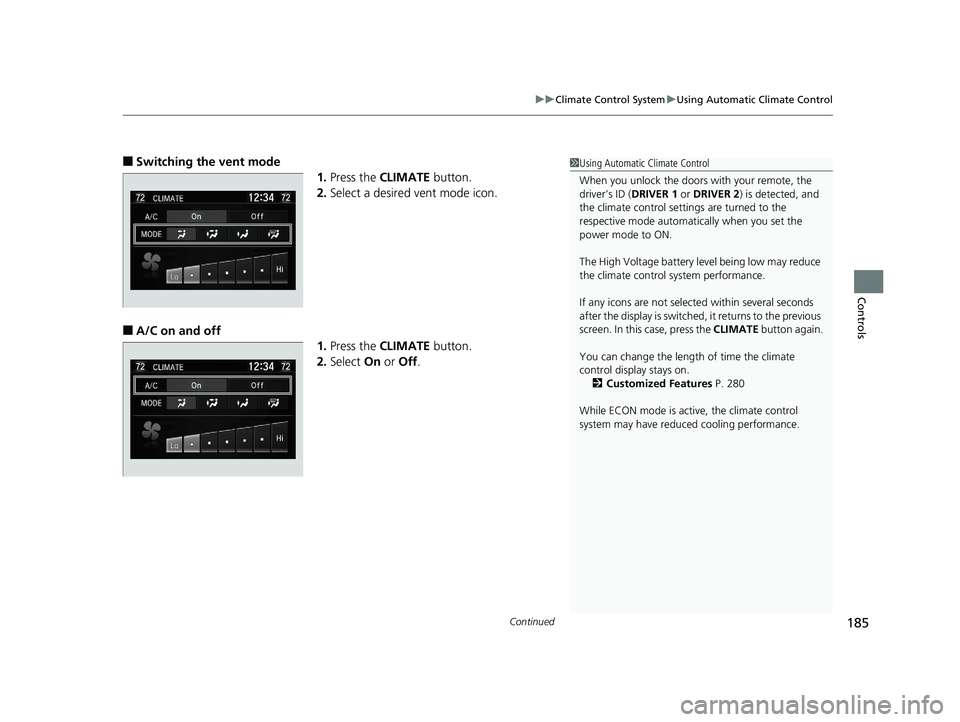
■Switching the vent mode
1.Press the CLIMATE button.
2. Select a desired vent mode icon.
■A/C on and off
1.Press the CLIMATE button.
2. Select On or Off .
1Using Automatic Climate Control
When you unlock the doors with your remote, the
driver’s ID (DRIVER 1 or DRIVER 2) is detected, and
the climate control settings are turned to the
respective mode automatically when you set the
power mode to ON.
The High Voltage battery level being low may reduce
the climate control system performance.
If any icons are not select ed within several seconds
after the display is switched, it returns to the previous
screen. In this case, press the CLIMATE button again.
You can change the length of time the climate
control display stays on. 2 Customized Features P. 280
While ECON mode is active, the climate control
system may have reduced cooling performance.
17 CLARITY BEV CSS-31TRV6000.book 185 ページ 2017年4月14日 金曜日 午前11 時8分
Page 193 of 543
191
Features
This chapter describes how to operate technology features.
Audio SystemAbout Your Audio System ................ 192
USB Ports ......................................... 193
Audio System Theft Protection ......... 194
Audio Remote Controls .................... 195
Audio System Basic Operation ........ 198
Audio/Information Screen ................ 199
Adjusting the Sound ........................ 222
Display Setup ................................... 223
Voice Control Operation .................. 225
Playing AM/FM Radio ....................... 229
Playing SiriusXM ® Radio ................... 233 Playing an iPod ................................ 241
Song By VoiceTM (SBV) ...................... 244
Playing Pandora ®............................. 248
Playing a USB Flash Drive ................. 250
Playing Bluetooth ® Audio................. 253
HondaLink ®..................................... 255
Wi-Fi Connection ............................. 260
Siri Eyes Free .................................... 262
Apple CarPlay .................................. 263
Android Auto................................... 266
Audio Error Messages ...................... 270
General Information on the Audio
System
............................................. 274
Customized Features............................280
HomeLink® Universal Transceiver.......306
Bluetooth ® HandsFreeLink® ............. 309
17 CLARITY BEV CSS-31TRV6000.book 191 ページ 2017年4月14日 金曜日 午前11 時8分
Page 195 of 543
193
uuAudio System uUSB Ports
Features
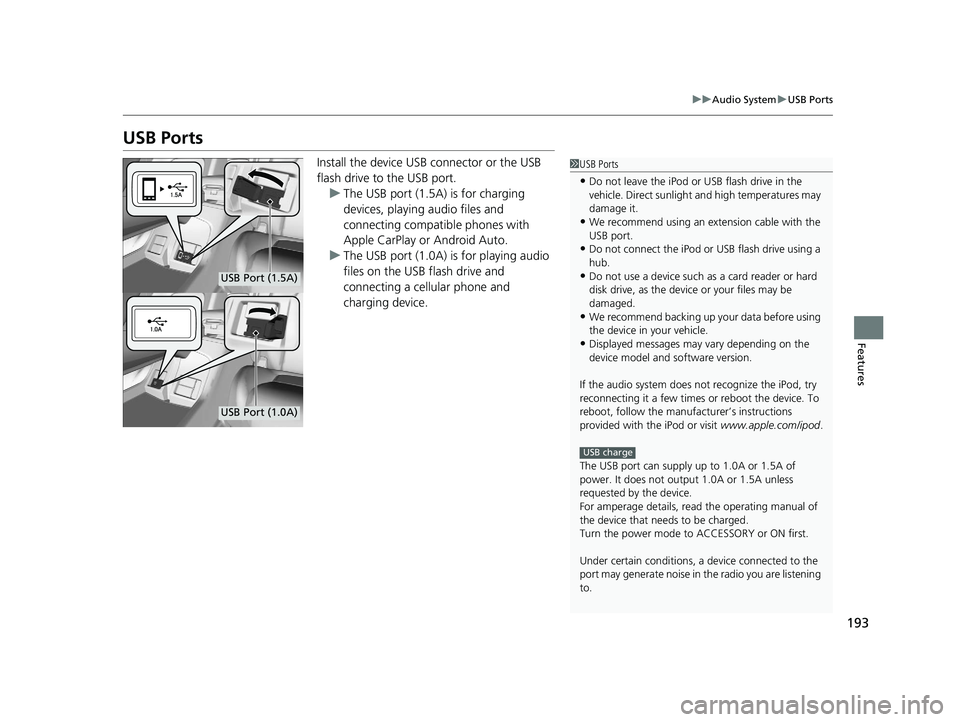
USB Ports
Install the device USB connector or the USB
flash drive to the USB port.
u The USB port (1.5A) is for charging
devices, playing audio files and
connecting compatib le phones with
Apple CarPlay or Android Auto.
u The USB port (1.0A) is for playing audio
files on the USB flash drive and
connecting a cellular phone and
charging device.1USB Ports
•Do not leave the iPod or USB flash drive in the
vehicle. Direct sunlight and high temperatures may
damage it.
•We recommend using an extension cable with the
USB port.
•Do not connect the iPod or USB flash drive using a
hub.
•Do not use a device such as a card reader or hard
disk drive, as the device or your files may be
damaged.
•We recommend backing up yo ur data before using
the device in your vehicle.
•Displayed messages may vary depending on the
device model and software version.
If the audio system does not recognize the iPod, try
reconnecting it a few times or reboot the device. To
reboot, follow the manufac turer’s instructions
provided with the iPod or visit www.apple.com/ipod.
The USB port can supply up to 1.0A or 1.5A of
power. It does not output 1.0A or 1.5A unless
requested by the device.
For amperage details, read the operating manual of
the device that ne eds to be charged.
Turn the power mode to ACCESSORY or ON first.
Under certain condi tions, a device connected to the
port may generate noise in the radio you are listening
to.
USB charge
USB Port (1.5A)
USB Port (1.0A)
17 CLARITY BEV CSS-31TRV6000.book 193 ページ 2017年4月14日 金曜日 午前11 時8分