2017 HONDA ACCORD ect
[x] Cancel search: ectPage 165 of 613

uuAdjusting the Seats uHead Restraints
164
Controls
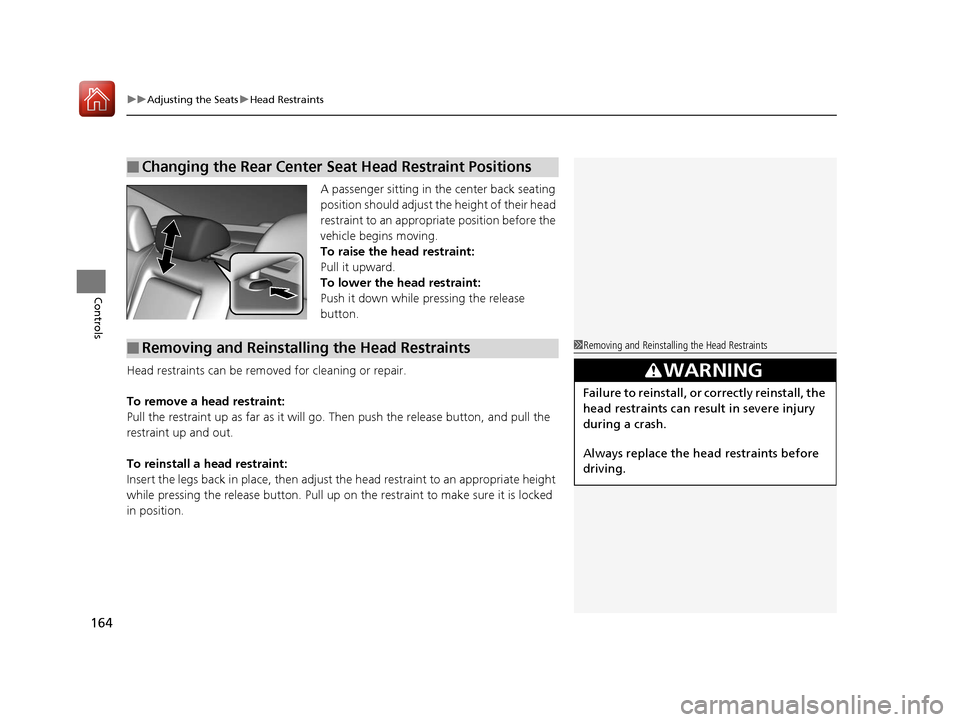
A passenger sitting in the center back seating
position should adjust th e height of their head
restraint to an appropriate position before the
vehicle begins moving.
To raise the head restraint:
Pull it upward.
To lower the head restraint:
Push it down while pressing the release
button.
Head restraints can be removed for cleaning or repair.
To remove a head restraint:
Pull the restraint up as far as it will go. Then push the release button, and pull the
restraint up and out.
To reinstall a head restraint:
Insert the legs back in place, then adjust the head restraint to an appropriate height
while pressing the release butto n. Pull up on the restraint to make sure it is locked
in position.
■Changing the Rear Center Seat Head Restraint Positions
■Removing and Reinstalling the Head Restraints1 Removing and Reinstalling the Head Restraints
3WARNING
Failure to reinstall, or correctly reinstall, the
head restraints can result in severe injury
during a crash.
Always replace the he ad restraints before
driving.
17 ACCORD 4D GAS-31T2A6400.book 164 ページ 2016年6月7日 火曜日 午後5時6分
Page 173 of 613

uuInterior Lights/Interior Convenience Items uInterior Convenience Items
172
Controls
■Front seat beverage holders
Are located in the console between the front
seats.
■Front door beverage holders
■Rear seat beverage holders
Fold the armrest down to use the rear seat
beverage holders.
■Beverage Holders1 Beverage Holders
NOTICE
Spilled liquids damage the upholstery, carpeting, and
electrical components in the interior.
Be careful when you are us ing the beverage holders.
Hot liquid can scald you.
17 ACCORD 4D GAS-31T2A6400.book 172 ページ 2016年6月7日 火曜日 午後5時6分
Page 175 of 613

uuInterior Lights/Interior Convenience Items uInterior Convenience Items
174
Controls
To use the wireless charger, the ig nition switch must be in ACCESSORY (q or ON
(w*1.
Charge a compatible device on the ar ea indicated by the mark as follows:
1. To turn the system on and off, press and
hold the (power) button.
u When the system is activated, the green
indicator light comes on.
2. Place the device you want to charge on the
charging area.
u The system will automatically start
charging the device, and the amber
indicator light will come on.
u Make sure that the device is compatible
with the system, and placed with the
chargeable side in the center of the
charging area.
3. When charging is completed, the green
indicator light will come on.
u Depending on the device, the amber
indicator light will stay on.
*1:Models with the smart entry system have an ENGINE START/STOP button instead of an
ignition switch.
■Wireless Charger*1 Wireless Charger*
This system consumes a lot of power. Do not use the
system for a long time when the engine is not
running. This may weaken the battery, making it
difficult to start the engine.
When using the wireless charger, check the user’s manual that
came with the compatible device you want to charge.
3CAUTION
Metal objects between the charge pad
and the device to be charged will get
hot and can burn you.
• Always remove foreign objects from
the charge pad before charging the
device.
• Be sure the surface is clear of dust and
other debris before charging.
• Do not spill liquids (i. e. water, drinks,
etc.) on the charger and the device.
• Do not use oil, grease, alcohol,
benzine or thinner for cleaning the
charge pad.
• Do not cover the system with towels,
clothing, or other objects while
charging etc.
• Avoid spraying aerosols which may
come in contact with the charge pad
surface.
Green Indicator
Amber Indicator
Charging Area
(Power)
Button
* Not available on all models
17 ACCORD 4D GAS-31T2A6400.book 174 ページ 2016年6月7日 火曜日 午後5時6分
Page 176 of 613

Continued175
uuInterior Lights/Interior Convenience Items uInterior Convenience Items
Controls
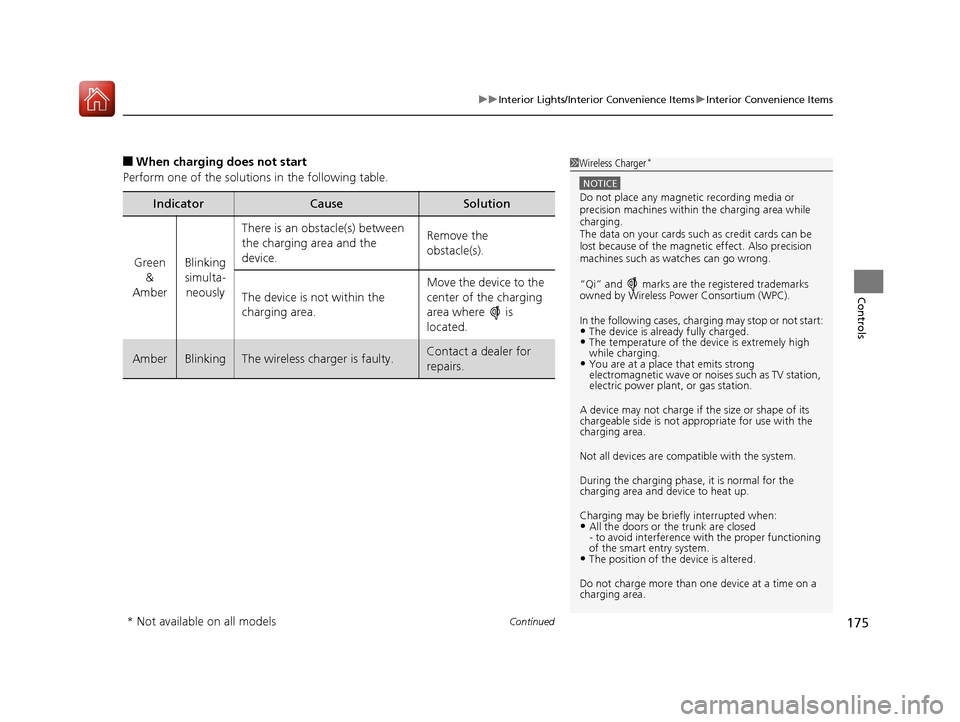
■When charging does not start
Perform one of the solutions in the following table.
IndicatorCauseSolution
Green &
AmberBlinking
simulta- neously
There is an obstacle(s) between
the charging area and the
device.Remove the
obstacle(s).
The device is not within the
charging area. Move the device to the
center of the charging
area where is
located.
AmberBlinkingThe wireless charger is faulty.Contact a dealer for
repairs.
1
Wireless Charger*
NOTICE
Do not place any magneti c recording media or
precision machines within the charging area while
charging.
The data on your cards such as credit cards can be
lost because of the magneti c effect. Also precision
machines such as watches can go wrong.
“Qi” and marks are the registered trademarks
owned by Wire less Power Consortium (WPC).
In the following cases, ch arging may stop or not start:
•The device is already fully charged.•The temperature of the device is extremely high
while charging.
•You are at a place that emits strong
electromagnetic wave or noi ses such as TV station,
electric power plant, or gas station.
A device may not charge if the size or shape of its
chargeable side is not appropriate for use with the
charging area.
Not all devices are compatible with the system.
During the charging phase, it is normal for the
charging area and de vice to heat up.
Charging may be briefl y interrupted when:
•All the doors or the trunk are closed
- to avoid interference with the proper functioning
of the smart entry system.
•The position of the device is altered.
Do not charge more than one device at a time on a
charging area.
* Not available on all models
17 ACCORD 4D GAS-31T2A6400.book 175 ページ 2016年6月7日 火曜日 午後5時6分
Page 177 of 613

uuInterior Lights/Interior Convenience Items uInterior Convenience Items
176
Controls
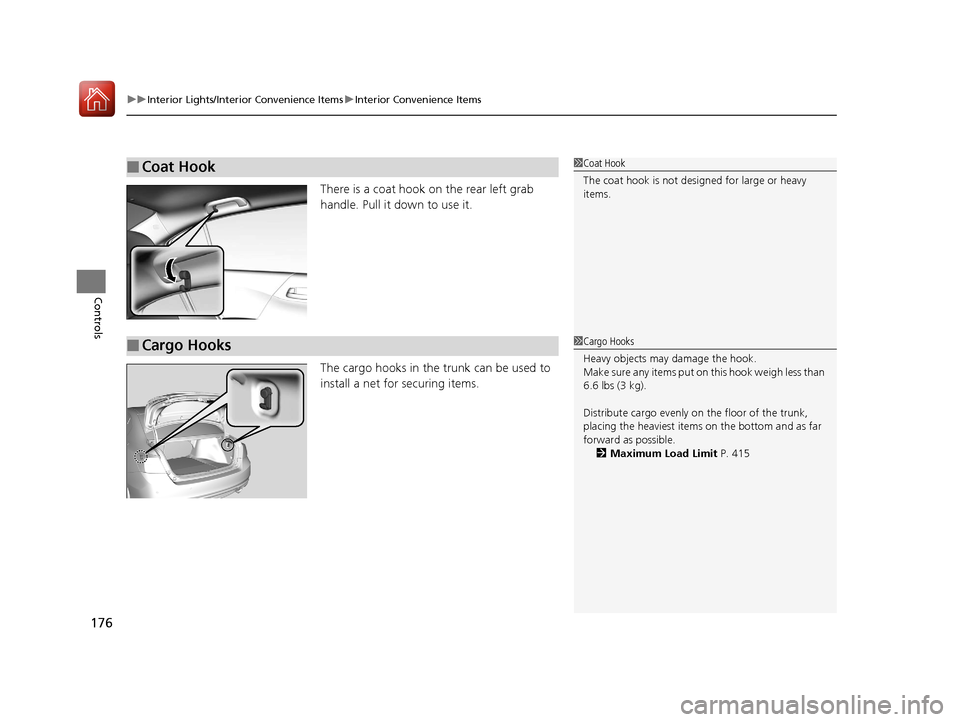
There is a coat hook on the rear left grab
handle. Pull it down to use it.
The cargo hooks in the trunk can be used to
install a net for securing items.
■Coat Hook1Coat Hook
The coat hook is not desi gned for large or heavy
items.
■Cargo Hooks1 Cargo Hooks
Heavy objects may damage the hook.
Make sure any items put on this hook weigh less than
6.6 lbs (3 kg).
Distribute cargo evenly on the floor of the trunk,
placing the heaviest item s on the bottom and as far
forward as possible.
2 Maximum Load Limit P. 415
17 ACCORD 4D GAS-31T2A6400.book 176 ページ 2016年6月7日 火曜日 午後5時6分
Page 181 of 613

180
Controls
Climate Control System
Using Automatic Climate Control
The automatic climate control system maintains the interior temperature you select.
The system also selects the proper mix of heated or cooled air that raises or lowers
the interior temperature to your pr eference as quickly as possible.
Use the system when the engine is running.
1. Press the AUTO button.
2. Adjust the interior temperature using the dr iver’s side or passenger’s side control
buttons.
3. Press the (on/off) button to cancel.
■Switching between the recirculation and fresh air modes
Press the (recirculation) button and switch the mode depending on
environmental conditions.
Recirculation mode (indicator on): Recirculat es air from the vehicle’s interior through
the system.
Fresh air mode (indicator off): Maintains ou tside ventilation. Keep the system in
fresh air mode in normal situations.
1 Using Automatic Climate Control
If any buttons are presse d while using the climate
control system in auto, the function of the button
that was pressed will take priority.
The AUTO indicator will go off, but functions
unrelated to the button th at was pressed will be
controlled automatically.
To prevent cold air from bl owing in from outside, the
fan may not start i mmediately when the AUTO
button is pressed.
If the interior is very warm, you can cool it down
more rapidly by partial ly opening the windows,
turning the system on auto, and setting the
temperature to low. Change the fresh mode to
recirculation mode until the temperature cools down.
When you set the temperat ure to the lower or upper
limit, Lo or Hi is displayed.
Pressing the button switches the climate
control system between on and off. When turned on,
the system returns to your last selection.
Floor and
defroster
vents
Floor vents
Dashboard and floor
vents, and back of
the center console
*
Dashboard vents
and back of the
center console
*
AUTO Button
Driver’s Side
Temperature
Control Buttons (Recirculation) Button
/ (Fan Control) ButtonsA/C
(Air Conditioning)
Button Passenger’s Side
Temperature
Control Buttons
* Not available on all models
17 ACCORD 4D GAS-31T2A6400.book 180 ページ 2016年6月7日 火曜日 午後5時6分
Page 186 of 613

185
Features
This chapter describes how to operate technology features.
Audio SystemAbout Your Audio System ................ 186
USB Port(s
*) ..................................... 187
Auxiliary Input Jack*........................ 188
Audio System Theft Protection*....... 189
Audio Remote Controls .................... 190
Audio System Basic Operation ........ 192
Audio/Information Screen ................ 193
Display Setup ................................... 198
Playing AM/FM Radio ....................... 199
Playing a CD .................................... 201
Playing an iPod ................................ 204
Playing Internet Radio ...................... 207
Playing a USB Flash Drive ................. 210
Playing Bluetooth ® Audio ................. 213
Models with one display
Audio System Basic Operation ........ 215
Audio/Information Screen ................ 216
Audio/Information Touch Screen ...... 218
Adjusting the Sound ........................ 232
Display Setup ................................... 233
Voice Control Operation .................. 235
Playing AM/FM Radio ....................... 239
Playing SiriusXM ® Radio
*................. 243
Playing a CD .................................... 251
Playing an iPod ................................ 254
Song By Voice
TM (SBV) ...................... 257
Playing Pandora ®*............................ 261
Playing AhaTM................................... 263
Playing a USB Flash Drive ................. 264
Playing Bluetooth ® Audio................. 267
Models with two displaysHondaLink ®..................................... 269
Wi-Fi Connection ............................. 274
Apple CarPlay
TM............................... 276
Android AutoTM............................... 280
Siri ® Eyes Free .................................. 284
Audio Error Messages ...................... 285
General Information on the Audio System ............................................. 290
Customized Features ................ 297, 315
HomeLink ® Universal Transceiver
*... 339
Bluetooth ® HandsFreeLink® ..... 342, 373
Compass
*.......................................... 408
* Not available on all models
17 ACCORD 4D GAS-31T2A6400.book 185 ページ 2016年6月7日 火曜日 午後5時6分
Page 187 of 613

186
Features
Audio System
About Your Audio System
The audio system features AM/FM radio and SiriusXM ® Radio service*. It can also
play audio CDs, WMA/MP3/AAC files, USB flash drives, and iPod, iPhone and
Bluetooth ® devices.
You can operate the audio system from the buttons and switches on the panel or
the remote controls on the steering wheel, or on the touchscreen interface
*.
1 About Your Audio System
SiriusXM ® Radio is available on a subscription basis
only. For more information on SiriusXM ® Radio,
contact a dealer.
2 General Information on the Audio System
P. 290
SiriusXM ® Radio is available in the United States and
Canada, except Ha waii, Alaska, and Puerto Rico.
SiriusXM ® is a trademark of Sirius XM Radio, Inc.
Video CDs, DVDs, and 3-inch (8-cm) mini CDs are not
supported.
iPod, iPhone and iTunes are trademarks of Apple Inc.
State or local laws may pr ohibit the operation of
handheld electronic devi ces while operating a
vehicle.
Remote Controls
iPod
USB
Flash
Drive
Models with one display
Remote Controls
iPod
USB
Flash
Drive
Models with two displays
* Not available on all models
17 ACCORD 4D GAS-31T2A6400.book 186 ページ 2016年6月7日 火曜日 午後5時6分