2017 FORD TAURUS brake
[x] Cancel search: brakePage 244 of 504
Engine oil dipstick. See Engine Oil Dipstick (page 241).C.
Brake fluid reservoir. See Brake Fluid Check (page 251).D.
Battery. See Changing the 12V Battery (page 252).E.
Engine compartment fuse box. See Fuses (page 226).F.
Air filter assembly. See Changing the Engine Air Filter (page 259).G.
Automatic transmission dipstick. See Automatic Transmission Fluid Check(page 247).H.
Washer fluid reservoir. See Washer Fluid Check (page 251).I.
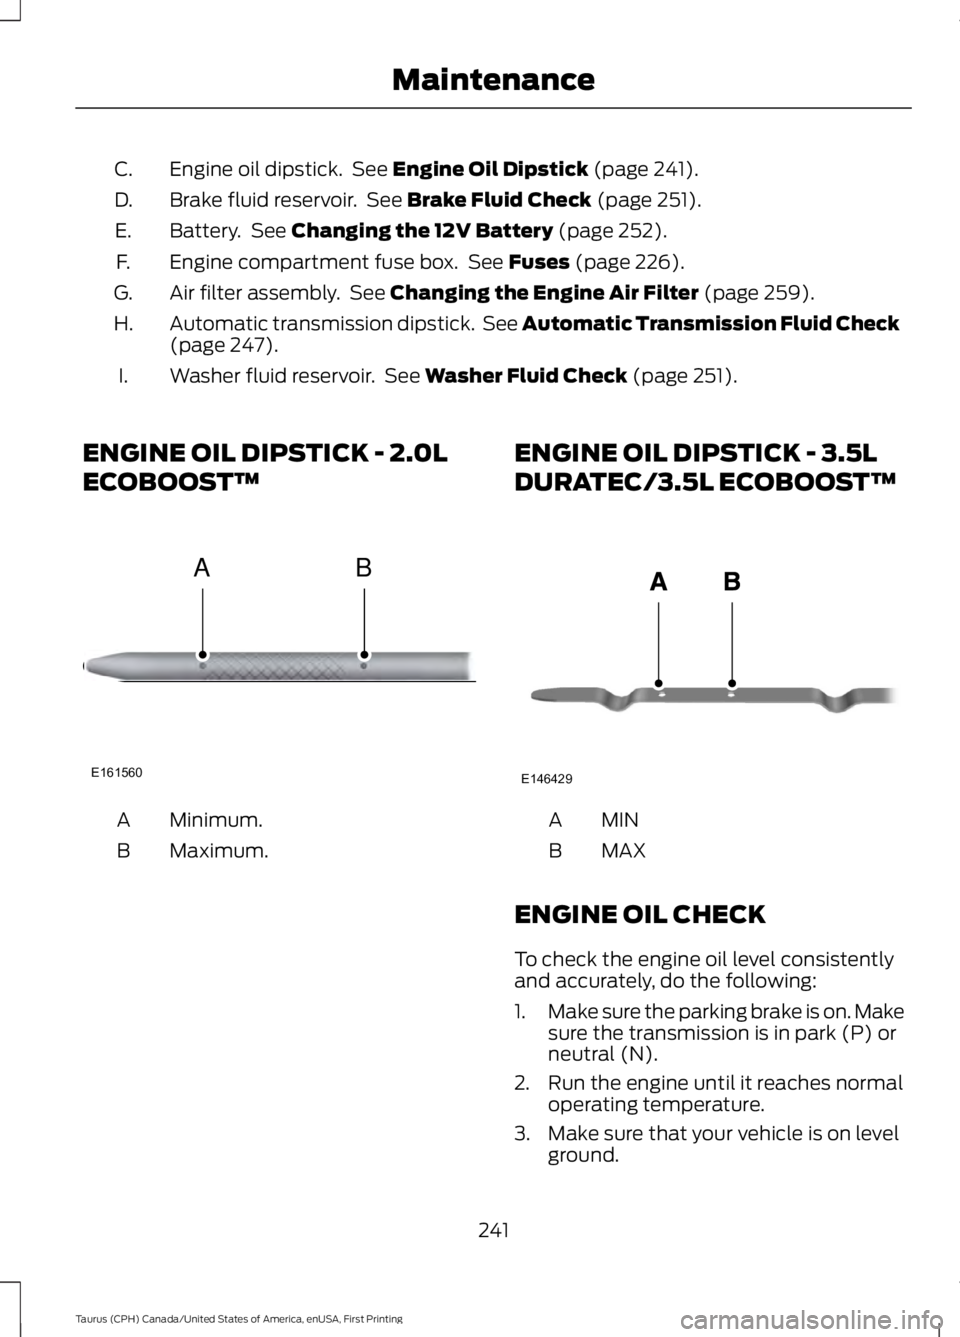
ENGINE OIL DIPSTICK - 2.0L
ECOBOOST™
Minimum.A
Maximum.B
ENGINE OIL DIPSTICK - 3.5L
DURATEC/3.5L ECOBOOST™
MINA
MAXB
ENGINE OIL CHECK
To check the engine oil level consistentlyand accurately, do the following:
1.Make sure the parking brake is on. Makesure the transmission is in park (P) orneutral (N).
2. Run the engine until it reaches normaloperating temperature.
3. Make sure that your vehicle is on levelground.
241
Taurus (CPH) Canada/United States of America, enUSA, First Printing
MaintenanceE161560
AB E146429
Page 249 of 504
How Fail-Safe Cooling Works
If the engine begins to overheat,the coolant temperature gaugemoves toward the red zone:
A warning lamp illuminates anda message may appear in theinformation display.
If the engine reaches a presetover-temperature condition, the engineautomatically switches to alternatingcylinder operation. Each disabled cylinderacts as an air pump and cools the engine.
When this occurs, your vehicle stilloperates, however:
•Engine power is limited.
•The air conditioning system turns off.
Continued operation increases the enginetemperature, causing the engine tocompletely shut down. Your steering andbraking effort increases in this situation.
When the engine temperature cools, youcan re-start the engine. Have your vehiclechecked as soon as possible to minimizeengine damage.
When Fail-Safe Mode Is Activated
WARNINGS
Fail-safe mode is for use duringemergencies only. Operate yourvehicle in fail-safe mode only as longas necessary to bring your vehicle to restin a safe location and seek immediaterepairs. When in fail-safe mode, yourvehicle will have limited power, will not beable to maintain high-speed operation, andmay completely shut down withoutwarning, potentially losing engine power,power steering assist, and power brakeassist, which may increase the possibilityof a crash resulting in serious injury.
WARNINGS
Never remove the coolant reservoircap when the engine is running orhot.
Your vehicle has limited engine powerwhen in the fail-safe mode, drive yourvehicle with caution. Your vehicle does notmaintain high-speed operation and theengine may operate poorly.
Remember that the engine is capable ofautomatically shutting down to preventengine damage. In this situation:
1. Pull off the road as soon as safelypossible and switch the engine off.
2. If you are a member of a roadsideassistance program, we recommendthat you contact your roadsideassistance service provider.
3. If this is not possible, wait a shortperiod for the engine to cool.
4. Check the coolant level. If the coolantlevel is at or below the minimum mark,add prediluted coolant immediately.
5. When the engine temperature cools,you can re-start the engine. Have yourvehicle checked as soon as possible tominimize engine damage.
Note:Driving your vehicle without repairincreases the chance of engine damage.
Engine Coolant TemperatureManagement (If Equipped)
WARNING
To reduce the risk of crash and injury,be prepared that the vehicle speedmay reduce and the vehicle may notbe able to accelerate with full power untilthe coolant temperature reduces.
246
Taurus (CPH) Canada/United States of America, enUSA, First Printing
Maintenance
Page 251 of 504
Note:Automatic transmission fluidexpands when warmed. To obtain anaccurate fluid check, drive your vehicle untilyou warm it up, approximately 20 mi(30 km). If you operate your vehicle for anextended period at high speeds, in city trafficduring hot weather or pulling a trailer, switchyour vehicle off until it reaches normaloperating temperatures to allow the fluidto cool before checking. Depending onvehicle use, cooling times could take up to30 minutes or longer.
Refer to your scheduled maintenanceinformation for scheduled intervals for fluidchecks and changes. Your transmissiondoes not consume fluid. However, youshould check the fluid level if thetransmission is not working properly. Forexample, if the transmission slips or shiftsslowly or if you notice some sign of a fluidleak.
1. Drive your vehicle 20 mi (30 km) oruntil it reaches normal operatingtemperature.
2.Park your vehicle on a level surface andengage the parking brake.
3. With the parking brake engaged andyour foot on the brake pedal, start theengine and move the gearshift leverthrough all of the gear ranges. Allow aminimum of 10 seconds for each gearto engage.
4. Put the gearshift lever in park (P) andleave the engine running.
Note:For vehicles with the EcoBoostengine, move the air filter assembly asideto access the transmission dipstick. SeeMoving the Air Filter Assembly for moreinformation.
5. Remove the dipstick and wipe it cleanwith a dry, lint free clean rag. Ifnecessary, refer to the Under hoodoverview in this chapter for the locationof the dipstick.
6. Install the dipstick making sure youfully seat it in the filler tube by turningit to the locked position.
7. Remove the dipstick and inspect thefluid level. The fluid should be in thedesignated areas for normal operatingtemperature.
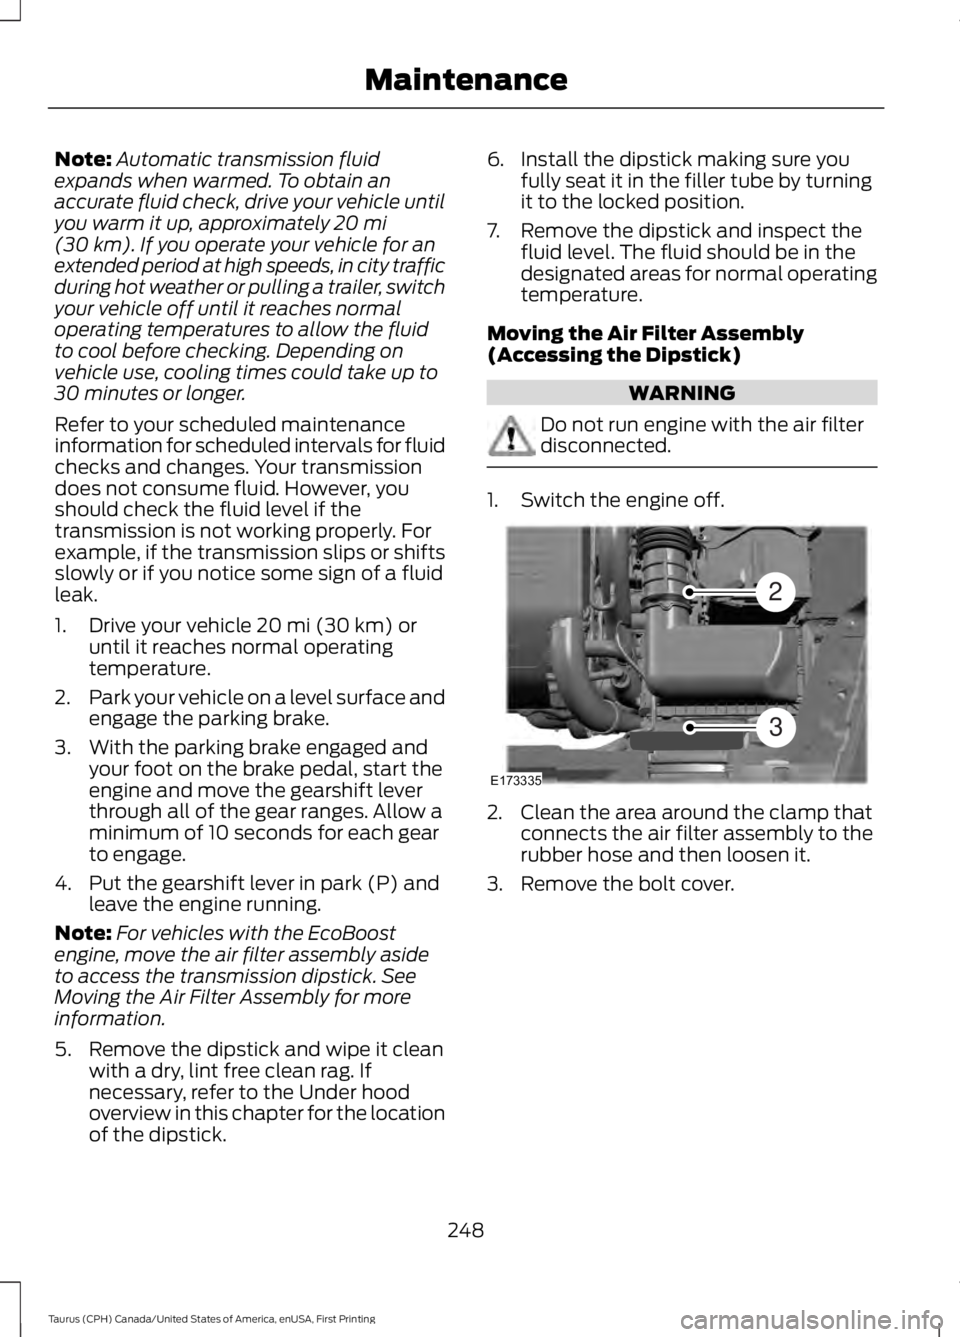
Moving the Air Filter Assembly(Accessing the Dipstick)
WARNING
Do not run engine with the air filterdisconnected.
1. Switch the engine off.
2. Clean the area around the clamp thatconnects the air filter assembly to therubber hose and then loosen it.
3. Remove the bolt cover.
248
Taurus (CPH) Canada/United States of America, enUSA, First Printing
MaintenanceE173335
2
3
Page 254 of 504
5. Install and tighten the two bolts thatattach the air filter assembly to thefront of the vehicle.
6. Install the bolt cover.
7.Reinstall the harness retaining clip intothe front of the air filter assembly.
BRAKE FLUID CHECK
WARNINGS
Do not use any fluid other than therecommended brake fluid as this willreduce brake efficiency. Use ofincorrect fluid could result in the loss ofvehicle control, serious personal injury ordeath.
Only use brake fluid from a sealedcontainer. Contamination with dirt,water, petroleum products or othermaterials may result in brake systemdamage or failure. Failure to adhere to thiswarning could result in the loss of vehiclecontrol, serious personal injury or death.
Do not allow the fluid to touch yourskin or eyes. If this happens, rinse theaffected areas immediately withplenty of water and contact your physician.
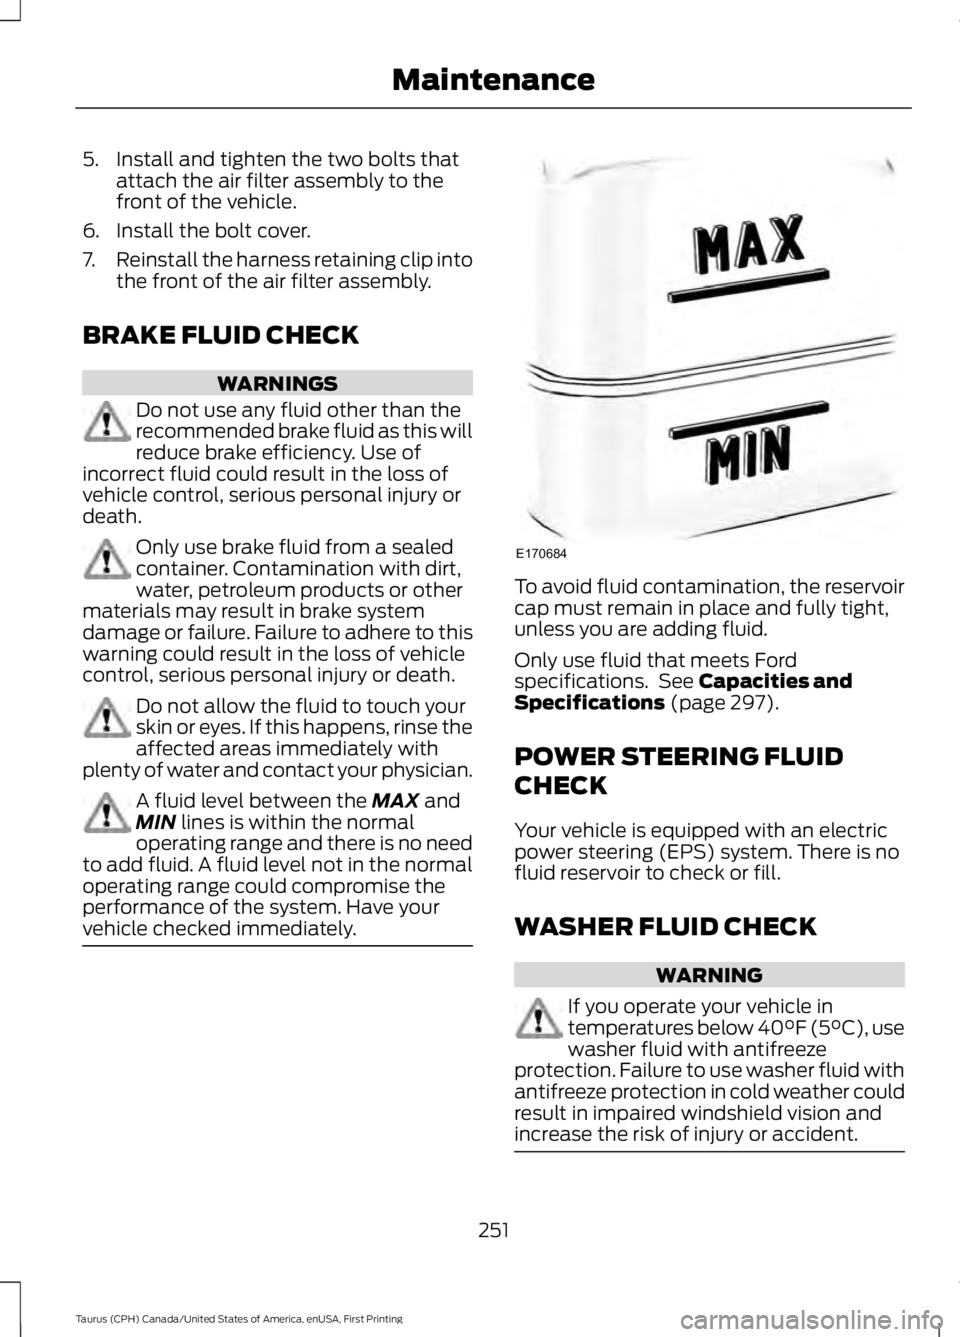
A fluid level between the MAX andMIN lines is within the normaloperating range and there is no needto add fluid. A fluid level not in the normaloperating range could compromise theperformance of the system. Have yourvehicle checked immediately.
To avoid fluid contamination, the reservoircap must remain in place and fully tight,unless you are adding fluid.
Only use fluid that meets Fordspecifications. See Capacities andSpecifications (page 297).
POWER STEERING FLUID
CHECK
Your vehicle is equipped with an electricpower steering (EPS) system. There is nofluid reservoir to check or fill.
WASHER FLUID CHECK
WARNING
If you operate your vehicle intemperatures below 40
Page 256 of 504
If you see any corrosion on the battery orterminals, remove the cables from theterminals and clean with a wire brush. Youcan neutralize the acid with a solution ofbaking soda and water.
Because your vehicle’s engine iselectronically controlled by a computer,some control conditions are maintainedby power from the battery. When thebattery is disconnected or a new batteryis installed, the engine must relearn its idleand fuel trim strategy for optimumdriveability and performance. Flexible fuelvehicles (FFV) must also relearn theethanol content of the fuel for optimumdriveability and performance.
To restore the settings, do the following:
1. Apply the parking brake.
2. Shift into park (P) or neutral (N).
3. Switch off all accessories.
4. Press the brake pedal and start yourvehicle.
5. Run the engine until it reaches normaloperating temperature. While theengine is warming up, complete thefollowing: Reset the clock. See AudioSystem (page 315). Reset the powerwindows bounce-back feature. SeeWindows and Mirrors (page 78).Reset the radio station presets. SeeAudio System (page 315).
6.Allow the engine to idle for at least oneminute.
7.Drive the vehicle at least 10 mi (16 km)to completely relearn the idle trim andfuel trim strategy.
Note:If you do not allow the engine torelearn the idle and fuel trim strategy, theidle quality of your vehicle may be adverselyaffected until the engine computereventually relearns the idle trim and fueltrim strategy.
Note:For flexible fuel vehicles, if you areoperating on E85, you may experience poorstarts or an inability to start the engine anddriveability problems until the fuel trim andethanol content have been relearned.
Make sure that you dispose of old batteriesin an environmentally friendly way. Seekadvice from your local authority aboutrecycling old batteries.
If storing your vehicle for more than 30days without recharging the battery, werecommend that you disconnect thebattery cables to maintain battery chargefor quick starting.
Battery Management System (If
Equipped)
The battery management system monitorsbattery conditions and takes actions toextend battery life. If excessive batterydrain is detected, the system temporarilydisables some electrical systems toprotect the battery.
Systems included are:
•Heated rear window.
•Heated seats.
•Climate control.
•Heated steering wheel.
•Audio unit.
•Navigation system.
A message may appear in the informationdisplays to alert you that batteryprotection actions are active. Thesemessages are only for notification that anaction is taking place, and not intended toindicate an electrical problem or that thebattery requires replacement.
253
Taurus (CPH) Canada/United States of America, enUSA, First Printing
Maintenance
Page 259 of 504
5. Locate the vertical adjuster on eachheadlamp. Use a Phillips #2screwdriver to turn the adjuster eitherclockwise or counterclockwise toadjust the vertical aim of theheadlamp. The horizontal edge of thebrighter light should touch thehorizontal reference line.
6.Repeat Steps 3 through 7 to adjust theother headlamp.
7.Close the hood and turn off the lamps.
Horizontal Aim Adjustment
Horizontal aim is not required for thisvehicle and is not adjustable.
CHANGING A BULB
WARNINGS
Bulbs can become hot. Let the bulbcool down before removing it. Failureto do so could result in personalinjury.
Switch the lamps and the ignition off.Failure to follow this warning couldresult in serious personal injury.
Use the correct specification bulb. SeeBulb Specification Chart (page 257).
Install in the reverse order unless otherwisestated.
High-Intensity DischargeHeadlamps
These lamps operate at a high voltage. Seean authorized dealer if they fail.
Front Fog Lamp (If Equipped)
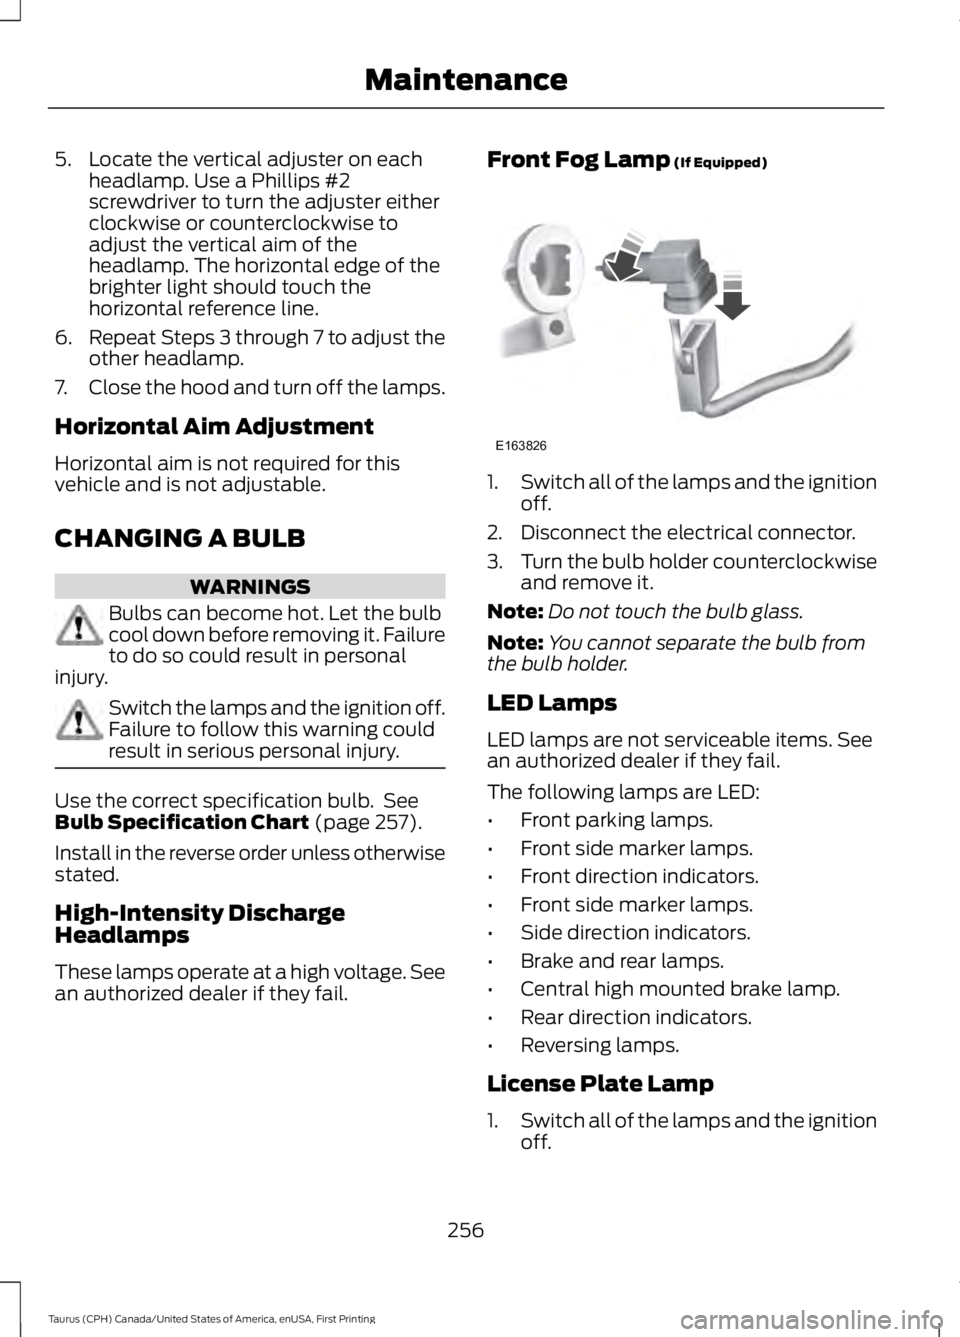
1.Switch all of the lamps and the ignitionoff.
2. Disconnect the electrical connector.
3.Turn the bulb holder counterclockwiseand remove it.
Note:Do not touch the bulb glass.
Note:You cannot separate the bulb fromthe bulb holder.
LED Lamps
LED lamps are not serviceable items. Seean authorized dealer if they fail.
The following lamps are LED:
•Front parking lamps.
•Front side marker lamps.
•Front direction indicators.
•Front side marker lamps.
•Side direction indicators.
•Brake and rear lamps.
•Central high mounted brake lamp.
•Rear direction indicators.
•Reversing lamps.
License Plate Lamp
1.Switch all of the lamps and the ignitionoff.
256
Taurus (CPH) Canada/United States of America, enUSA, First Printing
MaintenanceE163826
Page 260 of 504

2. Remove the screws that secure thelamp assembly.3. Remove the bulb.
BULB SPECIFICATION CHART
The specified replacement bulbs are in thechart below. Headlamp bulbs must bemarked with an authorized D.O.T.(Department of Transportation) for NorthAmerica to affirm lamp performance, lightbrightness and pattern and safe visibility.The correct bulbs will not damage thelamp assembly or void the lamp assemblywarranty and will provide quality bulb burntime.
Trade numberFunction
D3S* Headlamp (high intensity discharge) Lowand High
LED* Sidemarker - front
LED* Park lamp - front
7444NA* Turn lamp - front
LEDSignal indicator mirror lamp
LEDApproach lamp
LED* Tail and brake lamp
LED* Turn lamp - rear
LED* Backup lamp
257
Taurus (CPH) Canada/United States of America, enUSA, First Printing
MaintenanceE178598 E178599
Page 261 of 504
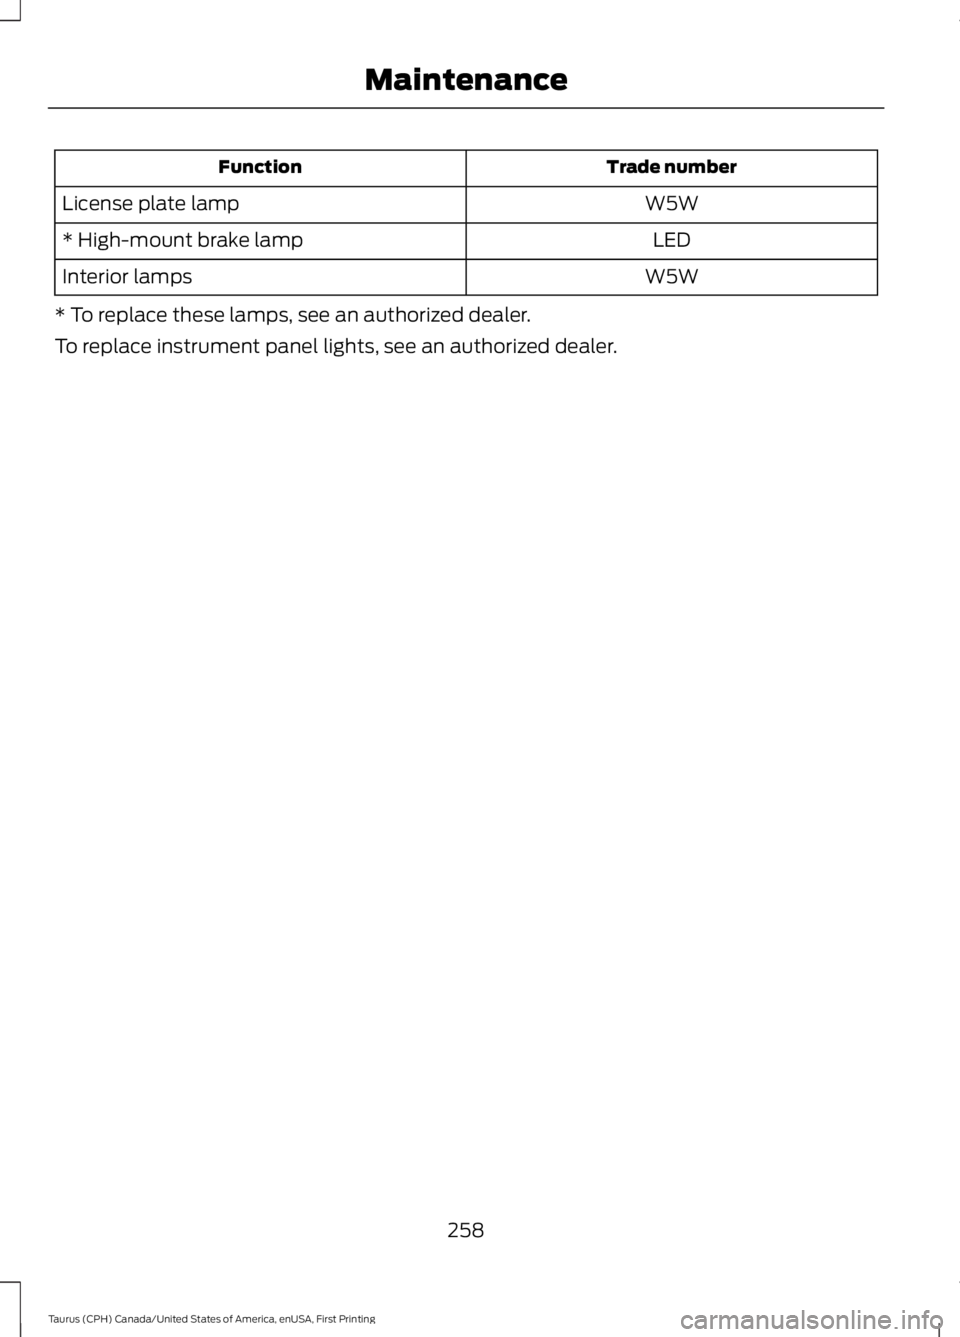
Trade numberFunction
W5WLicense plate lamp
LED* High-mount brake lamp
W5WInterior lamps
* To replace these lamps, see an authorized dealer.
To replace instrument panel lights, see an authorized dealer.
258
Taurus (CPH) Canada/United States of America, enUSA, First Printing
Maintenance