2017 FORD TAURUS transmission
[x] Cancel search: transmissionPage 215 of 504

•Transmissions give their best fueleconomy when operated in the topcruise gear and with steady pressureon the gas pedal.
•Four-wheel-drive operation (ifequipped) is less fuel efficient thantwo-wheel-drive operation.
•Close the windows for high-speeddriving.
DRIVING THROUGH WATER
WARNING
Do not drive through flowing or deepwater as you may lose control of yourvehicle.
Note:Driving through standing water cancause vehicle damage.
Note:Engine damage can occur if waterenters the air filter.
Before driving through standing water,check the depth. Never drive through waterthat is higher than the bottom of the frontrocker area of your vehicle.
When driving through standing water, drivevery slowly and do not stop your vehicle.Your brake performance and traction maybe limited. After driving through water andas soon as it is safe to do so:
•Lightly press the brake pedal to dry thebrakes and to check that they work.
•Check that the horn works.
•Check that the exterior lights work.
•Turn the steering wheel to check thatthe steering power assist works.
FLOOR MATS
WARNINGS
Always use floor mats that aredesigned to fit the foot well of yourvehicle. Only use floor mats thatleave the pedal area unobstructed. Onlyuse floor mats that are firmly secured toretention posts so that they cannot slip outof position and interfere with the pedalsor impair safe operation of your vehicle inother ways.
Pedals that cannot move freely cancause loss of vehicle control andincrease the risk of serious personalinjury.
Always make sure that the floormats are properly attached to theretention posts in the carpet that aresupplied with your vehicle. Floor mats mustbe properly secured to both retention poststo make sure mats do not shift out ofposition.
Never place floor mats or any othercovering in the vehicle foot well thatcannot be properly secured toprevent them from moving and interferingwith the pedals or the ability to control thevehicle.
Never place floor mats or any othercovering on top of already installedfloor mats. Floor mats should alwaysrest on top of vehicle carpeting surface andnot another floor mat or other covering.Additional floor mats or any other coveringwill reduce the pedal clearance andpotentially interfere with pedal operation.
212
Taurus (CPH) Canada/United States of America, enUSA, First Printing
Driving HintsE176360
Page 219 of 504
Note:When you try to restart your vehicleafter a fuel shutoff, the vehicle makes surethat various systems are safe to restart.Once your vehicle determines that thesystems are safe, then the vehicle will allowyou to restart.
Note:In the event that your vehicle doesnot restart after your third attempt, contactan authorized dealer.
JUMP STARTING THE VEHICLE
WARNINGS
Batteries normally produce explosivegases which can cause personalinjury. Therefore, do not allowflames, sparks or lighted substances tocome near the battery. When working nearthe battery, always shield your face andprotect your eyes. Always provide correctventilation.
Keep batteries out of reach ofchildren. Batteries contain sulfuricacid. Avoid contact with skin, eyes orclothing. Shield your eyes when workingnear the battery to protect against possiblesplashing of acid solution. In case of acidcontact with skin or eyes, flushimmediately with water for a minimum of15 minutes and get prompt medicalattention. If acid is swallowed, call aphysician immediately.
Use only adequately sized cableswith insulated clamps.
Preparing Your Vehicle
Do not attempt to push-start yourautomatic transmission vehicle.
Note:Attempting to push-start a vehiclewith an automatic transmission may causetransmission damage.
Note:Use only a 12-volt supply to start yourvehicle.
Note:Do not disconnect the battery of thedisabled vehicle as this could damage thevehicle electrical system.
Park the booster vehicle close to the hoodof the disabled vehicle, making sure thetwo vehicles do not touch.
Connecting the Jumper Cables
WARNINGS
Do not attach the cables to fuel lines,engine rocker covers, the intakemanifold or electrical componentsas grounding points. Stay clear of movingparts. To avoid reverse polarityconnections, make sure that you correctlyidentify the positive (+) and negative (-)terminals on both the disabled and boostervehicles before connecting the cables.
Do not attach the end of the positivecable to the studs or L-shaped eyeletlocated above the positive (+)terminal of your vehicle’s battery. Highcurrent may flow through and causedamage to the fuses.
Do not connect the end of thesecond cable to the negative (-)terminal of the battery to be jumped.A spark may cause an explosion of thegases that surround the battery.
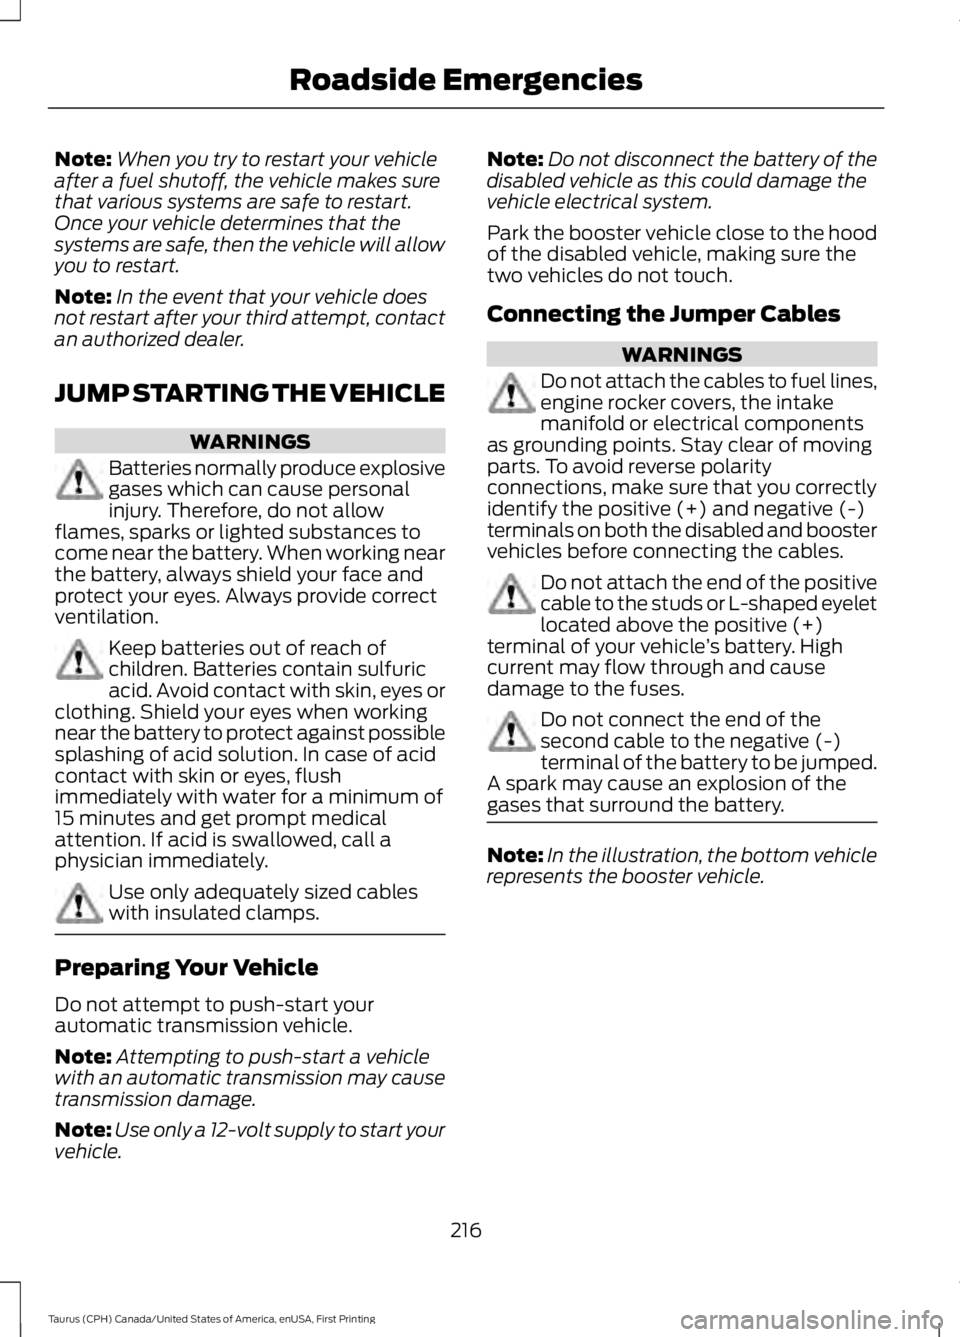
Note:In the illustration, the bottom vehiclerepresents the booster vehicle.
216
Taurus (CPH) Canada/United States of America, enUSA, First Printing
Roadside Emergencies
Page 232 of 504

Protected componentsFuse amp ratingFuse or relay number
Wiper relay.Relay55
Not used.-56
Left-hand high intensity discharge head-lamp.20A157
Alternator A-line.10A158
Brake on/off switch.10A159
Not used.-60
Not used.-61
A/C clutch relay.10A 162
Not used.-63
Massage control seats.15A164
Fuel pump relay.30A165Fuel injectors.
Powertrain control module relay.Relay66
Oxygen sensor heater.20A167Mass airflow sensor.Variable camshaft timing solenoid valve.Canister vent solenoid.Canister purge solenoid.
Ignition coils.20A168
Vehicle power 1 (powertrain controlmodule).20A169
A/C clutch.15A170Fan control relay coils 1-3.Variable air conditioning compressor.Auxiliary transmission warmup.Turbo charge waste-gate control.Electronic compressor bypass valve.All-wheel drive module.Positive crankcase ventilation heater.
Not used.-71
229
Taurus (CPH) Canada/United States of America, enUSA, First Printing
Fuses
Page 242 of 504
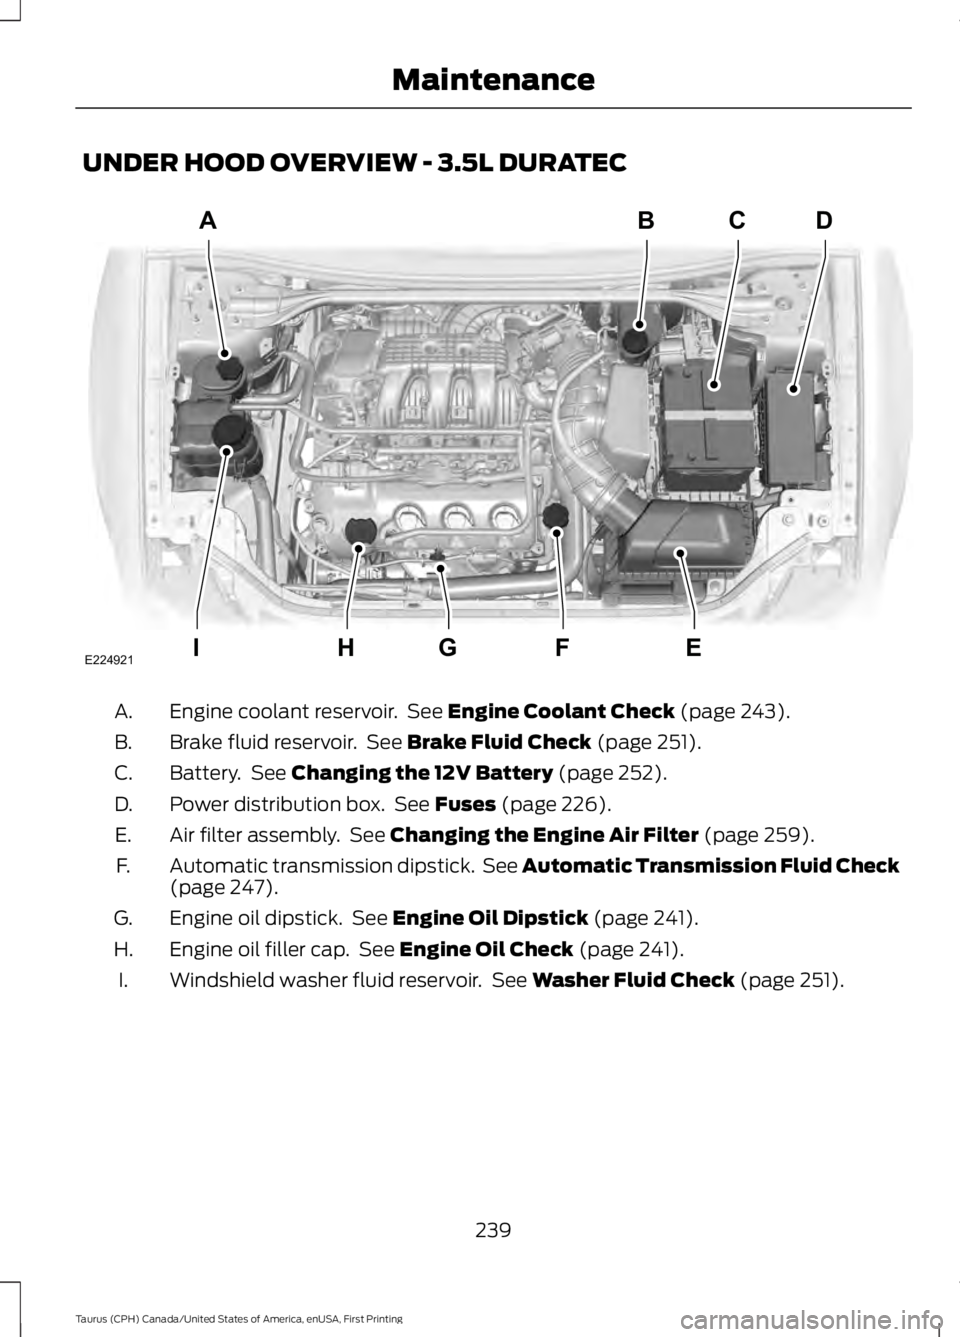
UNDER HOOD OVERVIEW - 3.5L DURATEC
Engine coolant reservoir. See Engine Coolant Check (page 243).A.
Brake fluid reservoir. See Brake Fluid Check (page 251).B.
Battery. See Changing the 12V Battery (page 252).C.
Power distribution box. See Fuses (page 226).D.
Air filter assembly. See Changing the Engine Air Filter (page 259).E.
Automatic transmission dipstick. See Automatic Transmission Fluid Check(page 247).F.
Engine oil dipstick. See Engine Oil Dipstick (page 241).G.
Engine oil filler cap. See Engine Oil Check (page 241).H.
Windshield washer fluid reservoir. See Washer Fluid Check (page 251).I.
239
Taurus (CPH) Canada/United States of America, enUSA, First Printing
MaintenanceA
IEFGH
BCD
E224921
Page 244 of 504
Engine oil dipstick. See Engine Oil Dipstick (page 241).C.
Brake fluid reservoir. See Brake Fluid Check (page 251).D.
Battery. See Changing the 12V Battery (page 252).E.
Engine compartment fuse box. See Fuses (page 226).F.
Air filter assembly. See Changing the Engine Air Filter (page 259).G.
Automatic transmission dipstick. See Automatic Transmission Fluid Check(page 247).H.
Washer fluid reservoir. See Washer Fluid Check (page 251).I.
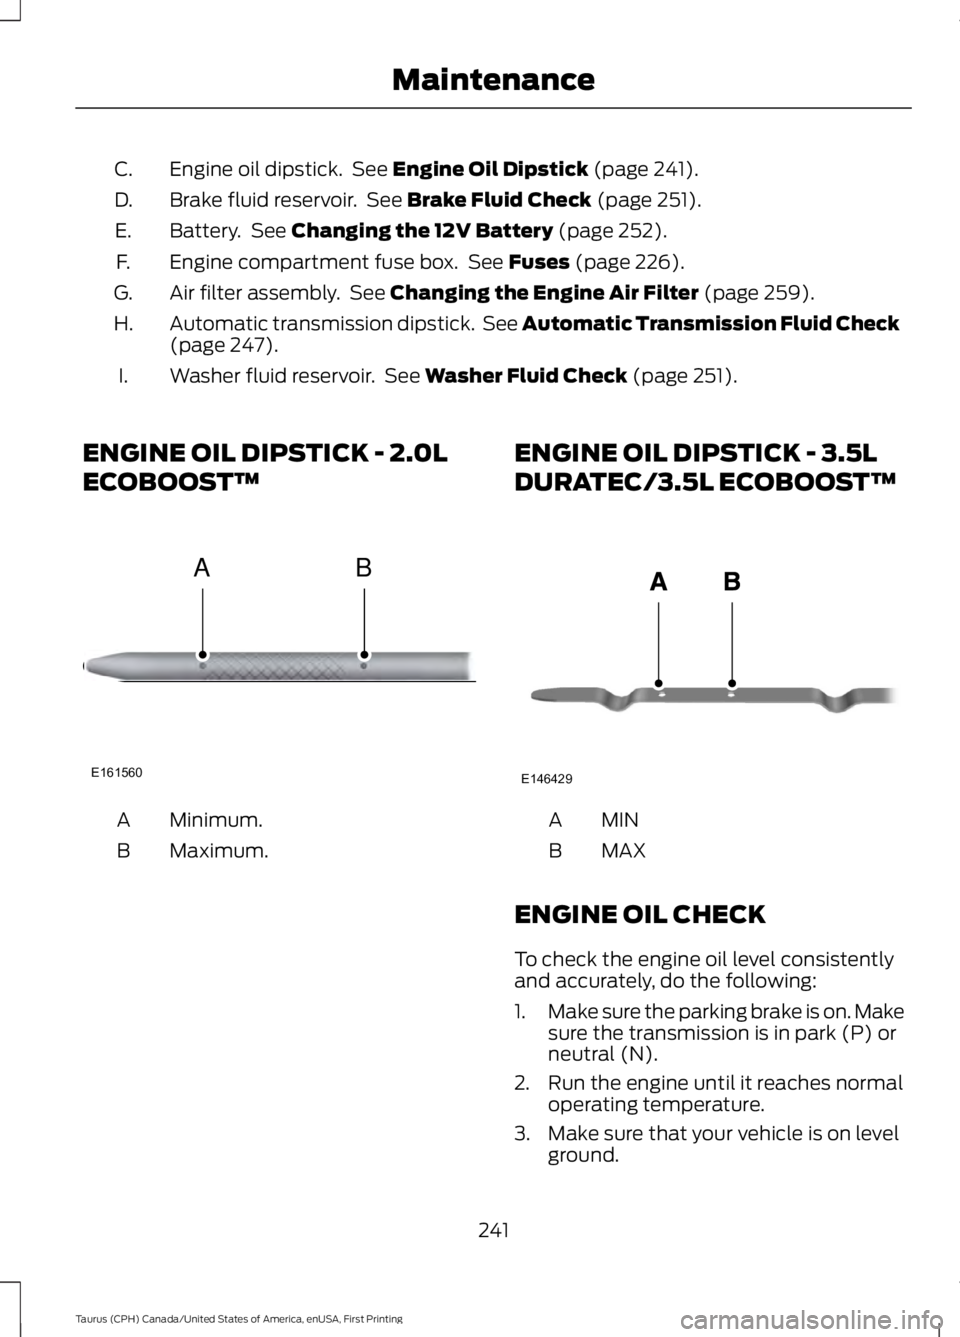
ENGINE OIL DIPSTICK - 2.0L
ECOBOOST™
Minimum.A
Maximum.B
ENGINE OIL DIPSTICK - 3.5L
DURATEC/3.5L ECOBOOST™
MINA
MAXB
ENGINE OIL CHECK
To check the engine oil level consistentlyand accurately, do the following:
1.Make sure the parking brake is on. Makesure the transmission is in park (P) orneutral (N).
2. Run the engine until it reaches normaloperating temperature.
3. Make sure that your vehicle is on levelground.
241
Taurus (CPH) Canada/United States of America, enUSA, First Printing
MaintenanceE161560
AB E146429
Page 250 of 504
If you tow a trailer with your vehicle, theengine may temporarily reach a highertemperature during severe operatingconditions, for example ascending a longor steep grade in high ambienttemperatures.
At this time, you may notice the coolanttemperature gauge moves toward the redzone and a message may appear in theinformation display.
You may notice a reduction in vehiclespeed caused by reduced engine power inorder to manage the engine coolanttemperature. Your vehicle may enter thismode if certain high-temperature andhigh-load conditions take place. Theamount of speed reduction depends onvehicle loading, grade and ambienttemperature. If this occurs, there is no needto pull off the road. You can continue todrive your vehicle.
The air conditioning may automaticallyturn on and off during severe operatingconditions to protect the engine fromoverheating. When the coolanttemperature decreases to the normaloperating temperature, the air conditioningturns on.
If the coolant temperature gauge movesfully into the red zone, or if the coolanttemperature warning or service enginesoon messages appear in your informationdisplay, do the following:
1. Pull off the road as soon as safelypossible and shift the transmission intopark (P).
2. Leave the engine running until thecoolant temperature gauge needlereturns to the normal position. Afterseveral minutes, if the temperaturedoes not drop, follow the remainingsteps.
3.Switch the engine off and wait for it tocool. Check the coolant level.
4. If the coolant level is at or below theminimum mark, add prediluted coolantimmediately.
5. If the coolant level is normal, restartthe engine and continue.
AUTOMATIC TRANSMISSION
FLUID CHECK - 2.0L
ECOBOOST™
6F35 Transmission
The automatic transmission does not havea transmission fluid dipstick.
The automatic transmission does notconsume fluid. If the transmission is notworking correctly, for example, thetransmission slips, shifts slowly or thereare signs of fluid leakage, have the systemchecked by an authorized dealer.
Change the automatic transmission fluidand filter at the correct service interval.
Do not use supplemental automatictransmission fluid additives because theyare unnecessary and could lead totransmission damage that may not becovered by the vehicle Warranty.
AUTOMATIC TRANSMISSION
FLUID CHECK - 3.5L DURATEC/
3.5L ECOBOOST™
6F50/6F55 Transmission (If Equipped)
WARNINGS
The dipstick cap and surroundingcomponents may be hot, use gloves.
Use gloves when moving the air filterassembly. Components will be hot.
247
Taurus (CPH) Canada/United States of America, enUSA, First Printing
Maintenance
Page 251 of 504
Note:Automatic transmission fluidexpands when warmed. To obtain anaccurate fluid check, drive your vehicle untilyou warm it up, approximately 20 mi(30 km). If you operate your vehicle for anextended period at high speeds, in city trafficduring hot weather or pulling a trailer, switchyour vehicle off until it reaches normaloperating temperatures to allow the fluidto cool before checking. Depending onvehicle use, cooling times could take up to30 minutes or longer.
Refer to your scheduled maintenanceinformation for scheduled intervals for fluidchecks and changes. Your transmissiondoes not consume fluid. However, youshould check the fluid level if thetransmission is not working properly. Forexample, if the transmission slips or shiftsslowly or if you notice some sign of a fluidleak.
1. Drive your vehicle 20 mi (30 km) oruntil it reaches normal operatingtemperature.
2.Park your vehicle on a level surface andengage the parking brake.
3. With the parking brake engaged andyour foot on the brake pedal, start theengine and move the gearshift leverthrough all of the gear ranges. Allow aminimum of 10 seconds for each gearto engage.
4. Put the gearshift lever in park (P) andleave the engine running.
Note:For vehicles with the EcoBoostengine, move the air filter assembly asideto access the transmission dipstick. SeeMoving the Air Filter Assembly for moreinformation.
5. Remove the dipstick and wipe it cleanwith a dry, lint free clean rag. Ifnecessary, refer to the Under hoodoverview in this chapter for the locationof the dipstick.
6. Install the dipstick making sure youfully seat it in the filler tube by turningit to the locked position.
7. Remove the dipstick and inspect thefluid level. The fluid should be in thedesignated areas for normal operatingtemperature.
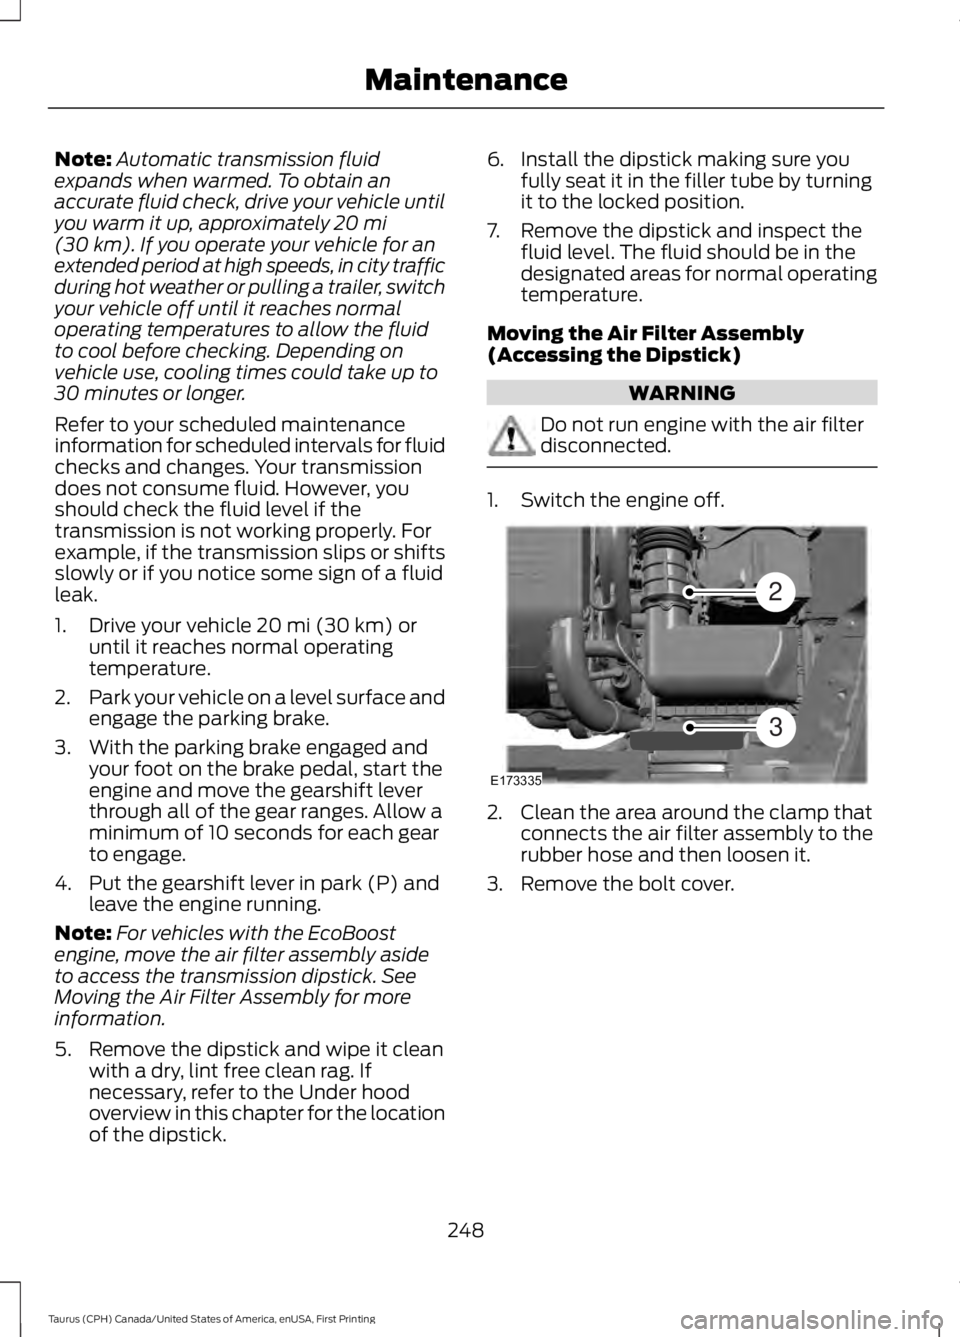
Moving the Air Filter Assembly(Accessing the Dipstick)
WARNING
Do not run engine with the air filterdisconnected.
1. Switch the engine off.
2. Clean the area around the clamp thatconnects the air filter assembly to therubber hose and then loosen it.
3. Remove the bolt cover.
248
Taurus (CPH) Canada/United States of America, enUSA, First Printing
MaintenanceE173335
2
3
Page 252 of 504

4. Remove two bolts that attach the airfilter assembly to the front of thevehicle.
5. Remove the harness retaining clip bypulling up.
6. Do not disconnect the sensor.
7. Pull the air filter assembly up todisconnect it from the seatedgrommets located under the air filterassembly.
8. Rotate the air filter assembly 90degrees counterclockwise. Make surethe rubber hose is still connected to theair filter assembly.
9. Tighten the clamp.
You can now access the transmission fluidlevel indicator.
Checking the fluid level
Low fluid level
If the fluid level is below the MIN range ofthe dipstick, add fluid to reach the hashmark level.
Note:If the fluid level is below the MINlevel, do not drive the vehicle. An underfillcondition may cause shift or engagementconcerns or possible damage.
Correct fluid level
249
Taurus (CPH) Canada/United States of America, enUSA, First Printing
MaintenanceE173334
654 E173400 E158842 E158843