2017 FORD TAURUS warning
[x] Cancel search: warningPage 55 of 504
•Various vehicle speed reminders so youknow when your vehicle approachesthe limits. Warnings appear in theinformation display and an audiblewarning sounds when you exceed thelimit.
•Audio system maximum volume of45%. A message will be shown in thedisplay when you attempt to exceedthe limited volume. Also, thespeed-sensitive or compensatedautomatic volume control will bedisabled.
•Always on setting. When this isselected, you will not be able to turnoff Advance Trac or traction control,911 Assist or Emergency Assistance, orDo Not Disturb (if your vehicle is
equipped with these features).
CREATING A MYKEY
Use the information display to create aMyKey:
1. Insert the key you want to program intothe ignition. If your vehicle is equipped witha push-button start, place the key fob intothe backup slot. The location of yourbackup slot is in another chapter. SeeKeyless Starting (page 137).
2. Switch the ignition on.
3. Access the main menu on theinformation display controls. Use the arrowkeys to get to the following menuselections:
Action and DescriptionMessage
Press the OK button or the right arrow key.Settings
Press the OK button or the right arrow key.MyKey
Press the OK button or the right arrow key.Create MyKey
When prompted, hold the OK button untilyou see a message informing you to labelthis key as a MyKey. The key will berestricted at the next start.
MyKey is successfully created. Make sureyou label it so you can distinguish it fromthe admin keys.
You can also program configurablesettings for the key(s). SeeProgramming/Changing ConfigurableSettings.
Programming/ChangingConfigurable Settings
Use the information display to access yourconfigurable MyKey settings.
1. Switch the ignition on using an adminkey or fob.
2. Access the main menu on theinformation display controls. Use thearrow keys to get to the following menuselections:
Action and DescriptionMessage
Press the OK button or the right arrow key.Settings
Press the OK button or the right arrow key.MyKey
52
Taurus (CPH) Canada/United States of America, enUSA, First Printing
MyKey™
Page 65 of 504
The anti-scan feature turns off after anyof the following occur:
•One minute of keypad inactivity.
•You press the unlock button on theremote control.
•You switch your vehicle on.
•You unlock the vehicle using intelligentaccess.
Locking and Unlocking the Doors
Locking All Doors
Press and hold 7·8 and 9·0 on the keypadsimultaneously with the driver door closed.You do not need to enter a code first.
Unlocking All Doors
Enter the factory-set code or your personalcode, then press 3·4 on the keypad withinfive seconds.
Unlocking Only the Driver Door
Enter the factory-set or your personalfive-digit code. You must press eachnumber within five seconds of each other.The interior lamps illuminate.
Note:All doors unlock if the two-stageunlocking feature is turned off. See Lockingand Unlocking (page 57).
INTERIOR LUGGAGE
COMPARTMENT RELEASE
WARNINGS
Keep vehicle doors and luggagecompartment locked and keep keysand remote transmitters out of achild’s reach. Unsupervised children couldlock themselves in the trunk and risk injury.Children should be taught not to play invehicles.
WARNINGS
Do not leave children or animalsunattended in the vehicle. On hotdays, the temperature in the trunk orvehicle interior can rise very quickly.Exposure of people or animals to thesehigh temperatures for even a short timecan cause death or serious heat-relatedinjuries, including brain damage. Smallchildren are particularly at risk.
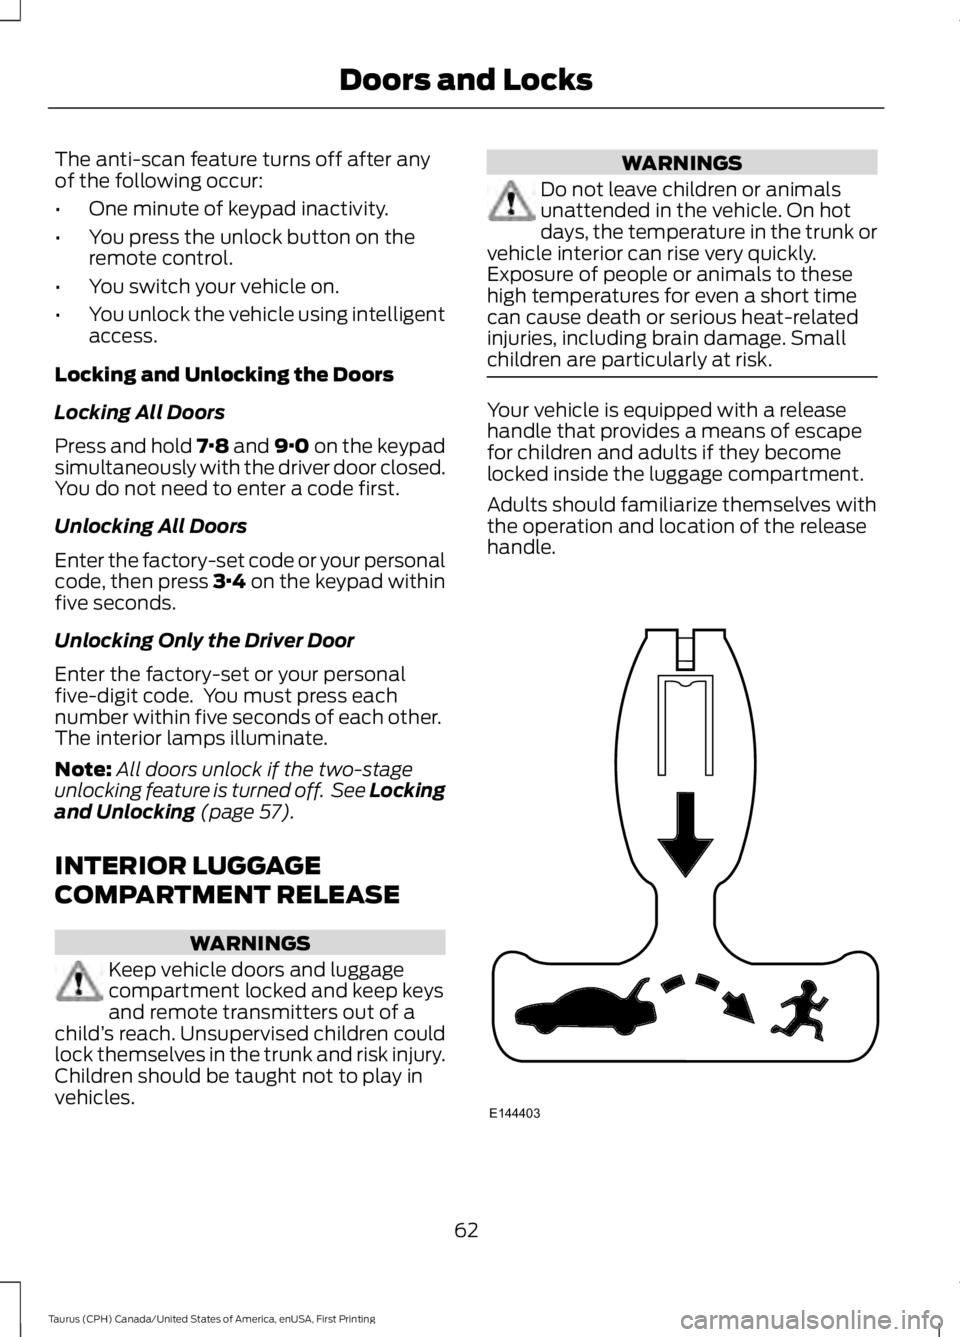
Your vehicle is equipped with a releasehandle that provides a means of escapefor children and adults if they becomelocked inside the luggage compartment.
Adults should familiarize themselves withthe operation and location of the releasehandle.
62
Taurus (CPH) Canada/United States of America, enUSA, First Printing
Doors and LocksE144403
Page 69 of 504
ADJUSTING THE STEERING
WHEEL - VEHICLES WITH:
MANUAL ADJUSTABLE
STEERING COLUMN
WARNING
Do not adjust the steering wheelwhen your vehicle is moving.
Note:Make sure that you are sitting in thecorrect position. See Sitting in the CorrectPosition (page 119).
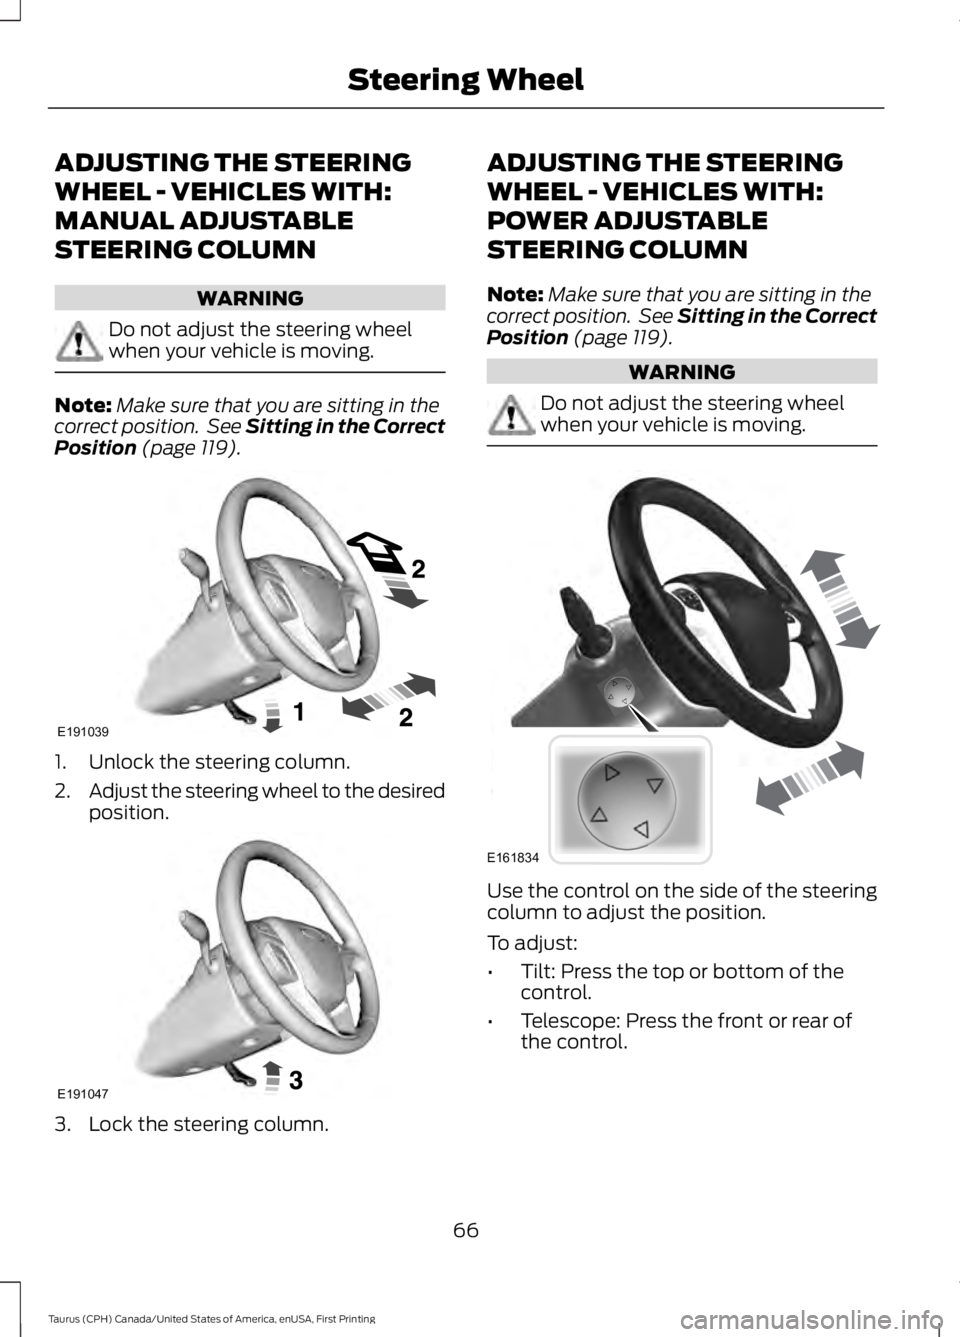
1. Unlock the steering column.
2.Adjust the steering wheel to the desiredposition.
3. Lock the steering column.
ADJUSTING THE STEERING
WHEEL - VEHICLES WITH:
POWER ADJUSTABLE
STEERING COLUMN
Note:Make sure that you are sitting in thecorrect position. See Sitting in the CorrectPosition (page 119).
WARNING
Do not adjust the steering wheelwhen your vehicle is moving.
Use the control on the side of the steeringcolumn to adjust the position.
To adjust:
•Tilt: Press the top or bottom of thecontrol.
•Telescope: Press the front or rear ofthe control.
66
Taurus (CPH) Canada/United States of America, enUSA, First Printing
Steering WheelE191039 E191047 E161834
Page 72 of 504
ADJUSTING THE PEDALS
WARNING
Never use the controls while yourfeet are on the accelerator and brakepedals and the vehicle is moving.
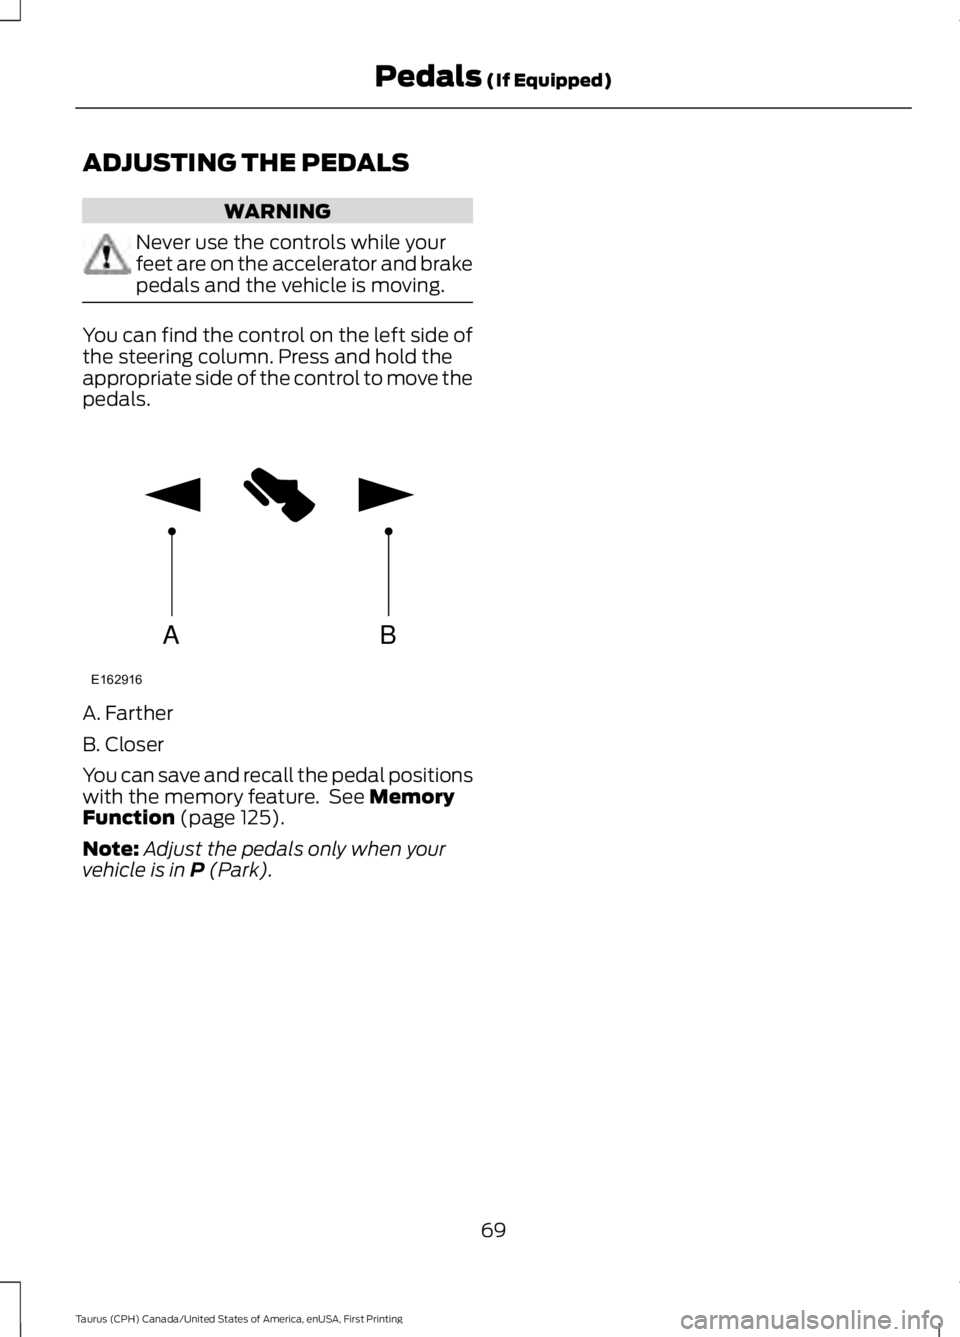
You can find the control on the left side ofthe steering column. Press and hold theappropriate side of the control to move thepedals.
A. Farther
B. Closer
You can save and recall the pedal positionswith the memory feature. See MemoryFunction (page 125).
Note:Adjust the pedals only when yourvehicle is in P (Park).
69
Taurus (CPH) Canada/United States of America, enUSA, First Printing
Pedals (If Equipped)AB
E162916
Page 76 of 504

Headlamp Flasher
Slightly pull the lever toward you andrelease it to flash the headlamps.
AUTOLAMPS
WARNING
The autolamps switch position maynot activate the headlamps in all lowvisibility conditions, such as daytimefog. Make sure the headlamps areswitched to auto or on, as appropriate,during all low visibility conditions. Failureto do so may result in a crash.
When the lighting control is in theautolamps position, the headlampsautomatically turn on in low light situationsor when the wipers activate.
If equipped, the following also activatewhen the lighting control is in theautolamps position and you switch themon in the information display:
•Configurable daytime running lamps.
•Automatic high beam control.
•Adaptive headlamp control.
The headlamps remain on for a period oftime after you switch the ignition off. Usethe information display controls to adjustthe period of time that the headlampsremain on. See Information Displays(page 89).
Note:With the headlamps in theautolamps position, you cannot switch thehigh beam headlamps on until theautolamps system turns the low beamheadlamps on.
Windshield Wiper ActivatedHeadlamps
The windshield wiper activated headlampsturn on within 10 seconds when you switchthe windshield wipers on and the lightingcontrol is in the autolamps position. Theyturn off approximately 60 seconds afteryou switch the windshield wipers off.
The headlamps do not turn on by wiperactivation:
•During a mist wipe.
•When the wipers are on to clear washerfluid during a wash condition.
•If the wipers are in intermittent mode.
Note:If you switch autolamps andautowipers on, the headlamps willautomatically turn on when the windshieldwipers continuously operate.
73
Taurus (CPH) Canada/United States of America, enUSA, First Printing
LightingE163268 E224686
A
Page 77 of 504

INSTRUMENT LIGHTING
DIMMER
Note:If you disconnect and connect thebattery, or fully discharge and charge thebattery, the lighting level will switch to themaximum setting.
Use the instrument lighting dimmer toadjust the brightness of the instrumentpanel and all applicable lighting in yourvehicle.
•Tap the top or bottom of the controlto the first detent to brighten or dim allinterior lighting incrementally.
•Press and hold the top or bottom ofthe control to the first detent until youreach the desired lighting level.
•Press and hold the top of the controlto the second detent to switch theinterior lights on.
•Press and hold the bottom of thecontrol to the second detent to switchthe interior lights off.
HEADLAMP EXIT DELAY
You can set the delay time to keep theheadlamps on for up to three minutes afterthe ignition is switched off.
Follow the steps below to change thedelay time (Steps 1 through 6 must bedone within 10 seconds):
1. Switch the ignition off.
2. Turn the lighting control to theautolamp position.
3. Turn the lighting control to the offposition.
4. Switch the ignition on.
5. Switch the ignition off.
6. Turn the lighting control to theautolamp position. The headlamps andparking lamps will turn on.
7. Turn the lighting control to the offposition when the desired delay timehas been reached. The headlamps andparking lamps will turn off. You can setthe headlamp exit delay to one of thefollowing settings:
•Off.
•10 seconds.
•20 seconds.
•120 seconds.
Note:You can also adjust the time delayusing the display controls in the instrumentcluster. See Information Displays (page89).
DAYTIME RUNNING LAMPS
WARNING
The daytime running lamps systemdoes not activate the rear lamps andmay not provide adequate lightingduring low visibility driving conditions. Also,the autolamps switch position may notactivate the headlamps in all low visibilityconditions, such as daytime fog. Make surethe headlamps are switched to auto or on,as appropriate, during all low visibilityconditions. Failure to do so may result in acrash.
74
Taurus (CPH) Canada/United States of America, enUSA, First Printing
LightingE173259
Page 81 of 504
POWER WINDOWS
WARNINGS
Do not leave children unattended inyour vehicle and do not let them playwith the power windows. They mayseriously injure themselves.
When closing the power windows,you should verify they are free ofobstructions and make sure thatchildren and pets are not in the proximityof the window openings.
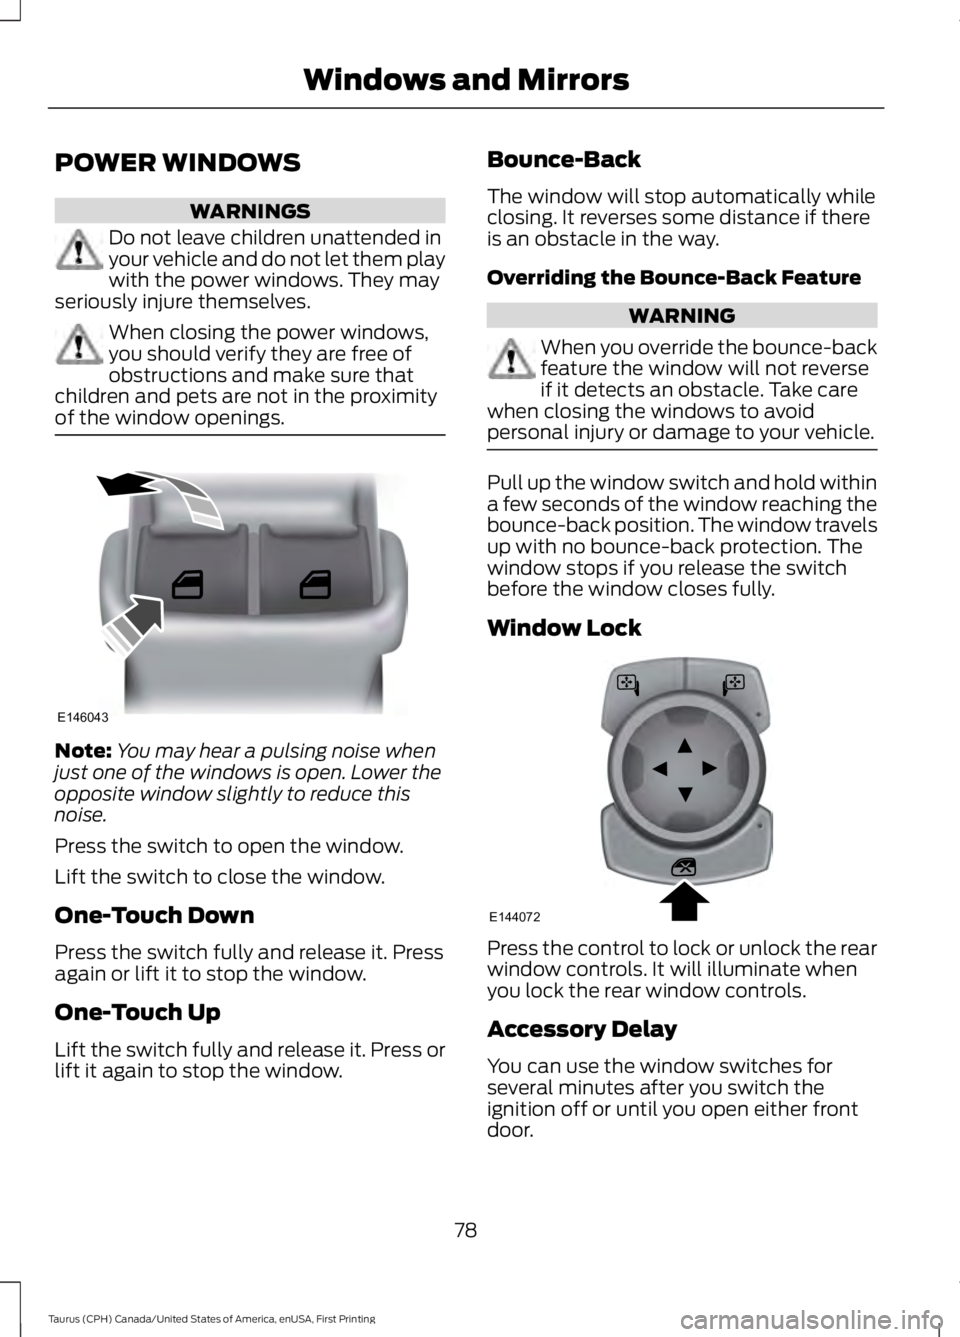
Note:You may hear a pulsing noise whenjust one of the windows is open. Lower theopposite window slightly to reduce thisnoise.
Press the switch to open the window.
Lift the switch to close the window.
One-Touch Down
Press the switch fully and release it. Pressagain or lift it to stop the window.
One-Touch Up
Lift the switch fully and release it. Press orlift it again to stop the window.
Bounce-Back
The window will stop automatically whileclosing. It reverses some distance if thereis an obstacle in the way.
Overriding the Bounce-Back Feature
WARNING
When you override the bounce-backfeature the window will not reverseif it detects an obstacle. Take carewhen closing the windows to avoidpersonal injury or damage to your vehicle.
Pull up the window switch and hold withina few seconds of the window reaching thebounce-back position. The window travelsup with no bounce-back protection. Thewindow stops if you release the switchbefore the window closes fully.
Window Lock
Press the control to lock or unlock the rearwindow controls. It will illuminate whenyou lock the rear window controls.
Accessory Delay
You can use the window switches forseveral minutes after you switch theignition off or until you open either frontdoor.
78
Taurus (CPH) Canada/United States of America, enUSA, First Printing
Windows and MirrorsE146043 E144072
Page 82 of 504
GLOBAL OPENING (If Equipped)
You can use the remote control to operatethe windows with the ignition off.
Note:You can enable or disable this featurein the information display, or see anauthorized dealer. See GeneralInformation (page 89).
Note:To operate this feature, accessorydelay must not be active.
Opening the Windows
You can open the windows for a short timeafter you unlock your vehicle with theremote control. After you unlock yourvehicle, press and hold the remote controlunlock button to open the windows andvent the moonroof. Release the buttononce movement starts. Press the lock orunlock button to stop movement.
Note:Only the front windows are operatedduring global opening.
EXTERIOR MIRRORS
Power Exterior Mirrors
WARNING
Do not adjust the mirrors when yourvehicle is moving.
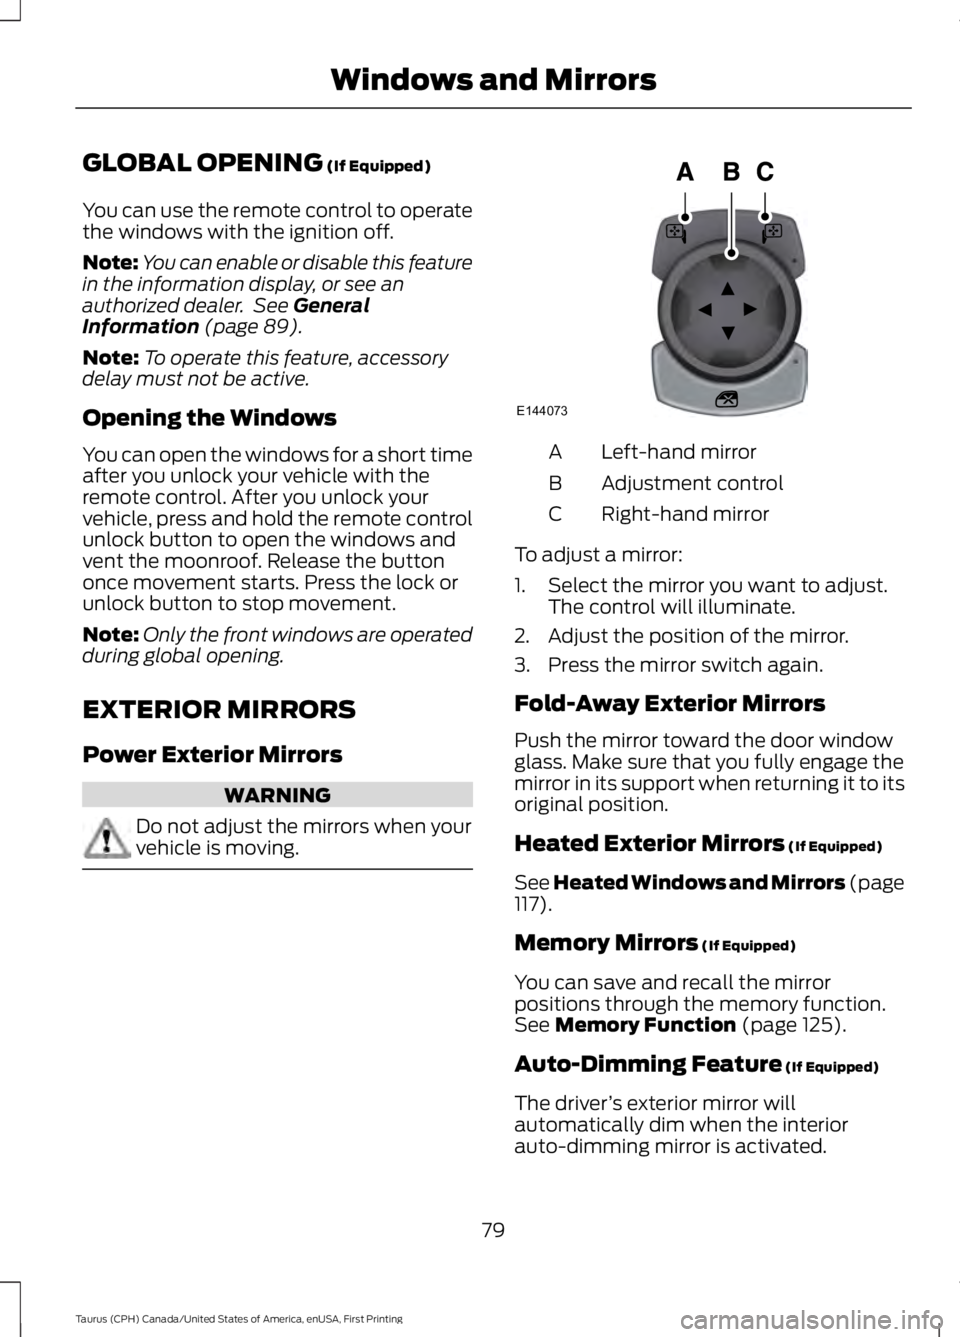
Left-hand mirrorA
Adjustment controlB
Right-hand mirrorC
To adjust a mirror:
1. Select the mirror you want to adjust.The control will illuminate.
2. Adjust the position of the mirror.
3. Press the mirror switch again.
Fold-Away Exterior Mirrors
Push the mirror toward the door windowglass. Make sure that you fully engage themirror in its support when returning it to itsoriginal position.
Heated Exterior Mirrors (If Equipped)
See Heated Windows and Mirrors (page117).
Memory Mirrors (If Equipped)
You can save and recall the mirrorpositions through the memory function.See Memory Function (page 125).
Auto-Dimming Feature (If Equipped)
The driver’s exterior mirror willautomatically dim when the interiorauto-dimming mirror is activated.
79
Taurus (CPH) Canada/United States of America, enUSA, First Printing
Windows and MirrorsE144073