2017 FORD TAURUS warning
[x] Cancel search: warningPage 118 of 504
HINTS ON CONTROLLING THE
INTERIOR CLIMATE
General Hints
WARNING
Prolonged use of recirculated air maycause the windows to fog up. If thewindows fog up, follow the settingsfor demisting the windshield.
Note:You may feel a small amount of airfrom the footwell air vents regardless of theair distribution setting.
Note:To reduce humidity build-up insideyour vehicle, do not drive with the systemswitched off or with recirculated air alwaysswitched on.
Note:Do not place objects under the frontseats as this may interfere with the airflowto the rear seats.
Note:Remove any snow, ice or leaves fromthe air intake area at the base of thewindshield.
Note:To improve the time to reach acomfortable temperature in hot weather,drive with the windows open until you feelcold air through the air vents.
Manual Climate Control
Note:To reduce fogging of the windshieldduring humid weather, adjust the airdistribution control to the windshield airvents position.
Automatic Climate Control
Note: Adjusting the settings when yourvehicle interior is extremely hot or cold isnot necessary. The system automaticallyadjusts to heat or cool the interior to yourselected temperature as quickly as possible.For the system to function efficiently, theinstrument panel and side air vents shouldbe fully open.
Note:If you select AUTO during coldtemperatures, the system directs airflow tothe windshield and side window vents. Inaddition, the fan may run at a slower speeduntil the engine warms up.
Note:If you select AUTO during hottemperatures, or the inside of the vehicle ishot, the system automatically usesrecirculated air to maximize interior cooling.When the interior reaches the selectedtemperature, the system automaticallyswitches to using outside air.
Heating the Interior Quickly
Vehicle with automatic climate controlVehicle with manual climate control
Press the AUTO button.Adjust the fan speed to the highestsetting.1
Adjust the temperature control to thedesired setting.Adjust the temperature control to thefull heat setting.2
Select the footwell air vents using theair distribution buttons.3
115
Taurus (CPH) Canada/United States of America, enUSA, First Printing
Climate Control
Page 122 of 504
SITTING IN THE CORRECT
POSITION
WARNINGS
Sitting improperly, out of position orwith the seatback reclined too farcan take weight off the seat cushionand affect the decision of the passengersensing system, resulting in serious injuryor death in the event of a crash. Always situpright against your seat back, with yourfeet on the floor.
Do not recline the seatback as thiscan cause the occupant to slideunder the safety belt, resulting inserious injury in the event of a crash.
Do not place objects higher than theseatback to reduce the risk of seriousinjury in the event of a crash or duringheavy braking.
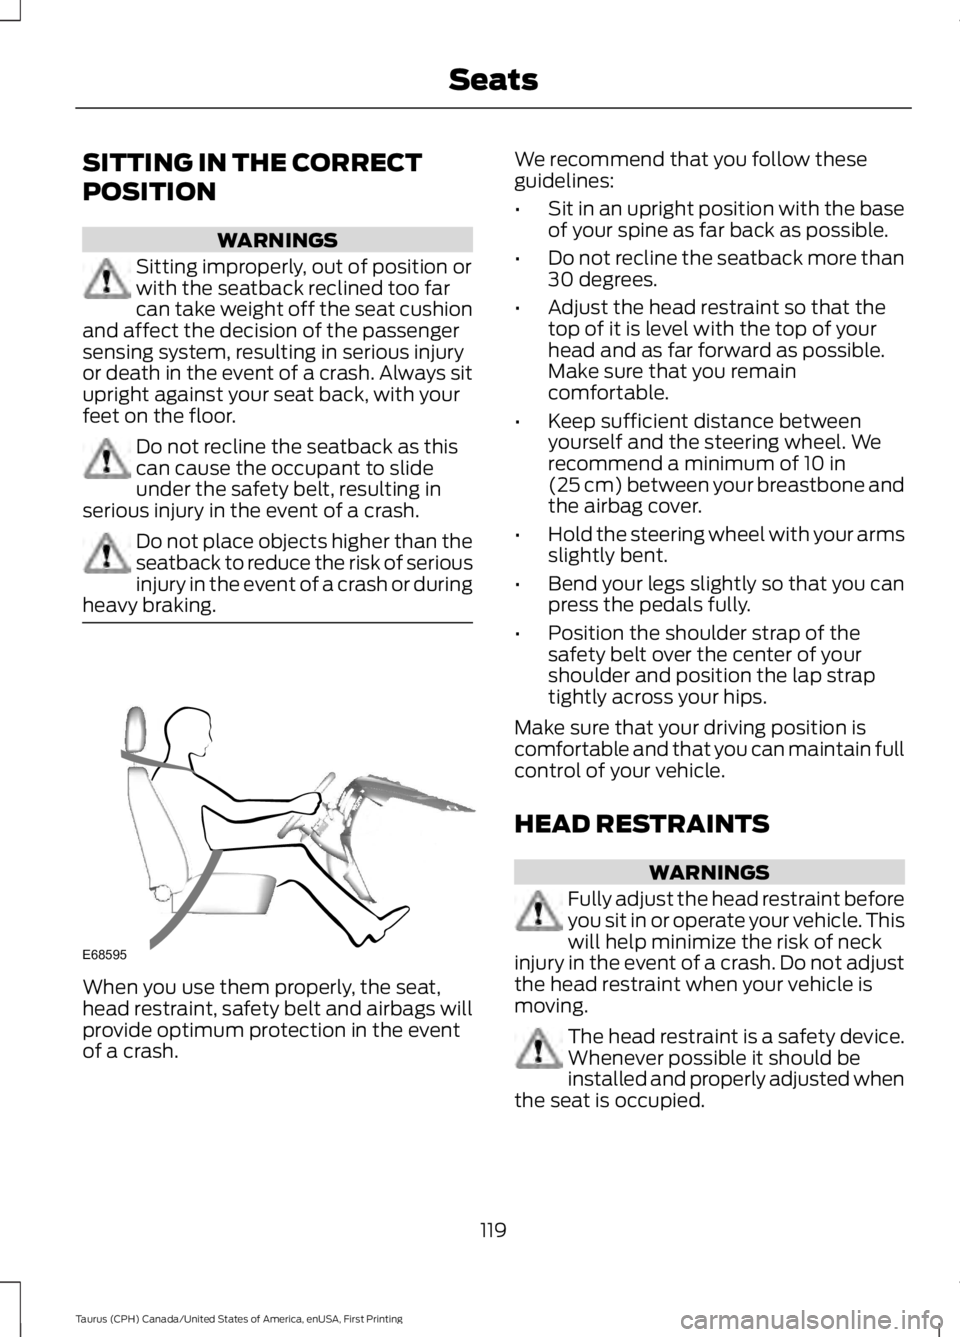
When you use them properly, the seat,head restraint, safety belt and airbags willprovide optimum protection in the eventof a crash.
We recommend that you follow theseguidelines:
•Sit in an upright position with the baseof your spine as far back as possible.
•Do not recline the seatback more than30 degrees.
•Adjust the head restraint so that thetop of it is level with the top of yourhead and as far forward as possible.Make sure that you remaincomfortable.
•Keep sufficient distance betweenyourself and the steering wheel. Werecommend a minimum of 10 in(25 cm) between your breastbone andthe airbag cover.
•Hold the steering wheel with your armsslightly bent.
•Bend your legs slightly so that you canpress the pedals fully.
•Position the shoulder strap of thesafety belt over the center of yourshoulder and position the lap straptightly across your hips.
Make sure that your driving position iscomfortable and that you can maintain fullcontrol of your vehicle.
HEAD RESTRAINTS
WARNINGS
Fully adjust the head restraint beforeyou sit in or operate your vehicle. Thiswill help minimize the risk of neckinjury in the event of a crash. Do not adjustthe head restraint when your vehicle ismoving.
The head restraint is a safety device.Whenever possible it should beinstalled and properly adjusted whenthe seat is occupied.
119
Taurus (CPH) Canada/United States of America, enUSA, First Printing
SeatsE68595
Page 123 of 504
WARNINGS
Install the head restraint properly tohelp minimize the risk of neck injuryin the event of a crash.
Note:Adjust the seatback to an uprightdriving position before adjusting the headrestraint. Adjust the head restraint so thatthe top of it is level with the top of your headand as far forward as possible. Make surethat you remain comfortable. If you areextremely tall, adjust the head restraint toits highest position.
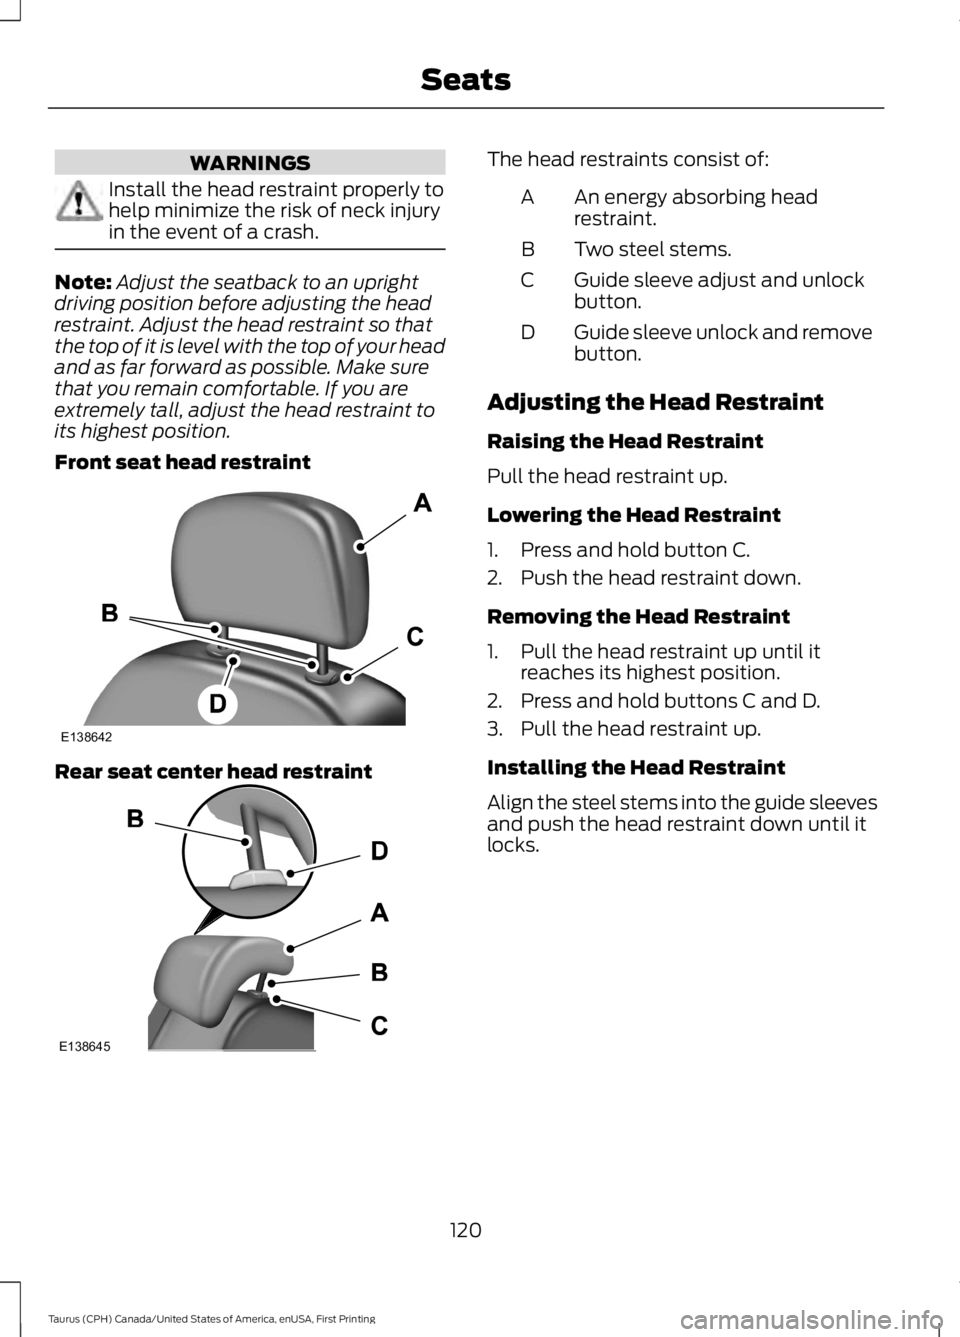
Front seat head restraint
Rear seat center head restraint
The head restraints consist of:
An energy absorbing headrestraint.A
Two steel stems.B
Guide sleeve adjust and unlockbutton.C
Guide sleeve unlock and removebutton.D
Adjusting the Head Restraint
Raising the Head Restraint
Pull the head restraint up.
Lowering the Head Restraint
1. Press and hold button C.
2. Push the head restraint down.
Removing the Head Restraint
1. Pull the head restraint up until itreaches its highest position.
2. Press and hold buttons C and D.
3. Pull the head restraint up.
Installing the Head Restraint
Align the steel stems into the guide sleevesand push the head restraint down until itlocks.
120
Taurus (CPH) Canada/United States of America, enUSA, First Printing
SeatsE138642 E138645
Page 124 of 504
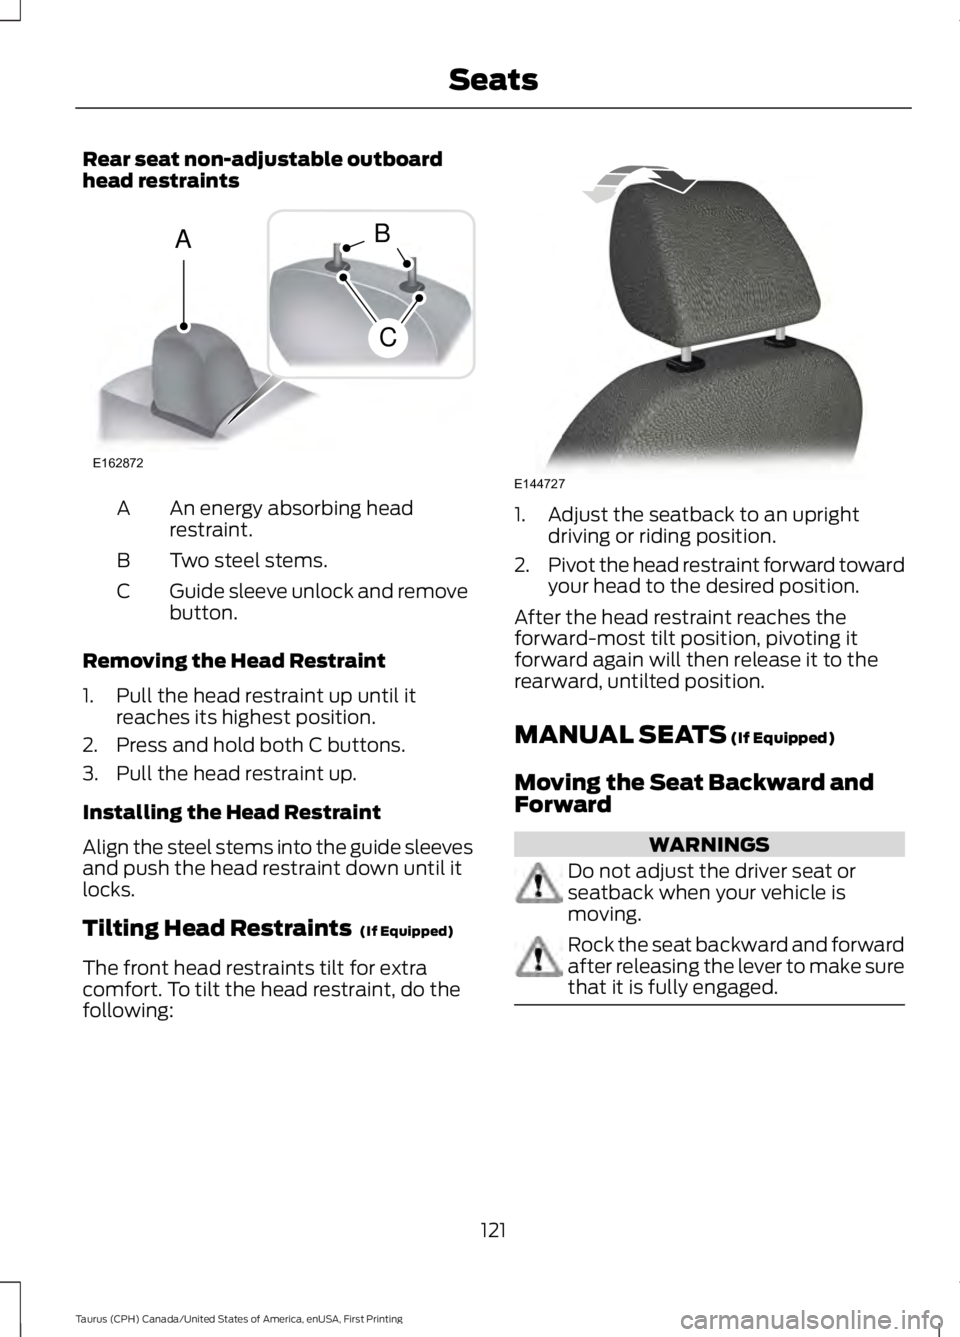
Rear seat non-adjustable outboardhead restraints
An energy absorbing headrestraint.A
Two steel stems.B
Guide sleeve unlock and removebutton.C
Removing the Head Restraint
1. Pull the head restraint up until itreaches its highest position.
2. Press and hold both C buttons.
3. Pull the head restraint up.
Installing the Head Restraint
Align the steel stems into the guide sleevesand push the head restraint down until itlocks.
Tilting Head Restraints (If Equipped)
The front head restraints tilt for extracomfort. To tilt the head restraint, do thefollowing:
1. Adjust the seatback to an uprightdriving or riding position.
2.Pivot the head restraint forward towardyour head to the desired position.
After the head restraint reaches theforward-most tilt position, pivoting itforward again will then release it to therearward, untilted position.
MANUAL SEATS (If Equipped)
Moving the Seat Backward andForward
WARNINGS
Do not adjust the driver seat orseatback when your vehicle ismoving.
Rock the seat backward and forwardafter releasing the lever to make surethat it is fully engaged.
121
Taurus (CPH) Canada/United States of America, enUSA, First Printing
SeatsE162872
A
C
B E144727
Page 125 of 504
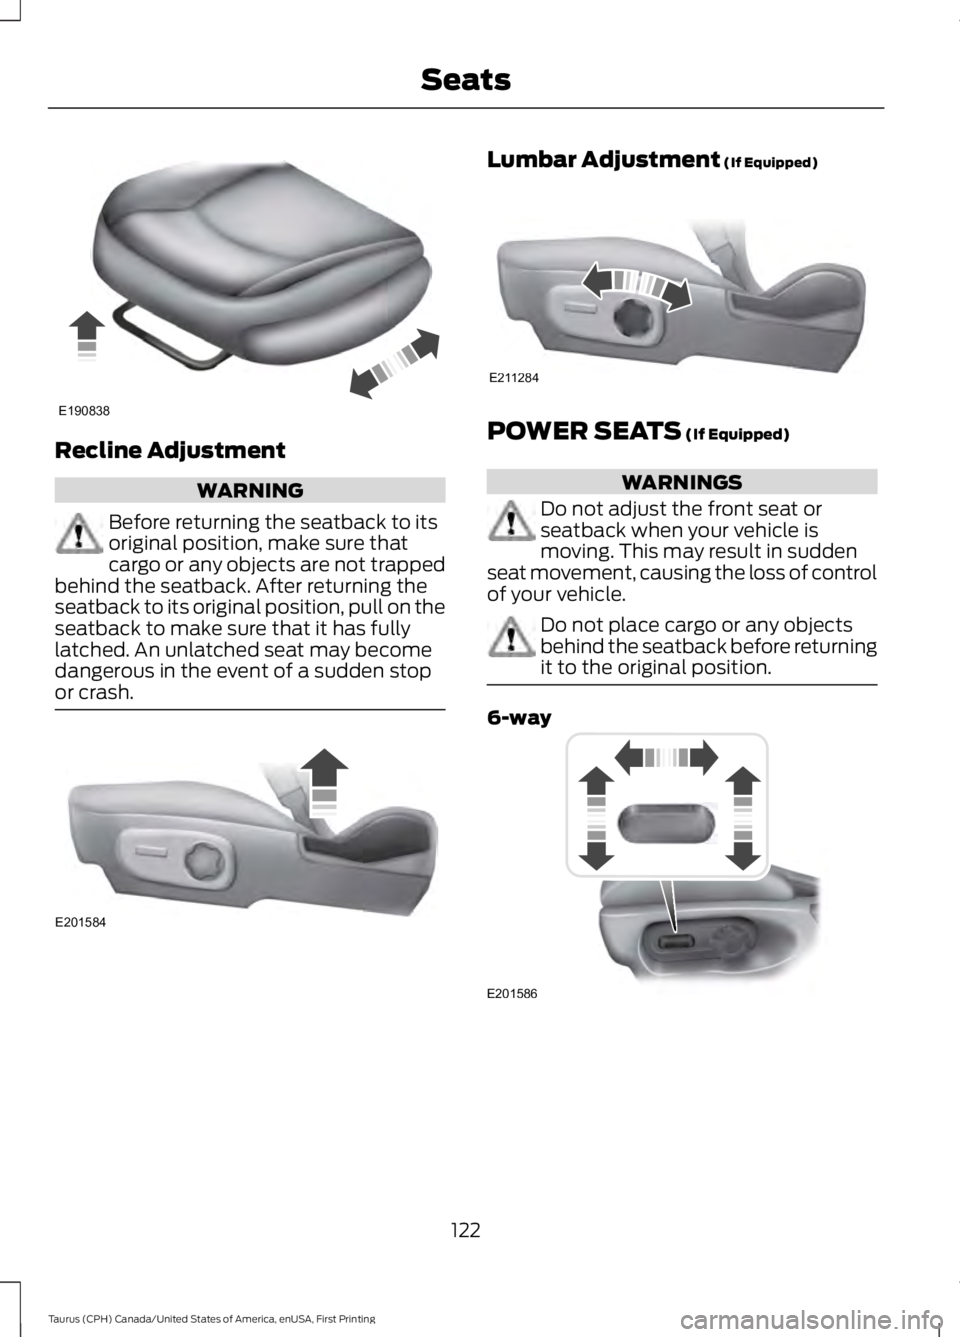
Recline Adjustment
WARNING
Before returning the seatback to itsoriginal position, make sure thatcargo or any objects are not trappedbehind the seatback. After returning theseatback to its original position, pull on theseatback to make sure that it has fullylatched. An unlatched seat may becomedangerous in the event of a sudden stopor crash.
Lumbar Adjustment (If Equipped)
POWER SEATS (If Equipped)
WARNINGS
Do not adjust the front seat orseatback when your vehicle ismoving. This may result in suddenseat movement, causing the loss of controlof your vehicle.
Do not place cargo or any objectsbehind the seatback before returningit to the original position.
6-way
122
Taurus (CPH) Canada/United States of America, enUSA, First Printing
SeatsE190838 E201584 E211284 E201586
Page 128 of 504
MEMORY FUNCTION (If Equipped)
WARNINGS
Before activating the memory seat,make sure that the area immediatelysurrounding the seat is clear ofobstructions and that all occupants areclear of moving parts.
Do not use the memory functionwhen your vehicle is moving.
This function automatically recalls theposition of these features.
•Driver seat.
•Power mirrors.
•Optional power adjustable pedals.
•Optional power steering column.
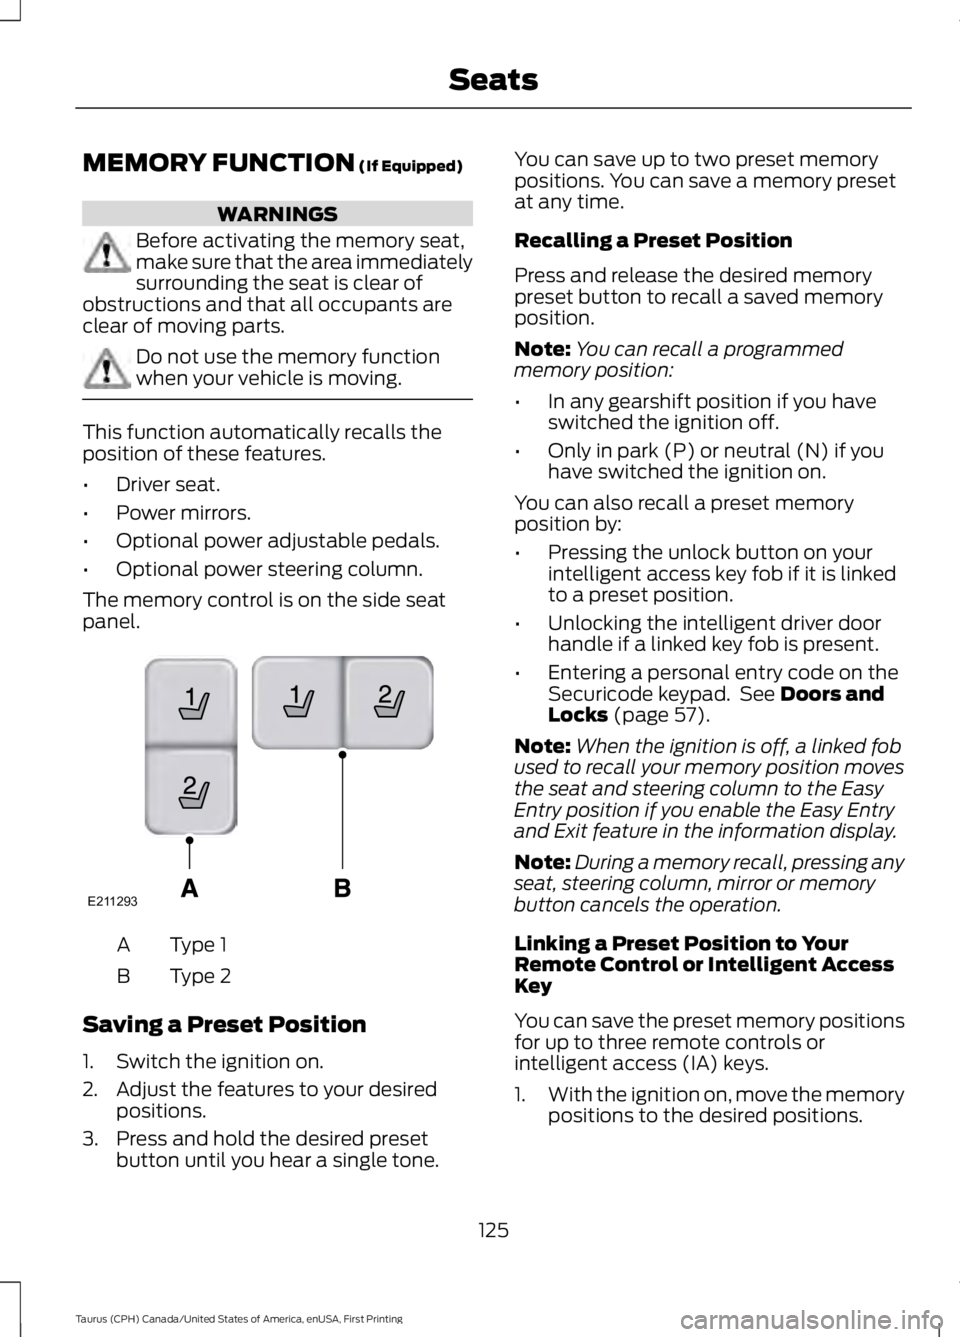
The memory control is on the side seatpanel.
Type 1A
Type 2B
Saving a Preset Position
1. Switch the ignition on.
2. Adjust the features to your desiredpositions.
3. Press and hold the desired presetbutton until you hear a single tone.
You can save up to two preset memorypositions. You can save a memory presetat any time.
Recalling a Preset Position
Press and release the desired memorypreset button to recall a saved memoryposition.
Note:You can recall a programmedmemory position:
•In any gearshift position if you haveswitched the ignition off.
•Only in park (P) or neutral (N) if youhave switched the ignition on.
You can also recall a preset memoryposition by:
•Pressing the unlock button on yourintelligent access key fob if it is linkedto a preset position.
•Unlocking the intelligent driver doorhandle if a linked key fob is present.
•Entering a personal entry code on theSecuricode keypad. See Doors andLocks (page 57).
Note:When the ignition is off, a linked fobused to recall your memory position movesthe seat and steering column to the EasyEntry position if you enable the Easy Entryand Exit feature in the information display.
Note:During a memory recall, pressing anyseat, steering column, mirror or memorybutton cancels the operation.
Linking a Preset Position to YourRemote Control or Intelligent AccessKey
You can save the preset memory positionsfor up to three remote controls orintelligent access (IA) keys.
1.With the ignition on, move the memorypositions to the desired positions.
125
Taurus (CPH) Canada/United States of America, enUSA, First Printing
SeatsE211293
Page 129 of 504
2. Press and hold the desired presetbutton for five seconds. A tone soundsafter about two seconds. Continueholding until you hear a second tone.
3. Within three seconds, press the lockbutton on the remote control you arelinking.
To unlink a remote control, follow thesame procedure – except in Step 3, pressthe unlock button on the remote control.
Easy Entry and Exit Feature (If
Equipped)
If you enable the easy entry and exitfeature, it automatically moves the driverseat position rearward up to 2 in (5 cm)and the steering column up and forwardwhen you switch the ignition off.
When you switch the ignition on, the driverseat and steering column return to theprevious position.
You can enable or disable this feature inthe information display. See InformationDisplays (page 89).
REAR SEATS
Split-folding Rear Seat
WARNING
Before returning the seatback to itsoriginal position, make sure thatcargo or any objects are not trappedbehind the seatback. After returning theseatback to its original position, pull on theseatback to make sure that it has fullylatched. An unlatched seat may becomedangerous in the event of a sudden stopor crash.
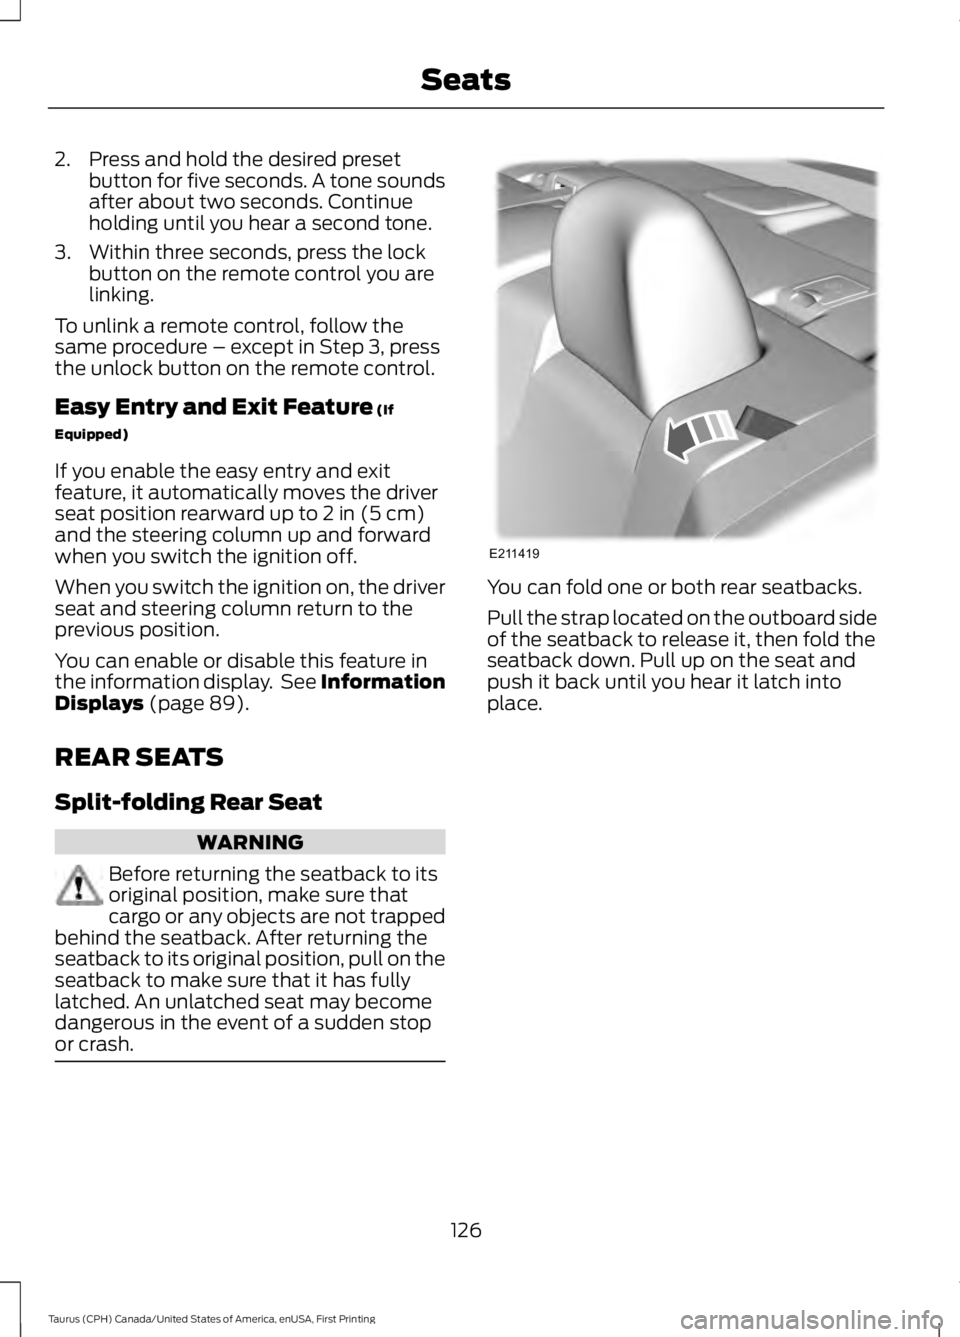
You can fold one or both rear seatbacks.
Pull the strap located on the outboard sideof the seatback to release it, then fold theseatback down. Pull up on the seat andpush it back until you hear it latch intoplace.
126
Taurus (CPH) Canada/United States of America, enUSA, First Printing
SeatsE211419
Page 130 of 504
HEATED SEATS (If Equipped)
WARNING
People who are unable to feel painto their skin because of advancedage, chronic illness, diabetes, spinalcord injury, medication, alcohol use,exhaustion or other physical conditions,must use caution when using the heatedseat. The heated seat may cause burnseven at low temperatures, especially ifused for long periods of time. Do not placeanything on the seat that may block theheat, such as a blanket or cushion. This cancause the heated seat to overheat. Do notpuncture the seat with pins, needles orother pointed objects. This damages theheating element and can cause the heatedseat to overheat. An overheated seat maycause serious personal injury.
Do not do the following:
•Place heavy objects on the seat.
•Operate the heated seat if water or anyother liquid spills on the seat. Allow theseat to dry thoroughly.
Note:You must switch the ignition on touse this feature.
Press the heated seat symbol to cyclethrough the various heat settings and off.More indicator lights indicate warmersettings.
Rear Heated Seats (If Equipped)
WARNING
People who are unable to feel painto their skin because of advancedage, chronic illness, diabetes, spinalcord injury, medication, alcohol use,exhaustion or other physical conditions,must use caution when using the heatedseat. The heated seat may cause burnseven at low temperatures, especially ifused for long periods of time. Do not placeanything on the seat that may block theheat, such as a blanket or cushion. This cancause the heated seat to overheat. Do notpuncture the seat with pins, needles orother pointed objects. This damages theheating element and can cause the heatedseat to overheat. An overheated seat maycause serious personal injury.
Do not do the following:
•Place heavy objects on the seat.
•Operate the heated seat if water or anyother liquid spills on the seat. Allow theseat to dry thoroughly.
Note:You must switch the ignition on touse this feature.
The rear seat heat controls are on the rearof the center console.
Press the heated seat symbol to cyclethrough the various heat settings and off.More indicator lights indicate warmersettings.
127
Taurus (CPH) Canada/United States of America, enUSA, First Printing
SeatsE146322 E146322