2017 FORD TAURUS ignition
[x] Cancel search: ignitionPage 70 of 504
End of Travel Position
The steering column sets a stoppingposition just short of the end of the columnposition to prevent damage to the steeringcolumn. A new stopping position sets if thesteering column encounters an objectwhen tilting or telescoping.
To reset the steering column to its normalstopping position:
1. Confirm there is nothing obstructingthe motion of the steering column.
2. Press and hold the steering columncontrol until the steering column stopsmoving.
3. Press the steering column controlagain. The steering column may beginto move again.
4. When the steering column stops,continue holding the control for anadditional few seconds.
5.Repeat for each direction as necessary.
A new stopping position is set. The nexttime you tilt or telescope the steeringcolumn, it will stop just short of the end ofthe column position.
Memory Feature
You can save and recall the steeringcolumn position with the memory function.See Memory Function (page 125).
Note:Pressing the adjustment controlduring memory recall cancels the operation.
Easy Entry and Exit Feature
When you switch the ignition off, thesteering column will move to allow extraroom to exit your vehicle. The column willreturn to the previous setting when youswitch the ignition on. You can enable ordisable this feature in the informationdisplay. See Information Displays (page89).
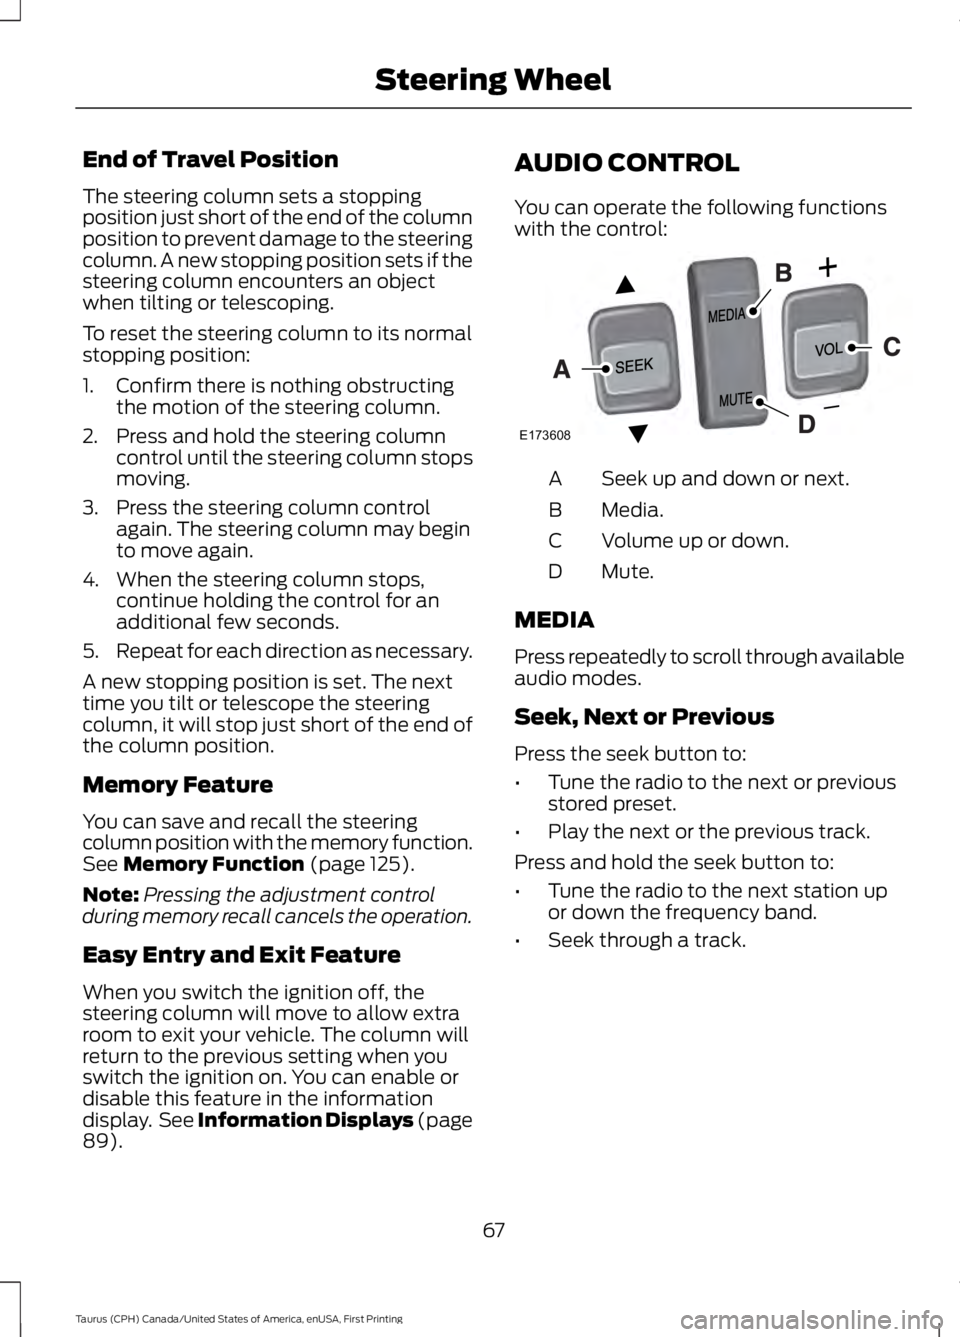
AUDIO CONTROL
You can operate the following functionswith the control:
Seek up and down or next.A
Media.B
Volume up or down.C
Mute.D
MEDIA
Press repeatedly to scroll through availableaudio modes.
Seek, Next or Previous
Press the seek button to:
•Tune the radio to the next or previousstored preset.
•Play the next or the previous track.
Press and hold the seek button to:
•Tune the radio to the next station upor down the frequency band.
•Seek through a track.
67
Taurus (CPH) Canada/United States of America, enUSA, First Printing
Steering WheelE173608
Page 76 of 504

Headlamp Flasher
Slightly pull the lever toward you andrelease it to flash the headlamps.
AUTOLAMPS
WARNING
The autolamps switch position maynot activate the headlamps in all lowvisibility conditions, such as daytimefog. Make sure the headlamps areswitched to auto or on, as appropriate,during all low visibility conditions. Failureto do so may result in a crash.
When the lighting control is in theautolamps position, the headlampsautomatically turn on in low light situationsor when the wipers activate.
If equipped, the following also activatewhen the lighting control is in theautolamps position and you switch themon in the information display:
•Configurable daytime running lamps.
•Automatic high beam control.
•Adaptive headlamp control.
The headlamps remain on for a period oftime after you switch the ignition off. Usethe information display controls to adjustthe period of time that the headlampsremain on. See Information Displays(page 89).
Note:With the headlamps in theautolamps position, you cannot switch thehigh beam headlamps on until theautolamps system turns the low beamheadlamps on.
Windshield Wiper ActivatedHeadlamps
The windshield wiper activated headlampsturn on within 10 seconds when you switchthe windshield wipers on and the lightingcontrol is in the autolamps position. Theyturn off approximately 60 seconds afteryou switch the windshield wipers off.
The headlamps do not turn on by wiperactivation:
•During a mist wipe.
•When the wipers are on to clear washerfluid during a wash condition.
•If the wipers are in intermittent mode.
Note:If you switch autolamps andautowipers on, the headlamps willautomatically turn on when the windshieldwipers continuously operate.
73
Taurus (CPH) Canada/United States of America, enUSA, First Printing
LightingE163268 E224686
A
Page 77 of 504

INSTRUMENT LIGHTING
DIMMER
Note:If you disconnect and connect thebattery, or fully discharge and charge thebattery, the lighting level will switch to themaximum setting.
Use the instrument lighting dimmer toadjust the brightness of the instrumentpanel and all applicable lighting in yourvehicle.
•Tap the top or bottom of the controlto the first detent to brighten or dim allinterior lighting incrementally.
•Press and hold the top or bottom ofthe control to the first detent until youreach the desired lighting level.
•Press and hold the top of the controlto the second detent to switch theinterior lights on.
•Press and hold the bottom of thecontrol to the second detent to switchthe interior lights off.
HEADLAMP EXIT DELAY
You can set the delay time to keep theheadlamps on for up to three minutes afterthe ignition is switched off.
Follow the steps below to change thedelay time (Steps 1 through 6 must bedone within 10 seconds):
1. Switch the ignition off.
2. Turn the lighting control to theautolamp position.
3. Turn the lighting control to the offposition.
4. Switch the ignition on.
5. Switch the ignition off.
6. Turn the lighting control to theautolamp position. The headlamps andparking lamps will turn on.
7. Turn the lighting control to the offposition when the desired delay timehas been reached. The headlamps andparking lamps will turn off. You can setthe headlamp exit delay to one of thefollowing settings:
•Off.
•10 seconds.
•20 seconds.
•120 seconds.
Note:You can also adjust the time delayusing the display controls in the instrumentcluster. See Information Displays (page89).
DAYTIME RUNNING LAMPS
WARNING
The daytime running lamps systemdoes not activate the rear lamps andmay not provide adequate lightingduring low visibility driving conditions. Also,the autolamps switch position may notactivate the headlamps in all low visibilityconditions, such as daytime fog. Make surethe headlamps are switched to auto or on,as appropriate, during all low visibilityconditions. Failure to do so may result in acrash.
74
Taurus (CPH) Canada/United States of America, enUSA, First Printing
LightingE173259
Page 78 of 504
The daytime running lamps turn on when:
1. The ignition is switched to the onposition.
2. The lighting control is in the offposition, parking lamps position or theautolamps position, and the sensordetects daylight.
3. Your vehicle is in drive (D).
AUTOMATIC HIGH BEAM
CONTROL (If Equipped)
The system will automatically turn on yourhigh beams if it is dark enough and no othertraffic is present. When it detects theheadlights of an approaching vehicle, thetail lamps of the preceding vehicle or streetlighting, the system will turn off the highbeams. The low beams remain on.
Note:If it appears that automatic controlof the high beams is not functioningproperly, check the windshield in front ofthe camera for a blockage. A clear view ofthe road is required for proper systemoperation. Have any windshield damage inthe area of the camera’s field-of-viewrepaired.
Note:If the system detects a blockage suchas bird droppings, bug splatter, snow or ice,and you do not observe changes, the systemwill go into low beam mode until you clearthe blockage. A message may also appearin the instrument cluster display noting thefront camera is blocked.
Note:In cold or inclement weatherconditions, you will notice a decrease in theavailability of the high beam system,especially at start up. If you want to changethe beam state independently of theautomatic control, you may switch the highbeams on or off using the lever. Automaticcontrol will resume when conditions arecorrect.
Note:Modification of the vehicle ride heightsuch as using much larger tires, maydegrade feature performance.
A camera sensor, centrally mountedbehind the windshield of your vehicle,continuously monitors conditions to decidewhen to turn the high beams off and on.
Once the system is active, the high beamswill turn on if:
•The ambient light level is low enough.
•There is no traffic in front of the vehicle.
•The vehicle speed is greater than32 mph (52 km/h).
The high beams will turn off if:
•The system detects the headlamps ofan approaching vehicle or the taillamps of a preceding vehicle.
•Vehicle speed falls below 27 mph(44 km/h).
•The ambient light level is high enoughthat high beams are not required.
•The system detects severe rain, snowor fog.
•The camera is blocked.
Activating the System
Switch on the system using the informationdisplay and autolamps. See InformationDisplays (page 89).
Switch the lighting control to theautolamps position. See Autolamps(page 73).
75
Taurus (CPH) Canada/United States of America, enUSA, First Printing
Lighting
Page 79 of 504

Manually Overriding the System
When the automatic control has activatedthe high beams, pushing or pulling the stalkwill provide a temporary override to lowbeam.
Use the information display menu topermanently deactivate the system, orswitch the lighting control from autolampsto headlamps.
DIRECTION INDICATORS
•To operate the left direction indicator,push the lever down until it stops.
•To operate the right direction indicator,push the lever up until it stops.
Note:Tap the lever up or down to make thedirection indicators flash three times.
INTERIOR LAMPS
The lamps will switch on when you havemet one of the following conditions:
•You open any door.
•You press a remote control button.
•You press the outer edge of the clearlens on the front row map lamp.
Front Row Map Lamps
To switch on the map lamps, press theouter edge of the clear lens.
The front row map lamp will automaticallyturn on when:
•Any door is opened.
•You press and hold the top of theinstrument lighting dimmer switch pastthe first detent.
•You press any of the remote entrycontrols and the ignition is in the offposition.
76
Taurus (CPH) Canada/United States of America, enUSA, First Printing
LightingE167827 E163272 E166237
Page 80 of 504
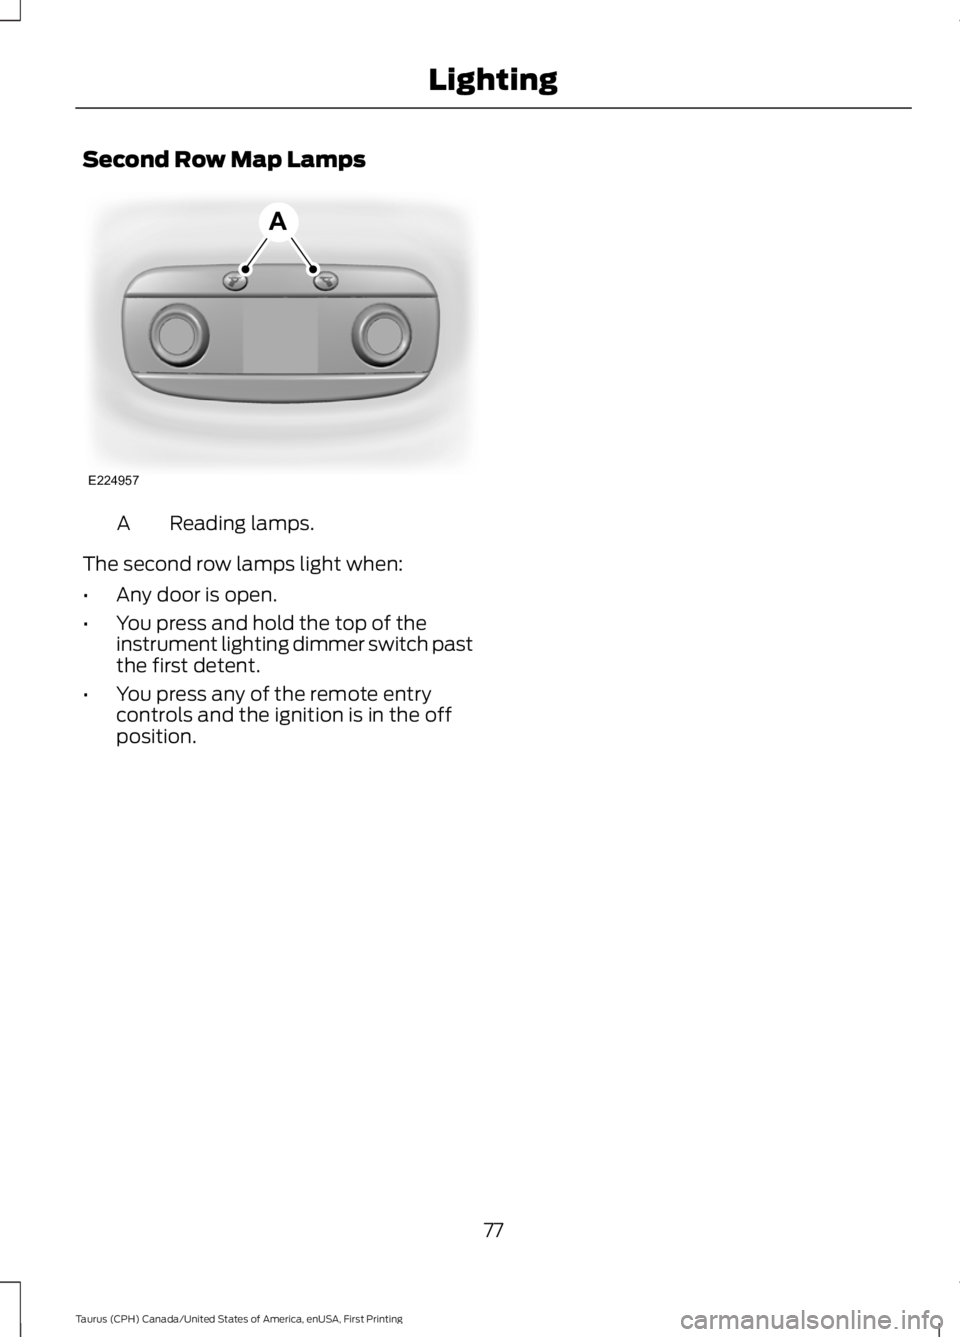
Second Row Map Lamps
Reading lamps.A
The second row lamps light when:
•Any door is open.
•You press and hold the top of theinstrument lighting dimmer switch pastthe first detent.
•You press any of the remote entrycontrols and the ignition is in the offposition.
77
Taurus (CPH) Canada/United States of America, enUSA, First Printing
LightingE224957
A
Page 81 of 504
POWER WINDOWS
WARNINGS
Do not leave children unattended inyour vehicle and do not let them playwith the power windows. They mayseriously injure themselves.
When closing the power windows,you should verify they are free ofobstructions and make sure thatchildren and pets are not in the proximityof the window openings.
Note:You may hear a pulsing noise whenjust one of the windows is open. Lower theopposite window slightly to reduce thisnoise.
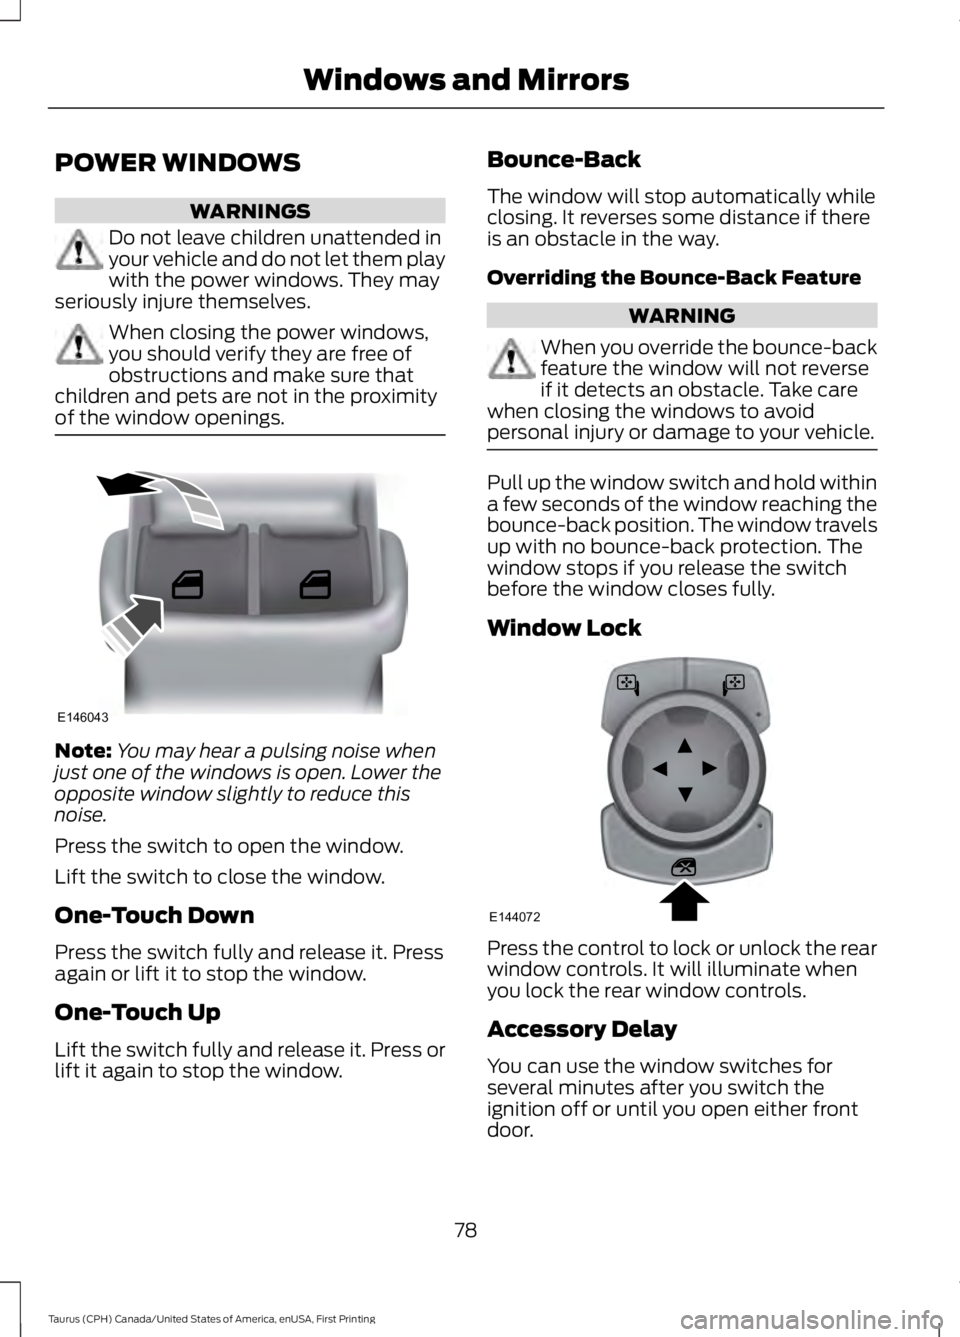
Press the switch to open the window.
Lift the switch to close the window.
One-Touch Down
Press the switch fully and release it. Pressagain or lift it to stop the window.
One-Touch Up
Lift the switch fully and release it. Press orlift it again to stop the window.
Bounce-Back
The window will stop automatically whileclosing. It reverses some distance if thereis an obstacle in the way.
Overriding the Bounce-Back Feature
WARNING
When you override the bounce-backfeature the window will not reverseif it detects an obstacle. Take carewhen closing the windows to avoidpersonal injury or damage to your vehicle.
Pull up the window switch and hold withina few seconds of the window reaching thebounce-back position. The window travelsup with no bounce-back protection. Thewindow stops if you release the switchbefore the window closes fully.
Window Lock
Press the control to lock or unlock the rearwindow controls. It will illuminate whenyou lock the rear window controls.
Accessory Delay
You can use the window switches forseveral minutes after you switch theignition off or until you open either frontdoor.
78
Taurus (CPH) Canada/United States of America, enUSA, First Printing
Windows and MirrorsE146043 E144072
Page 82 of 504
GLOBAL OPENING (If Equipped)
You can use the remote control to operatethe windows with the ignition off.
Note:You can enable or disable this featurein the information display, or see anauthorized dealer. See GeneralInformation (page 89).
Note:To operate this feature, accessorydelay must not be active.
Opening the Windows
You can open the windows for a short timeafter you unlock your vehicle with theremote control. After you unlock yourvehicle, press and hold the remote controlunlock button to open the windows andvent the moonroof. Release the buttononce movement starts. Press the lock orunlock button to stop movement.
Note:Only the front windows are operatedduring global opening.
EXTERIOR MIRRORS
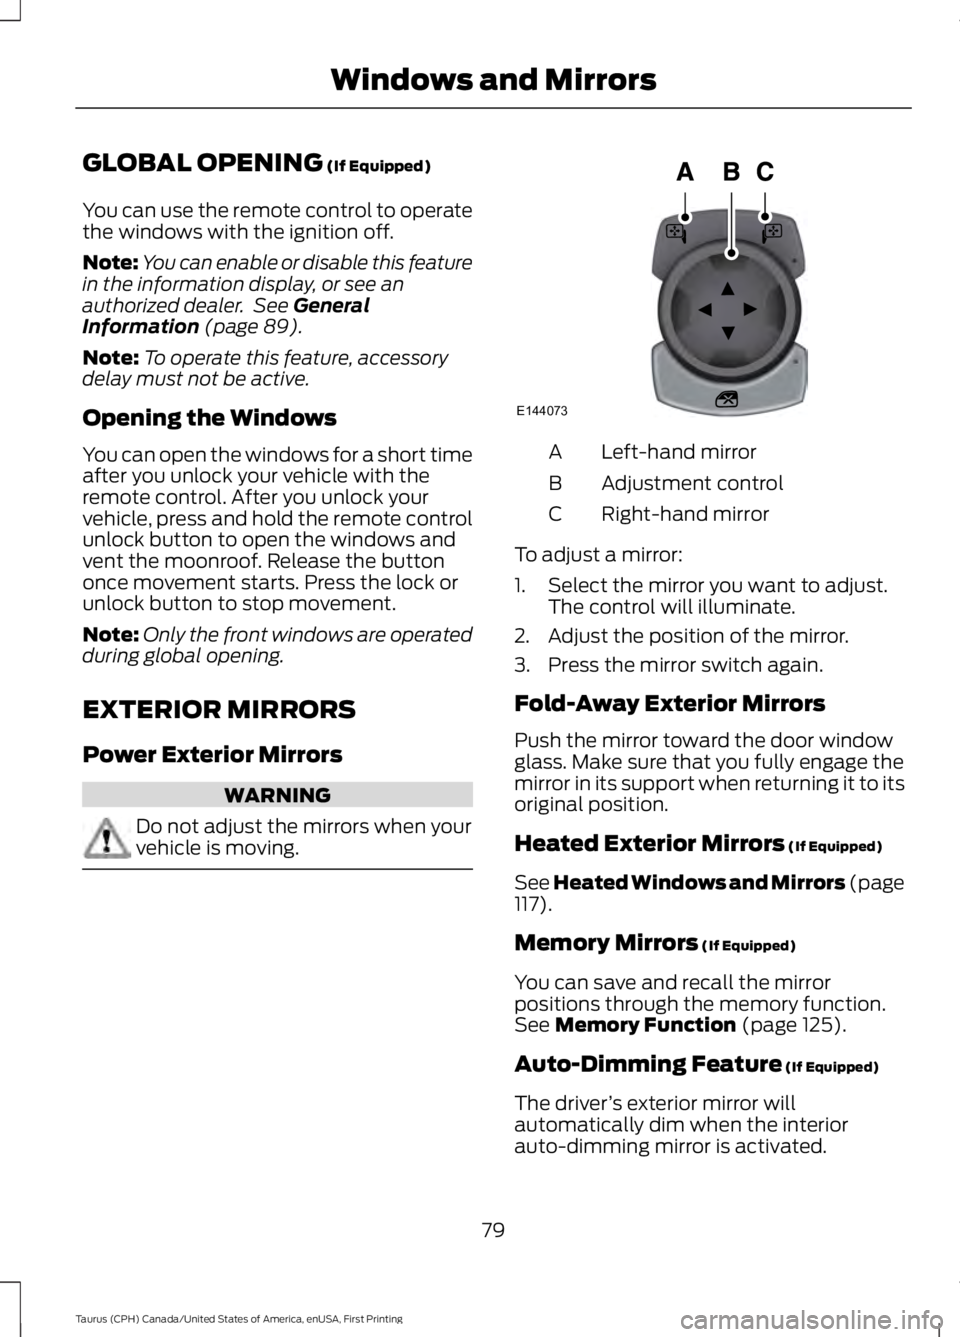
Power Exterior Mirrors
WARNING
Do not adjust the mirrors when yourvehicle is moving.
Left-hand mirrorA
Adjustment controlB
Right-hand mirrorC
To adjust a mirror:
1. Select the mirror you want to adjust.The control will illuminate.
2. Adjust the position of the mirror.
3. Press the mirror switch again.
Fold-Away Exterior Mirrors
Push the mirror toward the door windowglass. Make sure that you fully engage themirror in its support when returning it to itsoriginal position.
Heated Exterior Mirrors (If Equipped)
See Heated Windows and Mirrors (page117).
Memory Mirrors (If Equipped)
You can save and recall the mirrorpositions through the memory function.See Memory Function (page 125).
Auto-Dimming Feature (If Equipped)
The driver’s exterior mirror willautomatically dim when the interiorauto-dimming mirror is activated.
79
Taurus (CPH) Canada/United States of America, enUSA, First Printing
Windows and MirrorsE144073