2017 FORD TAURUS glove box
[x] Cancel search: glove boxPage 64 of 504

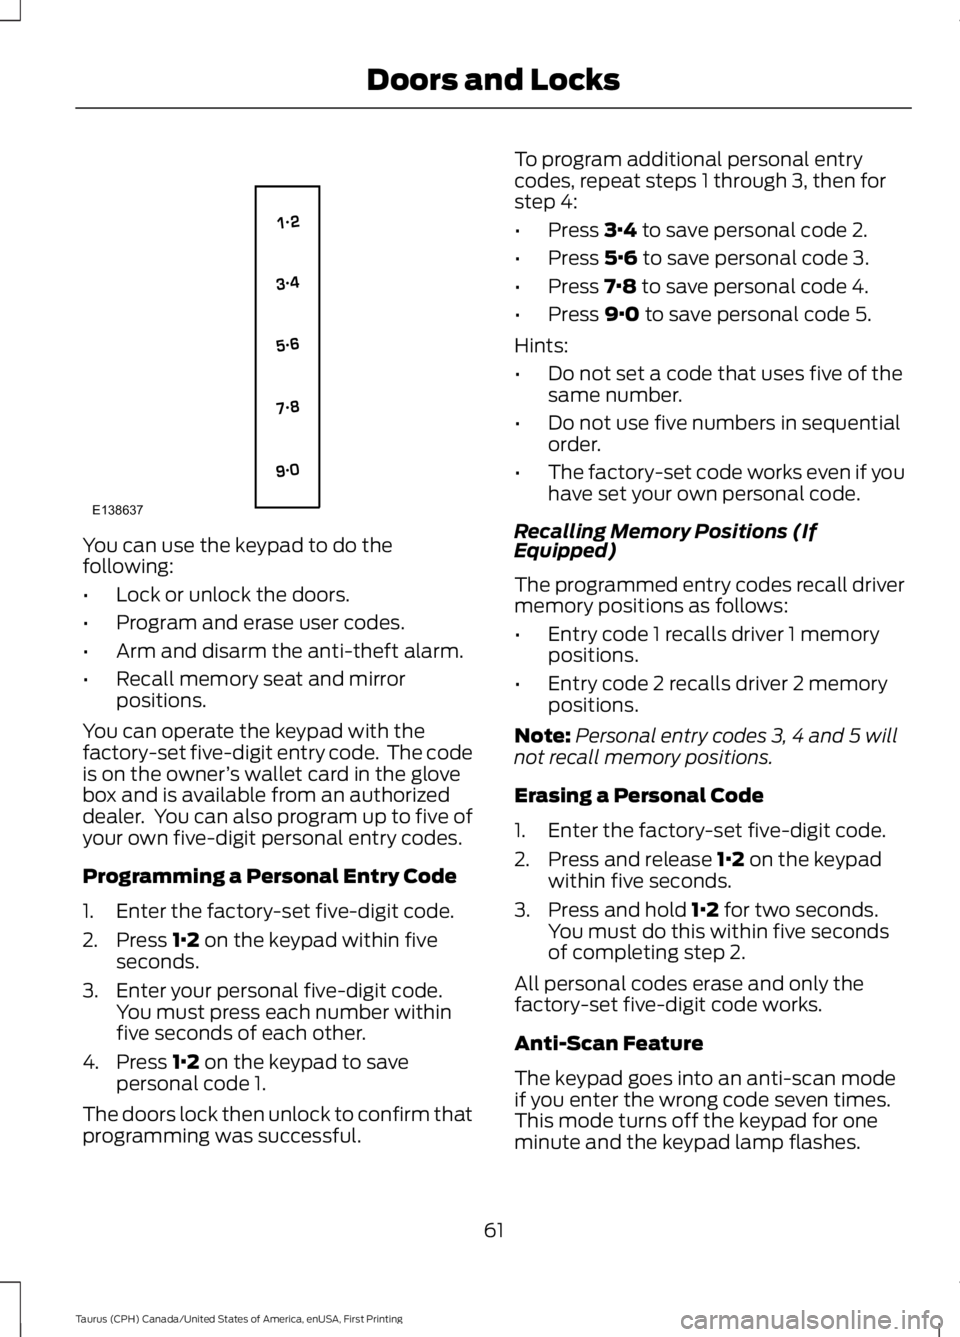
You can use the keypad to do thefollowing:
•Lock or unlock the doors.
•Program and erase user codes.
•Arm and disarm the anti-theft alarm.
•Recall memory seat and mirrorpositions.
You can operate the keypad with thefactory-set five-digit entry code. The codeis on the owner’s wallet card in the glovebox and is available from an authorizeddealer. You can also program up to five ofyour own five-digit personal entry codes.
Programming a Personal Entry Code
1. Enter the factory-set five-digit code.
2. Press 1·2 on the keypad within fiveseconds.
3. Enter your personal five-digit code.You must press each number withinfive seconds of each other.
4. Press 1·2 on the keypad to savepersonal code 1.
The doors lock then unlock to confirm thatprogramming was successful.
To program additional personal entrycodes, repeat steps 1 through 3, then forstep 4:
•Press 3·4 to save personal code 2.
•Press 5·6 to save personal code 3.
•Press 7·8 to save personal code 4.
•Press 9·0 to save personal code 5.
Hints:
•Do not set a code that uses five of thesame number.
•Do not use five numbers in sequentialorder.
•The factory-set code works even if youhave set your own personal code.
Recalling Memory Positions (IfEquipped)
The programmed entry codes recall drivermemory positions as follows:
•Entry code 1 recalls driver 1 memorypositions.
•Entry code 2 recalls driver 2 memorypositions.
Note:Personal entry codes 3, 4 and 5 willnot recall memory positions.
Erasing a Personal Code
1. Enter the factory-set five-digit code.
2. Press and release 1·2 on the keypadwithin five seconds.
3. Press and hold 1·2 for two seconds.You must do this within five secondsof completing step 2.
All personal codes erase and only thefactory-set five-digit code works.
Anti-Scan Feature
The keypad goes into an anti-scan modeif you enter the wrong code seven times.This mode turns off the keypad for oneminute and the keypad lamp flashes.
61
Taurus (CPH) Canada/United States of America, enUSA, First Printing
Doors and LocksE138637
Page 120 of 504

Side Window Defogging in Cold Weather
Vehicle with automatic climate controlVehicle with manual climate control
Press the defrost button.Select the windshield air vents using theair distribution buttons.1
Adjust the temperature control to thedesired setting. Use 72°F (22°C) as astarting point, then adjust the setting asnecessary.
Press the A/C button if the indicator isoff.2
Adjust the temperature control to thedesired setting.3
Adjust the fan speed to the highestsetting.4
HEATED WINDOWS AND
MIRRORS
Heated Rear Window
Note:Make sure the engine is runningbefore operating the heated windows.
Press the button to clear theheated rear window of thin iceand fog. The heated rear windowwill automatically turn off after a shortperiod of time. Start the engine before youswitch the heated rear window on.
Note:Do not use razor blades or othersharp objects to clean or remove decalsfrom the inside of the heated rear window.The vehicle warranty does not coverdamage caused to the heated rear windowgrid lines.
Heated Exterior Mirror (If Equipped)
When you switch the heated rear windowon, the heated exterior mirrors willautomatically turn on.
Note:Do not remove ice from the mirrorswith a scraper or adjust the mirror glasswhen it is frozen in place.
Note:Do not clean the mirror housing orglass with harsh abrasives, fuel or otherpetroleum-based cleaning products.
CABIN AIR FILTER
Your vehicle is equipped with a cabin airfilter, which gives you and your passengersthe following benefits:
•It improves your driving comfort byreducing particle concentration.
•It improves the interior compartmentcleanliness.
•It protects the climate controlcomponents from particle deposits.
You can locate the cabin air filter behindthe glove box.
Note:Make sure you have a cabin air filterinstalled at all times. This prevents foreignobjects from entering the system. Runningthe system without a filter in place couldresult in degradation or damage to thesystem.
Replace the filter at regular intervals. SeeScheduled Maintenance (page 447).
117
Taurus (CPH) Canada/United States of America, enUSA, First Printing
Climate ControlE184884
Page 272 of 504

•When inflating a tire or other objects,use the black air hose only. Do not usethe transparent hose which is designedfor sealant application only.
•Operating the kit could cause anelectrical disturbance in radio, CD, andDVD player operation.
What to do when a Tire IsPunctured
A tire puncture within the tire tread areacan be repaired in two stages with the kit.
•In the first stage, the tire will bereinflated with a sealing compoundand air. After the tire has beenreinflated, you will need to drive thevehicle a short distance 4 mi (6 km) todistribute the sealant in the tire.
•In the second stage, you will need tocheck the tire pressure and adjust, ifnecessary, to the vehicle tire inflationpressure.
First Stage: Reinflating the Tirewith Sealing Compound and Air
WARNINGS
Do not stand directly over the kitwhile inflating the tire. If you noticeany unusual bulges or deformationsin the tire sidewall during inflation, stopand call roadside assistance.
If the tire does not inflate to therecommended tire pressure within15 minutes, stop and call roadsideassistance.
Preparation: Park the vehicle in a safe, leveland secure area, away from moving traffic.Turn the hazard lights on. Apply the parkingbrake and turn the engine off. Inspect theflat tire for visible damage.
Sealant compound contains latex. Toavoid any allergic reactions, use thenon-latex gloves located in the accessorybox on the underside of the kit housing.
Do not remove any foreign object that haspierced the tire. If a puncture is located inthe tire sidewall, stop and call roadsideassistance.
1. Remove the valve cap from the tirevalve.
2. Unwrap the clear tube from thecompressor housing.
3. Remove the tube cap and fasten themetal connector of the tube to the tirevalve, turning clockwise. Make sure theconnection is tightly fastened.
4. Plug the power cable into the 12-voltpower point in the vehicle.
5. Remove the warning sticker found onthe canister and place it on the top ofthe instrument panel or the center ofthe dash.
6. Start the vehicle only if the vehicle isoutdoors or in a well-ventilated area.
269
Taurus (CPH) Canada/United States of America, enUSA, First Printing
Wheels and TiresE144619
Page 328 of 504

AUDIO INPUT JACK
WARNINGS
Driving while distracted can result inloss of vehicle control, crash andinjury. We strongly recommend thatyou use extreme caution when using anydevice that may take your focus off theroad. Your primary responsibility is the safeoperation of your vehicle. We recommendagainst the use of any hand-held devicewhile driving and encourage the use ofvoice-operated systems when possible.Make sure you are aware of all applicablelocal laws that may affect the use ofelectronic devices while driving.
For safety reasons, do not connector adjust the settings on yourportable music player while yourvehicle is moving.
Store the portable music player in asecure location, such as the centerconsole or the glove box, when yourvehicle is moving. Hard objects maybecome projectiles in a collision or suddenstop, which may increase the risk of seriousinjury. The audio extension cable must belong enough to allow the portable musicplayer to be safely stored while yourvehicle is moving.
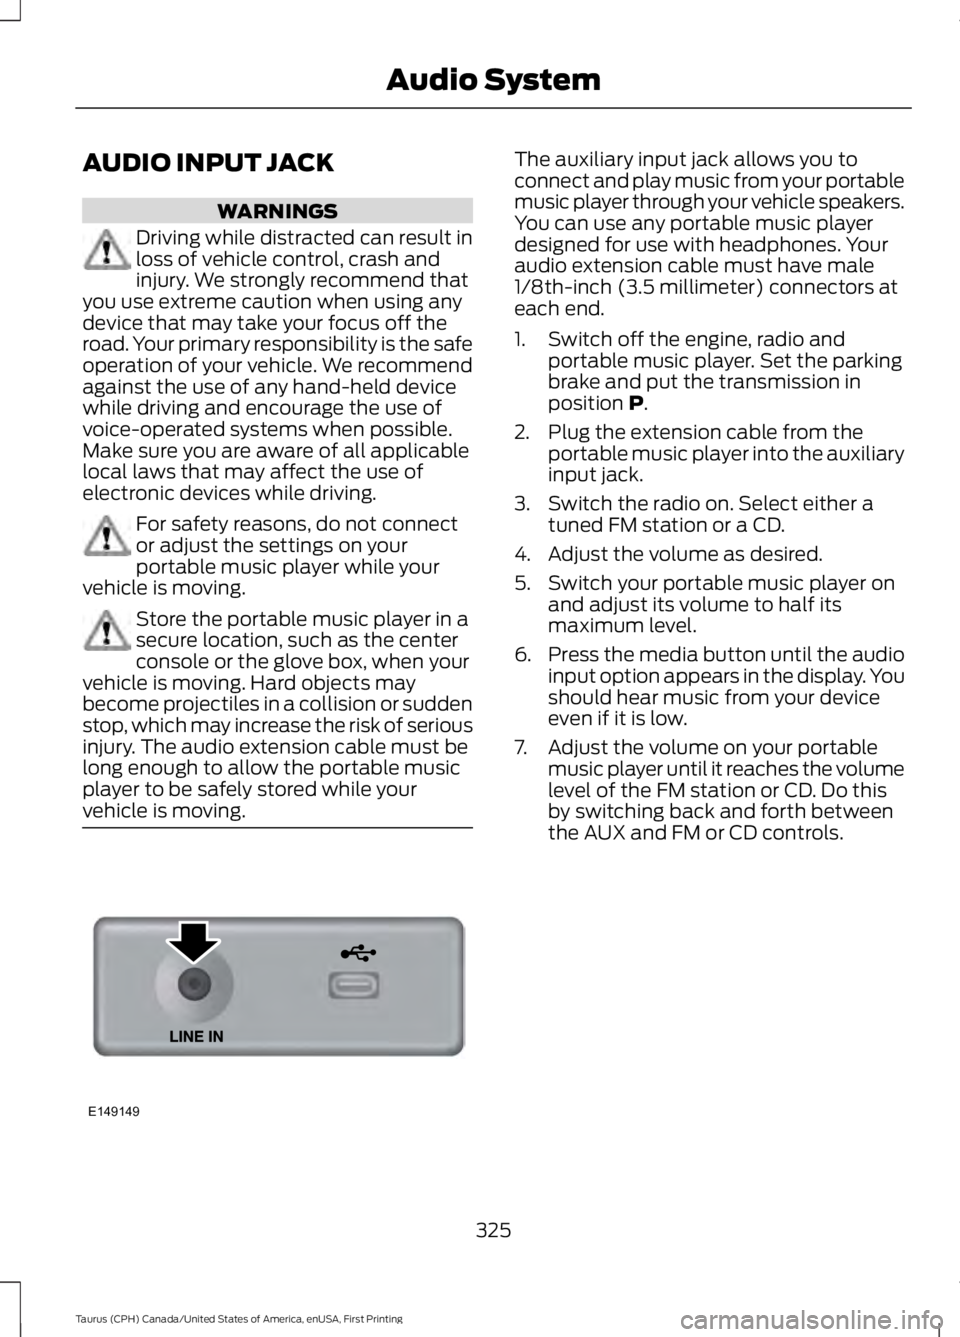
The auxiliary input jack allows you toconnect and play music from your portablemusic player through your vehicle speakers.You can use any portable music playerdesigned for use with headphones. Youraudio extension cable must have male1/8th-inch (3.5 millimeter) connectors ateach end.
1. Switch off the engine, radio andportable music player. Set the parkingbrake and put the transmission inposition P.
2. Plug the extension cable from theportable music player into the auxiliaryinput jack.
3. Switch the radio on. Select either atuned FM station or a CD.
4. Adjust the volume as desired.
5. Switch your portable music player onand adjust its volume to half itsmaximum level.
6.Press the media button until the audioinput option appears in the display. Youshould hear music from your deviceeven if it is low.
7. Adjust the volume on your portablemusic player until it reaches the volumelevel of the FM station or CD. Do thisby switching back and forth betweenthe AUX and FM or CD controls.
325
Taurus (CPH) Canada/United States of America, enUSA, First Printing
Audio SystemE149149
Page 432 of 504

Door Keypad Code
Select this button to add or erase apersonal door keypad code. To add orerase a personal code, you first need to
enter the five-digit factory set code. Youcan find this code on the owner's walletcard in the glove box or from yourauthorized dealer.
Camera Settings
To make adjustments using the touchscreen, select:
Action and DescriptionMessage
Camera Settings
Then select from the following:
You can enable or disable this option using the slider.Rear CameraDelay
You can find more information on the rear-view camera system in the parking aids chapterof your owner manual.
Onboard Modem Serial Number (ESN)
Selecting this button on the settings menushows you the ESN number for yoursystem. You need this number for certainregistrations such as Satellite Radio.
Display
To make adjustments using the touchscreen, select:
Action and DescriptionMenu Item
Make the screen display brighter or dimmer.Brightness
You can select:Mode
The screen automatically switches between day andnight modes based on the outside light level.Auto
The screen displays with a light background to enhancedaytime viewing.Day
429
Taurus (CPH) Canada/United States of America, enUSA, First Printing
SYNC™ 3