2017 FORD SUPER DUTY tow
[x] Cancel search: towPage 256 of 636
System Operation
If you select a trailer in the display screen
prior to connecting the trailer, the system
will load that configuration and the
information cluster displays a message
when the trailer is connected. A second
message appears stating Cross Traffic
Alert has been turned off; the Blind Spot
Information System with Trailer Tow still
functions normally when driving forward.
If no trailer has been set up and a trailer is
connected, the instrument cluster provides
a message indicating a trailer is connected
followed by a message asking to select a
trailer from the existing list of trailers or to
add a trailer. In order for the Blind Spot
Information System with Trailer Tow to
function, an existing trailer must be
selected or a new trailer must be added. If
the request is ignored or if you exit the
screen, a message appears prompting you
that the system has been turned off due
to a trailer connect. This message may not
appear until your vehicle speed reaches
22 mph (35 km/h).
The Blind Spot Information System with
Trailer Tow activates when driving forward
for that particular trailer set up. If the
ignition is cycled, the Blind Spot
Information System with Trailer Tow
continues to function using the last trailer
selected.
Trailer Considerations
The Blind Spot Information System with
Trailer Tow is designed to work with any
trailer whose front width is
8.5 ft (2.6 m)
or less and total length from the trailer
hitch ball to the rear of the trailer is
30 ft
(9 m) or less. Different trailers may cause
a slight change in performance as outlined
below. Large box trailers may cause false alerts
to trigger when driving next to buildings or
near parking cars. A false alert may also
occur while making a 90-degree turn.
Trailers that are
8.5 ft (2.6 m) wide at the
front and have a total length greater than
20 ft (6 m)
may have delayed alerts from
passing vehicles when the vehicle is
passing at high speed.
A box trailer whose front width is
8.5 ft
(2.6 m) may cause early alerts when you
are over taking a vehicle.
When towing a clam shell or V-Nose box
trailer with a front width of
8.5 ft (2.6 m),
delayed alerts on merging vehicles that are
traveling the same speed as your vehicle
may occur.
System Errors
If the system senses a problem with the
left or right sensor, the telltale illuminates
and a message appears in the display
screen. See
Information Messages
(page 128).
Switching the System Off and On
You can temporarily switch the Blind Spot
Information System off in the display
screen. See
General Information (page
111). When the Blind Spot Information
System switches off, you do not receive
alerts and the display screen shows a
system off message. The telltale in the
cluster also illuminates. When you switch
the Blind Spot Information System on or
off, the alert indicators flash twice.
Note: The Blind Spot Information System
remembers the last selected on or off
setting.
You can also have the Blind Spot
Information System switched off
permanently at an authorized dealer. Once
switched off permanently, the system can
only be switched back on at an authorized
dealer.
253
Super Duty (TFE) Canada/United States of America, enUSA, First Printing Driving Aids
Page 259 of 636

System Limitations
Cross Traffic Alert has its limitations;
situations such as severe weather
conditions or debris build-up on the sensor
area may limit vehicle detection.
The following are other situations that may
limit the Cross Traffic Alert performance:
•
Adjacently parked vehicles or objects
obstructing the sensors.
• Approaching vehicles passing at
speeds greater than 37 mph
(60 km/h).
• Driving in reverse faster than
7 mph
(12 km/h).
• Backing out of an angled parking spot.
False Alerts
Note: If your vehicle has a tow bar with a
factory equipped trailer tow module and it
is towing a trailer, the sensors will
automatically turn the Cross Traffic Alert
off. If your vehicle has a tow bar but no
factory equipped trailer tow module, it is
recommended to turn the Cross Traffic Alert
off manually. Operating Cross Traffic Alert
with a trailer attached will cause poor Cross
Traffic Alert performance.
There may be certain instances when there
is a false alert by the Cross Traffic Alert
system that illuminates the alert indicator
with no vehicle in the coverage zone. Some
amount of false alerts are normal; they are
temporary and self-correct.
System Errors
If Cross Traffic Alert senses a problem with
the left or right sensor a message appears
in the display screen. See
Information
Messages (page 128). Switching the System Off and On
Note:
The Cross Traffic Alert switches on
whenever the ignition is switched on and
ready to provide appropriate alerts when
the transmission is in reverse (R). Cross
Traffic Alert will not remember the last
selected on or off setting.
You can temporarily switch Cross Traffic
Alert off in the information display. See
General Information
(page 111). When
you switch Cross Traffic Alert off, you do
not receive alerts and the display screen
shows a system off message.
You can also have Cross Traffic Alert
switched off permanently at an authorized
dealer. Once switched off permanently,
the system can only be switched back on
at an authorized dealer.
STEERING
Power Steering
To help prevent damage to the power
steering system:
• Never hold the steering wheel at its
furthest turning points (until it stops)
for more than three seconds when the
engine is running.
• Do not operate the vehicle with a low
power steering pump fluid level (below
the MIN mark on the reservoir).
• Some noise is normal during operation.
If excessive, check for low power
steering pump fluid level before
seeking service by your dealer.
• Heavy or uneven efforts may be caused
by low power steering fluid. Check for
low power steering pump fluid level
before seeking service by your dealer.
• Do not fill the power steering pump
reservoir above the MAX mark on the
reservoir, as this may result in leaks
from the reservoir.
256
Super Duty (TFE) Canada/United States of America, enUSA, First Printing Driving Aids
Page 260 of 636
If the power steering system breaks down
(or if the engine is turned off), you can
steer the vehicle manually, but it takes
more effort.
If the steering wanders or pulls, check for:
•
an improperly inflated tire
• uneven tire wear
• loose or worn suspension components
• loose or worn steering components
• improper vehicle alignment
If any steering components are serviced or
replaced, install new fasteners (many are
coated with thread adhesive or have
prevailing torque features which may not
be re-used). Never re-use a bolt or nut.
Torque fasteners to specifications.
A high crown in the road or high crosswinds
may also make the steering seem to
wander or pull.
Adaptive Steering (If Equipped) WARNING
The adaptive steering system has
diagnostic checks that continuously
monitor the system. If a fault is
detected a message displays in the
information display. Stop your vehicle as
soon as it is safe to do so. This warning
message may clear if the fault is no longer
present. If an adaptive steering system
warning message appears each time you
start your vehicle, have the system
checked as soon as possible. The adaptive steering system continually
changes the steering ratio with changes to
vehicle speed, optimizing the steering
response in all conditions. The system also
changes when you switch on the
transmission tow/haul feature. When you
select the tow/haul button, the adaptive
steering system reduces vehicle sensitivity
to steering inputs at higher vehicle speeds,
while maintaining the ease of parking and
maneuverability at low speeds.
Note:
The adaptive steering system is
designed with a locking device. With the
lock engaged, the adaptive steering system
remains mechanically locked at a fixed
steering ratio. You may also notice a click
when you switch the vehicle on or after you
switch it off, as the lock disengages or
engages.
Note: If your vehicle loses electrical power
or detects a fault when you are driving, the
system automatically shuts down and you
retain normal steering function with a fixed
steering ratio. During this time it is possible
that the steering wheel may not be straight
when the vehicle is driving straight ahead.
In addition, the driver may notice that the
steering wheel angle required to steer the
vehicle may be different.
Note: During parking maneuvers, the
adaptive steering system balances the driver
work load for various steering wheel inputs
and vehicle loading conditions. Under
extreme operating conditions the system
locking device may engage. This strategy
prevents overheating and permanent
damage to the adaptive steering system.
Typical steering and driving maneuvers
allow the system to cool and return to
normal operation.
257
Super Duty (TFE) Canada/United States of America, enUSA, First Printing Driving Aids
Page 265 of 636
Payload is the combined weight
of cargo and passengers that your
vehicle is carrying. The maximum
payload for your vehicle appears
on the Tire and Loading label. The
label is either on the B-pillar or the
edge of the driver door. Vehicles
exported outside the US and
Canada may not have a tire and
loading label. Look for
“The
combined weight of occupants
and cargo should never exceed
XXX kg OR XXX lb ” for maximum
payload. The payload listed on the
Tire and Loading Information label
is the maximum payload for your
vehicle as built by the assembly
plant. If you install any additional
equipment on your vehicle, you
must determine the new payload.
Subtract the weight of the
equipment from the payload listed
on the Tire and Loading label.
When towing, trailer tongue
weight or king pin weight is also
part of payload. WARNING
The appropriate loading
capacity of your vehicle can
be limited either by volume
capacity (how much space is
available) or by payload capacity
(how much weight the vehicle
should carry). Once you have
reached the maximum payload of
your vehicle, do not add more
cargo, even if there is space
available. Overloading or
improperly loading your vehicle
can contribute to loss of vehicle
control and vehicle rollover. GAWR (Gross Axle Weight
Rating)
GAWR is the maximum allowable
weight that a single axle (front or
rear) can carry. These numbers
are on the Safety Compliance
Certification label. The label is
located on the door hinge pillar,
door-latch post, or the door edge
that meets the door-latch post,
next to the driver seating position.
The total load on each axle must
never exceed its Gross Axle
Weight Rating.
GVWR (Gross Vehicle Weight
Rating)
GVWR is the maximum allowable
weight of the fully loaded vehicle.
This includes all options,
equipment, passengers and cargo.
It appears on the Safety
Compliance Certification label.
The label is located on the door
hinge pillar, door-latch post, or the
door edge that meets the
door-latch post, next to the driver
seating position.
The gross vehicle weight must
never exceed the Gross Vehicle
Weight Rating.
262
Super Duty (TFE) Canada/United States of America, enUSA, First Printing Load Carrying
Page 266 of 636
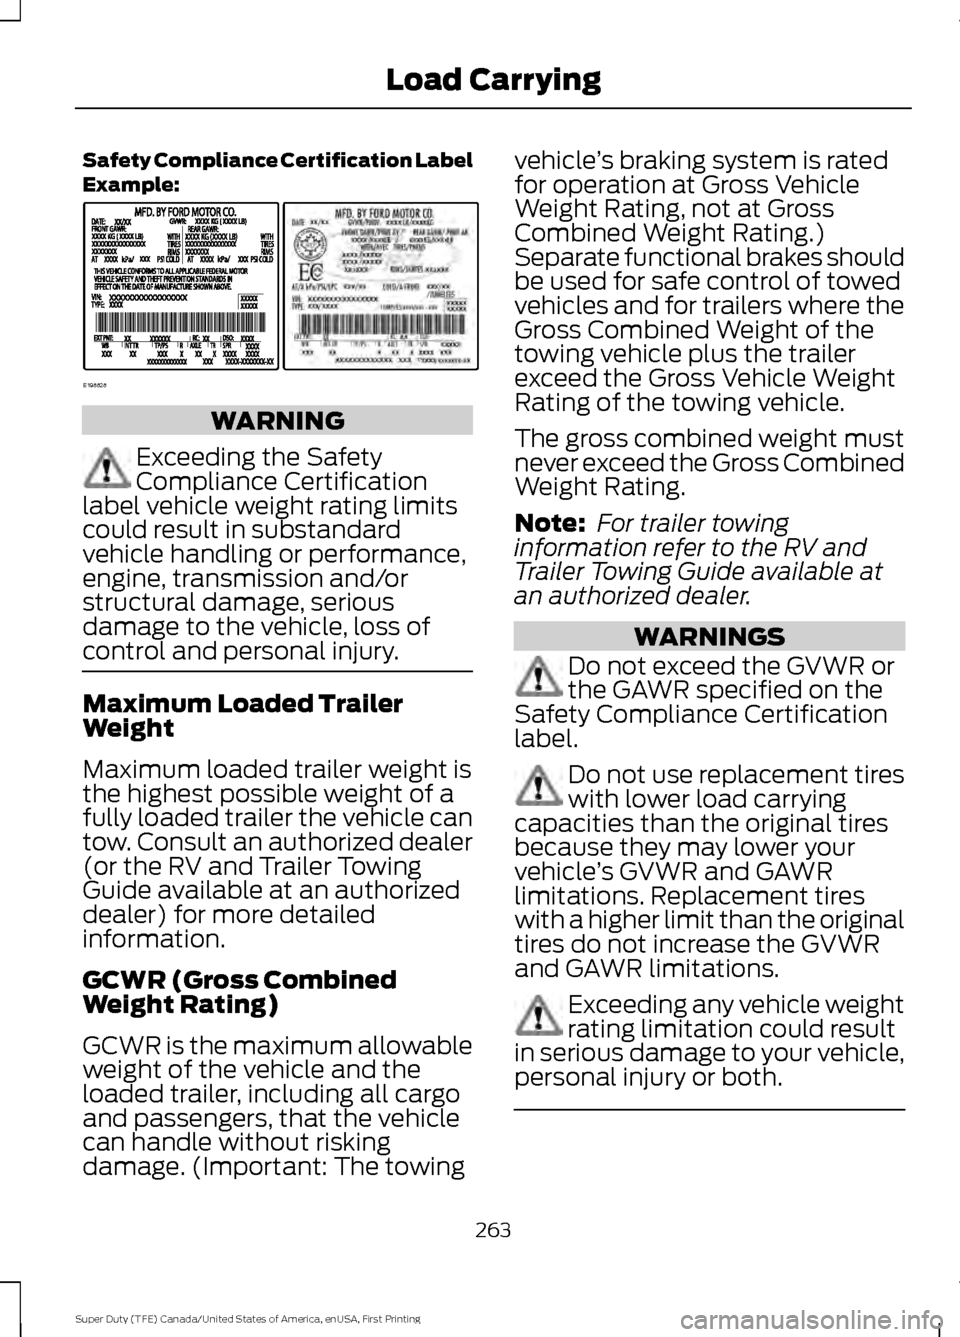
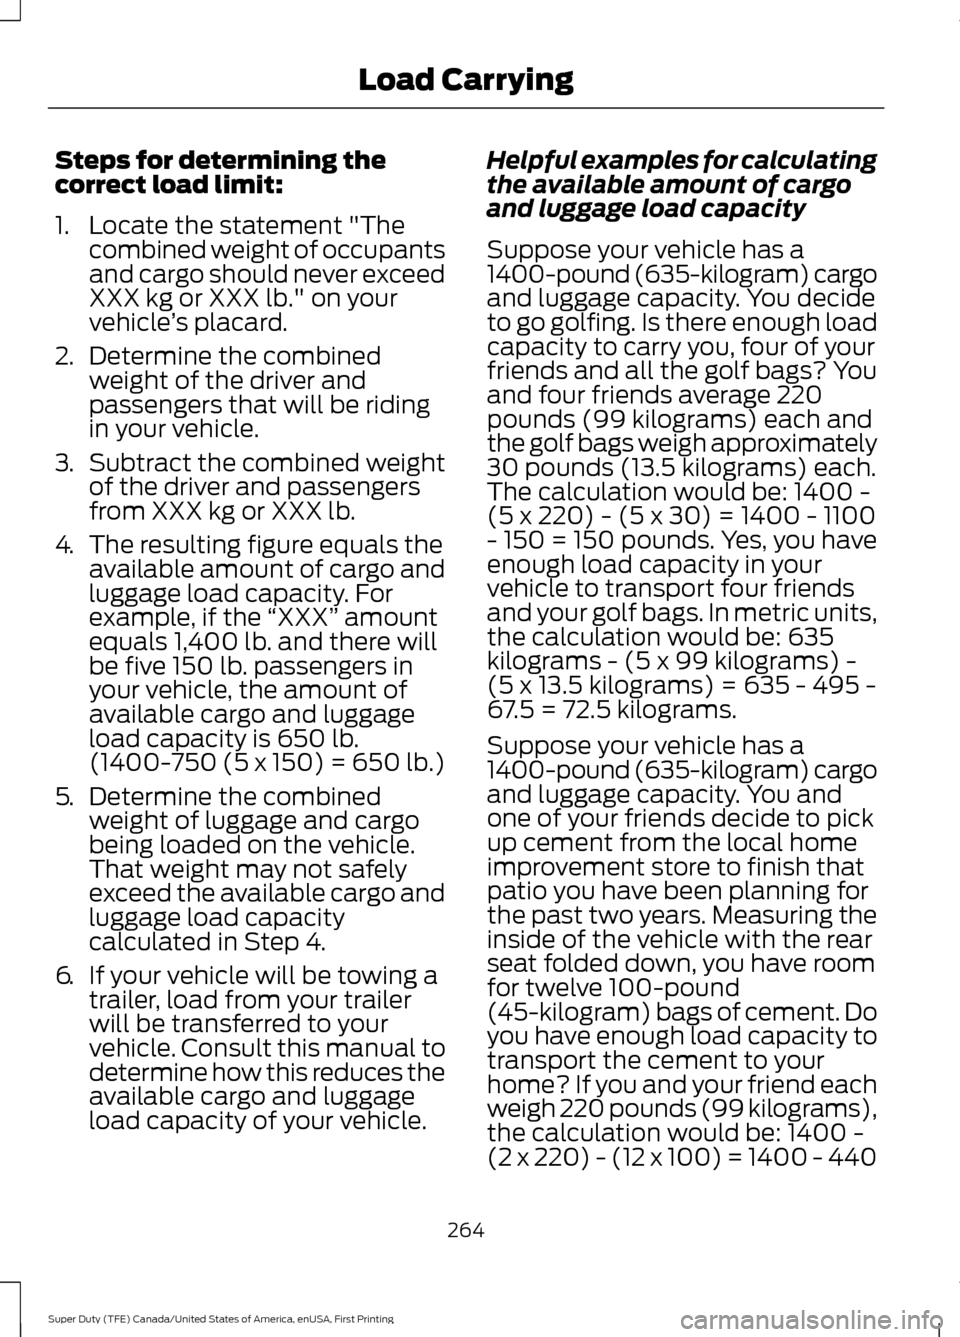
Safety Compliance Certification Label
Example:
WARNING
Exceeding the Safety
Compliance Certification
label vehicle weight rating limits
could result in substandard
vehicle handling or performance,
engine, transmission and/or
structural damage, serious
damage to the vehicle, loss of
control and personal injury. Maximum Loaded Trailer
Weight
Maximum loaded trailer weight is
the highest possible weight of a
fully loaded trailer the vehicle can
tow. Consult an authorized dealer
(or the RV and Trailer Towing
Guide available at an authorized
dealer) for more detailed
information.
GCWR (Gross Combined
Weight Rating)
GCWR is the maximum allowable
weight of the vehicle and the
loaded trailer, including all cargo
and passengers, that the vehicle
can handle without risking
damage. (Important: The towing vehicle
’s braking system is rated
for operation at Gross Vehicle
Weight Rating, not at Gross
Combined Weight Rating.)
Separate functional brakes should
be used for safe control of towed
vehicles and for trailers where the
Gross Combined Weight of the
towing vehicle plus the trailer
exceed the Gross Vehicle Weight
Rating of the towing vehicle.
The gross combined weight must
never exceed the Gross Combined
Weight Rating.
Note: For trailer towing
information refer to the RV and
Trailer Towing Guide available at
an authorized dealer. WARNINGS
Do not exceed the GVWR or
the GAWR specified on the
Safety Compliance Certification
label. Do not use replacement tires
with lower load carrying
capacities than the original tires
because they may lower your
vehicle ’s GVWR and GAWR
limitations. Replacement tires
with a higher limit than the original
tires do not increase the GVWR
and GAWR limitations. Exceeding any vehicle weight
rating limitation could result
in serious damage to your vehicle,
personal injury or both. 263
Super Duty (TFE) Canada/United States of America, enUSA, First Printing Load CarryingE198828
Page 267 of 636
Steps for determining the
correct load limit:
1. Locate the statement "The
combined weight of occupants
and cargo should never exceed
XXX kg or XXX lb." on your
vehicle ’s placard.
2. Determine the combined
weight of the driver and
passengers that will be riding
in your vehicle.
3. Subtract the combined weight
of the driver and passengers
from XXX kg or XXX lb.
4. The resulting figure equals the
available amount of cargo and
luggage load capacity. For
example, if the “XXX” amount
equals 1,400 lb. and there will
be five 150 lb. passengers in
your vehicle, the amount of
available cargo and luggage
load capacity is 650 lb.
(1400-750 (5 x 150) = 650 lb.)
5. Determine the combined
weight of luggage and cargo
being loaded on the vehicle.
That weight may not safely
exceed the available cargo and
luggage load capacity
calculated in Step 4.
6. If your vehicle will be towing a
trailer, load from your trailer
will be transferred to your
vehicle. Consult this manual to
determine how this reduces the
available cargo and luggage
load capacity of your vehicle. Helpful examples for calculating
the available amount of cargo
and luggage load capacity
Suppose your vehicle has a
1400-pound (635-kilogram) cargo
and luggage capacity. You decide
to go golfing. Is there enough load
capacity to carry you, four of your
friends and all the golf bags? You
and four friends average 220
pounds (99 kilograms) each and
the golf bags weigh approximately
30 pounds (13.5 kilograms) each.
The calculation would be: 1400 -
(5 x 220) - (5 x 30) = 1400 - 1100
- 150 = 150 pounds. Yes, you have
enough load capacity in your
vehicle to transport four friends
and your golf bags. In metric units,
the calculation would be: 635
kilograms - (5 x 99 kilograms) -
(5 x 13.5 kilograms) = 635 - 495 -
67.5 = 72.5 kilograms.
Suppose your vehicle has a
1400-pound (635-kilogram) cargo
and luggage capacity. You and
one of your friends decide to pick
up cement from the local home
improvement store to finish that
patio you have been planning for
the past two years. Measuring the
inside of the vehicle with the rear
seat folded down, you have room
for twelve 100-pound
(45-kilogram) bags of cement. Do
you have enough load capacity to
transport the cement to your
home? If you and your friend each
weigh 220 pounds (99 kilograms),
the calculation would be: 1400 -
(2 x 220) - (12 x 100) = 1400 - 440
264
Super Duty (TFE) Canada/United States of America, enUSA, First Printing Load Carrying
Page 268 of 636
- 1200 = - 240 pounds. No, you do
not have enough cargo capacity
to carry that much weight. In
metric units, the calculation would
be: 635 kilograms - (2 x 99
kilograms) - (12 x 45 kilograms) =
635 - 198 - 540 = -103 kilograms.
You will need to reduce the load
weight by at least 240 pounds
(104 kilograms). If you remove
three 100-pound (45-kilogram)
cement bags, then the load
calculation would be:1400 - (2 x
220) - (9 x 100) = 1400 - 440 -
900 = 60 pounds. Now you have
the load capacity to transport the
cement and your friend home. In
metric units, the calculation would
be: 635 kilograms - (2 x 99
kilograms) - (9 x 45 kilograms) =
635 - 198 - 405 = 32 kilograms.
The above calculations also
assume that the loads are
positioned in your vehicle in a
manner that does not overload
the front or the rear gross axle
weight rating specified for your
vehicle on the Safety Compliance
Certification label.
Special Loading Instructions
for Owners of Pick-up Trucks
and Utility-type Vehicles
WARNING
Loaded vehicles may handle
differently than unloaded
vehicles. Take extra precautions,
such as slower speeds and
increased stopping distance, when
driving a heavily loaded vehicle. BED RAMPS (If Equipped)
WARNINGS
The slide action of the ramp is a
pinch point. Do not place fingers or
hands in the pinch point.
Extend and retract the ramp only
when connected to the tailgate
plate.
Be sure the ramp is installed
correctly when loading and
unloading equipment on and off the
ramp. Do not step or sit on the ramp when
it is in the stowed position.
Install the ramp only within the
prescribed ramp angles.
Note:
The ramp maximum capacity is
800 lb (363 kg)
.
Note: Verify the ramp is on stable ground
before usage.
Note: For loading and unloading
equipment, your ramp should be set
between
10° upward and 26° downward to
avoid damage to the ramp claw and tailgate
plate.
Using the Bed Ramp
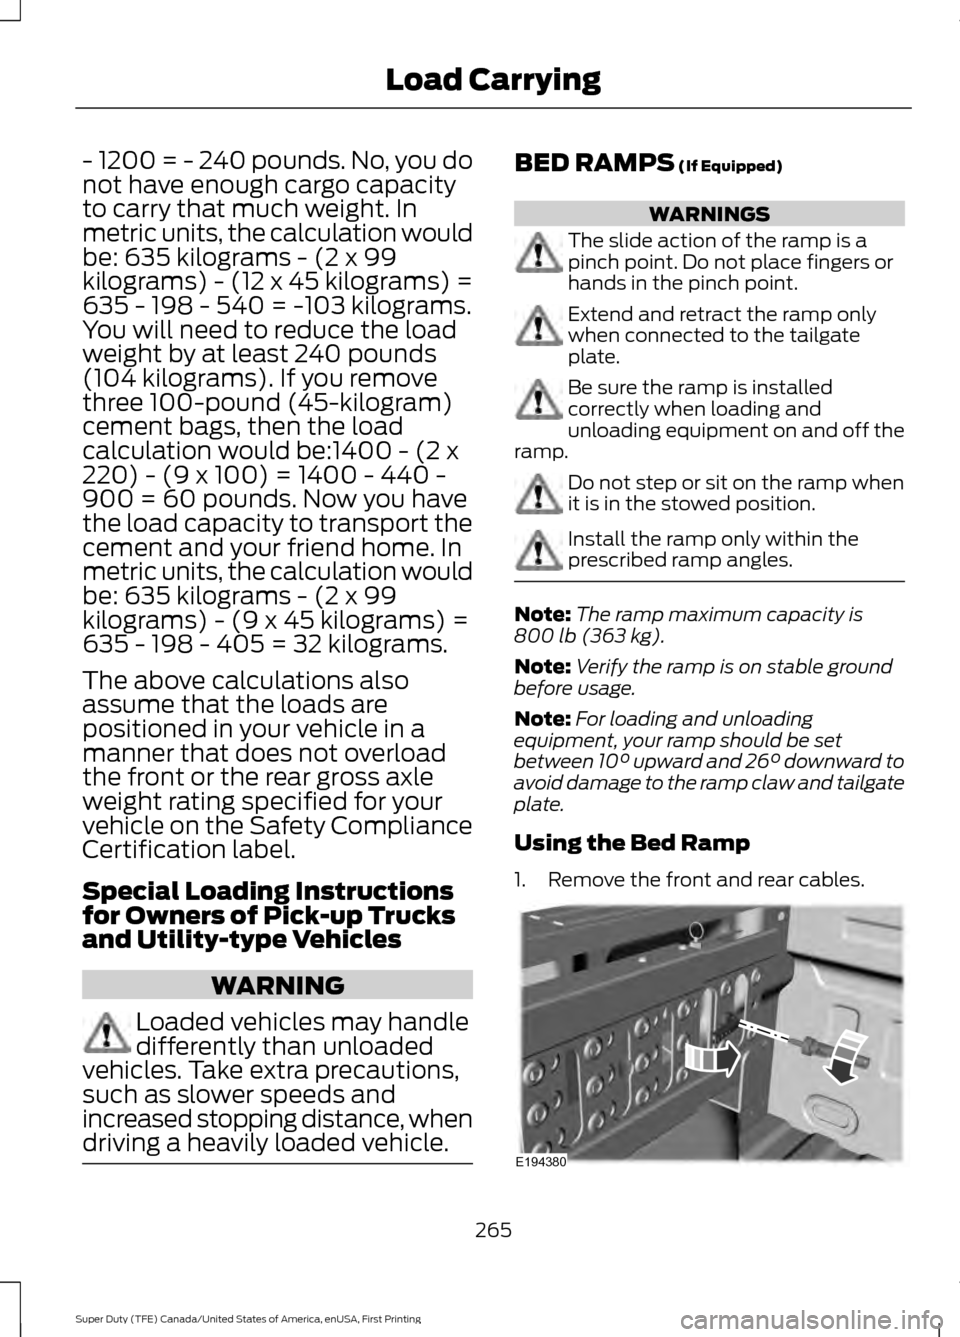
1. Remove the front and rear cables. 265
Super Duty (TFE) Canada/United States of America, enUSA, First Printing Load CarryingE194380
Page 269 of 636
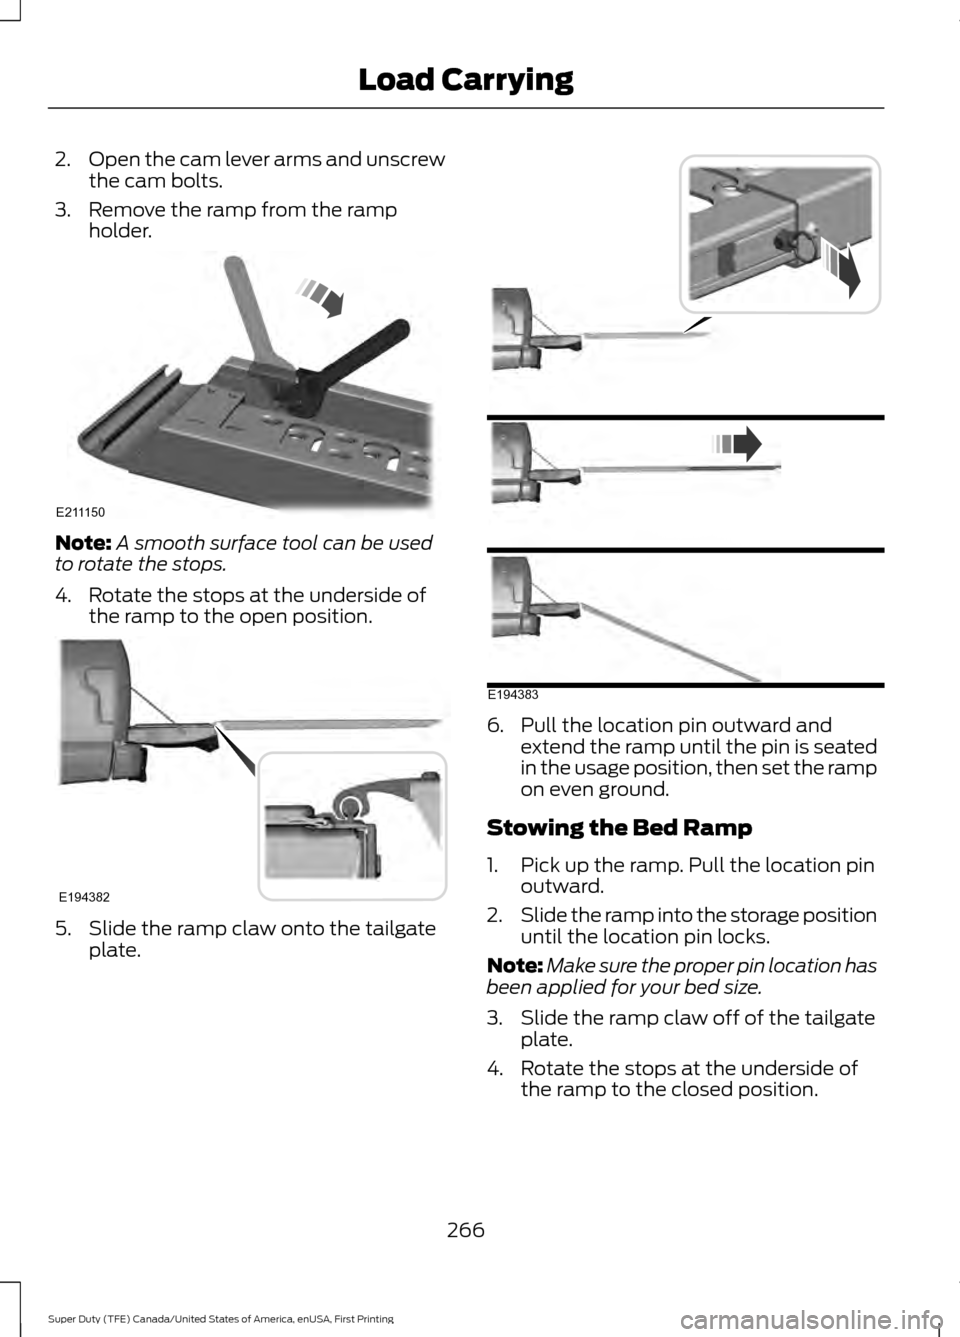
2.
Open the cam lever arms and unscrew
the cam bolts.
3. Remove the ramp from the ramp holder. Note:
A smooth surface tool can be used
to rotate the stops.
4. Rotate the stops at the underside of the ramp to the open position. 5. Slide the ramp claw onto the tailgate
plate. 6. Pull the location pin outward and
extend the ramp until the pin is seated
in the usage position, then set the ramp
on even ground.
Stowing the Bed Ramp
1. Pick up the ramp. Pull the location pin outward.
2. Slide the ramp into the storage position
until the location pin locks.
Note: Make sure the proper pin location has
been applied for your bed size.
3. Slide the ramp claw off of the tailgate plate.
4. Rotate the stops at the underside of the ramp to the closed position.
266
Super Duty (TFE) Canada/United States of America, enUSA, First Printing Load CarryingE211150 E194382 E194383