2017 FORD SUPER DUTY spare tire
[x] Cancel search: spare tirePage 406 of 636
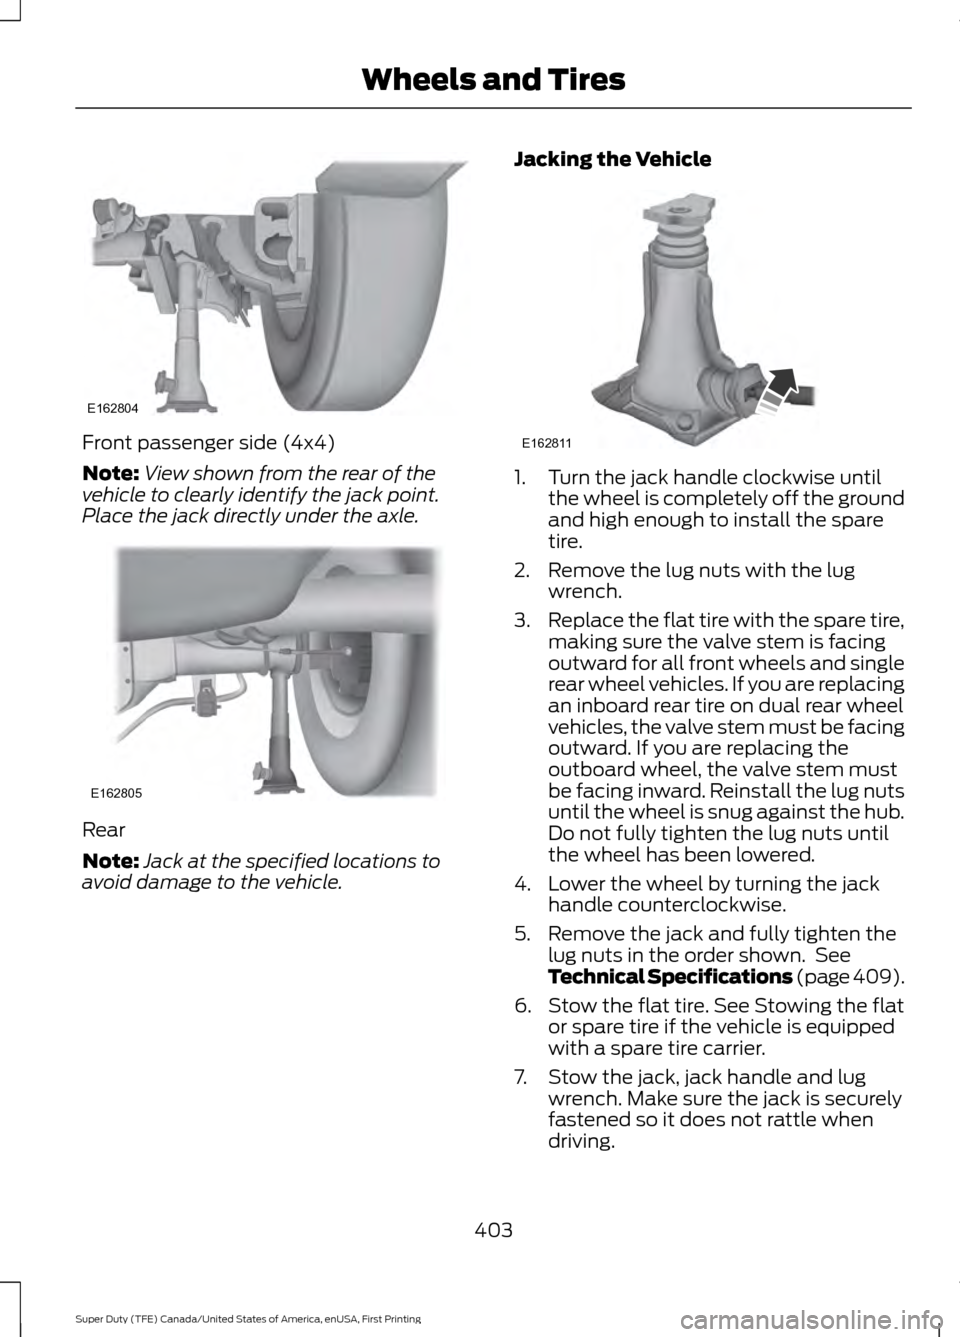
Front passenger side (4x4)
Note:
View shown from the rear of the
vehicle to clearly identify the jack point.
Place the jack directly under the axle. Rear
Note:
Jack at the specified locations to
avoid damage to the vehicle. Jacking the Vehicle 1. Turn the jack handle clockwise until
the wheel is completely off the ground
and high enough to install the spare
tire.
2. Remove the lug nuts with the lug wrench.
3. Replace the flat tire with the spare tire,
making sure the valve stem is facing
outward for all front wheels and single
rear wheel vehicles. If you are replacing
an inboard rear tire on dual rear wheel
vehicles, the valve stem must be facing
outward. If you are replacing the
outboard wheel, the valve stem must
be facing inward. Reinstall the lug nuts
until the wheel is snug against the hub.
Do not fully tighten the lug nuts until
the wheel has been lowered.
4. Lower the wheel by turning the jack handle counterclockwise.
5. Remove the jack and fully tighten the lug nuts in the order shown. See
Technical Specifications (page 409).
6. Stow the flat tire. See Stowing the flat or spare tire if the vehicle is equipped
with a spare tire carrier.
7. Stow the jack, jack handle and lug wrench. Make sure the jack is securely
fastened so it does not rattle when
driving.
403
Super Duty (TFE) Canada/United States of America, enUSA, First Printing Wheels and TiresE162804 E162805 E162811
Page 409 of 636
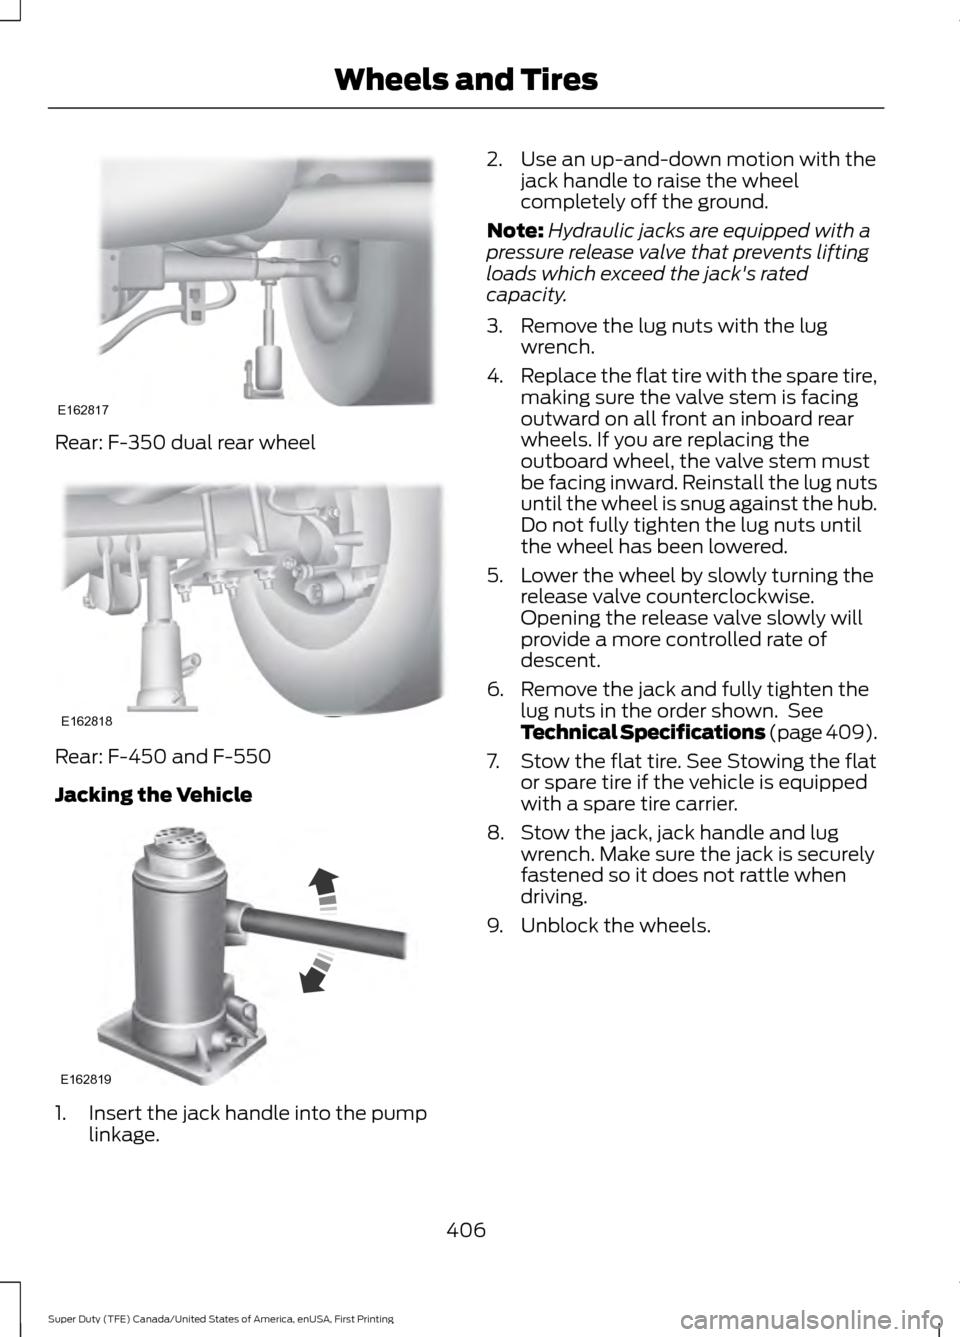
Rear: F-350 dual rear wheel
Rear: F-450 and F-550
Jacking the Vehicle
1. Insert the jack handle into the pump
linkage. 2. Use an up-and-down motion with the
jack handle to raise the wheel
completely off the ground.
Note: Hydraulic jacks are equipped with a
pressure release valve that prevents lifting
loads which exceed the jack's rated
capacity.
3. Remove the lug nuts with the lug wrench.
4. Replace the flat tire with the spare tire,
making sure the valve stem is facing
outward on all front an inboard rear
wheels. If you are replacing the
outboard wheel, the valve stem must
be facing inward. Reinstall the lug nuts
until the wheel is snug against the hub.
Do not fully tighten the lug nuts until
the wheel has been lowered.
5. Lower the wheel by slowly turning the release valve counterclockwise.
Opening the release valve slowly will
provide a more controlled rate of
descent.
6. Remove the jack and fully tighten the lug nuts in the order shown. See
Technical Specifications (page 409).
7. Stow the flat tire. See Stowing the flat or spare tire if the vehicle is equipped
with a spare tire carrier.
8. Stow the jack, jack handle and lug wrench. Make sure the jack is securely
fastened so it does not rattle when
driving.
9. Unblock the wheels.
406
Super Duty (TFE) Canada/United States of America, enUSA, First Printing Wheels and TiresE162817 E162818 E162819
Page 411 of 636
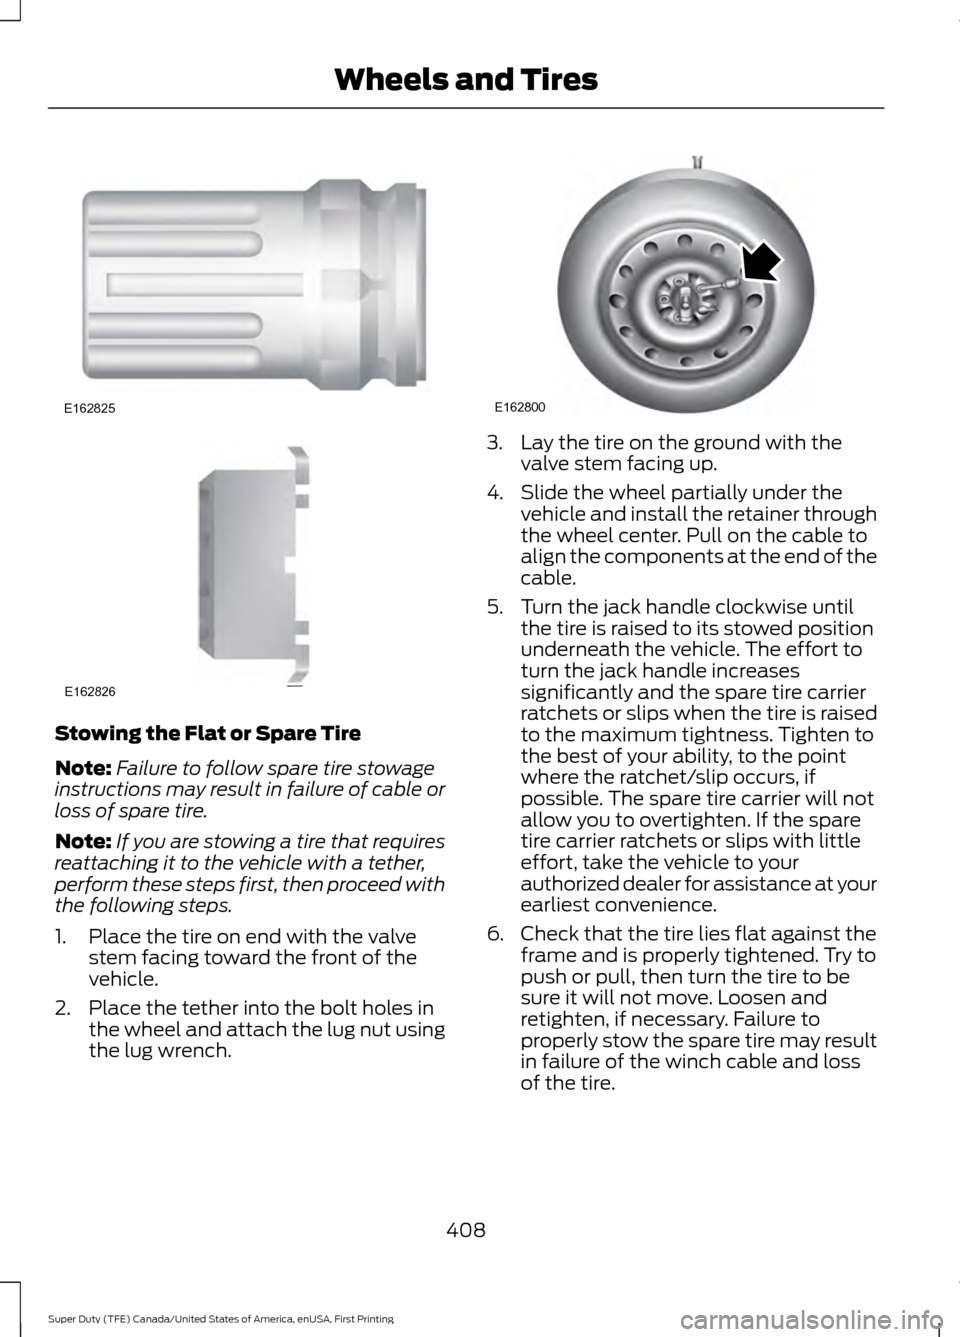
Stowing the Flat or Spare Tire
Note:
Failure to follow spare tire stowage
instructions may result in failure of cable or
loss of spare tire.
Note: If you are stowing a tire that requires
reattaching it to the vehicle with a tether,
perform these steps first, then proceed with
the following steps.
1. Place the tire on end with the valve stem facing toward the front of the
vehicle.
2. Place the tether into the bolt holes in the wheel and attach the lug nut using
the lug wrench. 3. Lay the tire on the ground with the
valve stem facing up.
4. Slide the wheel partially under the vehicle and install the retainer through
the wheel center. Pull on the cable to
align the components at the end of the
cable.
5. Turn the jack handle clockwise until the tire is raised to its stowed position
underneath the vehicle. The effort to
turn the jack handle increases
significantly and the spare tire carrier
ratchets or slips when the tire is raised
to the maximum tightness. Tighten to
the best of your ability, to the point
where the ratchet/slip occurs, if
possible. The spare tire carrier will not
allow you to overtighten. If the spare
tire carrier ratchets or slips with little
effort, take the vehicle to your
authorized dealer for assistance at your
earliest convenience.
6. Check that the tire lies flat against the frame and is properly tightened. Try to
push or pull, then turn the tire to be
sure it will not move. Loosen and
retighten, if necessary. Failure to
properly stow the spare tire may result
in failure of the winch cable and loss
of the tire.
408
Super Duty (TFE) Canada/United States of America, enUSA, First Printing Wheels and TiresE162825 E162826 E162800
Page 412 of 636
7.
Repeat this tightness check procedure
when servicing the spare tire pressure
(every six months, per scheduled
maintenance information), or at any
time that the spare tire is disturbed through service of other components.
8. If removed, install the spare tire lock into the bumper drive tube with the
spare tire lock key and jack handle.
TECHNICAL SPECIFICATIONS
Wheel Lug Nut Torque Specifications WARNING
When a wheel is installed, always remove any corrosion, dirt or foreign materials
present on the mounting surfaces of the wheel or the surface of the wheel hub,
brake drum or brake disc that contacts the wheel. Make sure that any fasteners
that attach the rotor to the hub are secured so they do not interfere with the mounting
surfaces of the wheel. Installing wheels without correct metal-to-metal contact at the
wheel mounting surfaces can cause the wheel nuts to loosen and the wheel to come off
while the vehicle is in motion, resulting in loss of control. lb.ft (Nm)
Bolt size
165 lb.ft (224 Nm)
M14 x 1.5
* Torque specifications are for nut and bolt threads free of dirt and rust. Use only Ford
recommended replacement fasteners.
On vehicles equipped with single rear wheels, retighten the lug nuts to the specified torque
at 100 miles (160 kilometers) after any wheel disturbance (such as tire rotation, changing
a flat tire, wheel removal).
On vehicles equipped with dual rear wheels, retighten the wheel lug nuts to the specified
torque at 100 miles (160 kilometers), and again at 500 miles (800 kilometers) of new
vehicle operation and after any wheel disturbance (such as tire rotation, changing a flat
tire, wheel removal).
It is important to follow the proper wheel mounting and lug nut torque procedures.
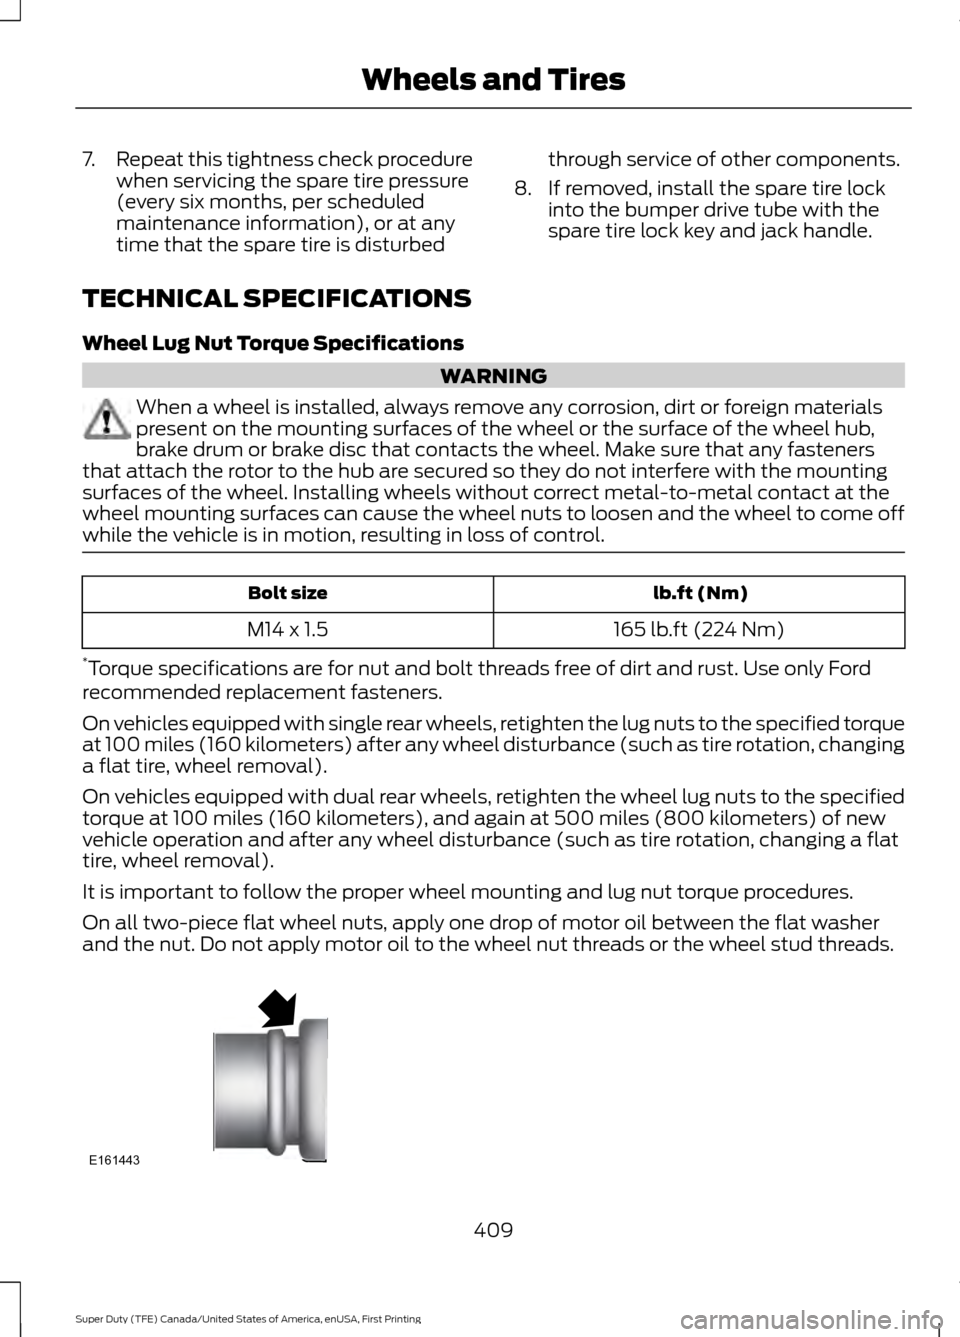
On all two-piece flat wheel nuts, apply one drop of motor oil between the flat washer
and the nut. Do not apply motor oil to the wheel nut threads or the wheel stud threads. 409
Super Duty (TFE) Canada/United States of America, enUSA, First Printing Wheels and TiresE161443
Page 571 of 636
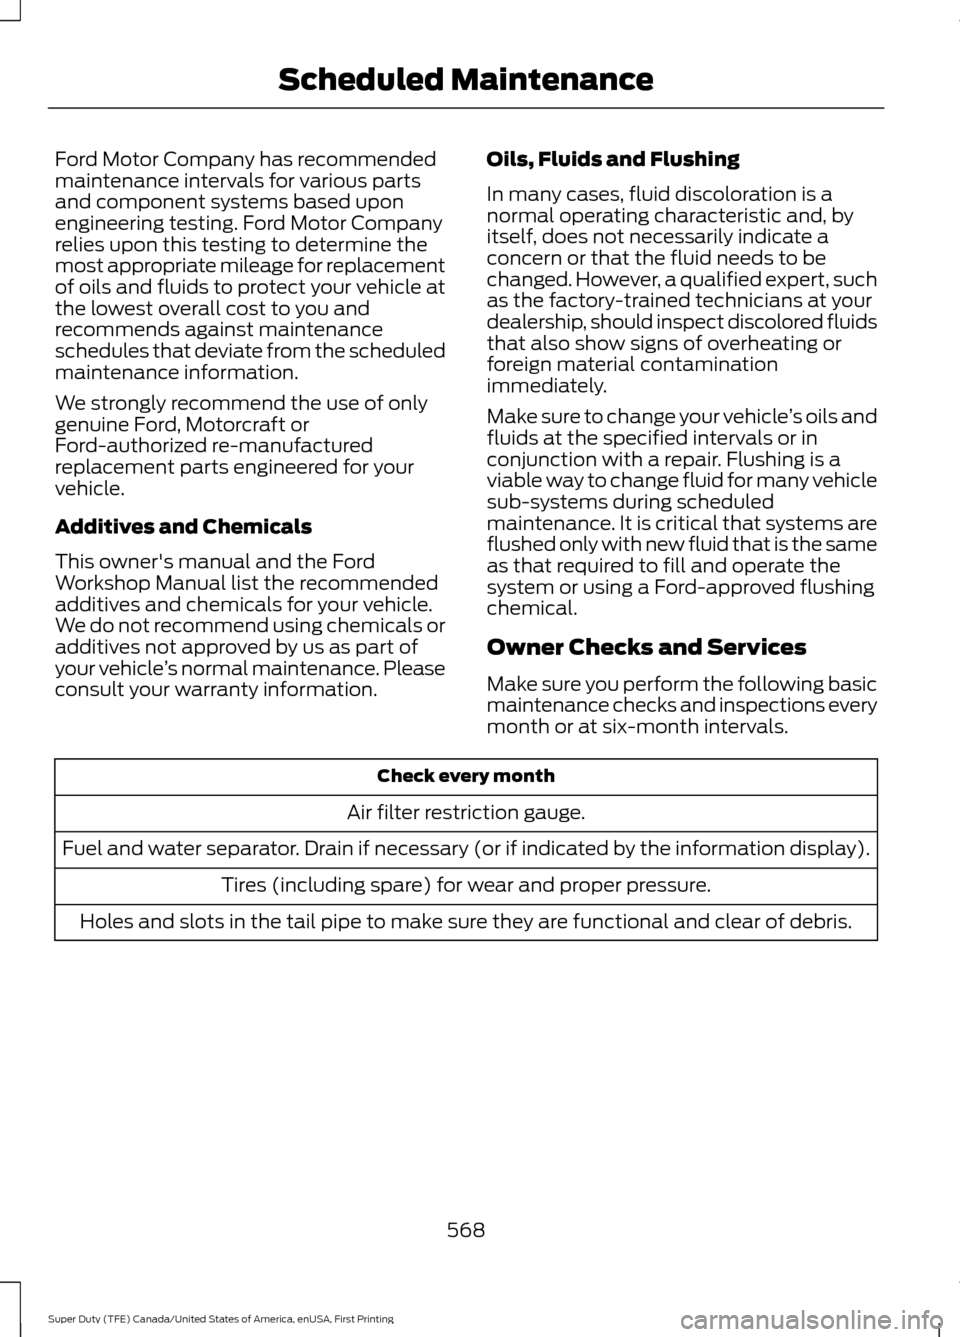
Ford Motor Company has recommended
maintenance intervals for various parts
and component systems based upon
engineering testing. Ford Motor Company
relies upon this testing to determine the
most appropriate mileage for replacement
of oils and fluids to protect your vehicle at
the lowest overall cost to you and
recommends against maintenance
schedules that deviate from the scheduled
maintenance information.
We strongly recommend the use of only
genuine Ford, Motorcraft or
Ford-authorized re-manufactured
replacement parts engineered for your
vehicle.
Additives and Chemicals
This owner's manual and the Ford
Workshop Manual list the recommended
additives and chemicals for your vehicle.
We do not recommend using chemicals or
additives not approved by us as part of
your vehicle
’s normal maintenance. Please
consult your warranty information. Oils, Fluids and Flushing
In many cases, fluid discoloration is a
normal operating characteristic and, by
itself, does not necessarily indicate a
concern or that the fluid needs to be
changed. However, a qualified expert, such
as the factory-trained technicians at your
dealership, should inspect discolored fluids
that also show signs of overheating or
foreign material contamination
immediately.
Make sure to change your vehicle
’s oils and
fluids at the specified intervals or in
conjunction with a repair. Flushing is a
viable way to change fluid for many vehicle
sub-systems during scheduled
maintenance. It is critical that systems are
flushed only with new fluid that is the same
as that required to fill and operate the
system or using a Ford-approved flushing
chemical.
Owner Checks and Services
Make sure you perform the following basic
maintenance checks and inspections every
month or at six-month intervals. Check every month
Air filter restriction gauge.
Fuel and water separator. Drain if necessary (or if indicated by the information display). Tires (including spare) for wear and proper pressure.
Holes and slots in the tail pipe to make sure they are functional and clear of debris.
568
Super Duty (TFE) Canada/United States of America, enUSA, First Printing Scheduled Maintenance
Page 572 of 636
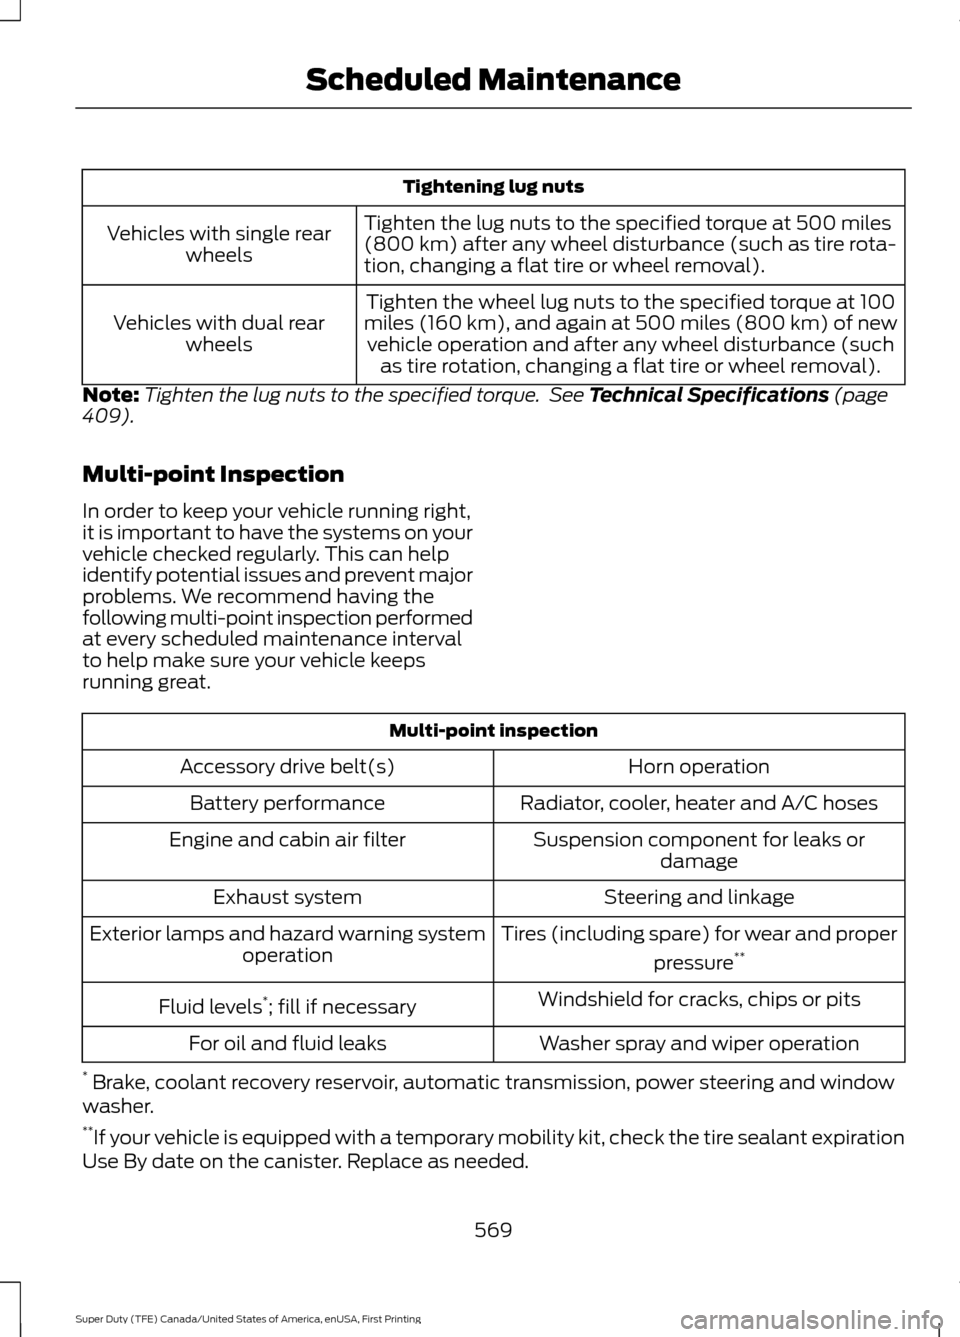
Tightening lug nuts
Tighten the lug nuts to the specified torque at 500 miles
(800 km) after any wheel disturbance (such as tire rota-
tion, changing a flat tire or wheel removal).
Vehicles with single rear
wheels
Tighten the wheel lug nuts to the specified torque at 100
miles (160 km), and again at 500 miles (800 km) of new vehicle operation and after any wheel disturbance (such as tire rotation, changing a flat tire or wheel removal).
Vehicles with dual rear
wheels
Note: Tighten the lug nuts to the specified torque. See Technical Specifications (page
409).
Multi-point Inspection
In order to keep your vehicle running right,
it is important to have the systems on your
vehicle checked regularly. This can help
identify potential issues and prevent major
problems. We recommend having the
following multi-point inspection performed
at every scheduled maintenance interval
to help make sure your vehicle keeps
running great. Multi-point inspection
Horn operation
Accessory drive belt(s)
Radiator, cooler, heater and A/C hoses
Battery performance
Suspension component for leaks ordamage
Engine and cabin air filter
Steering and linkage
Exhaust system
Tires (including spare) for wear and properpressure**
Exterior lamps and hazard warning system
operation
Windshield for cracks, chips or pits
Fluid levels *
; fill if necessary
Washer spray and wiper operation
For oil and fluid leaks
* Brake, coolant recovery reservoir, automatic transmission, power steering and window
washer.
** If your vehicle is equipped with a temporary mobility kit, check the tire sealant expiration
Use By date on the canister. Replace as needed.
569
Super Duty (TFE) Canada/United States of America, enUSA, First Printing Scheduled Maintenance
Page 625 of 636
Automatic Transmission Fluid
Check.............................................................337
Checking Automatic Transmission Fluid.................................................................... 337
Autowipers.......................................................84
Auxiliary Power Points...............................168 110 Volt - 400 Watt Capacity AC Power
Outlet................................................................. 168
12 Volt DC Power Point..................................... 168
Locations............................................................... 168
Auxiliary Switches
........................................561
For more information on the Upfitter
Interface Module and the auxiliary
switches, visit:................................................ 564
Upfitter Interface Module............................... 564
B
Battery See: Changing the 12V Battery..................... 343
Bed Extender
....................................................72
Grocery mode........................................................ 73
Tailgate mode........................................................ 72
Bed Ramps
....................................................265
Installing the Ramp Holder............................ 267
Stowing the Bed Ramp................................... 266
Using the Bed Ramp........................................ 265
Blind Spot Information System.............249 Blind Spot Information System with Trailer
Tow...................................................................... 251
Switching the System Off and On...............253
System Errors...................................................... 253
Using the System.............................................. 250
Bonnet Lock See: Opening and Closing the Hood..........320
Booster Seats..................................................30 Types of Booster Seats...................................... 30
Brake Fluid Check
.......................................340
Brakes................................................................221 General Information........................................... 221
Breaking-In....................................................290
Bulb Specification Chart
..........................350
C
Cabin Air Filter
.................................................151
California Proposition 65.............................12 Capacities and Specifications -
6.2L
.................................................................418
Specifications...................................................... 419
Capacities and Specifications - 6.7L Diesel............................................................428
Engine Oil Specifications................................ 433
Specifications..................................................... 430
Capacities and Specifications - 6.8L................................................................422
Specifications..................................................... 424
Capacities and Specifications
..................411
Car Wash See: Cleaning the Exterior............................... 361
Center Console
..............................................170
Changing a Bulb...........................................347 Cargo Lamp and Central High Mounted
Brake Lamp Bulbs........................................ 350
Fog Lamp Bulbs................................................. 348
Front Park and Direction Indicator Lamp Bulbs.................................................................. 347
Headlamp Bulbs................................................ 348
License Plate Lamp Bulb............................... 350
Rear Lamps, Brake Lamps, Rear Direction Indicator and Reversing Lamp
Bulbs................................................................. 349
Changing a Fuse
...........................................318
Fuses....................................................................... 318
Changing a Road Wheel...........................398 Dissimilar Spare Wheel and Tire Assembly
Information..................................................... 398
Location of the Spare Tire and Tools........399
Removing the Spare Tire (With Spare Tire Carrier Only).................................................. 400
Tire Change Procedure.................................... 401
Changing the 12V Battery
.........................343
Battery Management System....................... 345
Changing the Coalescer Filter Element.........................................................327
Changing the Engine Air Filter - 6.2L/ 6.8L................................................................353
Changing the Engine Air Filter - 6.7L Diesel
.............................................................354
Air Filter Restriction Gauge............................ 355
Changing the Engine-Mounted and Diesel Fuel Conditioner Module Fuel
Filters - 6.7L Diesel
...................................356
Diesel Fuel Conditioner Module
Filter................................................................... 356
622
Super Duty (TFE) Canada/United States of America, enUSA, First Printing Index