2017 FORD SUPER DUTY air filter
[x] Cancel search: air filterPage 326 of 636
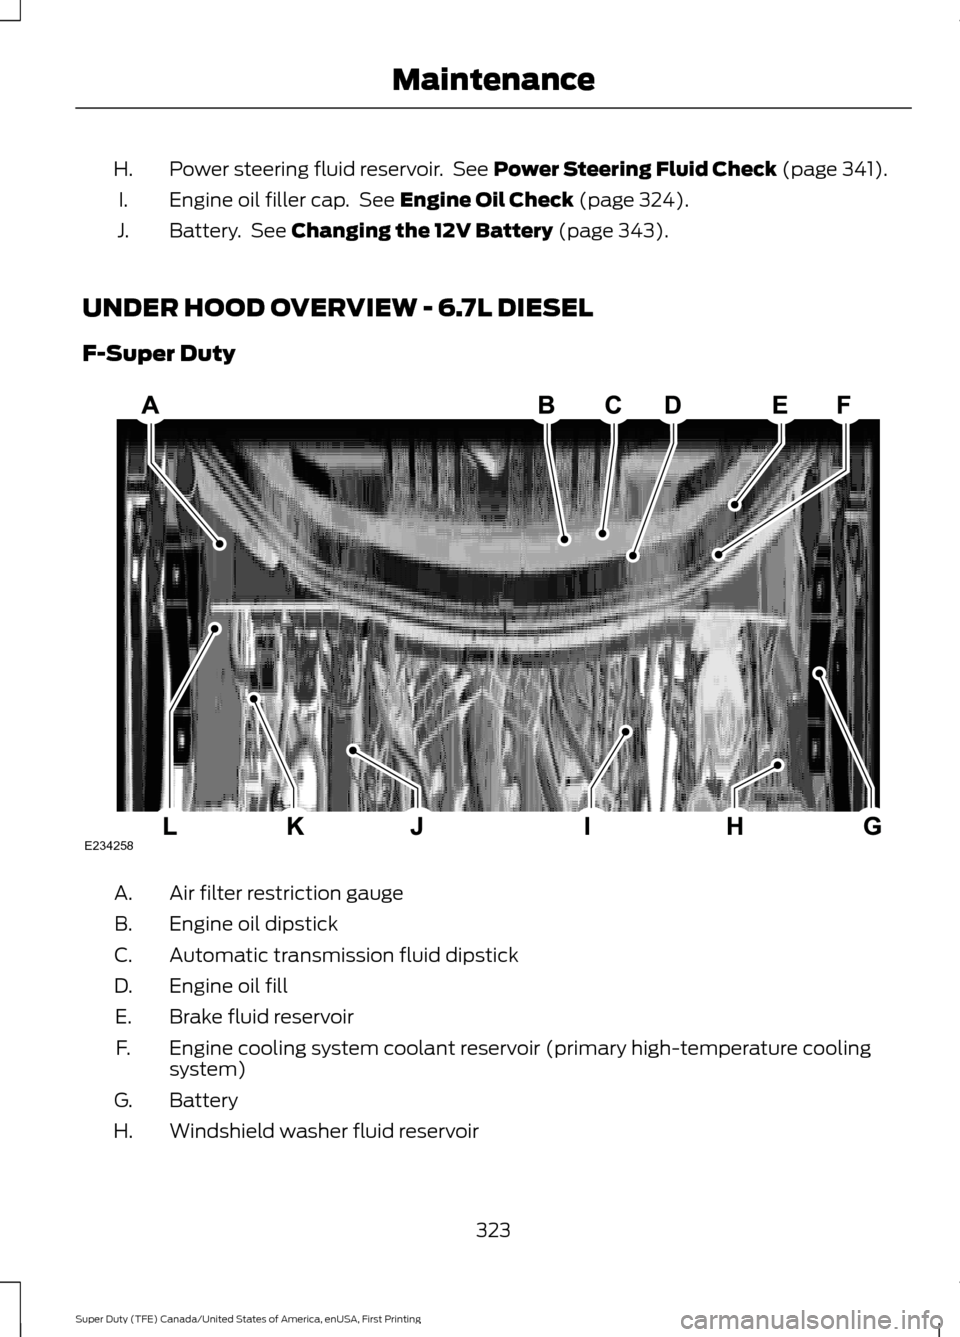
Power steering fluid reservoir. See Power Steering Fluid Check (page 341).
H.
Engine oil filler cap. See
Engine Oil Check (page 324).
I.
Battery. See
Changing the 12V Battery (page 343).
J.
UNDER HOOD OVERVIEW - 6.7L DIESEL
F-Super Duty Air filter restriction gauge
A.
Engine oil dipstick
B.
Automatic transmission fluid dipstick
C.
Engine oil fill
D.
Brake fluid reservoir
E.
Engine cooling system coolant reservoir (primary high-temperature cooling
system)
F.
Battery
G.
Windshield washer fluid reservoir
H.
323
Super Duty (TFE) Canada/United States of America, enUSA, First Printing MaintenanceE234258
Page 327 of 636
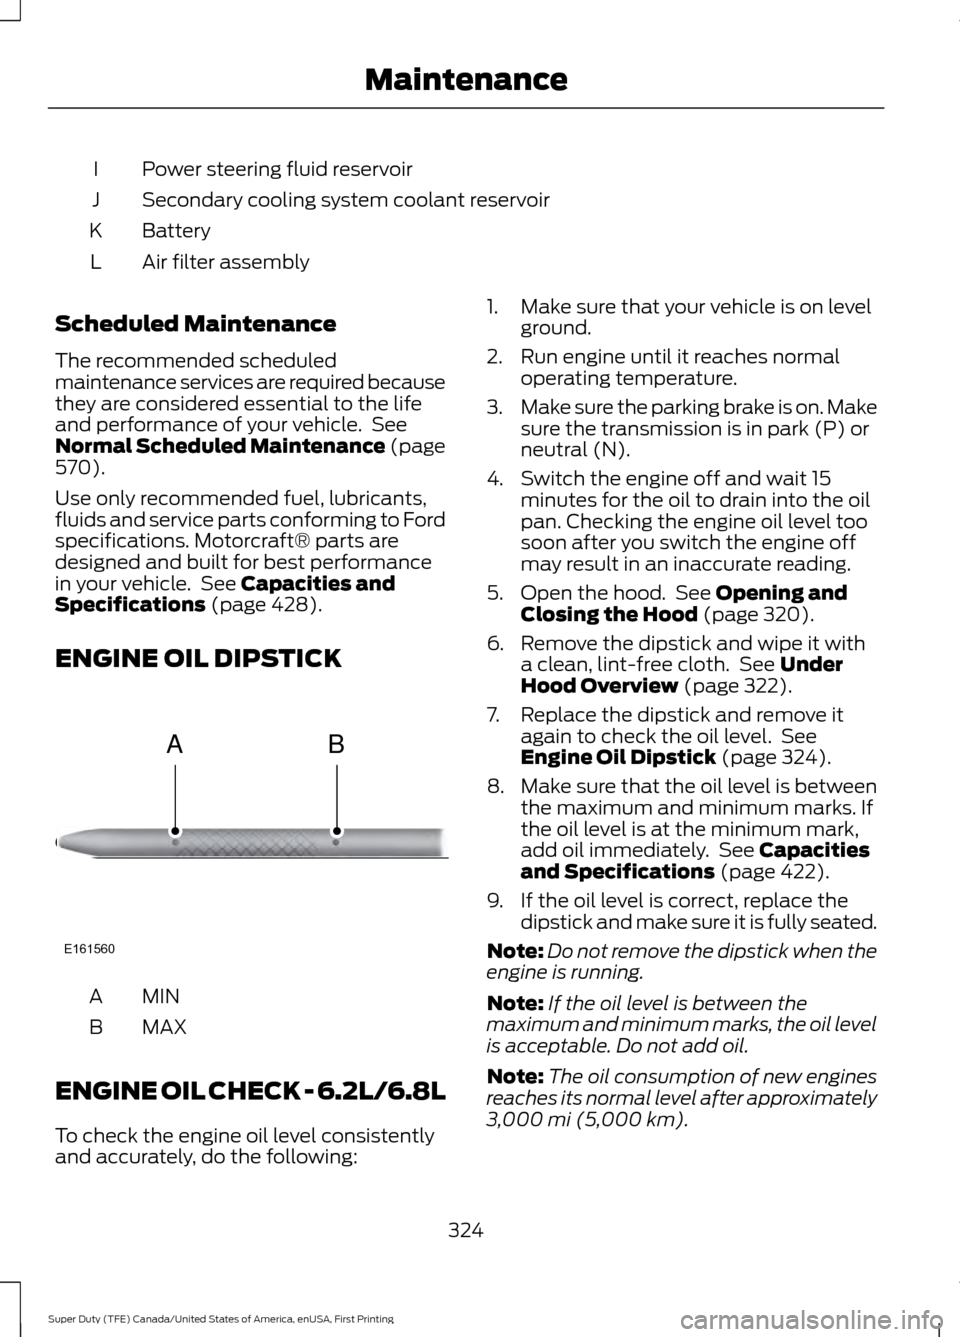
Power steering fluid reservoir
I
Secondary cooling system coolant reservoir
J
Battery
K
Air filter assembly
L
Scheduled Maintenance
The recommended scheduled
maintenance services are required because
they are considered essential to the life
and performance of your vehicle. See
Normal Scheduled Maintenance (page
570).
Use only recommended fuel, lubricants,
fluids and service parts conforming to Ford
specifications. Motorcraft® parts are
designed and built for best performance
in your vehicle. See
Capacities and
Specifications (page 428).
ENGINE OIL DIPSTICK MINA
MAX
B
ENGINE OIL CHECK - 6.2L/6.8L
To check the engine oil level consistently
and accurately, do the following: 1. Make sure that your vehicle is on level
ground.
2. Run engine until it reaches normal operating temperature.
3. Make sure the parking brake is on. Make
sure the transmission is in park (P) or
neutral (N).
4. Switch the engine off and wait 15 minutes for the oil to drain into the oil
pan. Checking the engine oil level too
soon after you switch the engine off
may result in an inaccurate reading.
5. Open the hood. See Opening and
Closing the Hood (page 320).
6. Remove the dipstick and wipe it with a clean, lint-free cloth. See
Under
Hood Overview (page 322).
7. Replace the dipstick and remove it again to check the oil level. See
Engine Oil Dipstick
(page 324).
8. Make sure that the oil level is between
the maximum and minimum marks. If
the oil level is at the minimum mark,
add oil immediately. See
Capacities
and Specifications (page 422).
9. If the oil level is correct, replace the dipstick and make sure it is fully seated.
Note: Do not remove the dipstick when the
engine is running.
Note: If the oil level is between the
maximum and minimum marks, the oil level
is acceptable. Do not add oil.
Note: The oil consumption of new engines
reaches its normal level after approximately
3,000 mi (5,000 km)
.
324
Super Duty (TFE) Canada/United States of America, enUSA, First Printing MaintenanceE161560
AB
Page 330 of 636
WARNINGS
Continuous contact with used motor
oil has caused cancer in laboratory
mice. Protect your skin by washing
with soap and water. If your vehicle is equipped with a diesel
engine, an Intelligent Oil Life Monitor™
calculates the proper oil change service
interval. When the information display
indicates: OIL CHANGE REQUIRED, change
the engine oil and oil filter. See
Information Displays (page 111).
The engine oil filter protects your engine
by filtering harmful, abrasive or sludge
particles and particles significantly smaller
than most available will-fit filters. See
Motorcraft Parts
(page 414).
1. Unscrew the oil filter and oil pan drain plug and wait for the oil to drain.
2. Replace the filter.
3. Reinstall the oil pan drain plug.
4. Refill the engine with new oil. See Capacities and Specifications (page
428
).
5. For diesel engines, you need to reset the Intelligent Oil Life Monitor™. See
Information Displays
(page 111).
Engine lubrication for severe
service operation
The following conditions define severe
operation for which engine operation with
SAE 5W-40 API CJ-4 is recommended. Oil
and oil filter change intervals will be
determined by the Intelligent Oil Life
Monitor™ as noted previously.
• Frequent or extended idling (over 10
minutes per hour of normal driving).
• Low-speed operation/stationary use.
• If vehicle is operated in sustained
ambient temperatures below
-9°F
(-23°C) or above 100°F (38°C). •
Frequent low-speed operation,
consistent heavy traffic less than
25 mph (40 km/h)
.
• Operating in severe dust conditions.
• Operating the vehicle off road.
• Towing a trailer over
1,000 mi
(1,600 km).
• Sustained, high-speed driving at Gross
Vehicle Weight Rating (maximum
loaded weight for vehicle operation).
• Use of fuels with sulfur content other
than ultra-low sulfur diesel (ULSD).
• Use of high-sulfur diesel fuel.
CHANGING THE COALESCER
FILTER ELEMENT WARNING
Do not dispose of engine oil or oil
filters in the household refuse or the
public sewage system. Use an
authorized waste disposal facility. Do not clean or recondition the filter
element.
We recommend that you demand the use
of genuine Ford and Motorcraft® parts
whenever your vehicle requires scheduled
maintenance or repair. Use the correct
specification filter element. See
Motorcraft Parts
(page 415).
Note: Operating your vehicle without a filter
element or with an unapproved filter
element may result in damage to the turbo
charger or exchanger and could lead to
engine damage that may not be covered by
the vehicle Warranty.
327
Super Duty (TFE) Canada/United States of America, enUSA, First Printing Maintenance
Page 340 of 636
Coolant Change
At specific mileage intervals, as listed in
the scheduled maintenance information,
the coolant should be changed. The
information display may display a message
to change coolant at this time. Add
prediluted coolant approved to the correct
specification. See Capacities and
Specifications (page 411).
Engine-driven Cooling Fan (Fan
Clutch)
Your vehicle may have an engine driven
cooling fan drive (also called a fan clutch).
This fan drive changes the fan speed to
match the vehicle ’s changing cooling air
flow requirements. Fan speed, fan noise
level and fuel consumption all will increase
based on the driving conditions that
include trailer towing, hill climbing, heavy
loads, high speed and high ambient
temperature, individually or in combination.
The fan drive is designed to provide the
minimum fan speed (and resulting
minimum fan noise and fuel consumption)
required to meet the ever changing vehicle
cooling air flow requirements. You will hear
the amount of fan noise increasing and
decreasing as the engine power
requirements and vehicle driving conditions
change as you drive. This is to be expected
as being normal to the operation of your
vehicle. High levels of fan noise might also
be heard when your engine is first started,
and should normally decrease after driving
for a short time.
AUTOMATIC TRANSMISSION
FLUID CHECK
Have an authorized dealer check and
change the transmission fluid and filter at
the correct service interval. See
Scheduled Maintenance
(page 567). Do not use supplemental transmission
fluid additives, treatments or cleaning
agents. The use of these materials may
affect transmission operation and result
in damage to internal transmission
components.
Checking Automatic Transmission
Fluid
For scheduled intervals of the fluid checks
and changes, See
Scheduled
Maintenance (page 567). Your
transmission does not consume fluid.
However, the fluid level should be checked
if the transmission is not working properly,
i.e., if the transmission slips or shifts slowly
or if you notice some sign of fluid leakage.
Automatic transmission fluid expands
when warmed. To obtain an accurate fluid
check, drive the vehicle until it is at normal
operating temperature (approximately
19 mi (30 km)
). Verify that the
transmission fluid temperature gauge,
located on the instrument cluster, is within
normal range.
1. Drive the vehicle
19 mi (30 km)until it
reaches normal operating temperature.
2. Park the vehicle on a level surface and
engage the parking brake.
3. With the engine running, parking brake
engaged and your foot on the brake
pedal, move the gearshift lever through
all of the gear ranges. Allow sufficient
time for each gear to engage.
4. Latch the gearshift lever in P and leave
the engine running.
5. Remove the dipstick, wiping it clean with a clean, dry lint free rag. If
necessary, refer to the Under Hood
Overview in this chapter for the
location of the dipstick.
337
Super Duty (TFE) Canada/United States of America, enUSA, First Printing Maintenance
Page 346 of 636
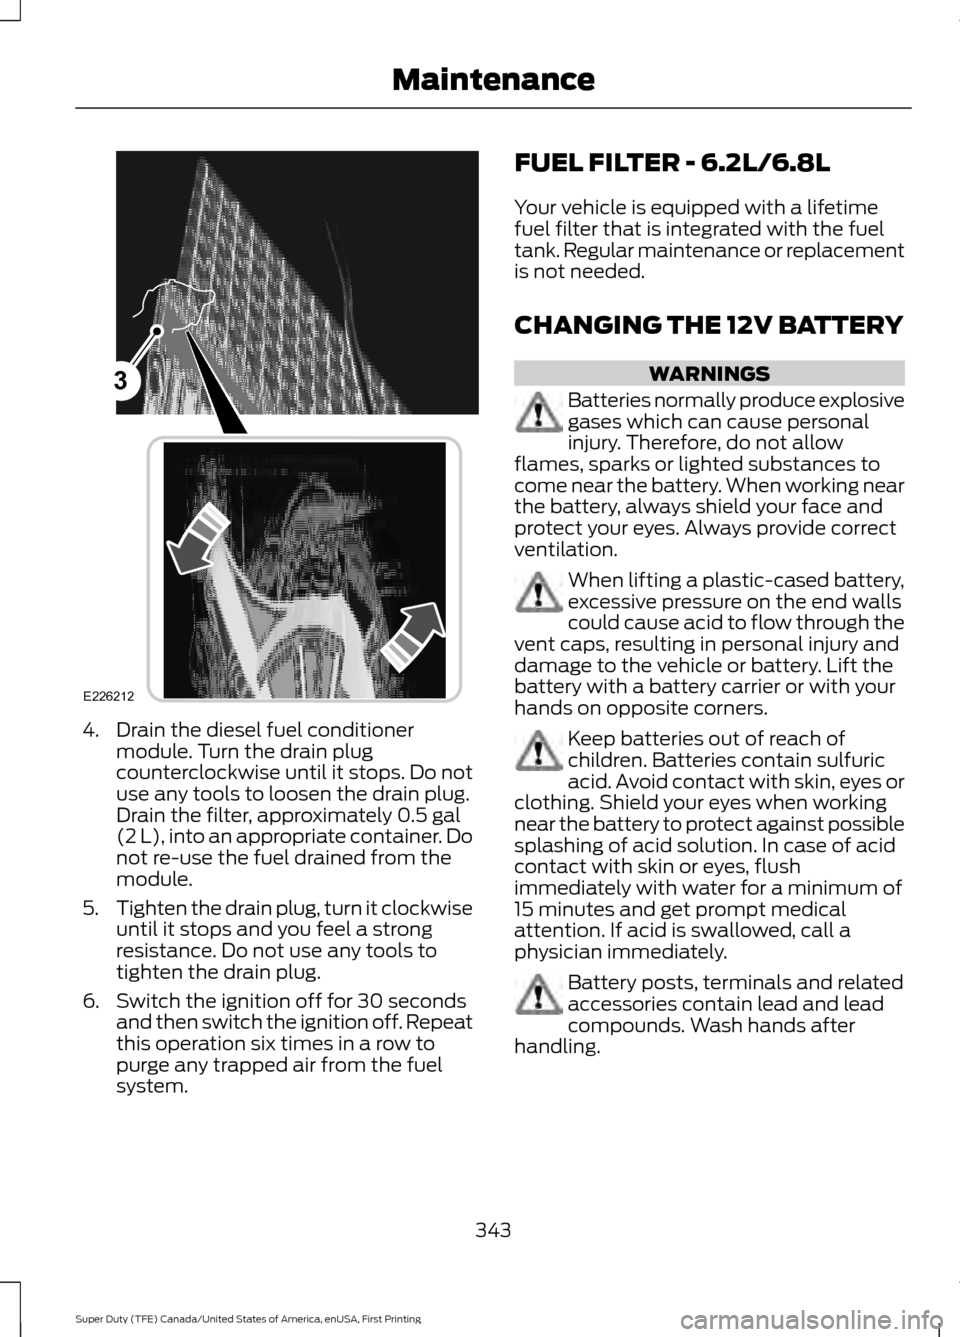
4. Drain the diesel fuel conditioner
module. Turn the drain plug
counterclockwise until it stops. Do not
use any tools to loosen the drain plug.
Drain the filter, approximately 0.5 gal
(2 L), into an appropriate container. Do
not re-use the fuel drained from the
module.
5. Tighten the drain plug, turn it clockwise
until it stops and you feel a strong
resistance. Do not use any tools to
tighten the drain plug.
6. Switch the ignition off for 30 seconds and then switch the ignition off. Repeat
this operation six times in a row to
purge any trapped air from the fuel
system. FUEL FILTER - 6.2L/6.8L
Your vehicle is equipped with a lifetime
fuel filter that is integrated with the fuel
tank. Regular maintenance or replacement
is not needed.
CHANGING THE 12V BATTERY
WARNINGS
Batteries normally produce explosive
gases which can cause personal
injury. Therefore, do not allow
flames, sparks or lighted substances to
come near the battery. When working near
the battery, always shield your face and
protect your eyes. Always provide correct
ventilation. When lifting a plastic-cased battery,
excessive pressure on the end walls
could cause acid to flow through the
vent caps, resulting in personal injury and
damage to the vehicle or battery. Lift the
battery with a battery carrier or with your
hands on opposite corners. Keep batteries out of reach of
children. Batteries contain sulfuric
acid. Avoid contact with skin, eyes or
clothing. Shield your eyes when working
near the battery to protect against possible
splashing of acid solution. In case of acid
contact with skin or eyes, flush
immediately with water for a minimum of
15 minutes and get prompt medical
attention. If acid is swallowed, call a
physician immediately. Battery posts, terminals and related
accessories contain lead and lead
compounds. Wash hands after
handling.
343
Super Duty (TFE) Canada/United States of America, enUSA, First Printing Maintenance3
E226212
Page 350 of 636
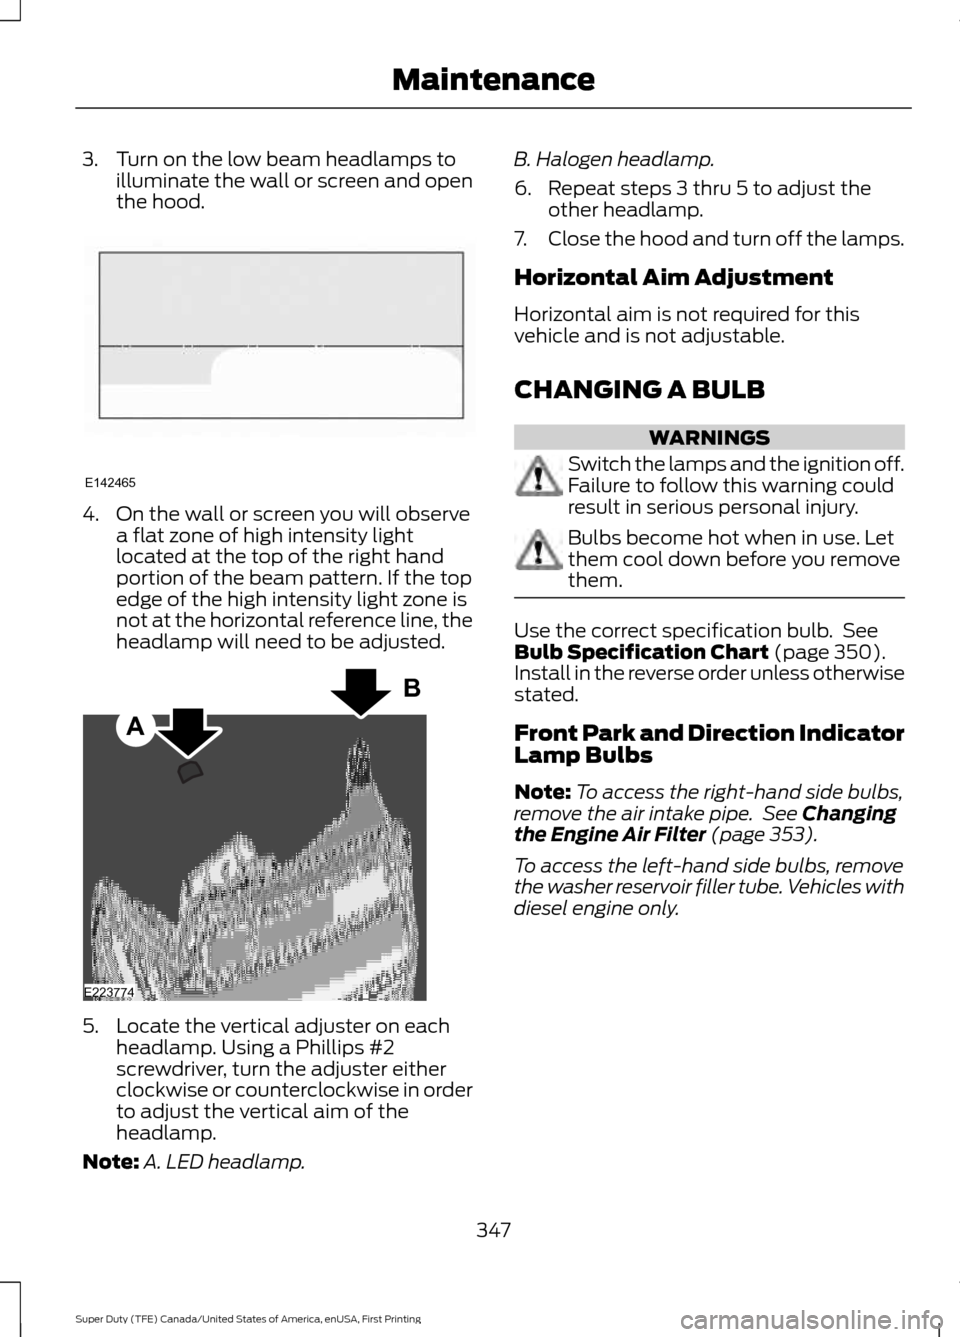
3. Turn on the low beam headlamps to
illuminate the wall or screen and open
the hood. 4. On the wall or screen you will observe
a flat zone of high intensity light
located at the top of the right hand
portion of the beam pattern. If the top
edge of the high intensity light zone is
not at the horizontal reference line, the
headlamp will need to be adjusted. 5. Locate the vertical adjuster on each
headlamp. Using a Phillips #2
screwdriver, turn the adjuster either
clockwise or counterclockwise in order
to adjust the vertical aim of the
headlamp.
Note: A. LED headlamp. B. Halogen headlamp.
6. Repeat steps 3 thru 5 to adjust the
other headlamp.
7. Close the hood and turn off the lamps.
Horizontal Aim Adjustment
Horizontal aim is not required for this
vehicle and is not adjustable.
CHANGING A BULB WARNINGS
Switch the lamps and the ignition off.
Failure to follow this warning could
result in serious personal injury.
Bulbs become hot when in use. Let
them cool down before you remove
them.
Use the correct specification bulb. See
Bulb Specification Chart (page 350).
Install in the reverse order unless otherwise
stated.
Front Park and Direction Indicator
Lamp Bulbs
Note: To access the right-hand side bulbs,
remove the air intake pipe. See
Changing
the Engine Air Filter (page 353).
To access the left-hand side bulbs, remove
the washer reservoir filler tube. Vehicles with
diesel engine only.
347
Super Duty (TFE) Canada/United States of America, enUSA, First Printing MaintenanceE142465 A
B
E223774
Page 351 of 636
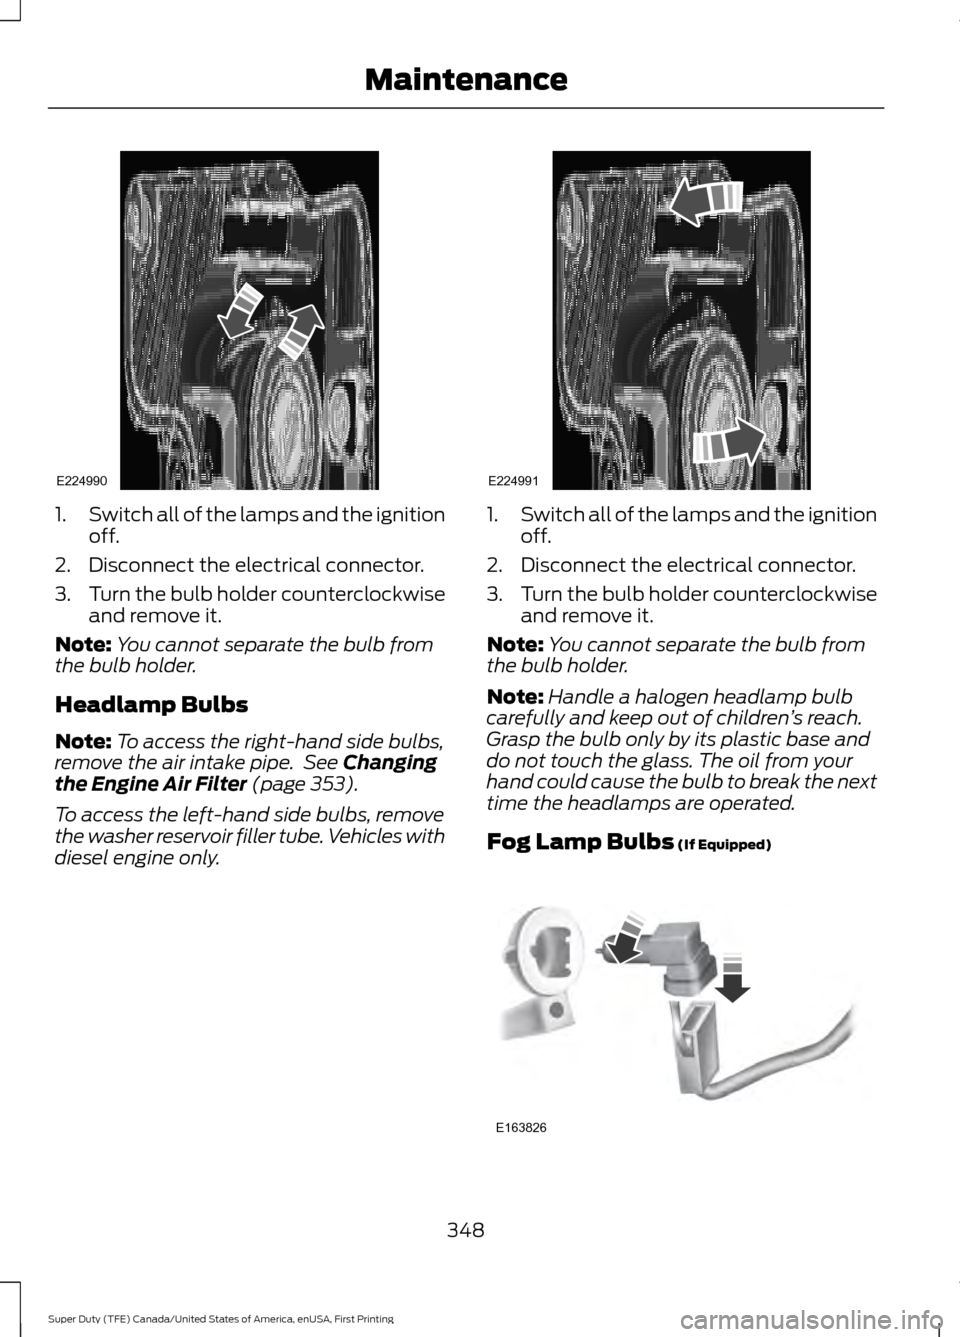
1.
Switch all of the lamps and the ignition
off.
2. Disconnect the electrical connector.
3. Turn the bulb holder counterclockwise
and remove it.
Note: You cannot separate the bulb from
the bulb holder.
Headlamp Bulbs
Note: To access the right-hand side bulbs,
remove the air intake pipe. See Changing
the Engine Air Filter (page 353).
To access the left-hand side bulbs, remove
the washer reservoir filler tube. Vehicles with
diesel engine only. 1.
Switch all of the lamps and the ignition
off.
2. Disconnect the electrical connector.
3. Turn the bulb holder counterclockwise
and remove it.
Note: You cannot separate the bulb from
the bulb holder.
Note: Handle a halogen headlamp bulb
carefully and keep out of children ’s reach.
Grasp the bulb only by its plastic base and
do not touch the glass. The oil from your
hand could cause the bulb to break the next
time the headlamps are operated.
Fog Lamp Bulbs
(If Equipped) 348
Super Duty (TFE) Canada/United States of America, enUSA, First Printing MaintenanceE224990 E224991 E163826
Page 356 of 636
CHANGING THE ENGINE AIR
FILTER - 6.2L/6.8L
WARNING
To reduce the risk of vehicle damage
and personal burn injuries, do not
start your engine with the air cleaner
removed and do not remove it while the
engine is running. Use the correct specification air filter
element. See Motorcraft Parts (page
414).
Note: Failure to use the correct air filter
element may result in severe engine
damage. Resulting component damage
may not be covered by the vehicle Warranty.
Change the air filter element at the correct
service interval. See
Scheduled
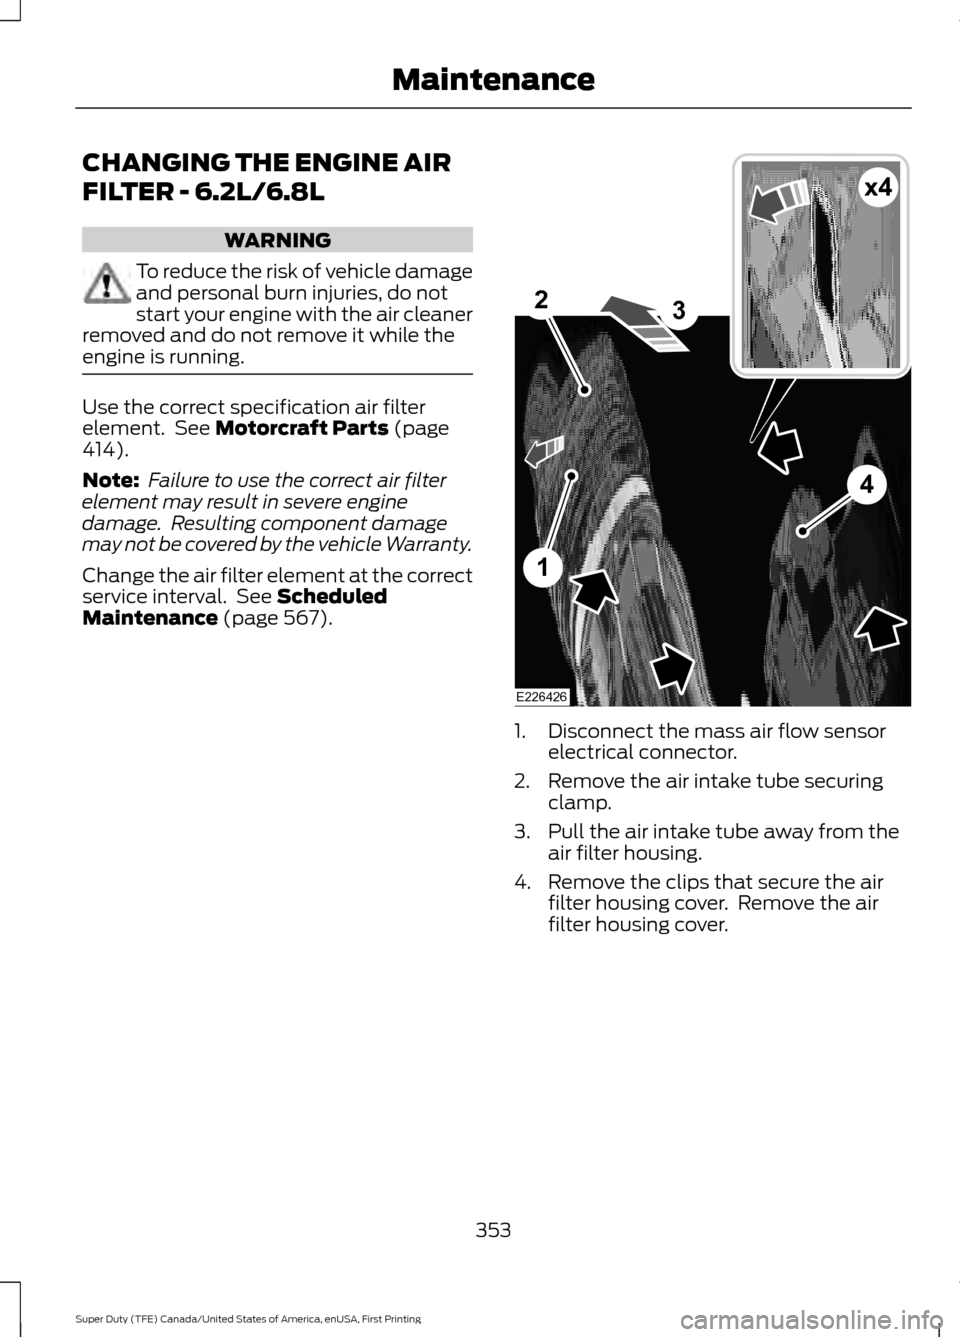
Maintenance (page 567). 1. Disconnect the mass air flow sensor
electrical connector.
2. Remove the air intake tube securing clamp.
3. Pull the air intake tube away from the air filter housing.
4. Remove the clips that secure the air filter housing cover. Remove the air
filter housing cover.
353
Super Duty (TFE) Canada/United States of America, enUSA, First Printing MaintenanceE226426
x4
1
2
4
3