2017 FORD F450 SUPER DUTY load capacity
[x] Cancel search: load capacityPage 171 of 642
12 Volt DC Power Point
WARNINGS
Do not plug optional electricalaccessories into the cigar lightersocket. Incorrect use of the cigarlighter can cause damage not covered bythe vehicle warranty, and can result in fireor serious injury.
Do not use a power point foroperating a cigar lighter. Incorrectuse of the power points can causedamage not covered by the vehiclewarranty, and can result in fire or seriousinjury.
Note:When you switch the ignition on, youcan use the socket to power 12 voltappliances with a maximum current ratingof 20 amps.
Note:Do not plug in any device thatsupplies power to the vehicle through thepower points, this may result in damage tovehicle systems.
Note:Do not hang any accessory from theaccessory plug.
Note:Do not use the power point over thevehicle capacity of 12 volt DC 240 watts ora fuse may blow.
Note:Always keep the power point capsclosed when not in use.
Do not insert objects other than anaccessory plug into the power point. Thiswill damage the power point and blow thefuse.
Run the vehicle for full capacity use of thepower point.
To prevent the battery from running out ofcharge:
•Do not use the power point longer thannecessary when the vehicle is notrunning.
•Do not leave devices plugged inovernight or when you park your vehiclefor extended periods.
Locations
Power points may be in the followinglocations:
•On the instrument panel.
•Inside the center console.
•On the rear of the center console.
•Inside the front under-seat storagecompartment.
Note:Timed power points remain on for 30minutes if the vehicle is in accessory mode.If you switch the vehicle off, the timedpower points remain on for 75 minutes.
110 Volt - 400 Watt Capacity ACPower Outlet
WARNING
Do not keep electrical devicesplugged in the power point wheneverthe device is not in use. Do not useany extension cord with the 110 volt ACpower point, since it will defeat the safetyprotection design. Doing so may cause thepower point to overload due to poweringmultiple devices that can reach beyondthe 400 watt load limit and could result infire or serious injury.
168
Super Duty (TFE) Canada/United States of America, enUSA, Edition date: 201710, Second Printing
Auxiliary Power Points
Page 265 of 642
Payload is the combined weightof cargo and passengers that yourvehicle is carrying. The maximumpayload for your vehicle appearson the Tire and Loading label. Thelabel is either on the B-pillar or theedge of the driver door. Vehiclesexported outside the US andCanada may not have a tire andloading label. Look for “Thecombined weight of occupantsand cargo should never exceedXXX kg OR XXX lb” for maximumpayload. The payload listed on theTire and Loading Information labelis the maximum payload for yourvehicle as built by the assemblyplant. If you install any additionalequipment on your vehicle, youmust determine the new payload.Subtract the weight of theequipment from the payload listedon the Tire and Loading label.When towing, trailer tongueweight or king pin weight is alsopart of payload.
WARNING
The appropriate loadingcapacity of your vehicle canbe limited either by volumecapacity (how much space isavailable) or by payload capacity(how much weight the vehicleshould carry). Once you havereached the maximum payload ofyour vehicle, do not add morecargo, even if there is spaceavailable. Overloading orimproperly loading your vehicle
can contribute to loss of vehiclecontrol and vehicle rollover.
GAWR (Gross Axle WeightRating)
GAWR is the maximum allowableweight that a single axle (front orrear) can carry. These numbersare on the Safety ComplianceCertification label. The label islocated on the door hinge pillar,door-latch post, or the door edgethat meets the door-latch post,next to the driver seating position.
The total load on each axle mustnever exceed its Gross AxleWeight Rating.
GVWR (Gross Vehicle WeightRating)
GVWR is the maximum allowableweight of the fully loaded vehicle.
This includes all options,equipment, passengers and cargo.It appears on the SafetyCompliance Certification label.The label is located on the doorhinge pillar, door-latch post, or thedoor edge that meets thedoor-latch post, next to the driverseating position.
The gross vehicle weight mustnever exceed the Gross VehicleWeight Rating.
262
Super Duty (TFE) Canada/United States of America, enUSA, Edition date: 201710, Second Printing
Load Carrying
Page 267 of 642
Steps for determining thecorrect load limit:
1. Locate the statement "Thecombined weight of occupantsand cargo should never exceedXXX kg or XXX lb." on yourvehicle’s placard.
2.Determine the combinedweight of the driver andpassengers that will be ridingin your vehicle.
3.Subtract the combined weightof the driver and passengersfrom XXX kg or XXX lb.
4.The resulting figure equals theavailable amount of cargo andluggage load capacity. Forexample, if the “XXX” amountequals 1,400 lb. and there willbe five 150 lb. passengers inyour vehicle, the amount ofavailable cargo and luggageload capacity is 650 lb.(1400-750 (5 x 150) = 650 lb.)
5.Determine the combinedweight of luggage and cargobeing loaded on the vehicle.That weight may not safelyexceed the available cargo andluggage load capacitycalculated in Step 4.
6.If your vehicle will be towing atrailer, load from your trailerwill be transferred to yourvehicle. Consult this manual todetermine how this reduces theavailable cargo and luggage
load capacity of your vehicle.
Helpful examples for calculatingthe available amount of cargoand luggage load capacity
Suppose your vehicle has a1400-pound (635-kilogram) cargoand luggage capacity. You decideto go golfing. Is there enough loadcapacity to carry you, four of yourfriends and all the golf bags? Youand four friends average 220pounds (99 kilograms) each andthe golf bags weigh approximately30 pounds (13.5 kilograms) each.The calculation would be: 1400 -(5 x 220) - (5 x 30) = 1400 - 1100- 150 = 150 pounds. Yes, you haveenough load capacity in yourvehicle to transport four friendsand your golf bags. In metric units,the calculation would be: 635kilograms - (5 x 99 kilograms) -(5 x 13.5 kilograms) = 635 - 495 -67.5 = 72.5 kilograms.
Suppose your vehicle has a1400-pound (635-kilogram) cargoand luggage capacity. You andone of your friends decide to pickup cement from the local homeimprovement store to finish thatpatio you have been planning forthe past two years. Measuring theinside of the vehicle with the rearseat folded down, you have roomfor twelve 100-pound(45-kilogram) bags of cement. Doyou have enough load capacity totransport the cement to yourhome? If you and your friend eachweigh 220 pounds (99 kilograms),
the calculation would be: 1400 -(2 x 220) - (12 x 100) = 1400 - 440
264
Super Duty (TFE) Canada/United States of America, enUSA, Edition date: 201710, Second Printing
Load Carrying
Page 268 of 642
- 1200 = - 240 pounds. No, you donot have enough cargo capacityto carry that much weight. Inmetric units, the calculation wouldbe: 635 kilograms - (2 x 99kilograms) - (12 x 45 kilograms) =635 - 198 - 540 = -103 kilograms.You will need to reduce the loadweight by at least 240 pounds(104 kilograms). If you removethree 100-pound (45-kilogram)cement bags, then the loadcalculation would be:1400 - (2 x220) - (9 x 100) = 1400 - 440 -900 = 60 pounds. Now you havethe load capacity to transport thecement and your friend home. Inmetric units, the calculation wouldbe: 635 kilograms - (2 x 99kilograms) - (9 x 45 kilograms) =635 - 198 - 405 = 32 kilograms.
The above calculations alsoassume that the loads arepositioned in your vehicle in amanner that does not overloadthe front or the rear gross axleweight rating specified for yourvehicle on the Safety ComplianceCertification label.
Special Loading Instructionsfor Owners of Pick-up Trucksand Utility-type Vehicles
WARNING
Loaded vehicles may handledifferently than unloadedvehicles. Take extra precautions,such as slower speeds andincreased stopping distance, whendriving a heavily loaded vehicle.
BED RAMPS (If Equipped)
WARNINGS
The slide action of the ramp is apinch point. Do not place fingers orhands in the pinch point.
Extend and retract the ramp onlywhen connected to the tailgateplate.
Be sure the ramp is installedcorrectly when loading andunloading equipment on and off theramp.
Do not step or sit on the ramp whenit is in the stowed position.
Install the ramp only within theprescribed ramp angles.
Note:The ramp maximum capacity is800 lb (363 kg).
Note:Verify the ramp is on stable groundbefore usage.
Note:For loading and unloadingequipment, your ramp should be setbetween 10° upward and 26° downward toavoid damage to the ramp claw and tailgateplate.
Using the Bed Ramp
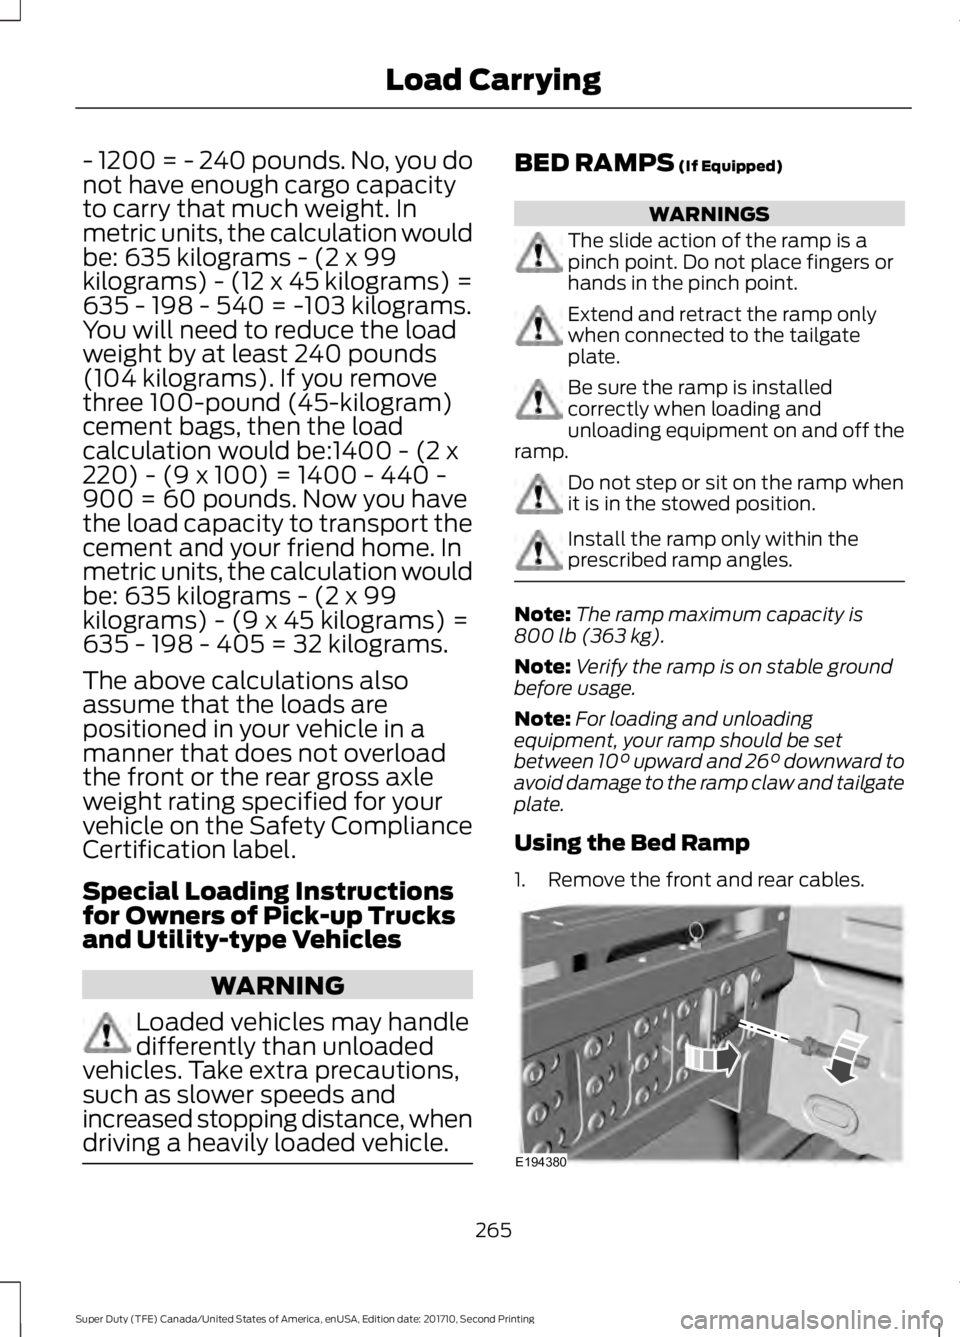
1. Remove the front and rear cables.
265
Super Duty (TFE) Canada/United States of America, enUSA, Edition date: 201710, Second Printing
Load CarryingE194380
Page 271 of 642
TOWING A TRAILER
WARNINGS
Towing trailers beyond themaximum recommendedgross trailer weight exceeds thelimit of your vehicle and couldresult in engine damage,transmission damage, structuraldamage, loss of vehicle control,vehicle rollover and personalinjury.
Do not exceed the GVWR orthe GAWR specified on thecertification label.
Note: See RecommendedTowing Weights (page 277).
Your vehicle may have electricalitems, such as fuses or relays,related to towing. See Fuses(page 312).
Your vehicle's load capacitydesignation is by weight, not byvolume, so you cannot necessarilyuse all available space whenloading a vehicle or trailer.
Towing a trailer places an extraload on your vehicle's engine,transmission, axle, brakes, tiresand suspension. Inspect thesecomponents periodically during,and after, any towing operation.
Load Placement
To help minimize how trailermovement affects your vehiclewhen driving:
•Load the heaviest items closestto the trailer floor.
•Load the heaviest itemscentered between the left andright side trailer tires.
•Load the heaviest items abovethe trailer axles or just slightlyforward toward the trailertongue. Do not allow the finaltrailer tongue weight to goabove or below 10-15% of theloaded trailer weight.
•Select a ball mount with thecorrect rise or drop and loadcapacity. When both theloaded vehicle and trailer areconnected, the trailer frameshould be level, or slightlyangled down toward yourvehicle, when viewed from theside.
When driving with a trailer orpayload, a slight takeoff vibrationor shudder may be present due tothe increased payload weight.Additional information regardingproper trailer loading and settingyour vehicle up for towing islocated in another chapter of thismanual. See Load Limit (page261).
You can also find information inthe RV & Trailer Towing Guideavailable at your authorizeddealer, or online.
268
Super Duty (TFE) Canada/United States of America, enUSA, Edition date: 201710, Second Printing
Towing
Page 379 of 642
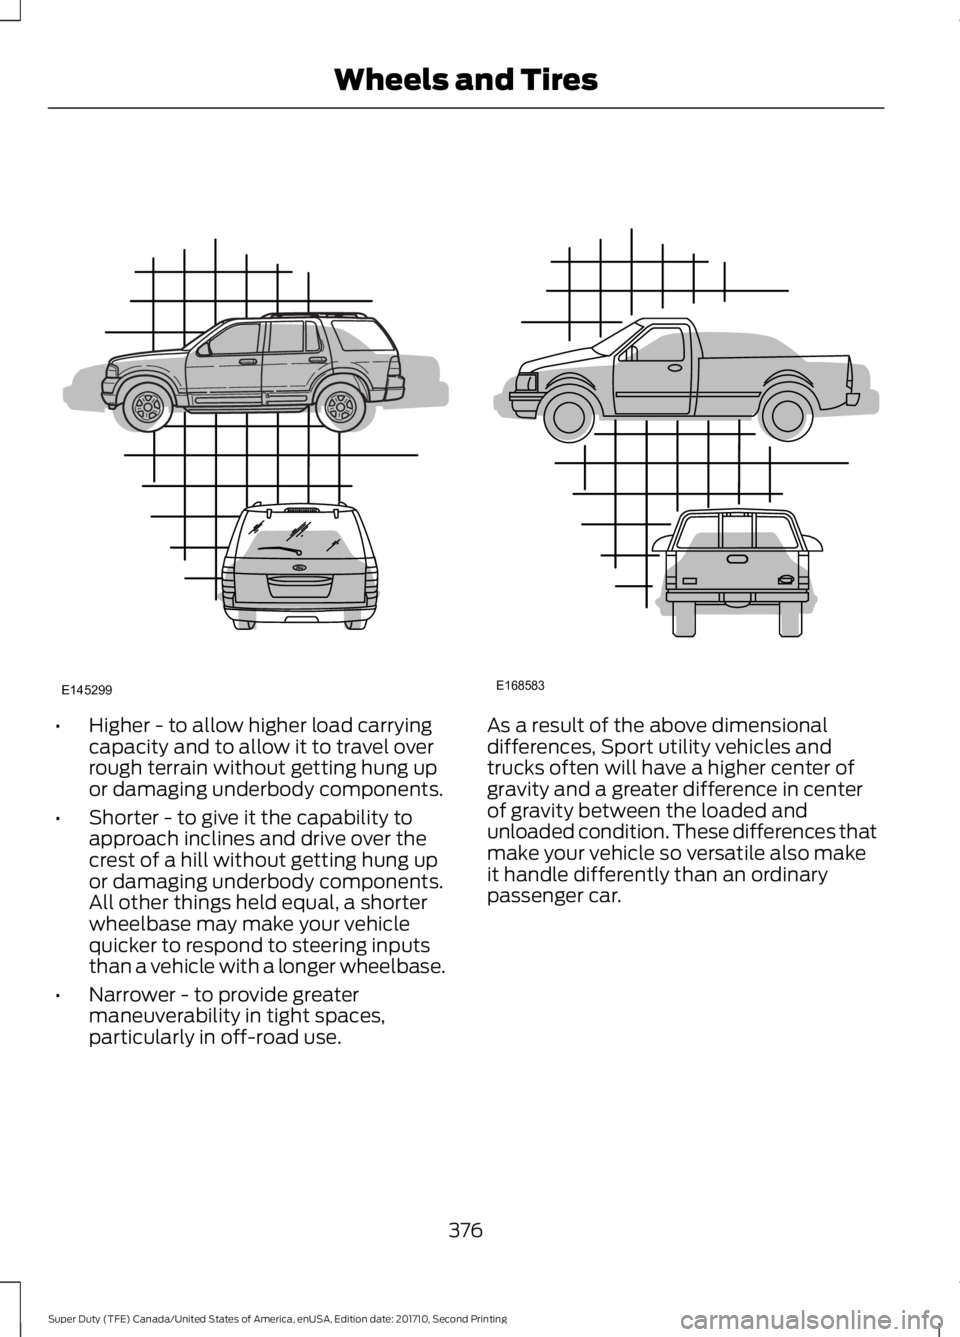
•Higher - to allow higher load carryingcapacity and to allow it to travel overrough terrain without getting hung upor damaging underbody components.
•Shorter - to give it the capability toapproach inclines and drive over thecrest of a hill without getting hung upor damaging underbody components.All other things held equal, a shorterwheelbase may make your vehiclequicker to respond to steering inputsthan a vehicle with a longer wheelbase.
•Narrower - to provide greatermaneuverability in tight spaces,particularly in off-road use.
As a result of the above dimensionaldifferences, Sport utility vehicles andtrucks often will have a higher center ofgravity and a greater difference in centerof gravity between the loaded andunloaded condition. These differences thatmake your vehicle so versatile also makeit handle differently than an ordinarypassenger car.
376
Super Duty (TFE) Canada/United States of America, enUSA, Edition date: 201710, Second Printing
Wheels and TiresE145299 E168583
Page 413 of 642

Rear: F-350 dual rear wheel
Rear: F-450 and F-550
Jacking the Vehicle
1. Insert the jack handle into the pumplinkage.
2. Use an up-and-down motion with thejack handle to raise the wheelcompletely off the ground.
Note:Hydraulic jacks are equipped with apressure release valve that prevents liftingloads which exceed the jack's ratedcapacity.
3. Remove the lug nuts with the lugwrench.
4.Replace the flat tire with the spare tire,making sure the valve stem is facingoutward on all front an inboard rearwheels. If you are replacing theoutboard wheel, the valve stem mustbe facing inward. Reinstall the lug nutsuntil the wheel is snug against the hub.Do not fully tighten the lug nuts untilthe wheel has been lowered.
5. Lower the wheel by slowly turning therelease valve counterclockwise.Opening the release valve slowly willprovide a more controlled rate ofdescent.
6. Remove the jack and fully tighten thelug nuts in the order shown. SeeTechnical Specifications (page 413).
7. Stow the flat tire. See Stowing the flator spare tire if the vehicle is equippedwith a spare tire carrier.
8. Stow the jack, jack handle and lugwrench. Make sure the jack is securelyfastened so it does not rattle whendriving.
9. Unblock the wheels.
410
Super Duty (TFE) Canada/United States of America, enUSA, Edition date: 201710, Second Printing
Wheels and TiresE162817 E162818 E162819