2017 FORD F150 change wheel
[x] Cancel search: change wheelPage 7 of 599

Load Carrying
Load Retaining Fixtures.............................247
Load Limit......................................................248
Bed Access
.....................................................252
Bed Ramps
.....................................................253
Towing
Towing a Trailer
............................................256
Trailer Reversing Aids..................................257
Trailer Sway Control....................................267
Recommended Towing Weights............267
Essential Towing Checks..........................278
Towing the Vehicle on Four Wheels
......285
Driving Hints
Breaking-In....................................................288
Economical Driving
.....................................288
Driving Through Water
..............................289
Floor Mats
......................................................289
Snowplowing................................................290
Roadside Emergencies
Roadside Assistance..................................293
Hazard Warning Flashers.........................294
Fuel Shutoff...................................................294
Jump Starting the Vehicle........................295
Post-Crash Alert System
..........................297
Transporting the Vehicle...........................297
Towing Points
...............................................298
Customer Assistance
Getting the Services You Need..............300
In California (U.S. Only).............................301
The Better Business Bureau (BBB) Auto Line Program (U.S. Only).....................302
Utilizing the Mediation/Arbitration Program (Canada Only).......................303
Getting Assistance Outside the U.S. and Canada
........................................................303 Ordering Additional Owner's
Literature....................................................304
Reporting Safety Defects (U.S. Only)............................................................305
Reporting Safety Defects (Canada Only)............................................................305
Fuses
Fuse Specification Chart..........................307
Changing a Fuse............................................315
Maintenance
General Information
.....................................317
Opening and Closing the Hood...............317
Under Hood Overview - 2.7L EcoBoost™.................................................318
Under Hood Overview - 3.5L
....................319
Under Hood Overview - 3.5L Ecoboost™................................................320
Under Hood Overview - 5.0L....................321
Engine Oil Dipstick.......................................322
Engine Oil Check..........................................322
Oil Change Indicator Reset.......................323
Engine Coolant Check................................323
Automatic Transmission Fluid Check............................................................327
Transfer Case Fluid Check........................328
Brake Fluid Check
........................................328
Power Steering Fluid Check.....................328
Washer Fluid Check
....................................329
Fuel Filter........................................................329
Changing the 12V Battery.........................329
Checking the Wiper Blades.......................331
Changing the Wiper Blades......................331
Adjusting the Headlamps.........................332
Changing a Bulb
...........................................333
Bulb Specification Chart...........................337
Changing the Engine Air Filter................339
Vehicle Care
General Information
...................................340
4
F-150 (TFC) Canada/United States of America, enUSA, First Printing Table of Contents
Page 63 of 599
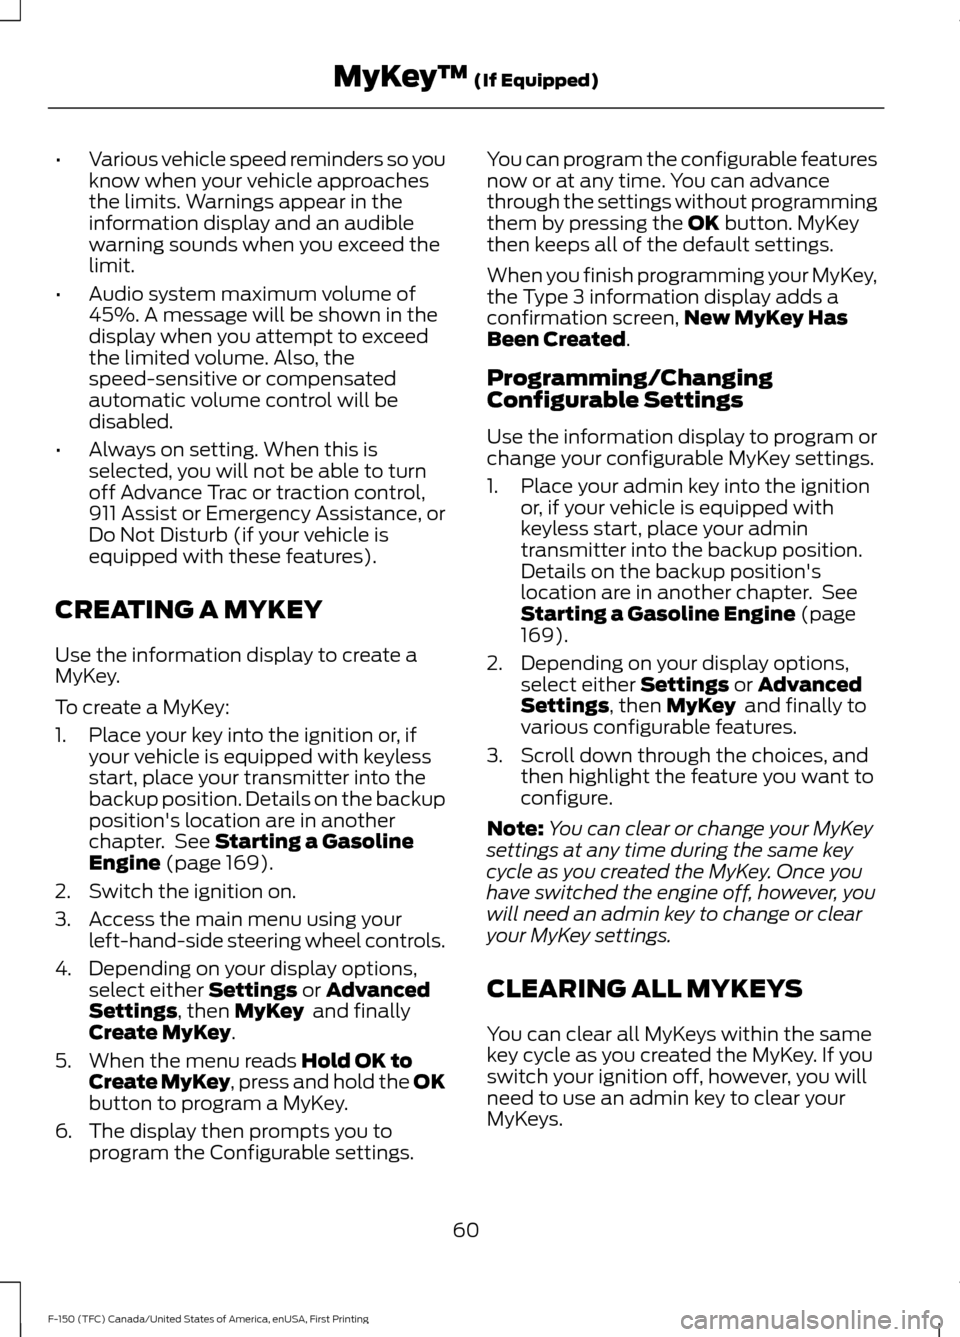
•
Various vehicle speed reminders so you
know when your vehicle approaches
the limits. Warnings appear in the
information display and an audible
warning sounds when you exceed the
limit.
• Audio system maximum volume of
45%. A message will be shown in the
display when you attempt to exceed
the limited volume. Also, the
speed-sensitive or compensated
automatic volume control will be
disabled.
• Always on setting. When this is
selected, you will not be able to turn
off Advance Trac or traction control,
911 Assist or Emergency Assistance, or
Do Not Disturb (if your vehicle is
equipped with these features).
CREATING A MYKEY
Use the information display to create a
MyKey.
To create a MyKey:
1. Place your key into the ignition or, if your vehicle is equipped with keyless
start, place your transmitter into the
backup position. Details on the backup
position's location are in another
chapter. See Starting a Gasoline
Engine (page 169).
2. Switch the ignition on.
3. Access the main menu using your left-hand-side steering wheel controls.
4. Depending on your display options, select either
Settings or Advanced
Settings, then MyKey and finally
Create MyKey.
5. When the menu reads
Hold OK to
Create MyKey, press and hold the OK
button to program a MyKey.
6. The display then prompts you to program the Configurable settings. You can program the configurable features
now or at any time. You can advance
through the settings without programming
them by pressing the
OK button. MyKey
then keeps all of the default settings.
When you finish programming your MyKey,
the Type 3 information display adds a
confirmation screen, New MyKey Has
Been Created
.
Programming/Changing
Configurable Settings
Use the information display to program or
change your configurable MyKey settings.
1. Place your admin key into the ignition or, if your vehicle is equipped with
keyless start, place your admin
transmitter into the backup position.
Details on the backup position's
location are in another chapter. See
Starting a Gasoline Engine
(page
169).
2. Depending on your display options, select either
Settings or Advanced
Settings, then MyKey and finally to
various configurable features.
3. Scroll down through the choices, and then highlight the feature you want to
configure.
Note: You can clear or change your MyKey
settings at any time during the same key
cycle as you created the MyKey. Once you
have switched the engine off, however, you
will need an admin key to change or clear
your MyKey settings.
CLEARING ALL MYKEYS
You can clear all MyKeys within the same
key cycle as you created the MyKey. If you
switch your ignition off, however, you will
need to use an admin key to clear your
MyKeys.
60
F-150 (TFC) Canada/United States of America, enUSA, First Printing MyKey
™
(If Equipped)
Page 119 of 599
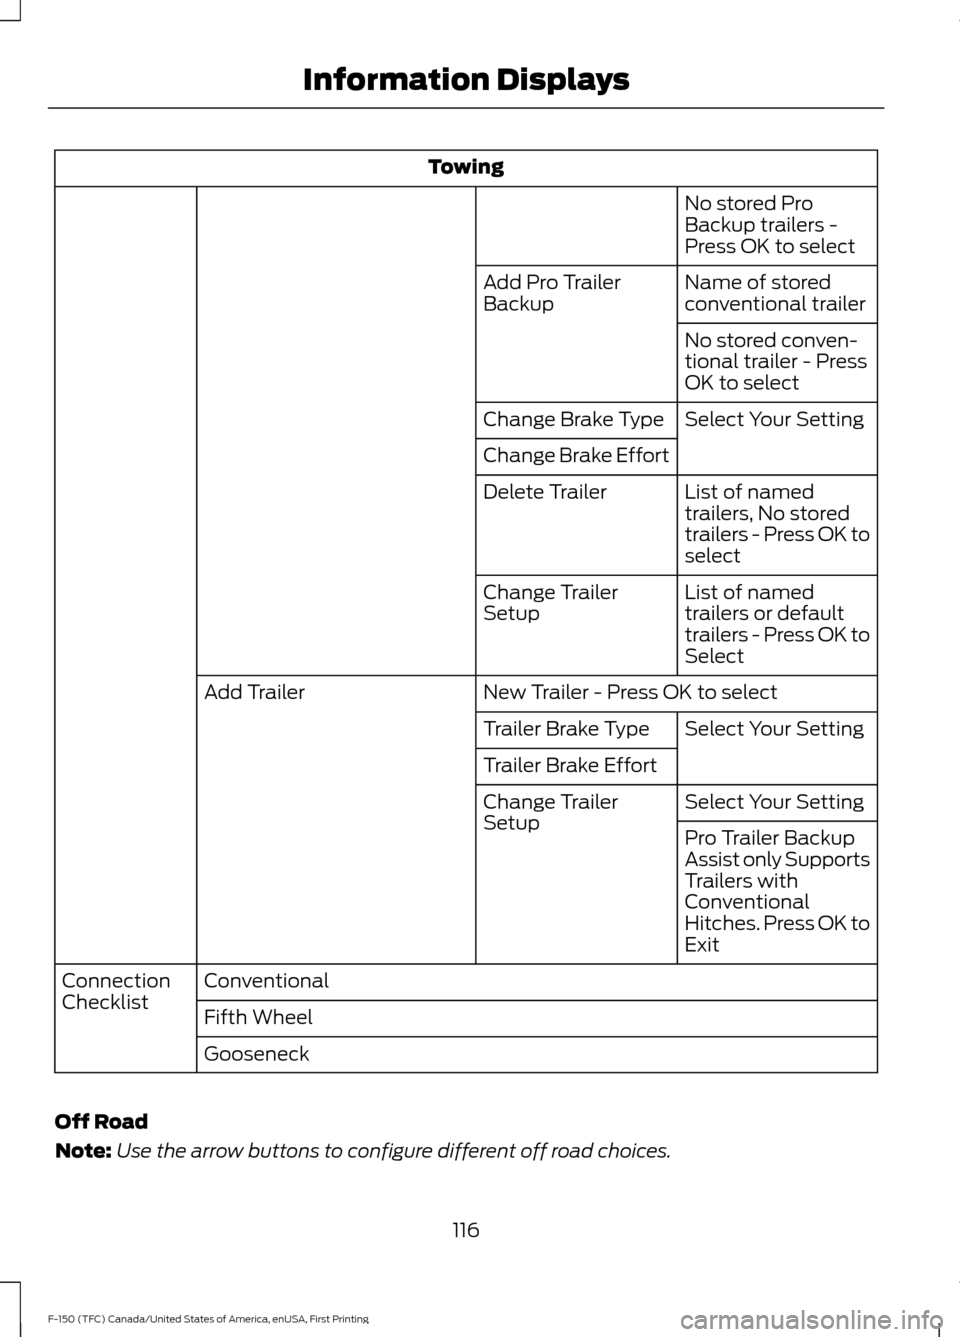
Towing
No stored Pro
Backup trailers -
Press OK to select
Name of stored
conventional trailer
Add Pro Trailer
Backup
No stored conven-
tional trailer - Press
OK to select
Select Your Setting
Change Brake Type
Change Brake Effort
List of named
trailers, No stored
trailers - Press OK to
select
Delete Trailer
List of named
trailers or default
trailers - Press OK to
Select
Change Trailer
Setup
New Trailer - Press OK to select
Add Trailer
Select Your Setting
Trailer Brake Type
Trailer Brake Effort
Select Your Setting
Change Trailer
Setup
Pro Trailer Backup
Assist only Supports
Trailers with
Conventional
Hitches. Press OK to
Exit
Conventional
Connection
Checklist
Fifth Wheel
Gooseneck
Off Road
Note: Use the arrow buttons to configure different off road choices.
116
F-150 (TFC) Canada/United States of America, enUSA, First Printing Information Displays
Page 126 of 599
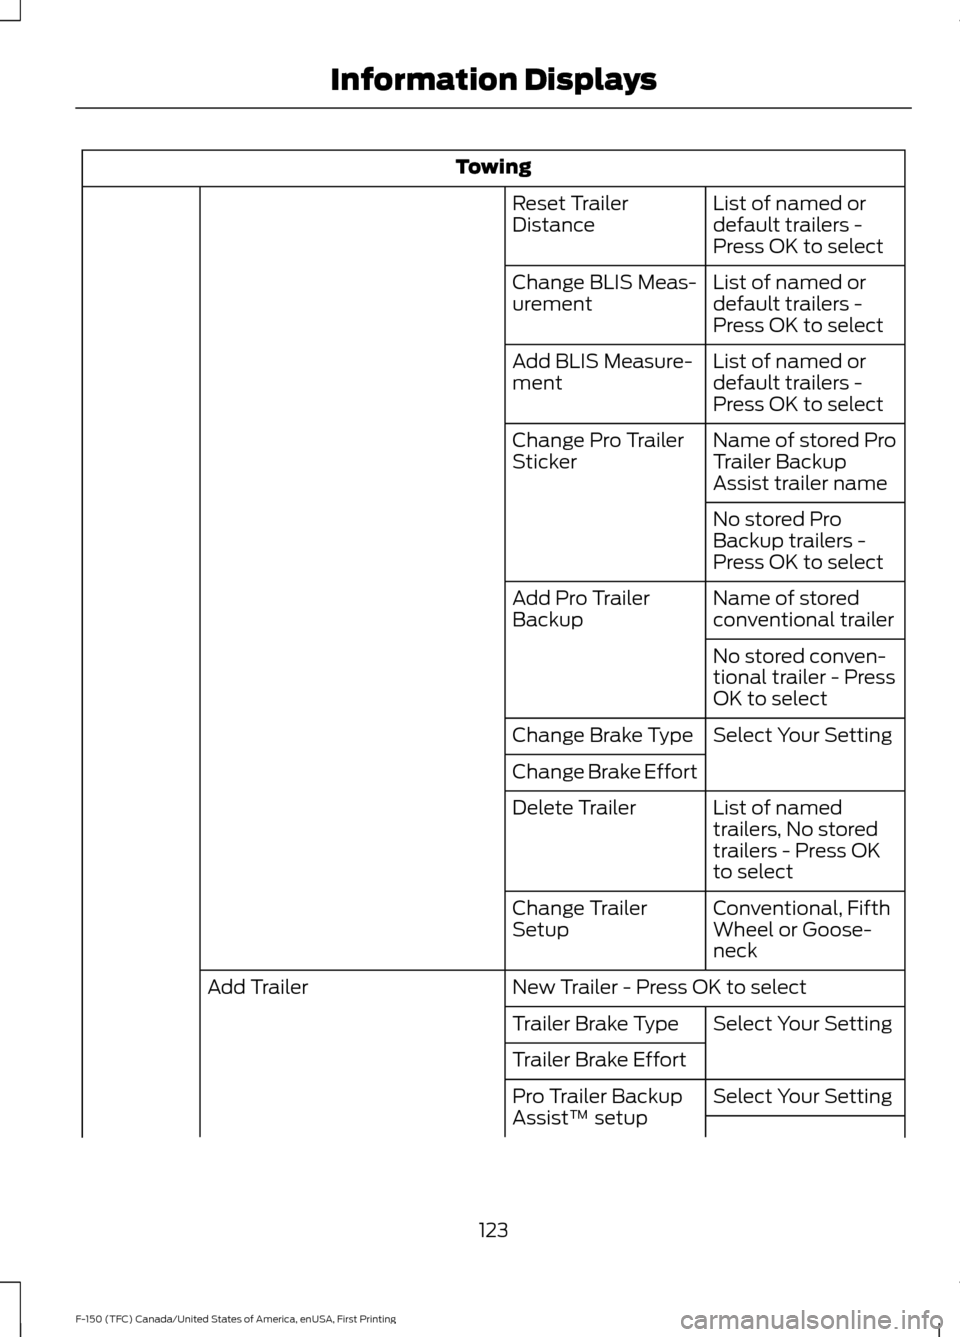
Towing
List of named or
default trailers -
Press OK to select
Reset Trailer
Distance
List of named or
default trailers -
Press OK to select
Change BLIS Meas-
urement
List of named or
default trailers -
Press OK to select
Add BLIS Measure-
ment
Name of stored Pro
Trailer Backup
Assist trailer name
Change Pro Trailer
Sticker
No stored Pro
Backup trailers -
Press OK to select
Name of stored
conventional trailer
Add Pro Trailer
Backup
No stored conven-
tional trailer - Press
OK to select
Select Your Setting
Change Brake Type
Change Brake Effort
List of named
trailers, No stored
trailers - Press OK
to select
Delete Trailer
Conventional, Fifth
Wheel or Goose-
neck
Change Trailer
Setup
New Trailer - Press OK to select
Add Trailer
Select Your Setting
Trailer Brake Type
Trailer Brake Effort
Select Your Setting
Pro Trailer Backup
Assist™ setup
123
F-150 (TFC) Canada/United States of America, enUSA, First Printing Information Displays
Page 136 of 599
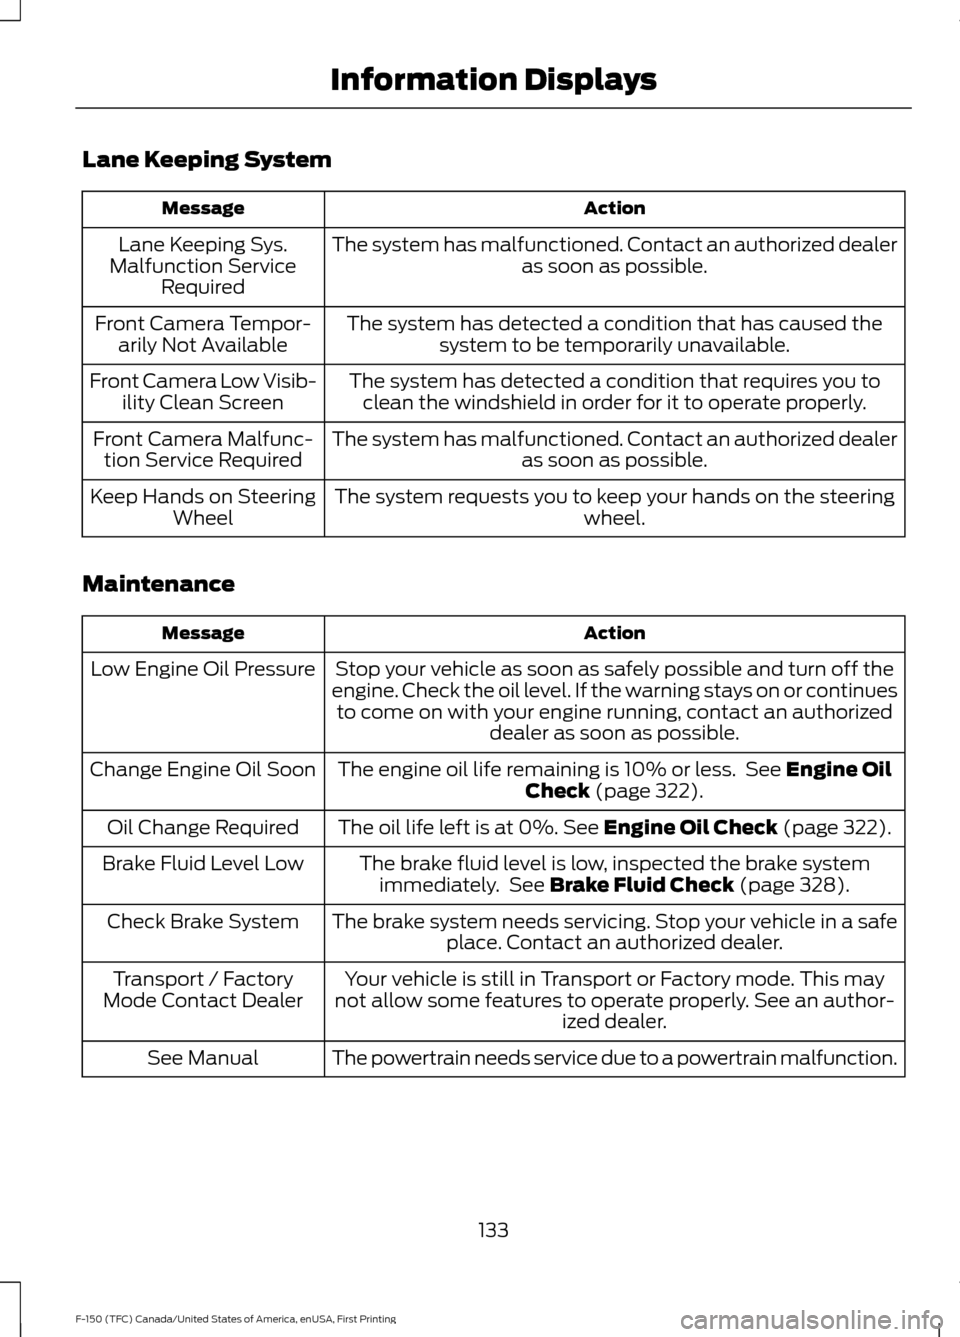
Lane Keeping System
Action
Message
The system has malfunctioned. Contact an authorized dealer as soon as possible.
Lane Keeping Sys.
Malfunction Service Required
The system has detected a condition that has caused thesystem to be temporarily unavailable.
Front Camera Tempor-
arily Not Available
The system has detected a condition that requires you toclean the windshield in order for it to operate properly.
Front Camera Low Visib-
ility Clean Screen
The system has malfunctioned. Contact an authorized dealeras soon as possible.
Front Camera Malfunc-
tion Service Required
The system requests you to keep your hands on the steering wheel.
Keep Hands on Steering
Wheel
Maintenance Action
Message
Stop your vehicle as soon as safely possible and turn off the
engine. Check the oil level. If the warning stays on or continues to come on with your engine running, contact an authorized dealer as soon as possible.
Low Engine Oil Pressure
The engine oil life remaining is 10% or less. See Engine Oil
Check (page 322).
Change Engine Oil Soon
The oil life left is at 0%.
See Engine Oil Check (page 322).
Oil Change Required
The brake fluid level is low, inspected the brake systemimmediately. See
Brake Fluid Check (page 328).
Brake Fluid Level Low
The brake system needs servicing. Stop your vehicle in a safeplace. Contact an authorized dealer.
Check Brake System
Your vehicle is still in Transport or Factory mode. This may
not allow some features to operate properly. See an author- ized dealer.
Transport / Factory
Mode Contact Dealer
The powertrain needs service due to a powertrain malfunction.
See Manual
133
F-150 (TFC) Canada/United States of America, enUSA, First Printing Information Displays
Page 189 of 599

AUTOMATIC TRANSMISSION
WARNINGS
Always set the parking brake fully
and make sure you shift the gearshift
lever to park (P). Switch the ignition
off and remove the key whenever you leave
your vehicle. Do not use the tow/haul feature
when driving in icy or slippery
conditions as the increased engine
braking can cause the rear wheels to slide
and your vehicle to swing around with the
possible loss of vehicle control. Understanding the Shift Positions
of your Automatic Transmission
Floor shifter
Column shifter (if equipped) Putting your vehicle in or out of gear:
1. Fully press down the brake pedal.
2. Move the gearshift lever into the
desired gear.
3. Come to a complete stop.
4. Move the gearshift lever and securely latch it in park (P).
Park (P)
This position locks the transmission and
prevents the rear wheels from turning.
Reverse (R)
With the gearshift lever in reverse (R), your
vehicle will move backward. Always come
to a complete stop before shifting into and
out of reverse (R).
Neutral (N)
With the gearshift lever in neutral (N), your
vehicle can be started and is free to roll.
Hold the brake pedal down while in this
position.
Drive (D)
Drive (D) is the normal driving position for
the best fuel economy. The overdrive
function allows automatic upshifts and
downshifts through all available gears.
Manual (M) with floor shifter
With the gearshift lever in manual (M), the
driver can change gears up or down as
desired. By moving the gearshift lever from
drive position drive (D) to manual (M) you
now have control of selecting the gear you
desire using buttons on the shift lever. See
Understanding your SelectShift
Automatic ™ transmission later in this
section.
To return to normal drive (D) position,
move the shift lever back from manual (M)
to drive (D).
186
F-150 (TFC) Canada/United States of America, enUSA, First Printing TransmissionE184456 E184457
Page 191 of 599
The sport mode feature:
•
Provides additional grade (engine)
braking and extends lower gear
operation to enhance performance for
uphill climbs, hilly terrain or
mountainous areas. This will increase
engine RPM during engine braking.
• Provides additional lower gear
operation through the automatic
transmission shift strategy.
• Selects gears more quickly and at
higher engine speeds.
To deactivate the sport mode feature and
return to normal driving mode, press the
button on the gearshift lever once. The
SPORT or S indicator light will deactivate.
The sport mode feature will also
deactivate when your vehicle is powered
down.
Automatic Transmission Adaptive
Learning
This feature increases durability and
provides consistent shift feel over the life
of your vehicle. A new vehicle or
transmission may have firm shifts, soft
shifts or both. This operation is considered
normal and will not affect function or
durability of the transmission. Over time,
the adaptive learning process will fully
update transmission operation.
Forced Downshifts
• Allowed in drive (D) with the tow/haul
feature on or off.
• Press the accelerator to the floor.
• Allows transmission to select an
appropriate gear. Understanding your SelectShift™
Automatic transmission
(If Equipped)
Your vehicle is equipped with a SelectShift
Automatic transmission gearshift lever.
The SelectShift Automatic transmission
gives you the ability to change gears up or
down (without a clutch) as desired.
In order to prevent the engine from running
at too low an RPM, which may cause it to
stall, SelectShift will still automatically
make some downshifts if it has determined
that you have not downshifted in time.
Although SelectShift will make some
downshifts for you, it will still allow you to
downshift at any time as long as the
SelectShift determines that damage will
not be caused to the engine from
over-revving.
SelectShift will not automatically upshift,
even if the engine is approaching the RPM
limit. It must be shifted manually by
pressing the
+ button.
Note: Engine damage may occur if you
maintain excessive engine revving without
shifting.
The SelectShift Automatic transmission
feature has two modes: PRS and M mode.
Manual (M) with floor shifter
Moving the gearshift lever to the manual
(M) position will allow you to manually
select the gear you desire. Only the current
gear will display. Use the buttons on the
gearshift lever or steering wheel to
manually select gears. Press the
+ button
to upshift or the – button to downshift.
Return the transmission to a different
gearshift position to deactivate manual
control.
188
F-150 (TFC) Canada/United States of America, enUSA, First Printing Transmission
Page 199 of 599
If Shift Delayed Pull Forward displays in
the information display, a transfer case
gear tooth blockage is present. To alleviate
this condition, place the transmission in a
forward gear, move your vehicle forward
approximately
5 ft (1.5 m), and shift the
transmission back to neutral (N) to allow
the transfer case to complete the range
shift.
How Your Vehicle Differs From
Other Vehicles WARNING
Vehicles with a higher center of
gravity such as utility and four-wheel
drive vehicles handle differently than
vehicles with a lower center of gravity.
Utility and four-wheel drive vehicles are
not designed for cornering at speeds as
high as passenger cars any more than
low-slung sports cars are designed to
perform satisfactorily under off-road
conditions. Avoid sharp turns, excessive
speed and abrupt maneuvers in these
vehicles. Failure to drive cautiously could
result in an increased risk of loss of vehicle
control, vehicle rollover, personal injury and
death. Truck and utility vehicles can differ from
some other vehicles. Your vehicle may be
higher to allow it to travel over rough
terrain without getting hung up or
damaging underbody components.
The differences that make your vehicle so
versatile also make it handle differently
than an ordinary passenger car.
Maintain steering wheel control at all
times, especially in rough terrain. Since
sudden changes in terrain can result in
abrupt steering wheel motion, make sure
you grip the steering wheel from the
outside. Do not grip the spokes. Drive cautiously to avoid vehicle damage
from concealed objects such as rocks and
stumps.
You should either know the terrain or
examine maps of the area before driving.
Map out your route before driving in the
area. To maintain steering and braking
control of your vehicle, you must have all
four wheels on the ground and they must
be rolling, not sliding or spinning.
Driving Off-Road With Truck and
Utility Vehicles
Note:
On some models, the initial shift from
two-wheel drive to four-wheel drive while
your vehicle is moving can cause some
momentary clunk and ratcheting sounds.
This is the front drivetrain coming up to
speed and the automatic locking hubs
engaging and is not cause for concern.
Note: Your vehicle may be equipped with
a front air dam that can become damaged
(due to reduced ground clearance) when
taking your vehicle off-road. You may
remove this air dam by removing eight bolts.
Note: Vehicles equipped with 2.7L
Ecoboost, 3.5L Ecoboost and 3.5L TiVCT
engines have an underbody transmission
shield and brackets that may become
damaged (due to reduced ground
clearance) when taking your vehicle
off-road. Remove the shield by disengaging
the fasteners at each corner of the shield.
Then, remove the shield rear brackets by
removing the bracket to frame bolts.
Four-wheel drive vehicles are specially
equipped for driving on sand, snow, mud
and rough terrain and have operating
characteristics that are somewhat
different from conventional vehicles, both
on and off the road.
196
F-150 (TFC) Canada/United States of America, enUSA, First Printing Four-Wheel Drive
(If Equipped)