2017 FORD F150 steering wheel
[x] Cancel search: steering wheelPage 293 of 599

WARNINGS
Check attachment of floor mats on
a regular basis. Always properly
reinstall and secure floor mats that
have been removed for cleaning or
replacement. Always make sure that objects
cannot fall into the driver foot well
while the vehicle is moving. Objects
that are loose can become trapped under
the pedals causing a loss of vehicle control. Failure to properly follow floor mat
installation or attachment
instructions can potentially cause
interference with pedal operation causing
a loss of vehicle control. To install floor mats, position the floor mat
so that the eyelet is over the retention post
and press down to lock in.
To remove the floor mat, reverse the
installation procedure.
SNOWPLOWING
We recommend the four-wheel drive F-150
in XL, XLT or Lariat trim levels with the 5.0L
engine and snowplow option for residential
snowplowing only. We do not recommend
the F-150 with the automatic four-wheel
drive system for snowplowing. Do not use F-150 vehicles equipped with
the 2.7L or 3.5L engines for snowplowing.
Installing the Snowplow
Weight limits and guidelines for selecting
and installing the snowplow are in the Ford
Truck Body Builders Layout Book,
snowplow section, found at
www.fleet.ford.com/truckbbas.
A typical installation affects the following:
•
Certification to government safety laws
such as occupant protection and airbag
deployment, braking, and lighting. Look
for an Alterer ’s Label on your vehicle
from the snowplow installer certifying
that the installation meets all
applicable Federal Motor Vehicle
Safety Standards (FMVSS).
• The Front Gross Axle Weight Rating
(GAWR) is on the upper left side of the
vehicle ’s Safety Compliance
Certification Label. This is the total
weight that front axle supports, which
includes the vehicle weight plus any
auxiliary equipment such as snowplow
frame-mounted hardware that can be
added to the vehicle and satisfy Ford
compliance certification to FMVSS. Do
not exceed FGAWR or Gross Vehicle
Weight Rating (GVWR).
• Rear ballast weight behind the rear
axle may be required to prevent
exceeding the FGAWR, and provide
front-to-rear weight balance for proper
braking and steering.
• Front wheel toe may require
re-adjustment to prevent premature
uneven tire wear. Specifications are in
the Ford Workshop Manual.
• Headlight aim may require adjustment.
290
F-150 (TFC) Canada/United States of America, enUSA, First Printing Driving HintsE142666
Page 294 of 599

•
The tire air pressures recommended
for general driving are on the vehicle ’s
Safety Certification Label. The
maximum cold inflation pressure for
the tire and associated load rating are
on the tire sidewall. Tire air pressure
may require re-adjustment within these
pressure limits to accommodate the
additional weight of the snowplow
installation.
• Federal and some local regulations
require additional exterior lamps for
snowplow-equipped vehicles. Contact
an authorized dealer for additional
information.
Snowplow Mode (If Equipped)
Press the snowplow button on the
instrument panel to switch on snowplow
mode. The button illuminates when in
snowplow mode. A message appears in
the information display indicating that
features are turned off when in snowplow
mode.
The following features are disabled when
in snowplow mode:
• 110V inverter.
• Fog lamps.
• Heated steering wheel.
• Heated front and rear seats.
• Massaging seats.
The body module also activates the
snowplow relay that provides power to
aftermarket snowplow controls.
Switch off snowplow mode by pressing
the snowplow button or switching off the
ignition. The snowplow button is no longer
illuminated and features are turned on. Note:
The electrical system is designed to
support the addition of a residential
snowplow (up to 60 Amps continuous) and
snowplow lights (up to 20 Amps
continuous) using snowplow mode. The
system is not designed to support snowplow
usage with additional electrical aftermarket
accessories.
Operating the Vehicle with the
Snowplow Attached
Note: Drive the vehicle at least 500 miles
(800 kilometers) before using your vehicle
for snow removal.
We recommend vehicle speed does not
exceed 45 mph (72 km/h) when
snowplowing.
The attached snowplow blade restricts
airflow to the radiator, and may cause the
engine to run at a higher temperature.
Attention to engine temperature is
especially important when outside
temperatures are above freezing. Angle
the blade to maximize airflow to the
radiator and monitor engine temperature
to determine whether a left or right angle
provides the best performance.
Follow the severe duty schedule in your
Scheduled Maintenance information for
engine oil and transmission fluid change
intervals.
Snowplowing with your Airbag
Equipped Vehicle WARNINGS
Do not attempt to service, repair, or
modify the airbag supplemental
restraint system (SRS) or its fuses.
Contact a Ford or Lincoln dealer.
291
F-150 (TFC) Canada/United States of America, enUSA, First Printing Driving Hints
Page 318 of 599

Protected components
Fuse amp rating
Fuse or relay number
Not used.
30A
29
Not used.
30A
30
Adjustable pedal switch and motor.
15A
31
Multi-function display.
10A
32
Global position system.
SYNC.
Radio frequency receiver.
Radio.
20A
33
Run-start relay.
30A
34
Restraints module.
5A
35
360 camera module.
15A
36
Heated steering wheel module.
Rear-view mirror.
Rear heated seats.
Power distribution box run-start fuses.
20A
37
Rear window switches and motors.
30A Circuit breaker.
38
CHANGING A FUSE
Fuses WARNING
Always replace a fuse with one that
has the specified amperage rating.
Using a fuse with a higher amperage
rating can cause severe wire damage and
could start a fire. If electrical components in the vehicle are
not working, a fuse may have blown. Blown
fuses are identified by a broken wire within
the fuse. Check the appropriate fuses
before replacing any electrical
components.
315
F-150 (TFC) Canada/United States of America, enUSA, First Printing FusesE217331
Page 326 of 599

Only use oils certified for gasoline engines
by the American Petroleum Institute (API).
An oil with this trademark symbol
conforms to the current engine and
emission system protection standards and
fuel economy requirements of the
International Lubricants Specification
Advisory Committee (ILSAC).
To top up the engine oil level do the
following:
1. Clean the area surrounding the engine
oil filler cap before you remove it.
2. Remove the engine oil filler cap. See Under Hood Overview (page 319).
Turn it counterclockwise and remove
it.
3. Add engine oil that meets Ford specifications. See
Capacities and
Specifications (page 388). You may
have to use a funnel to pour the engine
oil into the opening.
4. Recheck the oil level.
5. If the oil level is correct, replace the dipstick and make sure it is fully seated.
6. Replace the engine oil filler cap. Turn it clockwise until you feel a strong
resistance.
Note: Do not add oil further than the
maximum mark. Oil levels above the
maximum mark may cause engine damage.
Note: Make sure you install the oil filler cap
correctly.
Note: Soak up any spillage with an
absorbent cloth immediately.
OIL CHANGE INDICATOR
RESET
Use the information display controls on
the steering wheel to reset the oil change
indicator. From the main menu scroll to: Action and description
Message
Press the right arrow button,
then from this menu scroll
to the following message.
Settings
Press the right arrow button,
then from this menu scroll
to the following message.
Conveni-
ence
Press the right arrow button,
then from this menu scroll
to the following message.
Oil Life
Reset
Press and hold the
OK
button until the instrument
cluster displays the
following message.
Hold OK to
Reset
Reset Successful
When the oil change indic-
ator resets the instrument
cluster displays 100%.
Remaining Life
{00}%
If the instrument cluster
displays one of the following
messages, repeat the
process.
Not Reset
Reset Cancelled
ENGINE COOLANT CHECK WARNINGS
Do not add engine coolant when the
engine is hot. Steam and scalding
liquids released from a hot cooling
system can burn you badly. Also, spilling
coolant on hot engine parts can burn you.
323
F-150 (TFC) Canada/United States of America, enUSA, First Printing Maintenance
Page 333 of 599

Note:
If you add electrical accessories or
components to the vehicle, it may adversely
affect the low voltage battery performance
and durability. This may also affect the
performance of other electrical systems in
the vehicle.
For longer, trouble-free operation, keep the
top of the battery clean and dry.
If you see any corrosion on the battery or
terminals, remove the cables from the
terminals and clean with a wire brush. You
can neutralize the acid with a solution of
baking soda and water.
Because your vehicle ’s engine is
electronically controlled by a computer,
some control conditions are maintained
by power from the battery. When the
battery is disconnected or a new battery
is installed, the engine must relearn its idle
and fuel trim strategy for optimum
driveability and performance. Flexible fuel
vehicles (FFV) must also relearn the
ethanol content of the fuel for optimum
driveability and performance.
To restore the settings, do the following:
1. Apply the parking brake.
2. Shift into park (P) or neutral (N).
3. Switch off all accessories.
4. Press the brake pedal and start your vehicle.
5. Run the engine until it reaches normal operating temperature. While the
engine is warming up, complete the
following: Reset the clock. See Audio
System (page 405). Reset the power
windows bounce-back feature. See
Windows and Mirrors
(page 95).
Reset the radio station presets. See
Audio System
(page 405).
6. Allow the engine to idle for at least one
minute. 7.
Drive the vehicle at least 10 mi (16 km)
to completely relearn the idle trim and
fuel trim strategy.
Note: If you do not allow the engine to
relearn the idle and fuel trim strategy, the
idle quality of your vehicle may be adversely
affected until the engine computer
eventually relearns the idle trim and fuel
trim strategy.
Note: For flexible fuel vehicles, if you are
operating on E85, you may experience poor
starts or an inability to start the engine and
driveability problems until the fuel trim and
ethanol content have been relearned.
Make sure that you dispose of old batteries
in an environmentally friendly way. Seek
advice from your local authority about
recycling old batteries.
If storing your vehicle for more than 30
days without recharging the battery, we
recommend that you disconnect the
battery cables to maintain battery charge
for quick starting.
Battery Management System
(If
Equipped)
The battery management system monitors
battery conditions and takes actions to
extend battery life. If excessive battery
drain is detected, the system temporarily
disables some electrical systems to
protect the battery.
Systems included are:
• Heated rear window.
• Heated seats.
• Climate control.
• Heated steering wheel.
• Audio unit.
• Navigation system.
330
F-150 (TFC) Canada/United States of America, enUSA, First Printing Maintenance
Page 337 of 599

Examples of unacceptable moisture
(usually caused by a lamp water leak) are:
•
Water puddle inside the lamp.
• Large water droplets, drip marks or
streaks present on the interior of the
lens.
Take your vehicle to a dealer for service if
any of the above conditions of
unacceptable moisture are present.
Accessing the Halogen High Beam,
Low Beam and Direction Indicator
Bulbs
1. Rotate the steering wheel to the opposite side of the bulb needing
replacement.
2. Remove two screws and one push pin from the front of the wheel liner. 3. Pull the wheel liner back towards the
tire to gain access to the bulbs.
Replacing the Halogen High Beam,
Low Beam and Direction Indicator
Bulbs Low beam headlamp bulb.
A.
Direction indicator bulb.
B.
High beam headlamp bulb.
C.
334
F-150 (TFC) Canada/United States of America, enUSA, First Printing MaintenanceE183762 E183500
Page 347 of 599

CLEANING THE INSTRUMENT
PANEL AND INSTRUMENT
CLUSTER LENS
WARNING
Do not use chemical solvents or
strong detergents when cleaning the
steering wheel or instrument panel
to avoid contamination of the airbag
system. Clean the instrument panel and cluster
lens with a clean, damp, white cotton
cloth, then use a clean and dry white
cotton cloth to dry these areas.
•
Avoid cleaners or polishes that increase
the gloss of the upper portion of the
instrument panel. The dull finish in this
area helps protect you from
undesirable windshield reflection.
• Be certain to wash or wipe your hands
clean if you have been in contact with
certain products such as insect
repellent and suntan lotion in order to
avoid possible damage to the interior
painted surfaces.
• Do not use household or glass cleaners
as these may damage the finish of the
instrument panel, interior trim and
cluster lens.
• Do not allow air fresheners and hand
sanitizers to spill onto interior surfaces.
If a spill occurs, wipe off immediately.
Damage may not be covered by your
warranty.
If a staining liquid like coffee or juice has
been spilled on the instrument panel or on
interior trim surfaces, clean as follows:
1. Wipe up spilled liquid using a clean, white, cotton cloth. 2. Wipe the surface with a damp, clean,
white cotton cloth. For more thorough
cleaning, use a mild soap and water
solution. If the spot cannot be
completely cleaned by this method,
the area may be cleaned using a
commercially available cleaning
product designed for automotive
interiors.
3. If necessary, apply more soap and water solution or cleaning product to
a clean, white, cotton cloth and press
the cloth onto the soiled area. Allow
this to set at room temperature for 30
minutes.
4. Remove the soaked cloth and if it is not
soiled badly, use this cloth to clean the
area by using a rubbing motion for 60
seconds.
5. Following this, wipe area dry with a clean, white, cotton cloth.
CLEANING LEATHER SEATS (If
Equipped)
Without King Ranch Edition
Note: Follow the same procedure as
cleaning leather seats for cleaning leather
instrument panels and leather interior trim
surfaces.
For routine cleaning, wipe the surface with
a soft, damp cloth and a mild soap and
water solution. Dry the area with a clean,
soft cloth.
For cleaning and removing spots and stains
such as dye transfer, use Motorcraft
Premium Leather and Vinyl Cleaner or a
commercially available leather cleaning
product for automotive interiors.
Note: Test any cleaner or stain remover on
an inconspicuous area.
You should:
344
F-150 (TFC) Canada/United States of America, enUSA, First Printing Vehicle Care
Page 353 of 599

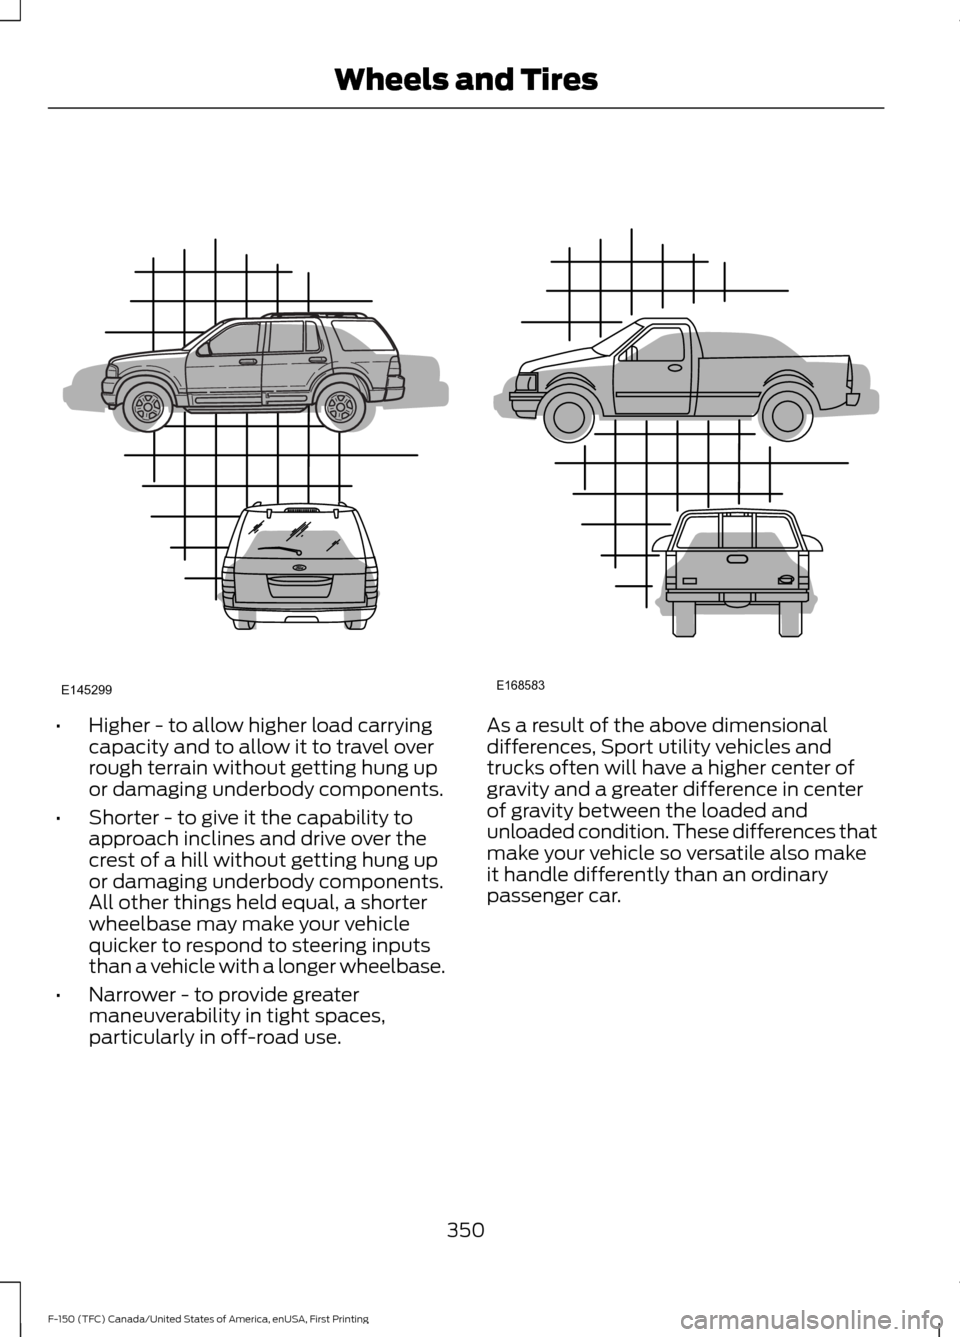
•
Higher - to allow higher load carrying
capacity and to allow it to travel over
rough terrain without getting hung up
or damaging underbody components.
• Shorter - to give it the capability to
approach inclines and drive over the
crest of a hill without getting hung up
or damaging underbody components.
All other things held equal, a shorter
wheelbase may make your vehicle
quicker to respond to steering inputs
than a vehicle with a longer wheelbase.
• Narrower - to provide greater
maneuverability in tight spaces,
particularly in off-road use. As a result of the above dimensional
differences, Sport utility vehicles and
trucks often will have a higher center of
gravity and a greater difference in center
of gravity between the loaded and
unloaded condition. These differences that
make your vehicle so versatile also make
it handle differently than an ordinary
passenger car.
350
F-150 (TFC) Canada/United States of America, enUSA, First Printing Wheels and TiresE145299 E168583