Page 225 of 500

This program is separate from the NewVehicle Limited Warranty, but the coverageis concurrent with the powertrain coverageperiod of your vehicle.
Canadian customers who require roadsideassistance, call 1-800-665-2006.
Vehicles Sold in Canada: UsingRoadside Assistance
Complete the roadside assistanceidentification card and place it in yourwallet for quick reference.
In Canada, this card is found in theWarranty Guide in the glove compartmentof your vehicle.
Vehicles Sold in Canada: RoadsideAssistance Program Coverage
The service is available 24 hours a day,seven days a week.
Canadian roadside coverage and benefitsmay differ from the U.S. coverage.
For complete program coverage detailsyou may contact your dealer, you can callus in Canada at 1-800-665-2006, or visitour website at www.ford.ca.
HAZARD WARNING FLASHERS
Note:If used when the vehicle is notrunning, the battery will lose charge. Theremay be insufficient power to restart yourvehicle.
The hazard warning button islocated on the instrument panel.Use it when your vehicle iscreating a safety hazard for othermotorists.
•Press the button to turn on the hazardwarning function, and the front andrear direction indicators will flash.
•Press the button again to turn themoff.
FUEL SHUTOFF
WARNING
Failure to inspect and, if necessary,repair fuel leaks after a collision mayincrease the risk of fire and seriousinjury. Ford Motor Company recommendsthat the fuel system be inspected by anauthorized dealer after any collision.
In the event of a moderate to severecollision, this vehicle includes a fuel pumpshutoff feature that stops the flow of fuelto the engine. Not every impact will causea shutoff.
Should your vehicle shut off after acollision, you may restart your vehicle. Forvehicles equipped with a key system:
1. Switch off the ignition.
2. Switch on the ignition.
3. Repeat Steps 1 and 2 to re-enable thefuel pump.
For vehicles equipped with a push buttonstart system:
1. Press the START/STOP button toswitch off the ignition.
2. Press the brake pedal and press theSTART/STOP button to switch on theignition.
3.Remove your foot from the brake pedaland press the START/STOP buttonto switch off the ignition.
4. You can either attempt to start theengine by pressing the brake pedal andthe START/STOP button, or switchon the ignition only by pressing theSTART/STOP button withoutpressing the brake pedal. Both waysre-enable the fuel system.
222
Expedition (TB7) Canada/United States of America, enUSA, Edition date: 03/2016, First Printing
Roadside Emergencies
Page 237 of 500
Protected componentsFuse amp ratingFuse or relay number
Electronic cooling fan.Relay6
Rear window defroster.Relay7Heated mirror relay.
Electronic cooling fan.Relay8
Run/start relay.Relay9
Power distribution box relay.Relay10
Power running boards.40A*11Heated seats.
Run/start relay.40A*12
Starter relay.30A*13
Electronic cooling fan.50A*14
Not used.—15
Electronic fan.50A*16
Not used.—17
Trailer brake.30A*18
Power point (console).20A*19
4x4 module HAT 2.20A*20
Trailer tow module.30A*21
Passenger power seat.30A*22
Air conditioner clutch relay.Relay23
Trailer tow park lamp relay.Relay24
Not used.—25
ALT sensor.10A**26
4x4 module HAT 1.20A**27
Trailer tow park lamp relay.25A**28
Integrated wheel end solenoid.10A**29
Air conditioner clutch relay.10A**30
Trailer tow back up lamp.15A**31
234
Expedition (TB7) Canada/United States of America, enUSA, Edition date: 03/2016, First Printing
Fuses
Page 238 of 500
Protected componentsFuse amp ratingFuse or relay number
Blower motor relay.40A*32
110-volt AC power point.40A*33
Auxiliary blower motor.30A*34
Powertrain control module relay.50A*35
Power liftgate.30A*36
Not used.—37
Not used.—38
Trailer tow backup lamps relay.Relay39
Electronic fan 2 relay.Relay40
Powertrain control module keep-alivepower.10A**41
Run/start relay.5A**42
Brake on/off switch.10A**43
Fuel pump relay.20A**44
Not used (spare).10A**45
Front/rear washer pump.15A**46
Rear wiper motor.30A*47
Trailer tow module.40A*48
Not used.—49
Front wiper motor relay.30A*50
Rear window defroster and heated mirrorrelay.40A*51
Anti-lock brake system run/start feed.10A**52
Powertrain control module ISP.5A**53
Power steering.5A**54
Not used.—55
Passenger compartment fuse panel run/start feed.30A**56
235
Expedition (TB7) Canada/United States of America, enUSA, Edition date: 03/2016, First Printing
Fuses
Page 239 of 500
Protected componentsFuse amp ratingFuse or relay number
Blower motor run/start.5A**57
Not used.—58
Heated mirrors.15A**59
Not used.—60
Not used.—61
Not used.—62
Electronic fan.25A*63
Moonroof.30A*64
Not used (spare).20A*65
Auxiliary power point (rear of centerconsole).20A*66
Front row climate controlled seats.40A*67
Anti-lock brake system valves.30A*68
Anti-lock brake system pump.60A*69
Third row power fold seat.30A*70
Auxiliary power point/cigar lighter.20A*71
Auxiliary power point (right rear quarterpanel).20A*72
Rear seat climate module.20A*73
Driver power seat.30A*74
Vehicle power 1 – powertrain controlmodule.25A**75
Vehicle power 2 – powertrain controlmodule.20A**76
Vehicle power 4 – ignition coils.20A**77
Not used.—78
Vehicle power 3 – powertrain controlmodule.15A**79
Not used.—80
236
Expedition (TB7) Canada/United States of America, enUSA, Edition date: 03/2016, First Printing
Fuses
Page 242 of 500
Protected componentsFuse amp ratingFuse or relay number
SYNC.10A9Power lift gate.Electric finish panel.Display.
Run accessory relay.10A10
Passive entry/start module.10A11
Interior lighting.15A12Puddle lamps.
Right turn and stop/turn signals.15A13
Left turn and stop/turn signals.15A14
Reverse lamp.15A15Center high mount stop lamp.EC mirror.
Right front low beam.10A16
Left front low beam.10A17
Brake shift interlock/start button LED/keypad illumination.10A18
Third row power folding seat.Passive entry touch start.
Not used.—19
Lock/unlock relays.20A20
Not used.—21
Horn.20A22
Steering wheel control module.15A23Cluster.
Adjustable pedals/power adjustablecolumn.15A24
Datalink.
Liftgate release decklid.15A25Liftglass release motor.
Push to start switch.5A26
Passive entry/start module.20A27
239
Expedition (TB7) Canada/United States of America, enUSA, Edition date: 03/2016, First Printing
Fuses
Page 243 of 500
Protected componentsFuse amp ratingFuse or relay number
Ignition switch.15A28Key inhibit switch.
Radio.20A29GPS.
Front park lamps.15A30
Trailer brake on/off.5A31
Power vent.15A32Driver's window motor.Power inverter.
CCD suspension module.10A33
Rear park assist.10A34Rear camera.BLIS.Heated seat.
Climate module.5A35O/D switch.
Not used.—36
4X4 module.10A37
EC mirror.10A38Moonroof.DVD.AM/FM radio.
Left and right front high beams.15A39
Rear park/tail lamps.10A40
Restraints control module.7.5A41
Not used.—42
Not used.—43
Not used.—44
Not used (spare).5A45
Climate control.10A46
240
Expedition (TB7) Canada/United States of America, enUSA, Edition date: 03/2016, First Printing
Fuses
Page 246 of 500

GENERAL INFORMATION
Have your vehicle serviced regularly to helpmaintain its roadworthiness and resalevalue. There is a large network ofauthorized dealers that are there to helpyou with their professional servicingexpertise. We believe that their speciallytrained technicians are best qualified toservice your vehicle properly and expertly.They are supported by a wide range ofhighly specialized tools developedspecifically for servicing your vehicle.
If your vehicle requires professional service,an authorized dealer can provide thenecessary parts and service. Check yourwarranty information to find out whichparts and services are covered.
Use only recommended fuels, lubricants,fluids and service parts conforming tospecifications. Motorcraft® parts aredesigned and built to provide the bestperformance in your vehicle.
Precautions
•Do not work on a hot engine.
•Make sure that nothing gets caught inmoving parts.
•Do not work on a vehicle with theengine running in an enclosed space,unless you are sure you have enoughventilation.
•Keep all open flames and other burningmaterial (such as cigarettes) awayfrom the battery and all fuel relatedparts.
Working with the Engine Off
1.Set the parking brake and shift to park(P).
2. Switch off the engine.
3. Block the wheels.
Working with the Engine On
WARNING
To reduce the risk of vehicle damageand/or personal burn injuries, do notstart your engine with the air cleanerremoved and do not remove it while theengine is running.
1.Set the parking brake and shift to park(P).
2. Block the wheels.
OPENING AND CLOSING THE
HOOD
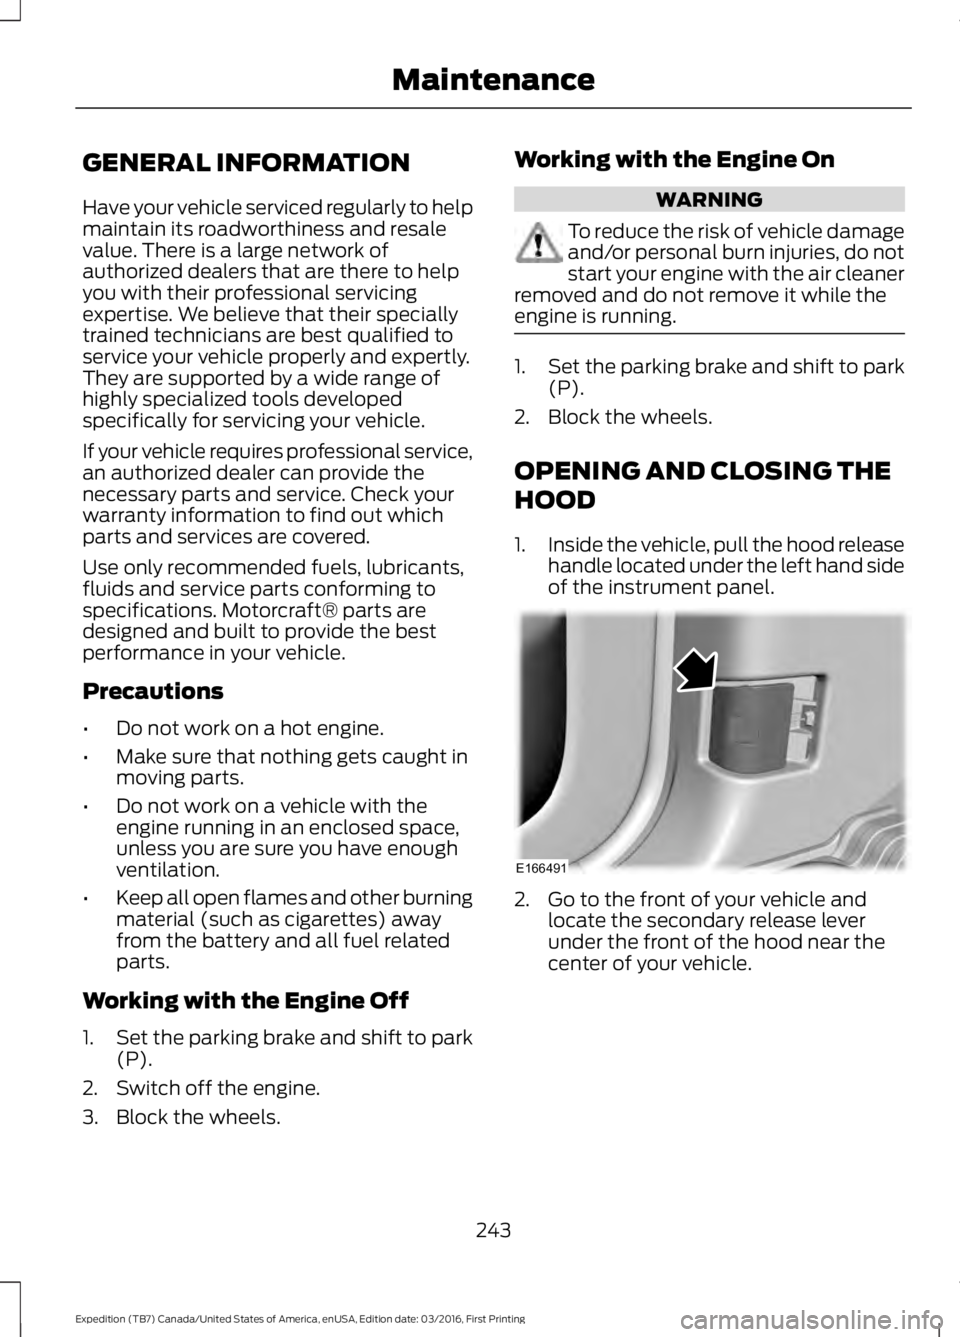
1.Inside the vehicle, pull the hood releasehandle located under the left hand sideof the instrument panel.
2. Go to the front of your vehicle andlocate the secondary release leverunder the front of the hood near thecenter of your vehicle.
243
Expedition (TB7) Canada/United States of America, enUSA, Edition date: 03/2016, First Printing
MaintenanceE166491
Page 248 of 500

Engine oil filler cap. See Engine Oil Check (page 245).C.
Engine oil dipstick. See Engine Oil Dipstick (page 245).D.
Brake fluid reservoir. See Brake Fluid Check (page 252).E.
Engine coolant reservoir. See Engine Coolant Check (page 247).F.
Air filter assembly. See Changing the Engine Air Filter (page 262).G.
Power distribution box. See Fuses (page 233).H.
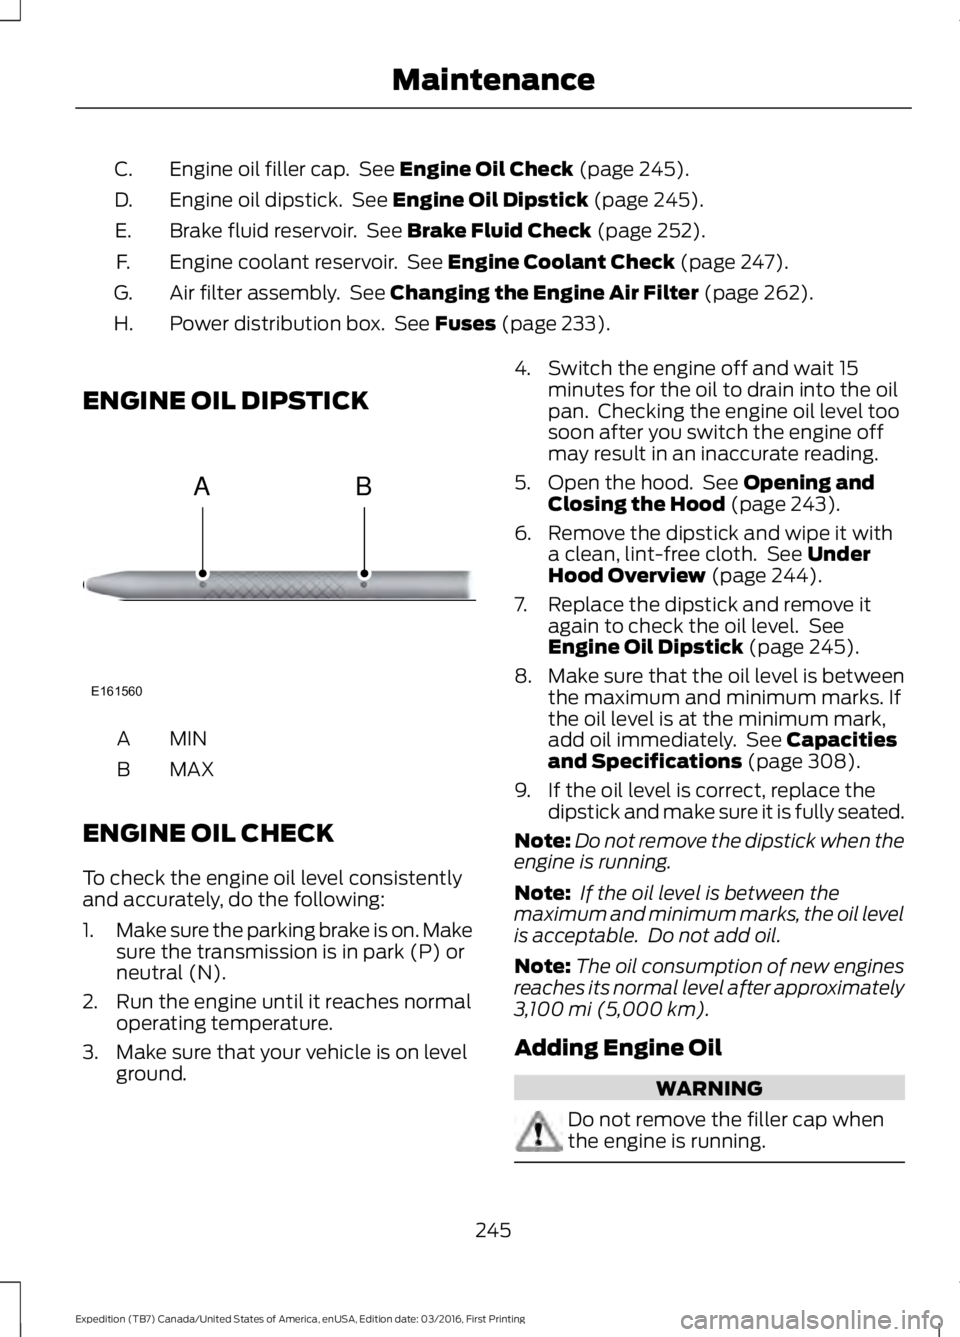
ENGINE OIL DIPSTICK
MINA
MAXB
ENGINE OIL CHECK
To check the engine oil level consistentlyand accurately, do the following:
1.Make sure the parking brake is on. Makesure the transmission is in park (P) orneutral (N).
2. Run the engine until it reaches normaloperating temperature.
3. Make sure that your vehicle is on levelground.
4. Switch the engine off and wait 15minutes for the oil to drain into the oilpan. Checking the engine oil level toosoon after you switch the engine offmay result in an inaccurate reading.
5. Open the hood. See Opening andClosing the Hood (page 243).
6. Remove the dipstick and wipe it witha clean, lint-free cloth. See UnderHood Overview (page 244).
7. Replace the dipstick and remove itagain to check the oil level. SeeEngine Oil Dipstick (page 245).
8.Make sure that the oil level is betweenthe maximum and minimum marks. Ifthe oil level is at the minimum mark,add oil immediately. See Capacitiesand Specifications (page 308).
9. If the oil level is correct, replace thedipstick and make sure it is fully seated.
Note:Do not remove the dipstick when theengine is running.
Note: If the oil level is between themaximum and minimum marks, the oil levelis acceptable. Do not add oil.
Note:The oil consumption of new enginesreaches its normal level after approximately3,100 mi (5,000 km).
Adding Engine Oil
WARNING
Do not remove the filler cap whenthe engine is running.
245
Expedition (TB7) Canada/United States of America, enUSA, Edition date: 03/2016, First Printing
MaintenanceE161560
AB