2017 FORD EXPEDITION EL key
[x] Cancel search: keyPage 179 of 500
PRINCIPLE OF OPERATION
The traction control system helps avoiddrive wheel spin and loss of traction.
If your vehicle begins to slide, the systemapplies the brakes to individual wheelsand, when needed, reduces engine powerat the same time. If the wheels spin whenaccelerating on slippery or loose surfaces,the system reduces engine power in orderto increase traction.
USING TRACTION CONTROL
WARNING
The stability and traction controllight illuminates steadily if thesystem detects a failure. Make sureyou did not manually disable the tractioncontrol system using the switch. If thestability control and traction control lightis still illuminating steadily, have thesystem serviced by an authorized dealerimmediately. Operating your vehicle withtraction control disabled could lead to anincreased risk of loss of vehicle control,vehicle rollover, personal injury and death.
The system automatically turns on eachtime you switch the ignition on.
If your vehicle is stuck in mud or snow,switching traction control off may bebeneficial as this allows the wheels to spin.
Note:When you switch traction control off,stability control remains fully active.
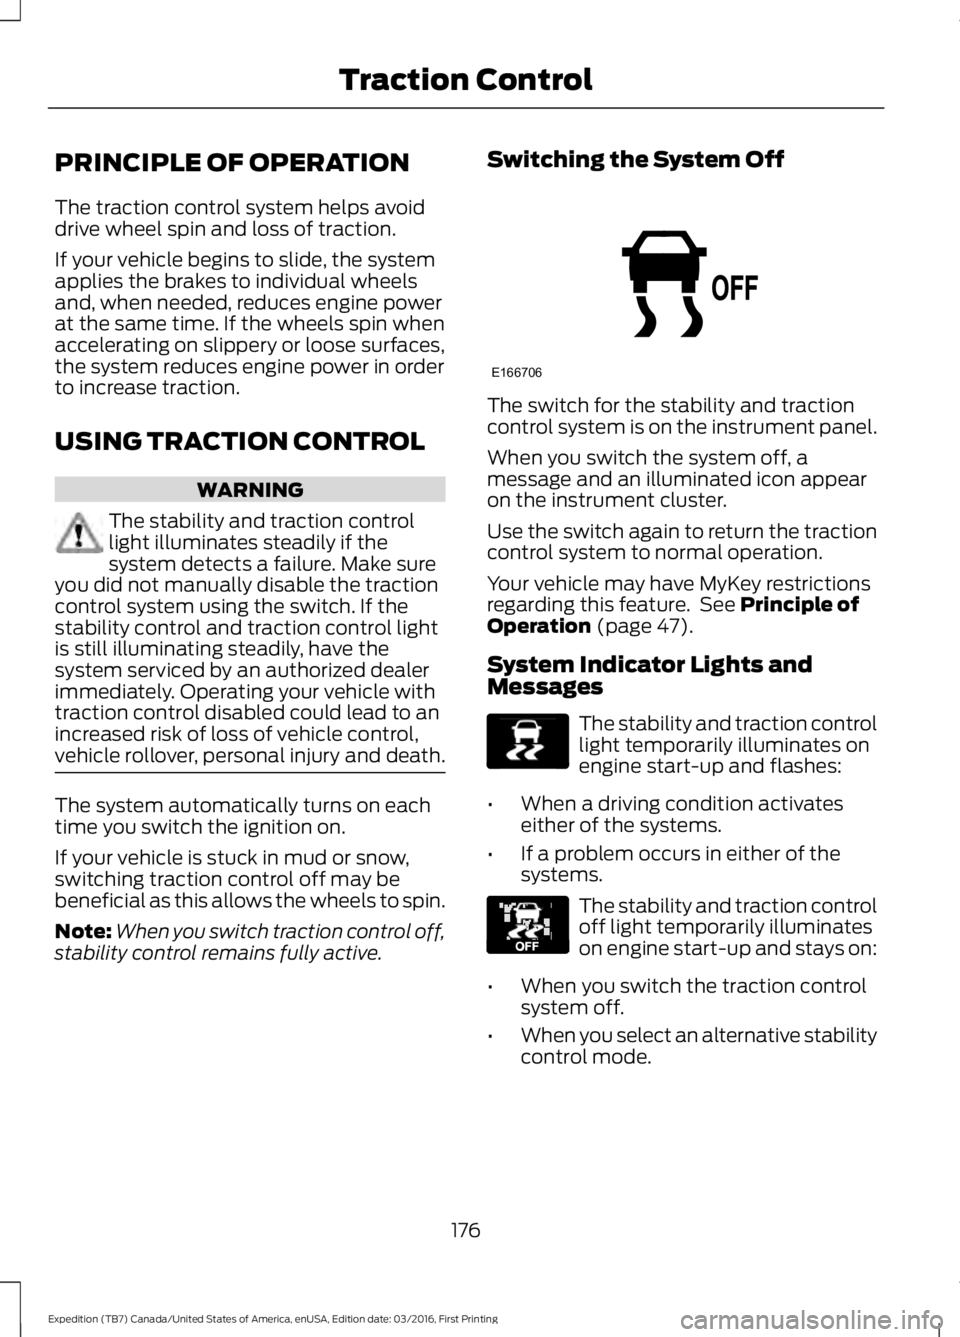
Switching the System Off
The switch for the stability and tractioncontrol system is on the instrument panel.
When you switch the system off, amessage and an illuminated icon appearon the instrument cluster.
Use the switch again to return the tractioncontrol system to normal operation.
Your vehicle may have MyKey restrictionsregarding this feature. See Principle ofOperation (page 47).
System Indicator Lights andMessages
The stability and traction controllight temporarily illuminates onengine start-up and flashes:
•When a driving condition activateseither of the systems.
•If a problem occurs in either of thesystems.
The stability and traction controloff light temporarily illuminateson engine start-up and stays on:
•When you switch the traction controlsystem off.
•When you select an alternative stabilitycontrol mode.
176
Expedition (TB7) Canada/United States of America, enUSA, Edition date: 03/2016, First Printing
Traction ControlE166706 E138639 E130458
Page 185 of 500

PRINCIPLE OF OPERATION
WARNINGS
To help avoid personal injury, pleaseread and understand the limitationsof the system as contained in thissection. Sensing is only an aid for some(generally large and fixed) objects whenmoving on a flat surface at parking speeds.Certain objects with surfaces that absorbultrasonic waves, surrounding vehicle'sparking aid systems, traffic controlsystems, fluorescent lamps, inclementweather, air brakes, and external motorsand fans may also affect the function ofthe sensing system; this may includereduced performance or a false activation.
To help avoid personal injury, alwaysuse caution when in reverse (R) andwhen using the sensing system.
This system is not designed toprevent contact with small or movingobjects. The system is designed toprovide a warning to assist the driver indetecting large stationary objects to avoiddamaging your vehicle. The system maynot detect smaller objects, particularlythose close to the ground.
Certain add-on devices such as largetrailer hitches, bike or surfboard racksand any device that may block thenormal detection zone of the system, maycreate false beeps.
Note:Keep the sensors, located on thebumper or fascia, free from snow, ice andlarge accumulations of dirt. If the sensorsare covered, the system’s accuracy can beaffected. Do not clean the sensors withsharp objects.
Note:If your vehicle sustains damage tothe bumper or fascia, leaving it misalignedor bent, the sensing zone may be alteredcausing inaccurate measurement ofobstacles or false alarms.
Note:The sensing system cannot be turnedoff when a MyKey is present. See Principleof Operation (page 47).
Note:If you attach certain add-on devicessuch as a trailer or bike rack, the rear sensingsystem may detect that add-on device andtherefore provide warnings. It is suggestedthat you disable the rear sensing systemwhen you attach an add-on device to yourvehicle to prevent these warnings.
The sensing system warns the driver ofobstacles within a certain range of yourvehicle. The system turns on automaticallywhenever you switch the ignition on.
You can turn the system on oroff by pressing the parking aidbutton. If your vehicle does nothave a parking aid button, the system canbe switched off through the informationdisplay menu or from the pop-up messagethat appears once you shift thetransmission into reverse (R). See GeneralInformation (page 91).
If a fault is present in the system, a warningmessage appears in the informationdisplay. See Information Messages(page 102).
REAR PARKING AID (If Equipped)
The rear sensors are only active when thetransmission is in reverse (R). As yourvehicle moves closer to the obstacle, therate of the audible warning increases.When the obstacle is less than 12 in(30 cm) away, the warning soundscontinuously. If the system detects astationary or receding object farther than12 in (30 cm) from the corners of thebumper, the tone sounds for only threeseconds. Once the system detects anobject approaching, the warning soundsagain.
182
Expedition (TB7) Canada/United States of America, enUSA, Edition date: 03/2016, First Printing
Parking AidsE139213
Page 194 of 500

System Lights and Messages
The Blind Spot Information and CrossTraffic Alert systems illuminate an amberalert indicator in the outside mirror on theside of your vehicle the approachingvehicle is coming from.
The alert indicator dims when the systemdetects nighttime darkness.
Cross Traffic Alert sounds also sounds anaudible alarm and a message appears inthe information display indicating a vehicleis coming from the right or left. CrossTraffic Alert works with the reverse sensingsystem which sounds its own audiblealarm. See Rear Parking Aid (page 182).
System Sensor Blockage
WARNING
Never use the Blind SpotInformation System as areplacement for using the interiorand exterior mirrors or looking over yourshoulder before changing lanes. The BlindSpot Information System is not areplacement for careful driving.
Note:It is possible to get a blockagewarning with no blockage present; this israre and known as a false blockage warning.A false blocked condition eitherself-corrects or clears after a key cycle.
The system uses radar sensors which arelocated behind the bumper fascia on eachside of your vehicle. Do not allow theseareas to become obstructed by mud, snowor bumper stickers, as this can causedegraded system performance.
If the system detects a degradedperformance condition, a blocked sensorwarning or low visibility warning will appearin the information display and the alertindicator illuminates in the appropriatemirror(s). The information display warningcan be cleared but the alert indicatorremains illuminated.
191
Expedition (TB7) Canada/United States of America, enUSA, Edition date: 03/2016, First Printing
Driving AidsE142442 E205199
Page 195 of 500

When the blockage is removed, the systemcan be reset in two ways: 1) when at leasttwo objects are detected while driving, or2) turn the ignition key from on to off, then
back on. If the blockage is still present afterthe key cycle, the system senses again thatit is blocked after driving in traffic.
Reasons for messages being displayed
Clean the fascia area in front of the radaror remove the obstruction.The radar surface is dirty or obstructed
Drive normally in traffic for a few minutesto allow the radar to detect passingvehicles so it can clear the blocked state.
The radar surface is not dirty or obstructed
No action required. The system automatic-ally resets to an unblocked state once therainfall/snowfall rate decreases or stops.Do not use the Blind Spot InformationSystem or Cross Traffic Alert in theseconditions.
Heavy rainfall/snowfall interferes with theradar signals
System Limitations
The Blind Spot Information and CrossTraffic Alert systems do have theirlimitations; situations such as severeweather conditions or debris build-up onthe sensor area may limit vehicle detection.
The following are other situations that maylimit the Blind Spot Information System:
•Certain maneuvering of vehiclesentering and exiting the blind zone.
•Vehicles passing through the blind zoneat very fast rates.
•When several vehicles forming aconvoy pass through the blind zone.
The following are other situations that maylimit the Cross Traffic Alert:
•Adjacently parked vehicles or objectsobstructing the sensors.
•Approaching vehicles passing atspeeds greater than 15 mph (24 km/h).
•Driving in reverse faster than 3 mph(5 km/h).
•Backing out of an angled parking spot.
False Alerts
Note:If you connected a trailer to yourvehicle, the Blind Spot Information Systemmay detect the trailer causing a false alert.To avoid false alerts you may want to turnthe system off manually.
There may be certain instances wheneither the Blind Spot Information or CrossTraffic Alert systems illuminate the alertindicator with no vehicle in the coveragezone; this is known as a false alert. Someamount of false alerts are normal; they aretemporary and self-correct.
System Errors
If the system senses a problem with theleft or right sensor, the telltale willilluminate and a message will appear inthe information display. See InformationMessages (page 102).
192
Expedition (TB7) Canada/United States of America, enUSA, Edition date: 03/2016, First Printing
Driving Aids
Page 219 of 500
Four Wheel Drive Vehicles
You can only tow a four wheel drive vehiclewith all wheels on the ground by placingthe transfer case in its neutral position andengaging the four-wheel-down towingfeature. Perform the steps outlined in thefollowing section after positioning yourvehicle behind the tow vehicle and properlysecuring them together.
Four-wheel-down Towing
Note:Make sure you properly secure yourvehicle to the tow vehicle.
Entering Four-wheel-down Towing
1. Put the ignition in the on position, butdo not start the engine. If your vehiclehas an ignition key, turn the key to on.If your vehicle has intelligent access,press the engine START/STOP buttontwice without pressing the brake pedal.
2. Press and hold the brake pedal.
3. Rotate the four-wheel drive switch to2H.
4. Shift the transmission to position N.
5. Rotate the four-wheel drive switchfrom 2H to 4L and back to 2H fivetimes within seven seconds.
Note:If completed successfully, theinformation display shows NEUTRAL TOWLEAVE IN N or NEUTRAL TOW ENABLEDLEAVE TRANSMISSION IN NEUTRAL.This indicates that your vehicle is safe totow with all wheels on the ground.
Note:If you do not see the message in thedisplay, you must perform the procedureagain from the beginning.
Note:You may hear an audible noise as thetransfer case shifts into its neutral position.This is normal.
6. Leave the transmission in position Nand turn the ignition as far as it will gotoward the off position (it will not turnfully off when the transmission is inposition N). If your vehicle has anignition key, you must leave the key inthe ignition while towing. To lock andunlock your vehicle, use the keylessentry keypad or extra set of keys. If yourvehicle has intelligent access, press theengine START/STOP button oncewithout pressing the brake pedal. Youdo not need to leave your keys in thevehicle. You can lock and unlock yourvehicle as you normally do.
7. Release the brake pedal.
WARNINGS
Do not disconnect the battery duringrecreational towing. Doing so willprevent the transfer case fromshifting properly and may cause the vehicleto roll even if the transmission is in P(Park).
Shifting the transfer case to itsneutral position for recreationaltowing may cause the vehicle to beable to roll even if the transmission is in P(Park). The driver or others could beinjured. Make sure the foot brake isdepressed and the vehicle is in a secureand safe position while the transfer caseis being shifted to its neutral position.
Failing to put the transfer case in itsneutral position will damage vehiclecomponents.
Note:You can check four-wheel-downtowing status at any time by opening thedriver's door or turning the ignition to theaccessory or on position and verifying theNEUTRAL TOW ENABLED messagedisplays in the cluster.
216
Expedition (TB7) Canada/United States of America, enUSA, Edition date: 03/2016, First Printing
Towing
Page 220 of 500
Exiting Four-wheel-down Towing
To exit four-wheel-down towing and returnthe transfer case to its 2H position:
1.With your vehicle still properly securedto the tow vehicle, put the ignition inthe on position, but do not start theengine. If your vehicle has an ignitionkey, turn the key to on. If your vehiclehas intelligent access, press the engineSTART/STOP button twice withoutpressing the brake pedal.
2. Press and hold the brake pedal.
3.Shift the transmission out of N and intoany gear.
4. Release the brake pedal.
Note:If completed successfully, theinstrument cluster displays 4X2, andNEUTRAL TOW DISABLED.
Note:If the indicator light and message donot display, you must perform the procedureagain from the beginning.
Note:You may hear an audible noise as thetransfer case shifts out of its neutralposition. This is normal.
Note:If SHIFT DELAY PULL FORWARDdisplays in the instrument cluster, transfercase gear tooth blockage is present. See theinstructions after this section.
5. Apply the parking brake, and thendisconnect the vehicle from the towvehicle.
6. Release the parking brake, start theengine, and shift the transmission toposition D to make sure the transfercase is out of position N.
7. If the transfer case does notsuccessfully shift out of position N, setthe parking brake until you can haveyour vehicle serviced.
Resolving the SHIFT DELAY PULLFORWARD Message
If the instrument cluster displays SHIFTDELAY PULL FORWARD perform thefollowing:
1. Press and hold the brake pedal.
2. Put the transmission into position N,and then start the engine.
3. With the engine running, shift thetransmission to position D and let thevehicle roll forward, up to 3 feet (1meter). You may hear an audible noiseas the transfer case shifts out of itsneutral position. This is normal.
4. Make sure the instrument clusterdisplays NEUTRAL TOW DISABLED.
217
Expedition (TB7) Canada/United States of America, enUSA, Edition date: 03/2016, First Printing
Towing
Page 224 of 500
ROADSIDE ASSISTANCE
Vehicles Sold in the United States:Getting Roadside Assistance
To fully assist you should you have avehicle concern, Ford Motor Companyoffers a complimentary roadsideassistance program. This program isseparate from the New Vehicle LimitedWarranty. The service is available:
•24 hours a day, seven days a week.
•For the coverage period listed on theRoadside Assistance Card included inyour Owner's Manual portfolio.
Roadside Assistance covers:
•A flat tire change with a good spare, ifprovided with the vehicle (exceptvehicles supplied with a tire inflationkit).
•Battery jump start.
•Lock-out assistance (key replacementcost is the customer's responsibility).
•Fuel delivery — independent servicecontractors, if not prohibited by state,local or municipal law, shall deliver upto 2 gal (7.6 L) of gasoline or 5 gal(18.9 L) of diesel fuel to a disabledvehicle. Roadside Assistance limits fueldelivery service to two no-chargeoccurrences within a 12-month period.
•Winch out — available within 100 ft(30.5 m) of a paved or countymaintained road, no recoveries.
•Towing — independent servicecontractors, if not prohibited by state,local or municipal law, shall tow Fordeligible vehicles to an authorized dealerwithin 35 mi (56 km) of thedisablement location or to the nearest
authorized dealer. If a memberrequests a tow to an authorized dealerthat is more than 35 mi (56 km) fromthe disablement location, the membershall be responsible for any mileagecosts in excess of 35 mi (56 km).
Roadside Assistance includes up to $200for a towed trailer if the disabled eligiblevehicle requires service at the nearestauthorized dealer. If the towing vehicle isoperational but the trailer is not, then thetrailer does not qualify for any roadsideservices.
Vehicles Sold in the United States:Using Roadside Assistance
Complete the roadside assistanceidentification card and place it in yourwallet for quick reference. This card is inthe owner's information portfolio in theglove compartment.
United States Ford vehicle customers whorequire Roadside Assistance, call1-800-241-3673.
If you need to arrange roadside assistancefor yourself, Ford Motor Companyreimburses a reasonable amount fortowing to the nearest dealership within35 mi (56 km). To obtain reimbursementinformation, United States Ford vehiclecustomers call 1-800-241-3673.Customers need to submit their originalreceipts.
Vehicles Sold in Canada: GettingRoadside Assistance
To fully assist you should you have avehicle concern, Ford Motor Company ofCanada, Limited offers a complimentaryroadside assistance program. This programis eligible within Canada or the continentalUnited States.
221
Expedition (TB7) Canada/United States of America, enUSA, Edition date: 03/2016, First Printing
Roadside Emergencies
Page 225 of 500
This program is separate from the NewVehicle Limited Warranty, but the coverageis concurrent with the powertrain coverageperiod of your vehicle.
Canadian customers who require roadsideassistance, call 1-800-665-2006.
Vehicles Sold in Canada: UsingRoadside Assistance
Complete the roadside assistanceidentification card and place it in yourwallet for quick reference.
In Canada, this card is found in theWarranty Guide in the glove compartmentof your vehicle.
Vehicles Sold in Canada: RoadsideAssistance Program Coverage
The service is available 24 hours a day,seven days a week.
Canadian roadside coverage and benefitsmay differ from the U.S. coverage.
For complete program coverage detailsyou may contact your dealer, you can callus in Canada at 1-800-665-2006, or visitour website at www.ford.ca.
HAZARD WARNING FLASHERS
Note:If used when the vehicle is notrunning, the battery will lose charge. Theremay be insufficient power to restart yourvehicle.
The hazard warning button islocated on the instrument panel.Use it when your vehicle iscreating a safety hazard for othermotorists.
•Press the button to turn on the hazardwarning function, and the front andrear direction indicators will flash.
•Press the button again to turn themoff.
FUEL SHUTOFF
WARNING
Failure to inspect and, if necessary,repair fuel leaks after a collision mayincrease the risk of fire and seriousinjury. Ford Motor Company recommendsthat the fuel system be inspected by anauthorized dealer after any collision.
In the event of a moderate to severecollision, this vehicle includes a fuel pumpshutoff feature that stops the flow of fuelto the engine. Not every impact will causea shutoff.
Should your vehicle shut off after acollision, you may restart your vehicle. Forvehicles equipped with a key system:
1. Switch off the ignition.
2. Switch on the ignition.
3. Repeat Steps 1 and 2 to re-enable thefuel pump.
For vehicles equipped with a push buttonstart system:
1. Press the START/STOP button toswitch off the ignition.
2. Press the brake pedal and press theSTART/STOP button to switch on theignition.
3.Remove your foot from the brake pedaland press the START/STOP buttonto switch off the ignition.
4. You can either attempt to start theengine by pressing the brake pedal andthe START/STOP button, or switchon the ignition only by pressing theSTART/STOP button withoutpressing the brake pedal. Both waysre-enable the fuel system.
222
Expedition (TB7) Canada/United States of America, enUSA, Edition date: 03/2016, First Printing
Roadside Emergencies