2017 FORD EXPEDITION EL key
[x] Cancel search: keyPage 60 of 500

Opening and Closing the Liftgate
WARNING
Make sure all persons are clear of thepower liftgate area before using thepower liftgate control.
Note:Make sure the area behind yourvehicle is free from obstruction and thatthere is enough room for you to operate theliftgate. Objects too close to your vehicle,for example a wall, garage door or anothervehicle may come into contact with themoving liftgate. This could damage theliftgate and its components.
Note:Be careful when opening or closingthe liftgate in a garage or other enclosedarea to avoid damaging the liftgate.
Note: Do not leave the liftgate open whiledriving. This could damage the liftgate andits components.
From the Instrument Panel
Press the button on theinstrument panel.
With the Remote Control
Press the button twice withinthree seconds.
With the Outside Control Button
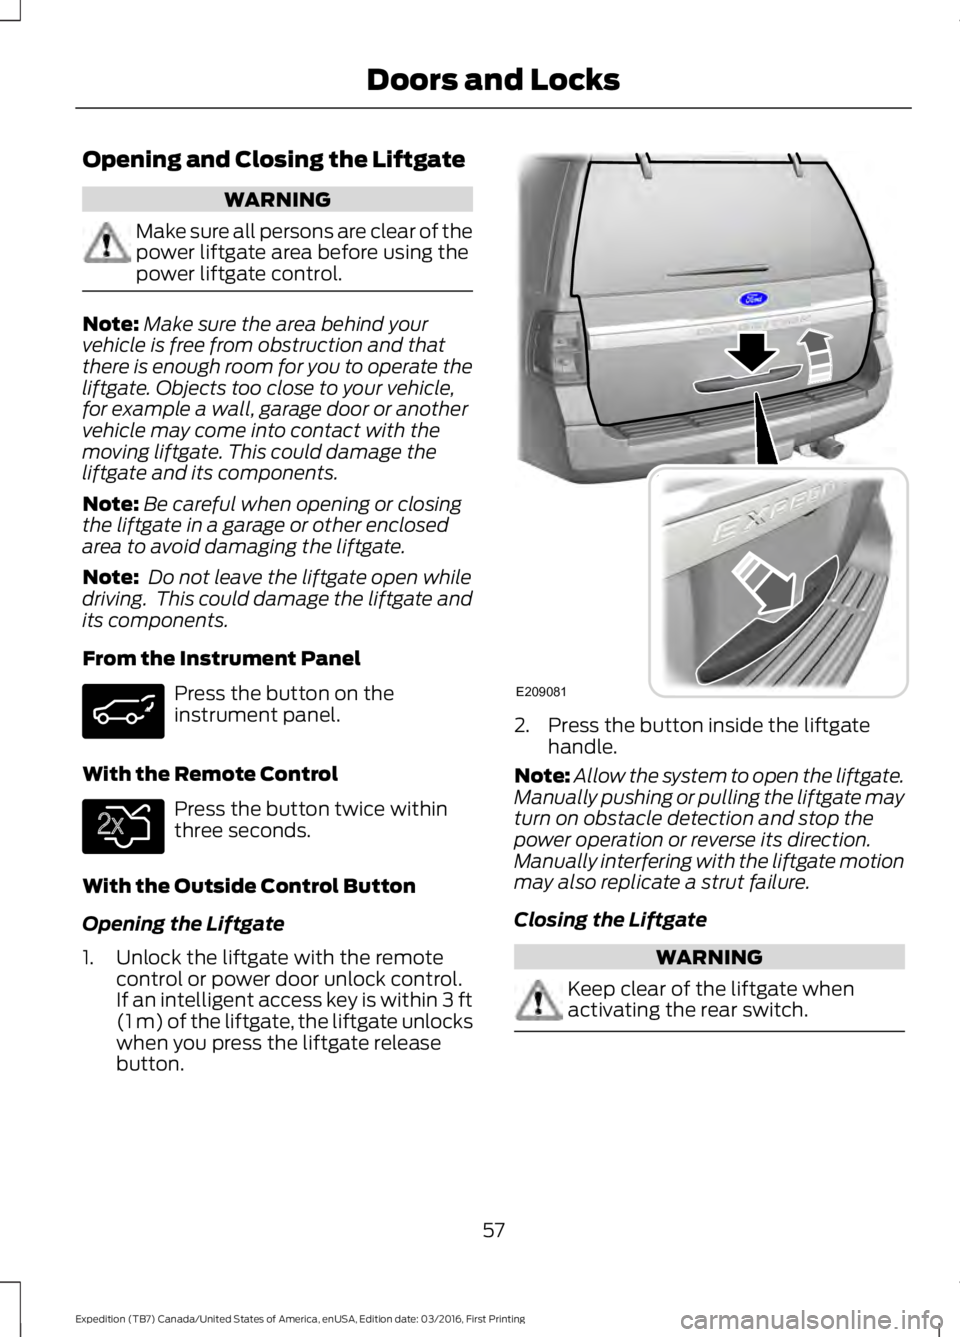
Opening the Liftgate
1. Unlock the liftgate with the remotecontrol or power door unlock control.If an intelligent access key is within 3 ft(1 m) of the liftgate, the liftgate unlockswhen you press the liftgate releasebutton.
2. Press the button inside the liftgatehandle.
Note:Allow the system to open the liftgate.Manually pushing or pulling the liftgate mayturn on obstacle detection and stop thepower operation or reverse its direction.Manually interfering with the liftgate motionmay also replicate a strut failure.
Closing the Liftgate
WARNING
Keep clear of the liftgate whenactivating the rear switch.
57
Expedition (TB7) Canada/United States of America, enUSA, Edition date: 03/2016, First Printing
Doors and Locks E138630 E209081
Page 61 of 500

Press and release the button in the rearcargo area.
Stopping the Liftgate Movement
Note:Do not apply sudden excessive forceto the liftgate while it is in motion. Thiscould damage the power liftgate and itscomponents.
You can stop the liftgate movement bydoing any of the following:
•Pressing the liftgate control button.
•Pressing the liftgate button on theremote control twice.
•Pressing the liftgate button on theinstrument panel.
Obstacle Detection
When Closing
The system stops when it detects anobstacle. Three chimes sound and thesystem reverses to open. Once you removethe obstacle, you can power close theliftgate.
Note:Entering your vehicle while theliftgate is closing can cause your vehicle tobounce and activate obstacle detection. Toprevent this, let the power liftgate closecompletely before you enter your vehicle.Before driving off, check the instrumentcluster for a liftgate or door ajar message orwarning indicator. Failure to do this couldresult in unintentionally leaving the liftgateopen while driving.
When Opening
The system stops when it detects anobstacle and two short tones sound.Remove the obstacle to operate theliftgate.
KEYLESS ENTRY
SECURICODE™ KEYLESS ENTRYKEYPAD
The keypad is located near the driverwindow.
Note:If you enter your entry code too faston the keypad, the unlock function may notwork. Re-enter your entry code more slowly.
58
Expedition (TB7) Canada/United States of America, enUSA, Edition date: 03/2016, First Printing
Doors and LocksE209084 E163050
Page 62 of 500

You can use the keypad to lock or unlockthe doors without using a key.
For vehicles without intelligent access, youcan operate the keypad with thefactory-set 5-digit entry code. The code islocated on the owner’s wallet card in theglove box and is available from anauthorized dealer. You can also create upto five of your own 5-digit personal entrycodes.
For vehicles with intelligent access, you donot need to enter a 5-digit entry code.Press any button on keyless entry keypadonce to unlock all doors.
Note:You must have an intelligent accesskey within 3 ft (1 m) of your vehicle.
Programming a Personal Entry Code
To create your own personal entry code:
1. Enter the factory-set code.
2. Press 1·2 on the keypad within fiveseconds.
3. Enter your personal 5-digit code. Youmust enter each number within fiveseconds of each other.
4. Press 1·2 on the keypad to savepersonal code 1.
The doors will lock then unlock to confirmthat programming was successful.
To program additional personal entrycodes, repeat Steps 1-3, then for Step 4:
•press 3·4 to save personal code 2
•press 5·6 to save personal code 3
•press 7·8 to save personal code 4
•press 9·0 to save personal code 5.
You may also program a personal entrycode through the information display.
Tips:
•Do not set a code that uses five of thesame number.
•Do not use five numbers in sequentialorder.
•The factory-set code will work even ifyou have set your own personal code.
Recalling Memory Positions (IfEquipped)
The programmed entry codes will recalldriver memory positions as follows:
•Entry code 1 will recall driver 1 memorypositions.
•Entry code 2 will recall driver 2 memorypositions.
Note:Personal entry codes 3, 4 and 5 willnot recall memory positions.
Erasing a Personal Code
1. Enter the factory-set 5-digit code.
2. Press and release 1·2 on the keypadwithin five seconds.
3. Press and hold 1·2 for two seconds.You must do this within five secondsof completing Step 2.
All personal codes will erase and only thefactory-set 5-digit code will work.
Anti-Scan Feature
The keypad will go into an anti-scan modeif you enter the wrong code seven times(35 consecutive button presses). Thismode disables the keypad for one minuteand the keypad lamp will flash.
The anti-scan feature will turn off after:
•one minute of keypad inactivity
•pressing the unlock button on theremote control
•switching the ignition on.
59
Expedition (TB7) Canada/United States of America, enUSA, Edition date: 03/2016, First Printing
Doors and Locks
Page 63 of 500

Displaying the Factory Set Code
Note:You need to have two programmedkeys for this procedure.
To display the factory-set code in theinformation display:
1.Insert a key into the ignition and switchthe ignition on for a few seconds.
2.Switch the ignition off and remove thekey.
3. Insert the second key into the ignitionand switch the ignition on.
The factory-set code will display for a fewseconds.
Note:The code may not display until afterany other warning messages first display.
Unlocking and Locking the Doors
Vehicles Without Intelligent Access
To Unlock the Driver Door
Enter the factory-set 5-digit code or yourpersonal code. You must press eachnumber within five seconds of each other.The interior lamps will illuminate.
Note:All doors will unlock if you disablethe two-stage unlocking mode. SeeLocking and Unlocking (page 52).
To Unlock All Doors
Enter the factory-set code or your personalcode, then press 3·4 within five seconds.
To Lock All Doors
Press and hold 7·8 and 9·0 at the sametime (with the driver door closed). You donot need to enter the keypad code first.
Vehicles With Intelligent Access
Press any button on keyless entry keypadonce to unlock all doors.
Note:You must have an intelligent accesskey within 3 ft (1 m) of your vehicle.
60
Expedition (TB7) Canada/United States of America, enUSA, Edition date: 03/2016, First Printing
Doors and Locks
Page 64 of 500

PASSIVE ANTI-THEFT
SYSTEM
Note:The system is not compatible withnon-Ford aftermarket remote start systems.Use of these systems may result in vehiclestarting problems and a loss of securityprotection.
Note:Metallic objects, electronic devicesor a second coded key on the same keychain may cause vehicle starting problemsif they are too close to the key when startingthe engine. Prevent these objects fromtouching the coded key while starting theengine. Switch the ignition off, move allobjects on the key chain away from thecoded key and restart the engine if aproblem occurs.
Note:Do not leave a duplicate coded keyin the vehicle. Always take your keys andlock all doors when leaving the vehicle.
SecuriLock®
The system is an engine immobilizationsystem. It is designed to help prevent theengine from being started unless a codedkey programmed to your vehicle is used.Using the wrong key may prevent theengine from starting. A message mayappear in the information display.
If you are unable to start the engine with acorrectly coded key, a malfunction hashappened and a message may appear inthe information display.
Automatic Arming
The vehicle arms immediately after youswitch the ignition off.
Automatic Disarming
Switching the ignition on with a coded keydisarms the vehicle.
Replacement Keys
Note:Your vehicle comes equipped withtwo integrated keyhead transmitters or twointelligent access keys.
The integrated keyhead transmitterfunctions as a programmed ignition keythat operates all the locks and starts thevehicle, as well as a remote control.
The intelligent access key functions as aprogrammed key that operates the driverdoor lock and activates the intelligentaccess with push button start system, aswell as a remote control.
If your programmed transmitters orstandard SecuriLock coded keys(integrated keyhead transmitters only) arelost or stolen and you do not have an extracoded key, you will need to have yourvehicle towed to an authorized dealer. Youneed to erase the key codes from yourvehicle and program new coded keys.
Store an extra programmed key away fromthe vehicle in a safe place to help preventany inconveniences. See your authorizeddealer to purchase additional spare orreplacement keys.
Programming a Spare IntegratedKeyhead Transmitter
Note:You can program a maximum of eightcoded keys to your vehicle. All eight can beintegrated keyhead transmitters.
You can program your own integratedkeyhead transmitter or standardSecuriLock coded keys to your vehicle. Thisprocedure will program both the engineimmobilizer keycode and the remote entryportion of the remote control to yourvehicle
Only use integrated keyhead transmittersor standard SecuriLock keys.
61
Expedition (TB7) Canada/United States of America, enUSA, Edition date: 03/2016, First Printing
Security
Page 65 of 500

You must have two previouslyprogrammed coded keys and the newunprogrammed key readily accessible. Seeyour authorized dealer to have the sparekey programmed if two previouslyprogrammed coded keys are not available.
Read and understand the entire procedurebefore you begin.
1.Insert the first previously programmedcoded key into the ignition.
2.Switch the ignition from off to on. Keepthe ignition on for at least threeseconds, but no more than 10 seconds.
3.Switch the ignition off and remove thefirst coded key from the ignition.
4. After three seconds but within 10seconds of switching the ignition off,insert the second previously coded keyinto the ignition.
5.Switch the ignition from off to on. Keepthe ignition on for at least threeseconds, but no more than 10 seconds.
6.Switch the ignition off and remove thesecond previously programmed codedkey from the ignition.
7. After three seconds but within 10seconds of switching the ignition offand removing the previouslyprogrammed coded key, insert the newunprogrammed key into the ignition.
8.Switch the ignition from off to on. Keepthe ignition on for at least six seconds.
9.Remove the newly programmed codedkey from the ignition.
If the key has been successfullyprogrammed it will start the engine andoperate the remote entry system (if thenew key is an integrated keyheadtransmitter).
If programming was not successful, wait10 seconds and repeat Steps 1 through 8.If you are still unsuccessful, take yourvehicle to your authorized dealer.
Programming a Spare IntelligentAccess Key
See your authorized dealer to haveadditional keys programmed to yourvehicle.
ANTI-THEFT ALARM
The system will warn you of anunauthorized entry to your vehicle. It willbe triggered if any door, the luggagecompartment or the hood is openedwithout using the key, remote control orkeyless entry keypad.
The direction indicators will flash and thehorn will sound if unauthorized entry isattempted while the alarm is armed.
Take all remote controls to an authorizeddealer if there is any potential alarmproblem with your vehicle.
Arming the Alarm
The alarm is ready to arm when there isnot a key in your vehicle. Electronically lockyour vehicle to arm the alarm.
Disarming the Alarm
Disarm the alarm by any of the followingactions:
•Unlock the doors or luggagecompartment with the remote controlor keyless entry keypad.
•Switch your vehicle on or start yourvehicle.
•Use a key in the driver door to unlockyour vehicle, then switch your vehicleon within 12 seconds.
Note:Pressing the panic button on theremote control will stop the horn and signalindicators, but will not disarm the system.
62
Expedition (TB7) Canada/United States of America, enUSA, Edition date: 03/2016, First Printing
Security
Page 81 of 500

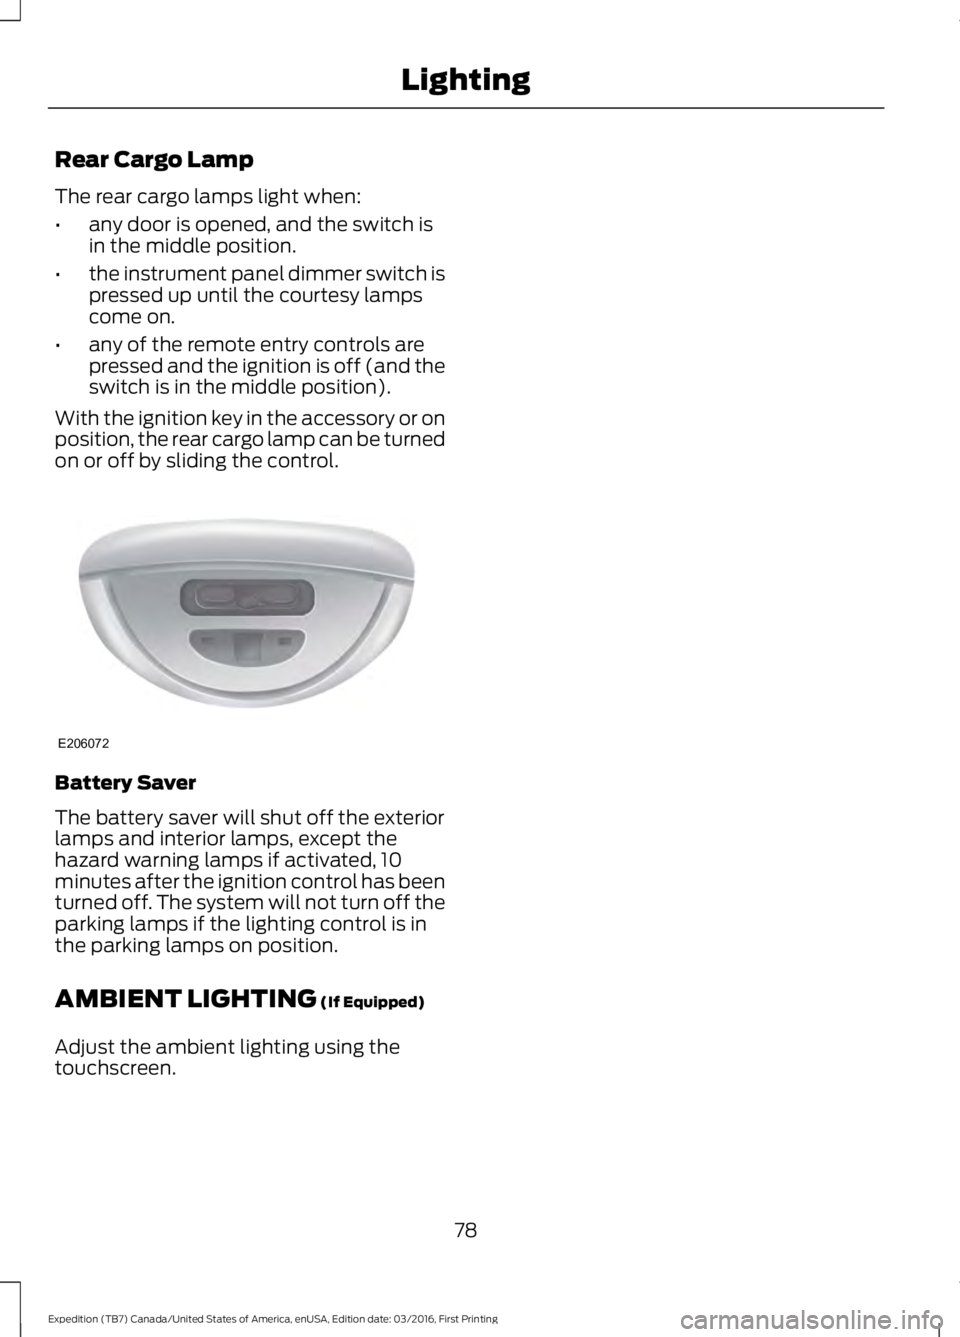
Rear Cargo Lamp
The rear cargo lamps light when:
•any door is opened, and the switch isin the middle position.
•the instrument panel dimmer switch ispressed up until the courtesy lampscome on.
•any of the remote entry controls arepressed and the ignition is off (and theswitch is in the middle position).
With the ignition key in the accessory or onposition, the rear cargo lamp can be turnedon or off by sliding the control.
Battery Saver
The battery saver will shut off the exteriorlamps and interior lamps, except thehazard warning lamps if activated, 10minutes after the ignition control has beenturned off. The system will not turn off theparking lamps if the lighting control is inthe parking lamps on position.
AMBIENT LIGHTING (If Equipped)
Adjust the ambient lighting using thetouchscreen.
78
Expedition (TB7) Canada/United States of America, enUSA, Edition date: 03/2016, First Printing
LightingE206072
Page 93 of 500

4X4 LOW
Illuminates when you engagefour-wheel drive low. If the lightfails to display or remains onwhen the ignition is on, have the systemserviced immediately by an authorizeddealer.
4X4 HIGH
Illuminates when you engagefour-wheel drive high. If the lightfails to display or remains onwhen the ignition is turned on, have thesystem serviced immediately by anauthorized dealer.
AUDIBLE WARNINGS AND
INDICATORS
Key in Ignition Warning Chime
Sounds when you leave the key in theignition and the driver door open.
Headlamps On Warning Chime
Sounds when the headlamps or parkinglamps are on, the ignition is off (the key isnot in the ignition) and the driver door isopen.
Parking Brake On Warning Chime
Sounds when you have left the parkingbrake on and drive your vehicle. If thewarning chime remains on after you havereleased the parking brake, have thesystem checked by an authorized dealerimmediately.
Direction Indicator Chime
Sounds when you leave the directionindicator on after signaling a turn anddriving the vehicle more than 1.5 miles (2.4km).
90
Expedition (TB7) Canada/United States of America, enUSA, Edition date: 03/2016, First Printing
Instrument ClusterE181780 E181779