2017 FIAT FIORINO interior lights
[x] Cancel search: interior lightsPage 25 of 272

Setup menu function
The menu fig. 17 comprises a series of functions in a
"circular" arrangement, which can be selected by
pressing the
andbuttons to access the
different selections and settings described in the
following paragraphs.
The menu can be activated by pressing theSET
button briefly.
Single presses on the
andbuttons will scroll
through the setup menu options.
Management modes differ according to the option
selected.
Selecting an option from the menu
- press theSET
button briefly to select the menu
setting you wish to change;
- by pressing the
andbuttons (with single
presses) you can choose the new setting;
- press theSET
button briefly to store the new
setting and at the same time go back to the
previously selected menu option.
Selecting "Set Clock"
- press theSET
button briefly to select the first
value to change (hours);
- by pressing the
andbuttons (with single
presses) you can choose the new setting;
- press theSET
button briefly to store the new
setting and at the same time go to the next set-up
menu option (minutes);- once the minutes are set in the same way, you
return to the previous menu option.
Hold down the SET
button:
- returns to the setup menu if you are in the menu;
- returns to the menu if you are setting a menu
option;
- to save only the changes already stored by the user
(and confirmed by pressing theSET
button).
The set-up menu page is timed. When the menu is
exited due to expiry of the time allowed, only the
changes already stored by the user (and confirmed by
pressing theSET
button briefly) will be saved.
From the standard screen, press theSET
button
briefly to start browsing.
Press
orto browse within the menu.
NOTE Only the reduced menu can be accessed while
the vehicle is moving for safety reasons ("SPEEd"
setting). Stop the vehicle to access the full menu.
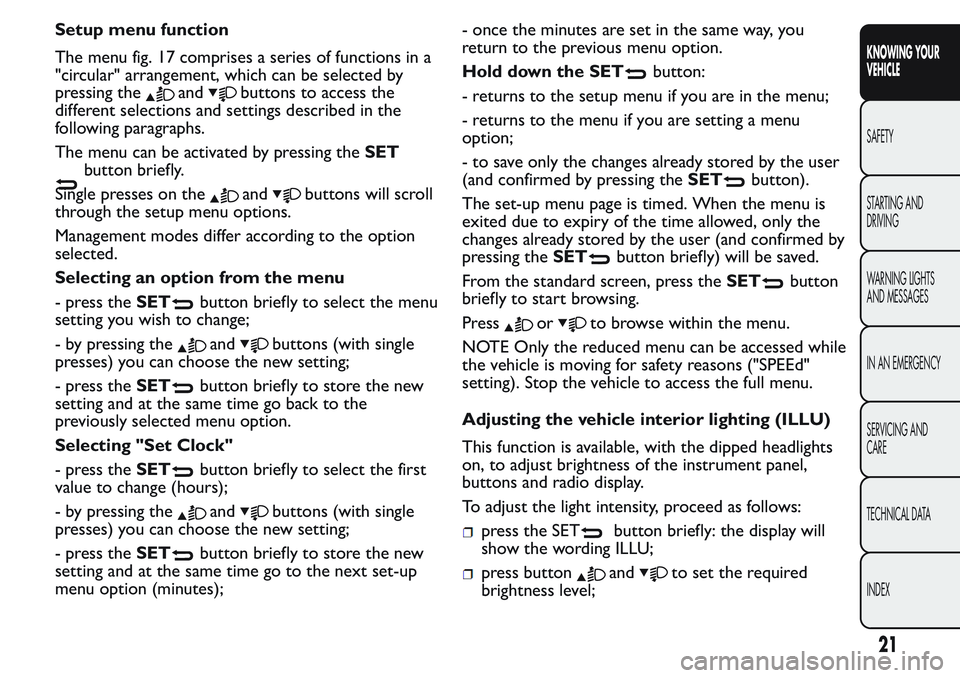
Adjusting the vehicle interior lighting (ILLU)
This function is available, with the dipped headlights
on, to adjust brightness of the instrument panel,
buttons and radio display.
To adjust the light intensity, proceed as follows:
press the SETbutton briefly: the display will
show the wording ILLU;
press buttonandto set the required
brightness level;
21
KNOWING YOUR
VEHICLE
SAFETY
STARTING AND
DRIVING
WARNING LIGHTS
AND MESSAGES
IN AN EMERGENCY
SERVICING AND
CARE
TECHNICAL DATA
INDEX
Page 32 of 272

the changes already stored by the user (and
confirmed by pressing theSET
button briefly)
will be saved.
From the standard screen, press theSET
button
briefly to start browsing.
Press the
orbuttons to navigate within the
menu.
NoteOnly the reduced menu can be accessed while
the vehicle is moving for safety reasons ("Speed
Beep" setting). Stop the vehicle to access the full
menu.
Adjusting the vehicle interior lighting
This function is available with the dipped beam
headlights on to adjust brightness of the instrument
panel, buttons and radio display.
To adjust the light intensity, proceed as follows:
press the SETbutton briefly to make
the display flash the previously set level;
press theorbutton to set the required
brightness level;
press the SETbutton briefly to go back to the
menu screen or hold the button down to go back
to the standard screen without saving.
Speed limit (Speed Beep)
This function makes it possible to set the vehicle
speed limit (km/h or mph). When this limit isexceeded the driver is immediately alerted (see
“Warning lights and messages” section).
To set the desired speed limit, proceed as follows:
- press theSET
button briefly, the display will
show the wording (Speed Beep);
- press the
orbutton to select speed limit
activation (On) or deactivation (Off );
- if the function is on, press
orbutton to
select the desired speed limit and then pressSET
to confirm.
NoteSetting is possible between 30 and 200 km/h,
or 20 and 125 mph, according to the previously
set unit. See the "Setting the unit of measurement
(Measurement unit)" paragraph described below. The
setting will increase/decrease by 5 units each time
button
/is pressed. Hold down the/
button to automatically increase/decrease the
setting rapidly. Complete the adjustment with single
presses of the button when you approach the desired
value.
- press theSET
button briefly to go back to the
menu screen or hold the button down to go back
to the standard screen without saving.
To cancel the setting, proceed as follows:
- press theSET
button briefly to make the
display flash (On);
- press button
, (Off ) will flash on the display;
- press theSET
button briefly to go back to the
menu screen or hold the button down to go back
to the standard screen without saving.
28
KNOWING YOUR
VEHICLE
SAFETY
STARTING AND
DRIVING
WARNING LIGHTS
AND MESSAGES
IN AN EMERGENCY
SERVICING AND
CARE
TECHNICAL DATA
INDEX
Page 48 of 272

REAR-VIEW MIRRORS
INTERIOR REAR-VIEW MIRROR
(for versions/markets, where provided)
The mirror is fitted with a safety device that causes
its release in the event of a violent impact with
the passenger.
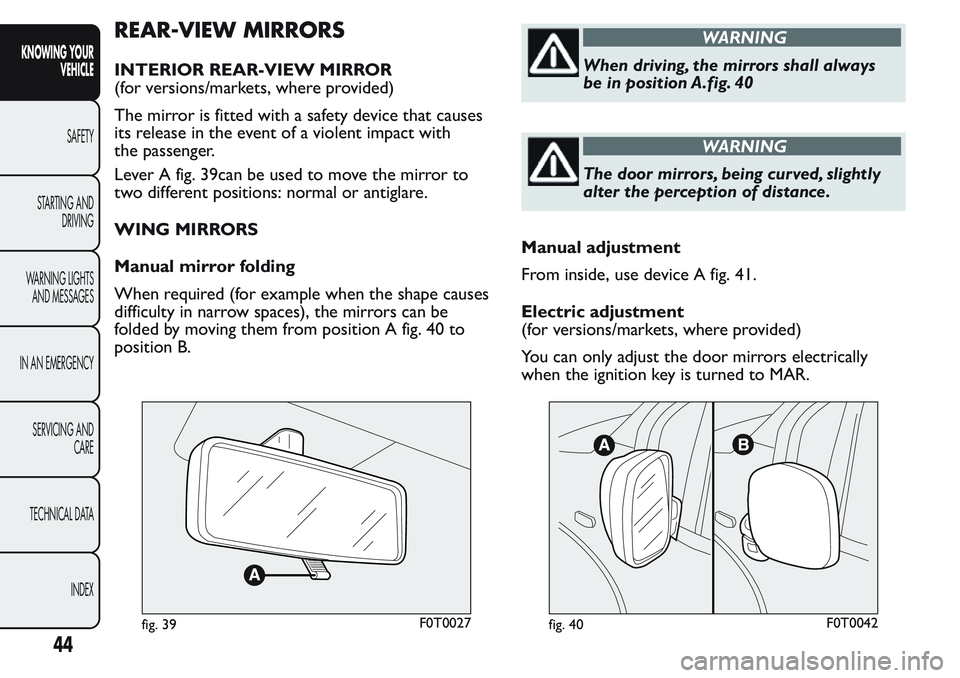
Lever A fig. 39can be used to move the mirror to
two different positions: normal or antiglare.
WING MIRRORS
Manual mirror folding
When required (for example when the shape causes
difficulty in narrow spaces), the mirrors can be
folded by moving them from position A fig. 40 to
position B.
WARNING
When driving, the mirrors shall always
be in position A.fig. 40
WARNING
The door mirrors, being curved, slightly
alter the perception of distance.
Manual adjustment
From inside, use device A fig. 41.
Electric adjustment
(for versions/markets, where provided)
You can only adjust the door mirrors electrically
when the ignition key is turned to MAR.
fig. 39F0T0027fig. 40F0T0042
44
KNOWING YOUR
VEHICLE
SAFETY
STARTING AND
DRIVING
WARNING LIGHTS
AND MESSAGES
IN AN EMERGENCY
SERVICING AND
CARE
TECHNICAL DATA
INDEX
Page 66 of 272

changes. This function complies with the relevant
legislations currently in force.
FOG LIGHTS
(for versions/markets, where provided)
Press button
fig. 60 with the side/taillights on to
turn the fog lights on. Instrument panel warning light
comes on.
Press the button again to turn the lights off.
REAR FOG LIGHTS
Press button
fig. 60 with the dipped beams or
front fog lights on to turn the rear fog lights on.
Instrument panel warning light
comes on.
Press the button again to turn the lights off or turn
off the dipped beam headlights and/or the front
fog lights (for versions/markets, where provided).
INTERIOR FITTINGS
DRIVER SIDE ARMREST
(for versions/markets, where provided)
On some versions, the driver side front seat has an
armrest.
Raise or lower the armrest as shown by the arrows
fig. 61.
STORAGE COMPARTMENT
This is located in front of the passenger seat fig. 62.
GLOVE COMPARTMENT
(for versions/markets, where provided)
To open it, operate handle A fig. 63
fig. 60F0T0501fig. 61F0T0056
62
KNOWING YOUR
VEHICLE
SAFETY
STARTING AND
DRIVING
WARNING LIGHTS
AND MESSAGES
IN AN EMERGENCY
SERVICING AND
CARE
TECHNICAL DATA
INDEX
Page 94 of 272

Projecting loads on the roof of the car
may interfere with the correct operation
of the sensor. Before starting make sure
the load is correctly positioned, in order not to
cover the sensor operating range.
If the windscreen must be replaced due to
scratches, chipping or breakage, contact
exclusively a Fiat Dealership. Do not
replace the windscreen on your own, risk of
malfunction! It is advisable to replace the
windscreen if it is damaged in the laser sensor
area.
Do not tamper nor operate on the laser
sensor. Do not close the openings in the
aesthetic cover located under the interior
rear view mirror. In the event of a sensor failure,
contact a Fiat Dealership.
If you are driving on roads close to trees
with protruding branches it is advisable to
deactivate the system to prevent the
branches at the height of the bonnet or the
windscreen from interfering with the system.
Do not cover the operating range of the
sensor with stickers or other objects.
Also pay attention to other objects on the
bonnet (e.g. a layer of snow) and make sure they
do not interfere with the light emitted by the
laser.
If a trailer or a vehicle is towed the system
must be deactivated with the display
Setup Menu.
If the system signals a loss of pressure on
a specific tyre, it is recommended to
check the pressure on all four tyres.
90
KNOWING YOUR
VEHICLE
SAFETY
STARTING AND
DRIVING
WARNING LIGHTS
AND MESSAGES
IN AN EMERGENCY
SERVICING AND
CARE
TECHNICAL DATA
INDEX
Page 133 of 272

A small amount of dust will be released when the
airbags are deployed. The dust is not harmful and
does not indicate the beginning of a fire.
Furthermore, the surface of the deployed bag and
the interior of the vehicle may be covered in a dusty
residue: this may irritate your skin and eyes. Wash
with mild soap and water in the event of exposure.
Should an accident occur in which any of the safety
devices are activated, take the vehicle to a Fiat
Dealership to have the activated devices replaced and
to have the whole system checked.
Every control, repair and replacement operation
concerning the airbags must be carried out only at
Fiat Dealerships.
If you are having the vehicle scrapped, have the airbag
system deactivated at a Fiat Dealership first. If the
vehicle changes ownership, the new owner must be
informed of the method of use of airbags and the
above warnings and also be given this "Owner's
Handbook".
Pretensioners, front airbags and front side bags are
deployed differently according to the type of
collision. Failure to activate one or more of the
devices does not indicate a system malfunction.WARNING
There may be a fault in the retaining
systems if the warning light
does not
light up when the key is turn on or remains on
while travelling (on some versions with a
message on the display). In this case, the airbags
or the pretensioners may not be activated in
the case of an accident or (in a lesser number of
cases) they may be activated incorrectly.
Contact a Fiat Dealership immediately to have
the system checked.
WARNING
Always drive with your hands on the rim
of the steering wheel so that the airbag
can inflate freely if required. Do not drive with
your body bent forward. Keep your back
straight against the backrest .
WARNING
In some versions, in case of a LED
failure (located on the plate of the
instrument panel), the
warning light on the
instrument panel turns on and the passenger
side airbags are deactivated.
129
KNOWING YOUR
VEHICLE
SAFETY
STARTING AND
DRIVING
WARNING LIGHTS
AND MESSAGES
IN AN EMERGENCY
SERVICING AND
CARE
TECHNICAL DATA
INDEX
Page 178 of 272

THIRD BRAKE LIGHTS
Swing door versions
Contact Fiat Dealership to replace the third brake
lights fig. 166.
NUMBER PLATE LIGHTS
Proceed as follows to replace the bulbs A fig. 167:
operate the holding tabs at the points indicated by
the arrows, and remove the bulb holder;
turn the bulb holder B fig. 168 anticlockwise and
then remove the bulb C.
CHANGING AN INTERIOR BULB
For the type of bulb and corresponding power rating,
see the paragraph "Changing a bulb".
fig. 166F0T0103
fig. 167F0T0104
fig. 168F0T0105
174
KNOWING YOUR
VEHICLE
SAFETY
STARTING AND
DRIVING
WARNING LIGHTS
AND MESSAGES
IN AN
EMERGENCY
SERVICING AND
CARE
TECHNICAL DATA
INDEX
Page 188 of 272

PROTECTED DEVICE - fig. 184 FUSE AMPS
Dipped headlight (passenger side)
F12
(*)7,5
Dipped headlight (driver side)/Headlight alignment corrector F13
7,5/5
(*)
INT/A SCM relay coils F31 5
Timed interior lighting
F32
(*)7,5
Radio
Bluetoothfisystem node/Blue&Me™ node/EOBD diagnostic socket/
Volumetric alarm ECU/Alarm siren ECUF36 10
Instrument panel node/Stop light control (NO) F37 5
Door/luggage compartment lock actuators
(*)F38 20
Windshield washer/rear window washer bidirectional pump F43 15
Front electric window (driver side)
(*)F47 20
Front electric window (passenger side)
(*)F48 20
Control lights/Parking sensors ECU/Electric wing mirrors/Volumetric alarm
ECUF49 5
INT Radio node/
Bluetoothfisystem ECU/Blue&Me™ node/Electric wing
mirrors movement/Clutch switch/
Brake light control (NC)F51 7.5
Instrument panel node F53 5
External mirror defrosters F41 7.5
SpareF45 -
SpareF46 -
SpareF90 -
(*)For versions/markets, where provided
184
KNOWING YOUR
VEHICLE
SAFETY
STARTING AND
DRIVING
WARNING LIGHTS
AND MESSAGES
IN AN
EMERGENCY
SERVICING AND
CARE
TECHNICAL DATA
INDEX