2017 FIAT 500L LIVING remove seats
[x] Cancel search: remove seatsPage 15 of 240
WARNING
7)Any adjustment must be performed with
the vehicle at a standstill.
8)After releasing the adjustment lever,
always check that the seat is locked on the
guides by trying to move it back and forth.
If the seat is not locked into place, it may
unexpectedly slide and cause the driver to
lose control of the vehicle.
9)Do not move the front passenger seat
table if a child is seated on the same or
sitting in the suitable child restraint system.
10)Do not travel with the supporting
surface open: always make sure it is
correctly closed.
11)Before setting off, make sure that the
seats are locked correctly to their
anchoring devices.
12)During repositioning of the second row
rear seats, sit correctly on the third row
rear seats, making sure that your feet do
not exceed the red strip located on the
floor.13)If there are any passengers sitting on
the third row seats, the second row rear
seat must be correctly anchored to the
floor and the backrest must be in vertical
position.
14)Make sure that the backrest is correctly
secured on both sides to prevent it from
moving forward in the event of sharp
braking, causing injuries to passengers. A
metallic click is heard when locking is
correct.
15)Do not move the front passenger seat
table if a child is seated on the same or
sitting in the suitable child restraint system.WARNING
2)The fabric upholstery for the seats has
been designed to withstand long-term
wear deriving from normal use of the
vehicle. Nevertheless, some precautions
are required. Avoid prolonged and/or
excessive rubbing involving clothing
accessories such as metal buckles,
bosses, Velcro strips and the like, which,
by applying a high pressure on the fabric in
a limited area, could cause it to break,
thereby damaging the upholstery.
3)Before tilting the front passenger seat
table fully, remove any objects laid on it.
4)Before tilting the seat backrest fully,
remove any objects laid on it.
HEAD RESTRAINTS
ADJUSTMENTS
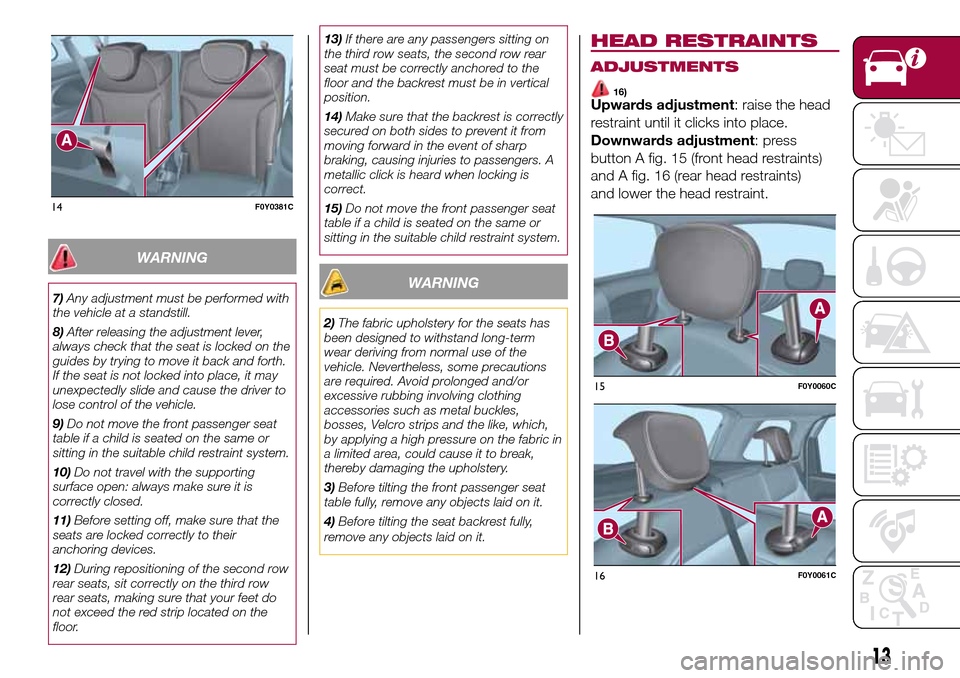
16)Upwards adjustment: raise the head
restraint until it clicks into place.
Downwards adjustment: press
button A fig. 15 (front head restraints)
and A fig. 16 (rear head restraints)
and lower the head restraint.
14F0Y0381C
15F0Y0060C
16F0Y0061C
13
Page 16 of 240
REMOVAL
To remove head restraints, lift them to
the max. height, press buttons A and B
fig. 15 (front head restraints) or A and
B fig. 16 (rear head restraints) at the
side of the two supports, then remove
the head restraints by pulling them
upwards.
IMPORTANT If the rear seats are used,
always set the head restraints in the
"completely raised" position.
WARNING
16)The head restraints must be adjusted
so that the head, rather than the neck,
rests on them. Only in this case can they
protect your head correctly.
STEERING WHEEL
17) 18)
ADJUSTMENTS
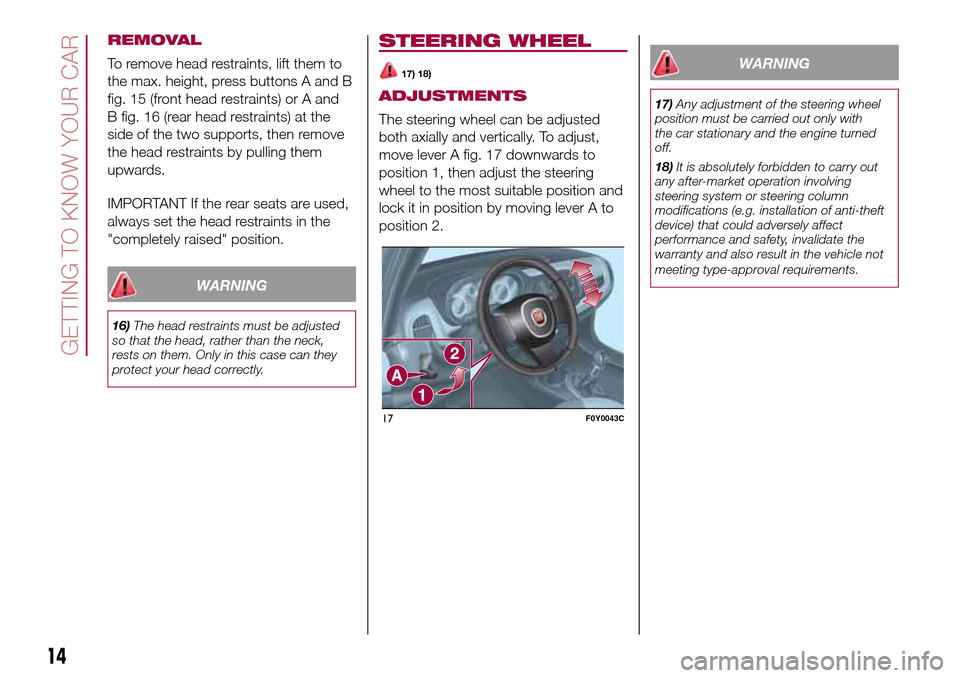
The steering wheel can be adjusted
both axially and vertically. To adjust,
move lever A fig. 17 downwards to
position 1, then adjust the steering
wheel to the most suitable position and
lock it in position by moving lever A to
position 2.
WARNING
17)Any adjustment of the steering wheel
position must be carried out only with
the car stationary and the engine turned
off.
18)It is absolutely forbidden to carry out
any after-market operation involving
steering system or steering column
modifications (e.g. installation of anti-theft
device) that could adversely affect
performance and safety, invalidate the
warranty and also result in the vehicle not
meeting type-approval requirements.
17F0Y0043C
14
GETTING TO KNOW YOUR CAR
Page 31 of 240
WARNING
25)Improper use of the electric windows
can be dangerous. Before and during
operation, always check that passengers
are not exposed to the risk of being injured
either directly by the moving windows or
through objects getting caught or struck by
them. When leaving the vehicle, always
remove the ignition key to avoid the risk of
injury of people still on board due to
accidental operation of the electric
windows.
LUGGAGE
COMPARTMENT
27) 28) 29) 31)13)
Luggage compartment unlocking is
electrically operated and is deactivated
when the car is in motion.
OPENING
26)
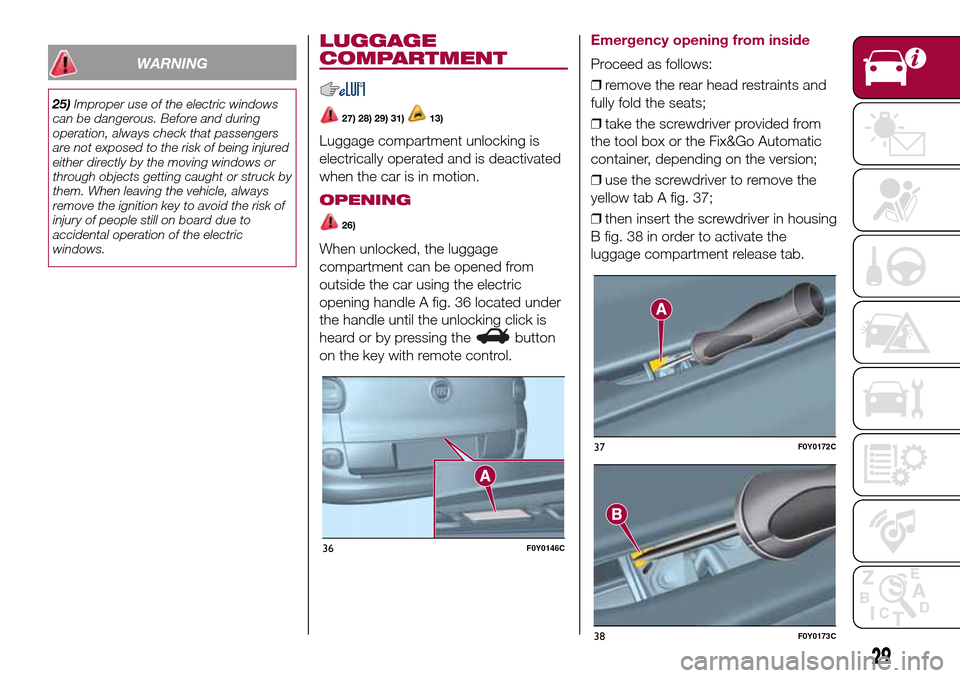
When unlocked, the luggage
compartment can be opened from
outside the car using the electric
opening handle A fig. 36 located under
the handle until the unlocking click is
heard or by pressing the
button
on the key with remote control.
Emergency opening from inside
Proceed as follows:
❒remove the rear head restraints and
fully fold the seats;
❒take the screwdriver provided from
the tool box or the Fix&Go Automatic
container, depending on the version;
❒use the screwdriver to remove the
yellow tab A fig. 37;
❒then insert the screwdriver in housing
B fig. 38 in order to activate the
luggage compartment release tab.
36F0Y0146C
37F0Y0172C
38F0Y0173C
29
Page 32 of 240
CLOSING
Grip the handle located inside the
tailgate and lower the latter, pressing
next to the lock until it clicks.
IMPORTANT Before closing the
luggage compartment make sure that
you have the keys since the luggage
compartment is automatically locked.
LUGGAGE
COMPARTMENT
INITIALISATION
IMPORTANT If the battery is
disconnected or the protection fuse
blows, the luggage compartment
opening/closing mechanism must be
reinitialised as follows:
❒close all the doors and the luggage
compartment;
❒press the
button on the remote
control;
❒press the
button on the remote
control.
"CARGO MAGIC SPACE"(for versions/markets, where provided)
14)The adjustable load platform "Cargo
Magic Space" can be positioned on
three different height levels:
❒Position 0 (platform completely
lowered);❒Position 1 (platform at threshold
level);
❒Position 2 (platform completely
raised).
Load platform tilting
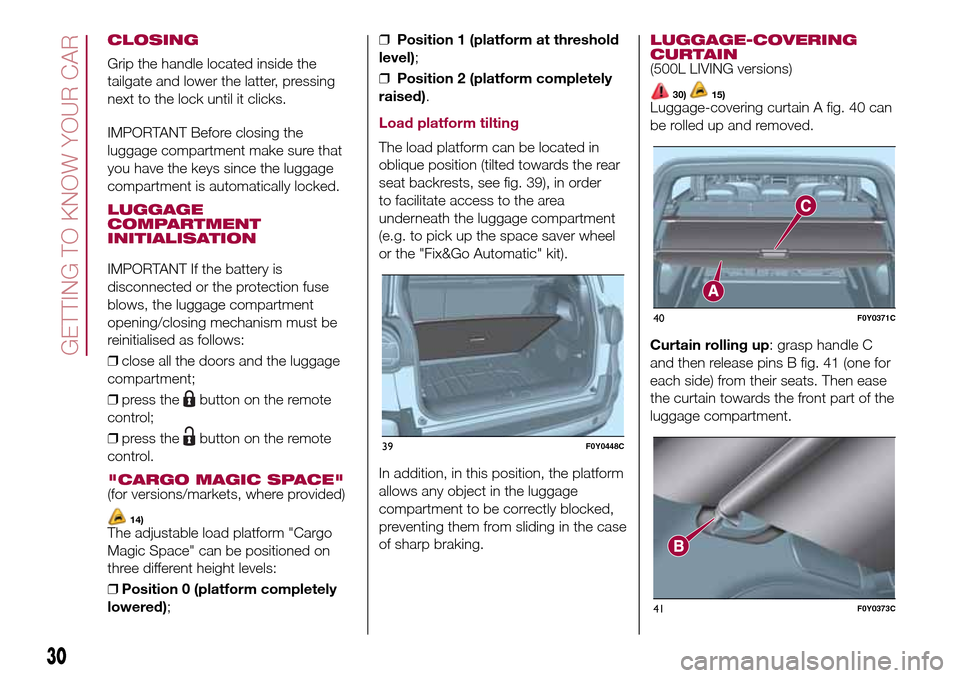
The load platform can be located in
oblique position (tilted towards the rear
seat backrests, see fig. 39), in order
to facilitate access to the area
underneath the luggage compartment
(e.g. to pick up the space saver wheel
or the "Fix&Go Automatic" kit).
In addition, in this position, the platform
allows any object in the luggage
compartment to be correctly blocked,
preventing them from sliding in the case
of sharp braking.
LUGGAGE-COVERING
CURTAIN
(500L LIVING versions)
30)15)Luggage-covering curtain A fig. 40 can
be rolled up and removed.
Curtain rolling up: grasp handle C
and then release pins B fig. 41 (one for
each side) from their seats. Then ease
the curtain towards the front part of the
luggage compartment.
39F0Y0448C
40F0Y0371C
41F0Y0373C
30
GETTING TO KNOW YOUR CAR
Page 78 of 240
CHILD PROTECTION
SYSTEMS
CARRYING CHILDREN
SAFELY
75) 76) 77) 78) 79) 80) 81)
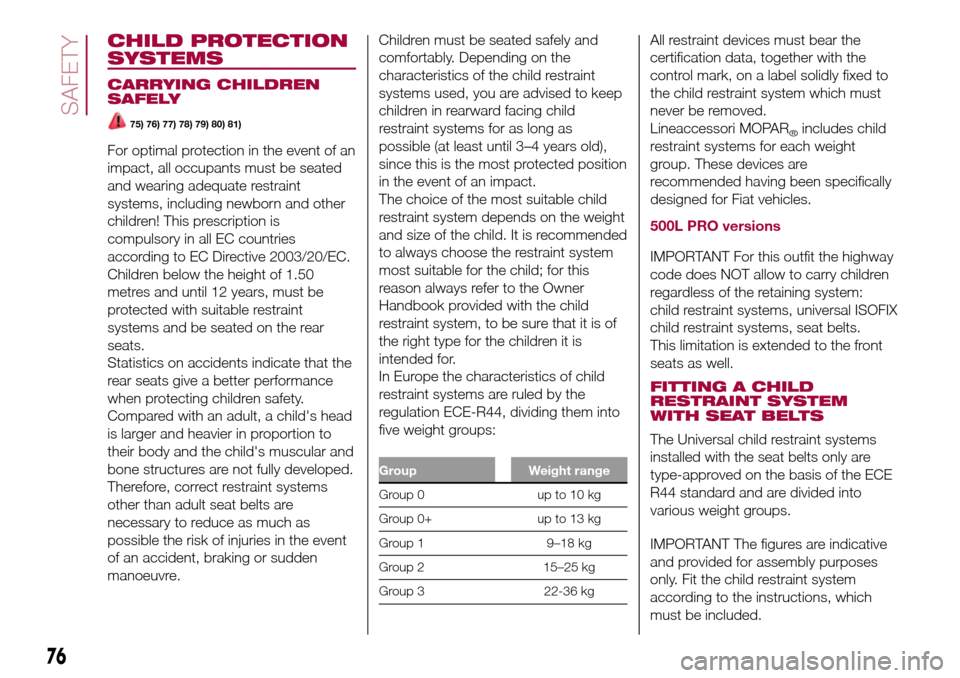
For optimal protection in the event of an
impact, all occupants must be seated
and wearing adequate restraint
systems, including newborn and other
children! This prescription is
compulsory in all EC countries
according to EC Directive 2003/20/EC.
Children below the height of 1.50
metres and until 12 years, must be
protected with suitable restraint
systems and be seated on the rear
seats.
Statistics on accidents indicate that the
rear seats give a better performance
when protecting children safety.
Compared with an adult, a child's head
is larger and heavier in proportion to
their body and the child's muscular and
bone structures are not fully developed.
Therefore, correct restraint systems
other than adult seat belts are
necessary to reduce as much as
possible the risk of injuries in the event
of an accident, braking or sudden
manoeuvre.Children must be seated safely and
comfortably. Depending on the
characteristics of the child restraint
systems used, you are advised to keep
children in rearward facing child
restraint systems for as long as
possible (at least until 3–4 years old),
since this is the most protected position
in the event of an impact.
The choice of the most suitable child
restraint system depends on the weight
and size of the child. It is recommended
to always choose the restraint system
most suitable for the child; for this
reason always refer to the Owner
Handbook provided with the child
restraint system, to be sure that it is of
the right type for the children it is
intended for.
In Europe the characteristics of child
restraint systems are ruled by the
regulation ECE-R44, dividing them into
five weight groups:
Group Weight range
Group0 upto10kg
Group 0+ up to 13 kg
Group 1 9–18 kg
Group 2 15–25 kg
Group 3 22-36 kg
All restraint devices must bear the
certification data, together with the
control mark, on a label solidly fixed to
the child restraint system which must
never be removed.
Lineaccessori MOPAR
®includes child
restraint systems for each weight
group. These devices are
recommended having been specifically
designed for Fiat vehicles.
500L PRO versions
IMPORTANT For this outfit the highway
code does NOT allow to carry children
regardless of the retaining system:
child restraint systems, universal ISOFIX
child restraint systems, seat belts.
This limitation is extended to the front
seats as well.
FITTING A CHILD
RESTRAINT SYSTEM
WITH SEAT BELTS
The Universal child restraint systems
installed with the seat belts only are
type-approved on the basis of the ECE
R44 standard and are divided into
various weight groups.
IMPORTANT The figures are indicative
and provided for assembly purposes
only. Fit the child restraint system
according to the instructions, which
must be included.
76
SAFETY
Page 81 of 240
FITTING AN ISOFIX
CHILD RESTRAINT
SYSTEM
82) 83) 84) 85)The car is equipped with ISOFIX
anchorages, a new standard which
makes fitting a child restraint system
quick, simple and safe.
The ISOFIX system allows the ISOFIX
child restraint systems to be fitted,
without using the vehicle's seat belt,
but directly securing the child restraint
system to three anchorages present on
the vehicle. Traditional child restraint
systems can be fitted alongside ISOFIX
child restraint systems on different
seats in the same vehicle.
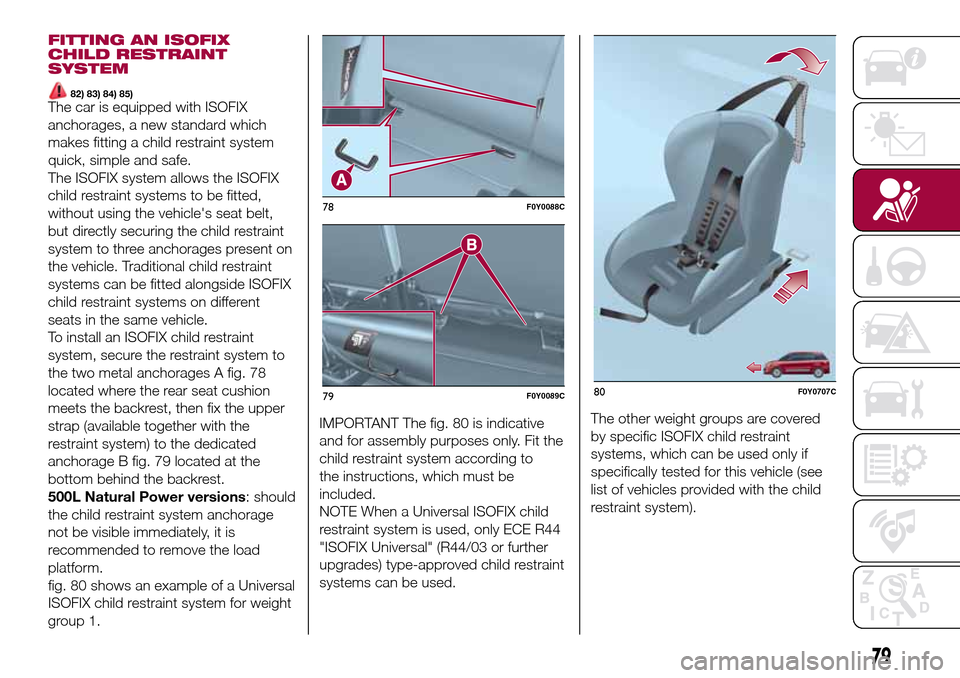
To install an ISOFIX child restraint
system, secure the restraint system to
the two metal anchorages A fig. 78
located where the rear seat cushion
meets the backrest, then fix the upper
strap (available together with the
restraint system) to the dedicated
anchorage B fig. 79 located at the
bottom behind the backrest.
500L Natural Power versions: should
the child restraint system anchorage
not be visible immediately, it is
recommended to remove the load
platform.
fig. 80 shows an example of a Universal
ISOFIX child restraint system for weight
group 1.IMPORTANT The fig. 80 is indicative
and for assembly purposes only. Fit the
child restraint system according to
the instructions, which must be
included.
NOTE When a Universal ISOFIX child
restraint system is used, only ECE R44
"ISOFIX Universal" (R44/03 or further
upgrades) type-approved child restraint
systems can be used.The other weight groups are covered
by specific ISOFIX child restraint
systems, which can be used only if
specifically tested for this vehicle (see
list of vehicles provided with the child
restraint system).
78F0Y0088C
79F0Y0089C80F0Y0707C
79
Page 87 of 240
Main recommendations to carry
children safely
❒Install the child restraint systems on
the rear seat, which is the most
protected position in the event of an
impact.
❒Keep children in rearward facing child
restraint systems for as long as
possible, until 3–4 years old if possible.
❒Should a rearward facing child
restraint system be installed on the rear
seats, it is advisable to position it as
far forward as the position of the front
seat allows.
❒If the passenger's front airbag is
deactivated always check the
dedicated LED on the trim located on
the dashboard switches on, to make
sure that it has actually been
deactivated.
❒Carefully follow the instructions
supplied with the child restraint system
itself. Keep the instructions in the
vehicle along with the other documents
and this handbook. Do not use
second-hand child restraint systems
without instructions.
❒Only one child is to be strapped into
each restraint system; never carry
two children using one child restraint
system.
❒Always check that the seat belts do
not rest on the child’s neck.❒Always check that the seat belt is
well fastened by pulling on it.
❒While travelling, do not let the child sit
incorrectly or unfasten the belts.
❒Never allow a child to put the belt's
diagonal section under an arm or
behind their back.
❒Never carry children on your lap,
even newborns. No one can hold
a child in the case of an accident.
❒In the event of an accident, replace
the child restraint system with a new
one.
WARNING
75)SEVERE DANGER When a front
passenger airbag is fitted, do not install
rearward facing child restraint systems on
the front passenger seat. Deployment of
the airbag in an accident could cause fatal
injuries to the child regardless of the
severity of the collision. It is advisable to
always carry children in a child restraint
system on the rear seat, which is the most
protected position in the event of an
impact.
76)On the sun visor there is a label with
suitable symbols reminding the user that it
is compulsory to deactivate the airbag if
a rearward facing child restraint system is
fitted. Always comply with the instructions
on the passenger's side sun visor (see
the "Supplementary Restraint System
(SRS) - Airbag" paragraph).77)Should it be necessary to carry a child
on the passenger side front seat in a
rearward facing child restraint system, the
passenger side front airbag and side bag
must be deactivated through the display
main Menu (see the instructions in the
"Display" paragraph, "Knowing the
instrument panel" chapter), verifying
deactivation by checking whether the LED
has switched on in the trim located
on the dashboard. Move the passenger's
seat as far back as possible to avoid
contact between the child restraint system
and the dashboard.
78)Do not adjust the front or rear seat if a
child is seated on it or on the dedicated
child restraint system.
79)Incorrect fitting of the child restraint
system may result in an inefficient
protection system. In the event of an
accident the child restraint system may
become loose and the child may be
injured, even fatally. When fitting a restraint
system for newborns or children, strictly
comply with the instructions provided
by the Manufacturer.
80)When the child restraint system is not
used, secure it with the seat belt or with
the ISOFIX anchorages, or remove it from
the vehicle. Do not leave it unsecured
inside the passenger compartment. In this
way, in the case of sudden braking or an
accident, it will not cause injuries to the
occupants.
81)After installing a child restraint system,
do not move the seat: always remove
the child restraint system before making
any adjustment.
85
Page 113 of 240
❒fit the space-saver wheel by inserting
the first stud bolt for two threads into
the hole closest to the valve; then,
tighten the stud bolt by some threads
and proceed in the same way for the
others;
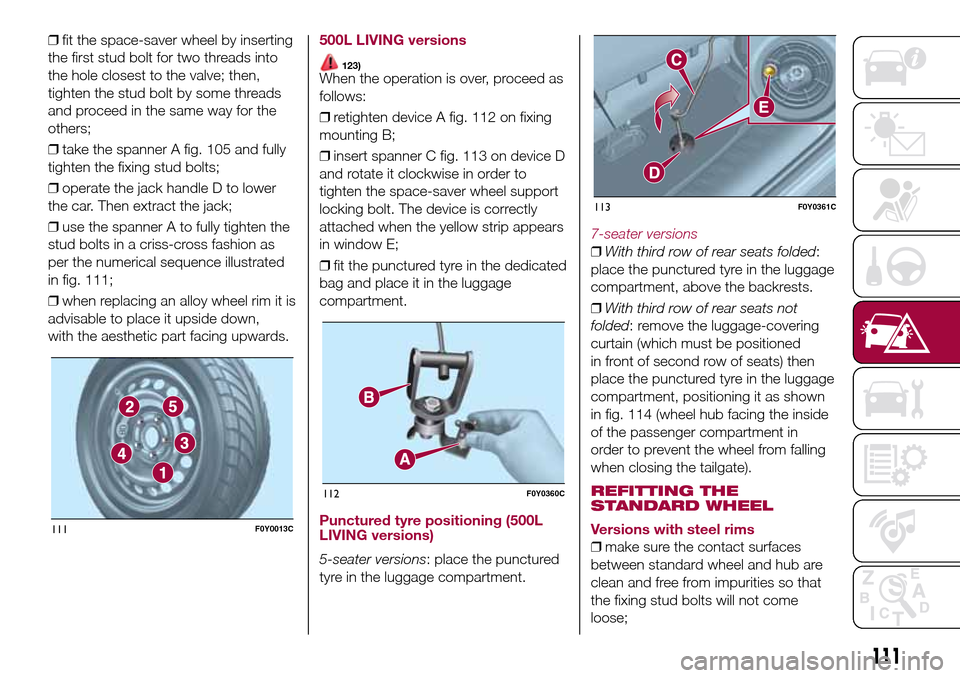
❒take the spanner A fig. 105 and fully
tighten the fixing stud bolts;
❒operate the jack handle D to lower
the car. Then extract the jack;
❒use the spanner A to fully tighten the
stud bolts in a criss-cross fashion as
per the numerical sequence illustrated
in fig. 111;
❒when replacing an alloy wheel rim it is
advisable to place it upside down,
with the aesthetic part facing upwards.500L LIVING versions
123)When the operation is over, proceed as
follows:
❒retighten device A fig. 112 on fixing
mounting B;
❒insert spanner C fig. 113 on device D
and rotate it clockwise in order to
tighten the space-saver wheel support
locking bolt. The device is correctly
attached when the yellow strip appears
in window E;
❒fit the punctured tyre in the dedicated
bag and place it in the luggage
compartment.
Punctured tyre positioning (500L
LIVING versions)
5-seater versions: place the punctured
tyre in the luggage compartment.
7-seater versions
❒With third row of rear seats folded:
place the punctured tyre in the luggage
compartment, above the backrests.
❒With third row of rear seats not
folded: remove the luggage-covering
curtain (which must be positioned
in front of second row of seats) then
place the punctured tyre in the luggage
compartment, positioning it as shown
in fig. 114 (wheel hub facing the inside
of the passenger compartment in
order to prevent the wheel from falling
when closing the tailgate).
REFITTING THE
STANDARD WHEEL
Versions with steel rims
❒make sure the contact surfaces
between standard wheel and hub are
clean and free from impurities so that
the fixing stud bolts will not come
loose;
111F0Y0013C
112F0Y0360C
113F0Y0361C
111