2017 FIAT 124 SPIDER ABARTH automatic transmission
[x] Cancel search: automatic transmissionPage 4 of 292

Read This Carefully
REFUELING
Only refuel with unleaded gasoline with a rating 91 octane recommended not less than 87 octane acceptable. Do not use gasoline containing
methanol or ethanol E85. Using these mixtures may cause misfiring and handling issues, as well as damage fundamental components of the
fuel supply system.
STARTING THE ENGINE
If Equipped with a manual transmission: Be sure that the parking brake is engaged; place the gear selector to NEUTRAL, fully depress the
clutch pedal without pressing the accelerator, then push the ignition button, the engine starts as soon as the ignition is pushed.If Equipped with a automatic transmission : Be sure that the parking brake is engaged and that the gear selector is in PARK (P) or
NEUTRAL (N) , depress the brake pedal, then push the ignition button, the engine starts as soon as the ignition is pushed.
PARKING ON FLAMMABLE MATERIAL
The catalytic converter develops high temperatures during operation. Do not park the vehicle on grass, dry leaves, pine needles or other
flammable material: fire hazard.
RESPECTING THE ENVIRONMENT
The vehicle is equipped with a system that carries out a continuous diagnosis of the emission-related components in order to help protect the
environment.
ELECTRICAL ACCESSORIES
Contact your Authorized Dealer if you decide to add electrical accessories (with the risk of gradually draining the battery) after buying the
vehicle. They can calculate the overall electrical requirement and check that the vehicle's electric system can support the required load.
SCHEDULED SERVICING
Correct maintenance of the vehicle is essential for ensuring that it maintains its performance and its safety features, its environmental
friendliness and low running costs are unchanged over time.
Page 16 of 292

KEYS
Key Fob
A code number is stamped on the plate
attached to the key set; detach this
plate and store it in a safe place (not in
the vehicle) for use if you need to make
a replacement Emergency Key.
Also, write down the code number and
keep it in a separate safe and
convenient place, but not in the vehicle.
If your key fob is lost, contact an
Authorized Dealership and have your
code number ready.
Note:Your key fob configuration may
vary with different feature button icons
as well as the total number of feature
buttons depending on your vehicle
options/features. Key fob example as
shown. To use the Emergency Key, push the
mechanical latch on the back side of
the key fob and pull the emergency key
out that's housed inside the key fob.
Note:
Always keep a spare key fob in
case one is lost. If a key fob is lost, see
an Authorized Dealer as soon as
possible.
The driver must carry the key fob to
ensure the keyless entry system
functions properly.
Warning!
Before exiting a vehicle, always shift the
automatic transmission into PARK or the
manual transmission into FIRST gear or
REVERSE, apply the parking brake, turn
the engine OFF, remove the key fob from
the vehicle and lock your vehicle.
Never leave children alone in a vehicle,
or with access to an unlocked vehicle.
Allowing children to be in a vehicle
unattended is dangerous for a number of
reasons. A child or others could be
seriously or fatally injured. Children should
be warned not to touch the parking brake,
brake pedal or the gear selector.
Do not leave the key fob in or near the
vehicle, or in a location accessible to
children. A child could operate power
windows, other controls, or move the
vehicle.
Do not leave children or animals inside
parked vehicles in hot weather. Interior
heat build-up may cause serious injury or
death.
04010177-361-002Abarth Key Fob
1 — Emergency Key
2 — Key Fob
3 — Key Code Number Plate
14
GETTING TO KNOW YOUR VEHICLE
Page 23 of 292

IGNITION SWITCH
Push Button Start
Positions
The system operates only when the key
fob is within operational range.
Each time the keyless ignition
START/STOP button is pushed, the
ignition cycles in the order of OFF, ACC,
and ON. Pushing the START/STOP
button again from ON position cycles
the ignition to the OFF position.
Note:
The engine starts by pushing the
keyless ignition START/STOP button
while depressing the clutch pedal
(manual transmission) or the brake
pedal (automatic transmission). To
change the ignition position, push the keyless ignition START/STOP button
without depressing the clutch or brake
pedal.
Do not leave the ignition in the ON
position while the engine is not
running, doing so could result in the
battery being discharged. If the ignition
is left in ACC position (for automatic
transmission, the gear selector is in the
P position, and the ignition is in ACC),
the ignition cycles to the OFF position
automatically after about 25 minutes.
OFF
The power supply to electrical devices
turns off and the keyless ignition start
indicator light (amber) also turns off. In
the OFF position, the steering wheel is
locked.
ACC (Accessory)
Some electrical accessories will operate
and the indicator light (amber)
illuminates. In the ACC position, the
steering wheel is unlocked.
The Keyless Entry System does not
function while the keyless ignition has
been placed in the ACC position, and
the doors will not lock/unlock even if
they have been locked manually.
ON
This is the normal running position after
the engine is started. Note:
The indicator light (amber) turns off (the
indicator light amber illuminates when
the ignition has been placed in the ON
position and the engine is not running).
Some indicator lights/warning lights
should be inspected before the engine
is started.
When the keyless ignition has been
placed in the ON position, the sound of
the fuel pump motor operating near the
fuel tank can be heard. This does not
indicate an abnormality.
Warning!
Never use the PARK position as a
substitute for the parking brake. Always
apply the parking brake fully when parked
to guard against vehicle movement and
possible injury or damage.
When leaving the vehicle, always make
sure the ignition is in the OFF mode,
remove the key fob from the vehicle, and
lock your vehicle.
Never leave children alone in a vehicle,
or with access to an unlocked vehicle.
Allowing children to be in a vehicle
unattended is dangerous for a number of
reasons. A child or others could be
seriously or fatally injured. Children should
be warned not to touch the parking brake,
brake pedal or the transmission gear
selector.
05010101-L12-001Abarth Keyless START/STOP Ignition Button
21
Page 33 of 292

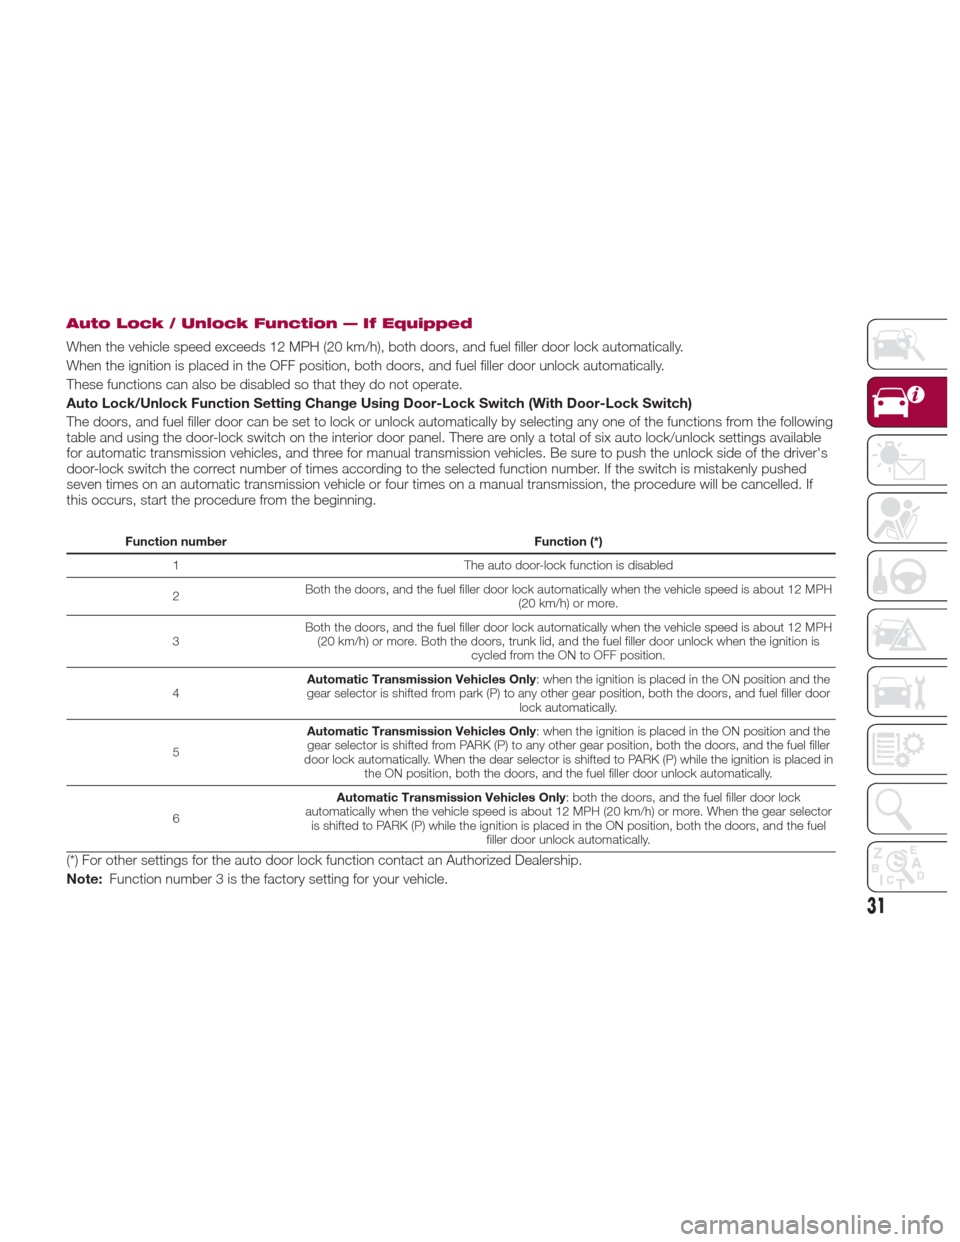
Auto Lock / Unlock Function — If Equipped
When the vehicle speed exceeds 12 MPH (20 km/h), both doors, and fuel filler door lock automatically.
When the ignition is placed in the OFF position, both doors, and fuel filler door unlock automatically.
These functions can also be disabled so that they do not operate.
Auto Lock/Unlock Function Setting Change Using Door-Lock Switch (With Door-Lock Switch)
The doors, and fuel filler door can be set to lock or unlock automatically by selecting any one of the functions from the following
table and using the door-lock switch on the interior door panel. There are only a total of six auto lock/unlock settings available
for automatic transmission vehicles, and three for manual transmission vehicles. Be sure to push the unlock side of the driver's
door-lock switch the correct number of times according to the selected function number. If the switch is mistakenly pushed
seven times on an automatic transmission vehicle or four times on a manual transmission, the procedure will be cancelled. If
this occurs, start the procedure from the beginning.
Function numberFunction (*)
1 The auto door-lock function is disabled
2 Both the doors, and the fuel filler door lock automatically when the vehicle speed is about 12 MPH
(20 km/h) or more.
3 Both the doors, and the fuel filler door lock automatically when the vehicle speed is about 12 MPH
(20 km/h) or more. Both the doors, trunk lid, and the fuel filler door unlock when the ignition is cycled from the ON to OFF position.
4 Automatic Transmission Vehicles Only
: when the ignition is placed in the ON position and the
gear selector is shifted from park (P) to any other gear position, both the doors, and fuel filler door lock automatically.
5 Automatic Transmission Vehicles Only
: when the ignition is placed in the ON position and the
gear selector is shifted from PARK (P) to any other gear position, both the doors, and the fuel filler
door lock automatically. When the dear selector is shifted to PARK (P) while the ignition is placed in the ON position, both the doors, and the fuel filler door unlock automatically.
6 Automatic Transmission Vehicles Only
: both the doors, and the fuel filler door lock
automatically when the vehicle speed is about 12 MPH (20 km/h) or more. When the gear selector is shifted to PARK (P) while the ignition is placed in the ON position, both the doors, and the fuel filler door unlock automatically.
(*) For other settings for the auto door lock function contact an Authorized Dealership.
Note:Function number 3 is the factory setting for your vehicle.
31
Page 34 of 292

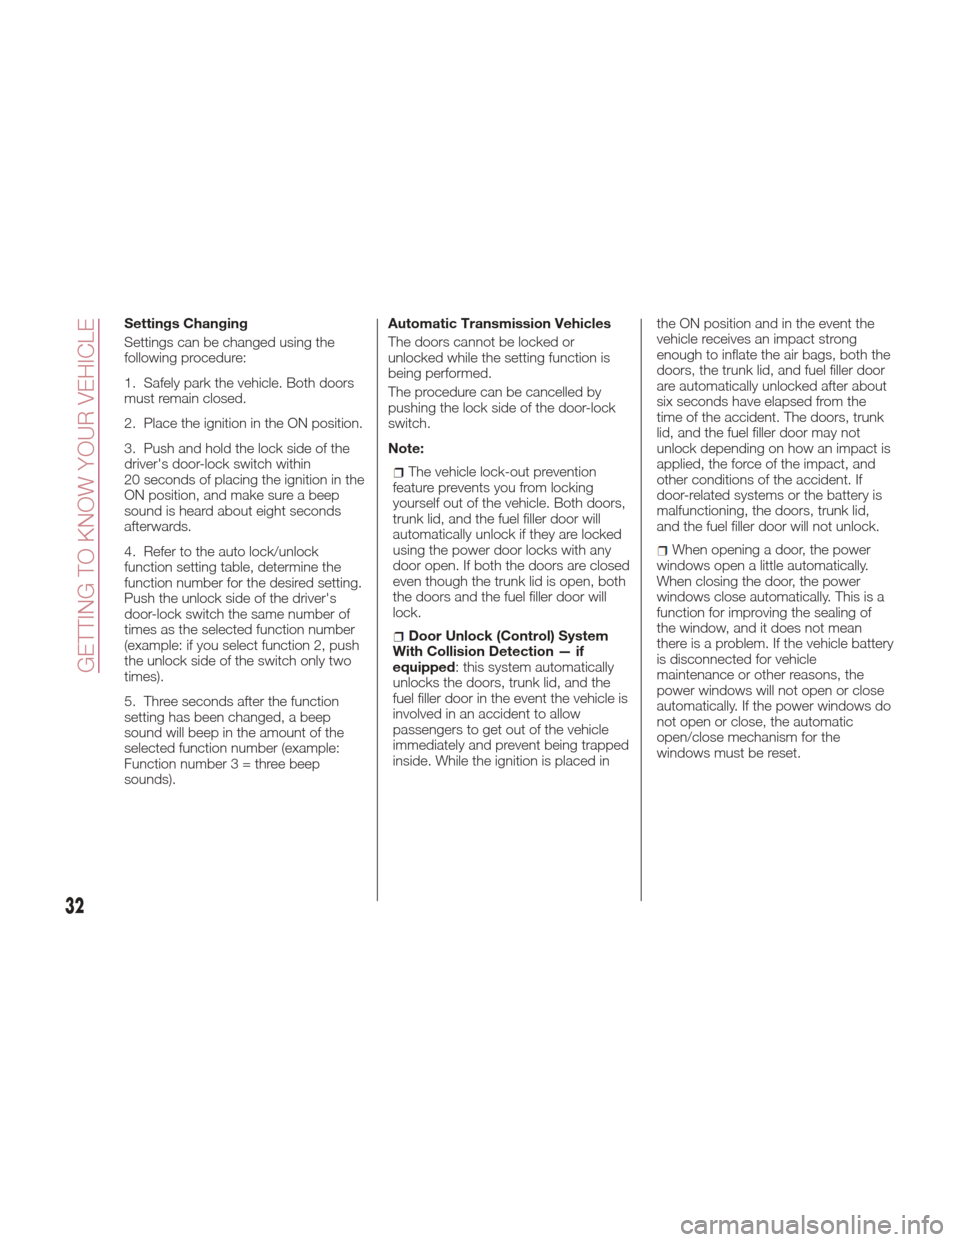
Settings Changing
Settings can be changed using the
following procedure:
1. Safely park the vehicle. Both doors
must remain closed.
2. Place the ignition in the ON position.
3. Push and hold the lock side of the
driver's door-lock switch within
20 seconds of placing the ignition in the
ON position, and make sure a beep
sound is heard about eight seconds
afterwards.
4. Refer to the auto lock/unlock
function setting table, determine the
function number for the desired setting.
Push the unlock side of the driver's
door-lock switch the same number of
times as the selected function number
(example: if you select function 2, push
the unlock side of the switch only two
times).
5. Three seconds after the function
setting has been changed, a beep
sound will beep in the amount of the
selected function number (example:
Function number 3 = three beep
sounds). Automatic Transmission Vehicles
The doors cannot be locked or
unlocked while the setting function is
being performed.
The procedure can be cancelled by
pushing the lock side of the door-lock
switch.
Note:
The vehicle lock-out prevention
feature prevents you from locking
yourself out of the vehicle. Both doors,
trunk lid, and the fuel filler door will
automatically unlock if they are locked
using the power door locks with any
door open. If both the doors are closed
even though the trunk lid is open, both
the doors and the fuel filler door will
lock.
Door Unlock (Control) System
With Collision Detection — if
equipped : this system automatically
unlocks the doors, trunk lid, and the
fuel filler door in the event the vehicle is
involved in an accident to allow
passengers to get out of the vehicle
immediately and prevent being trapped
inside. While the ignition is placed in the ON position and in the event the
vehicle receives an impact strong
enough to inflate the air bags, both the
doors, the trunk lid, and fuel filler door
are automatically unlocked after about
six seconds have elapsed from the
time of the accident. The doors, trunk
lid, and the fuel filler door may not
unlock depending on how an impact is
applied, the force of the impact, and
other conditions of the accident. If
door-related systems or the battery is
malfunctioning, the doors, trunk lid,
and the fuel filler door will not unlock.
When opening a door, the power
windows open a little automatically.
When closing the door, the power
windows close automatically. This is a
function for improving the sealing of
the window, and it does not mean
there is a problem. If the vehicle battery
is disconnected for vehicle
maintenance or other reasons, the
power windows will not open or close
automatically. If the power windows do
not open or close, the automatic
open/close mechanism for the
windows must be reset.
32
GETTING TO KNOW YOUR VEHICLE
Page 42 of 292

Daytime Running Lights
(DRL)
The daytime running lights turn on
automatically when the vehicle starts
moving.
They turn off when the parking brake is
engaged or the gear selector is shifted
to the Park (P) position (if equipped with
automatic transmission).
Note:In some markets, the daytime
running lights can be deactivated. For
markets that allow deactivation, refer to
“Personalization Features” in “Knowing
Your Instrument Panel” for further
information.
High Beams
The headlights can be switched
between high and low beams by
moving the lever forward or backward.
When the headlight high-beams are on,
the
high beam indicator is
illuminated.
Flash To Pass
You can signal another vehicle with your
headlights by partially pulling the
headlight lever toward the steering
wheel. This will cause the high beam
headlights to turn on until the lever is
released.
The
high beam indicator in the
instrument cluster illuminates
simultaneously.
Automatic Lighting
When the headlight switch is in the
AUTO position and the ignition is
switched ON, the light will sense the
surrounding lightness or darkness and
automatically turns the headlights, other
exterior lights and dashboard
illumination on or off.
Note: Do not shade the light sensor by
placing a sticker or a label on the
windshield. Otherwise the light sensor
will not operate correctly.
The light sensor also works as a rain
sensor for the auto-wiper control. Keep
hands and scrapers clear of the
windshield when the wiper lever is in
the AUTO position and the ignition is
switched ON as fingers could be
pinched or the wipers and wiper blades
damaged when the wipers activate
automatically. If you are going to clean the windshield, be sure the wipers are
turned off completely when the engine
is running.
Note:
The headlights, other exterior lights
and dashboard lights may not turn off
immediately even if the surrounding
area becomes well-lit because the light
sensor determines that it is night time if
the surrounding area is continuously
dark for several minutes such as inside
long tunnels, traffic jams inside tunnels,
or in indoor parking lots. In this case,
the lights turn off if the light switch is
turned to the OFF position.
When the headlight switch is in the
AUTO position and the ignition is
switched to ACC or the ignition is
switched off, the headlights, other
exterior lights and dashboard
illumination will turn off.
The dashboard lights can be
adjusted by rotating the knob in the
instrument cluster. The day/night mode
can be changed by rotating the knob
until a beep sound is heard.
The sensitivity of the automatic
lightsmaybechangedbyan
authorized dealer.
05030101-12A-003Light Sensor
40
GETTING TO KNOW YOUR VEHICLE
Page 79 of 292

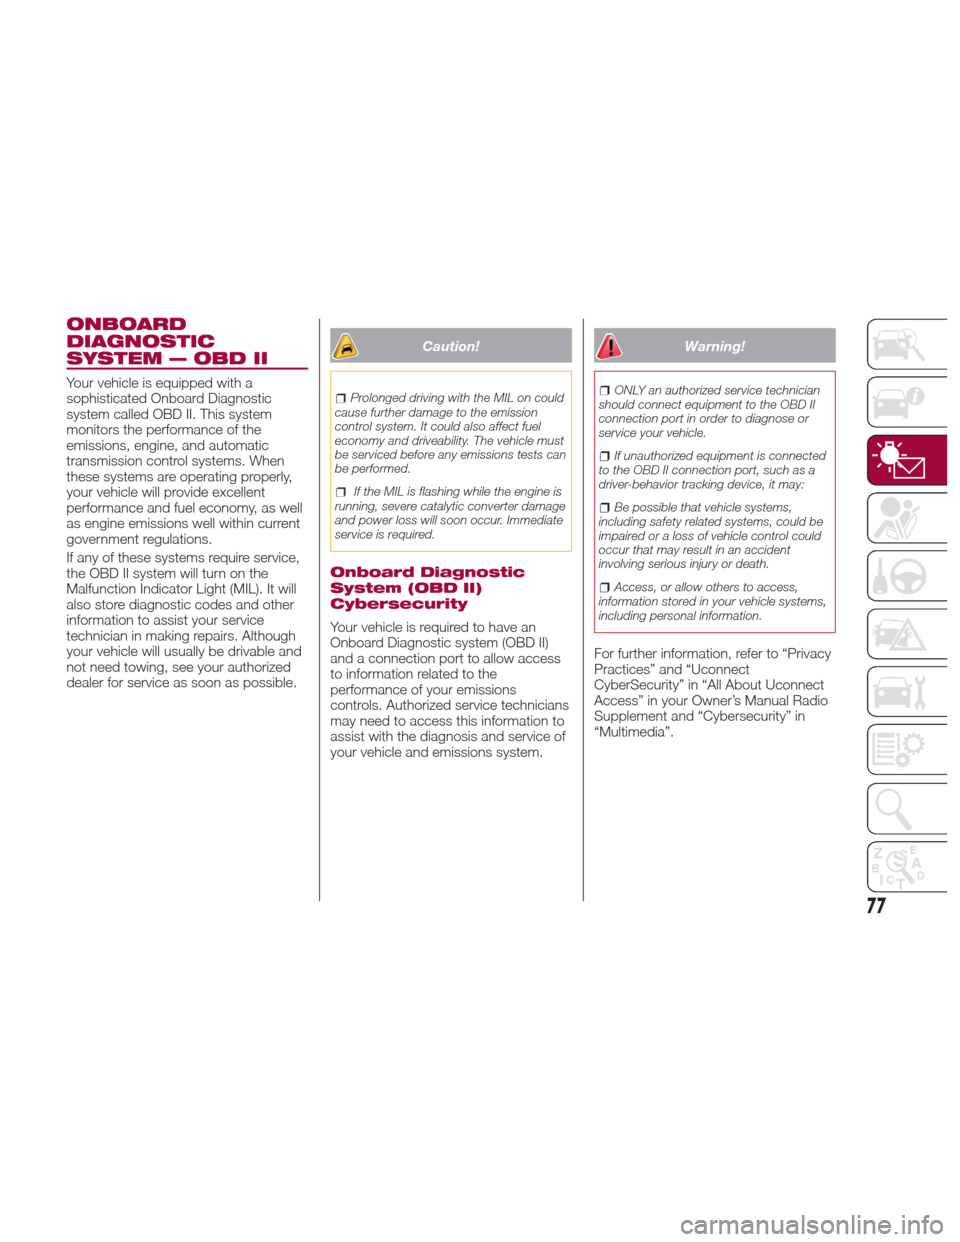
ONBOARD
DIAGNOSTIC
SYSTEM — OBD II
Your vehicle is equipped with a
sophisticated Onboard Diagnostic
system called OBD II. This system
monitors the performance of the
emissions, engine, and automatic
transmission control systems. When
these systems are operating properly,
your vehicle will provide excellent
performance and fuel economy, as well
as engine emissions well within current
government regulations.
If any of these systems require service,
the OBD II system will turn on the
Malfunction Indicator Light (MIL). It will
also store diagnostic codes and other
information to assist your service
technician in making repairs. Although
your vehicle will usually be drivable and
not need towing, see your authorized
dealer for service as soon as possible.
Caution!
Prolonged driving with the MIL on could
cause further damage to the emission
control system. It could also affect fuel
economy and driveability. The vehicle must
be serviced before any emissions tests can
be performed.
If the MIL is flashing while the engine is
running, severe catalytic converter damage
and power loss will soon occur. Immediate
service is required.
Onboard Diagnostic
System (OBD II)
Cybersecurity
Your vehicle is required to have an
Onboard Diagnostic system (OBD II)
and a connection port to allow access
to information related to the
performance of your emissions
controls. Authorized service technicians
may need to access this information to
assist with the diagnosis and service of
your vehicle and emissions system.
Warning!
ONLY an authorized service technician
should connect equipment to the OBD II
connection port in order to diagnose or
service your vehicle.
If unauthorized equipment is connected
to the OBD II connection port, such as a
driver-behavior tracking device, it may:
Be possible that vehicle systems,
including safety related systems, could be
impaired or a loss of vehicle control could
occur that may result in an accident
involving serious injury or death.
Access, or allow others to access,
information stored in your vehicle systems,
including personal information.
For further information, refer to “Privacy
Practices” and “Uconnect
CyberSecurity” in “All About Uconnect
Access” in your Owner’s Manual Radio
Supplement and “Cybersecurity” in
“Multimedia”.
77
Page 80 of 292

CONTROL PANEL AND INSTRUMENTS
Instrument Cluster
1 — Odometer/Trip Computer And Trip Computer Button/Dashboard Illumination
2 — Tachometer
3 — Speedometer
4 — Automatic Transmission Info Display
5 — Odometer/Trip Computer Info/Engine Coolant Temperature Gauge/Fuel Gauge/Outside Temperature/Cruise Control/Info
Switch Display
05020100-667-333Abarth Instrument Cluster
78
GETTING TO KNOW YOUR INSTRUMENT PANEL