2017 DODGE GRAND CARAVAN weight
[x] Cancel search: weightPage 74 of 530
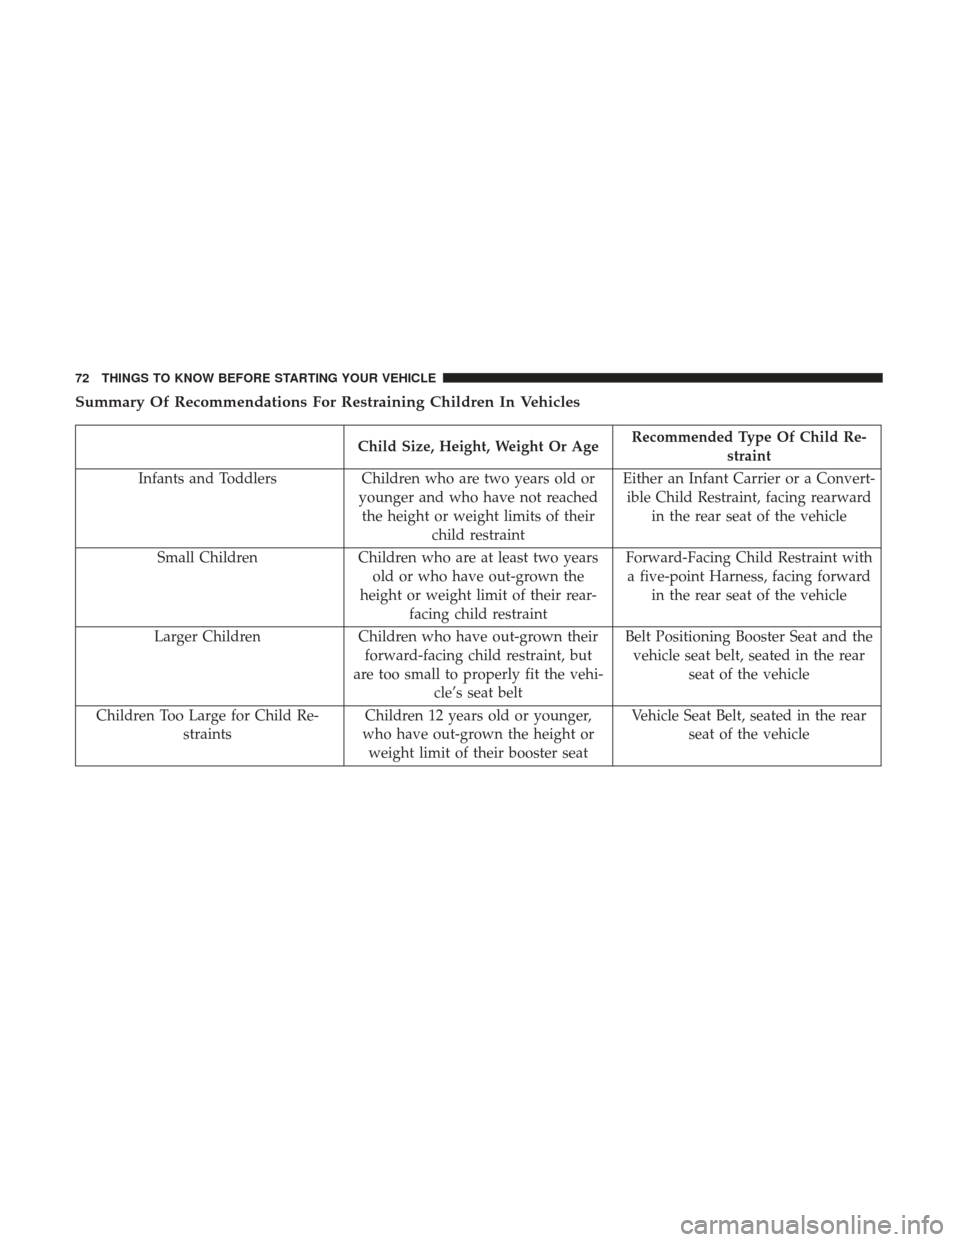
Summary Of Recommendations For Restraining Children In Vehicles
Child Size, Height, Weight Or AgeRecommended Type Of Child Re-
straint
Infants and Toddlers Children who are two years old or
younger and who have not reached the height or weight limits of their child restraint Either an Infant Carrier or a Convert-
ible Child Restraint, facing rearward in the rear seat of the vehicle
Small Children Children who are at least two years
old or who have out-grown the
height or weight limit of their rear- facing child restraint Forward-Facing Child Restraint with
a five-point Harness, facing forward in the rear seat of the vehicle
Larger Children Children who have out-grown their
forward-facing child restraint, but
are too small to properly fit the vehi- cle’s seat belt Belt Positioning Booster Seat and the
vehicle seat belt, seated in the rear seat of the vehicle
Children Too Large for Child Re- straints Children 12 years old or younger,
who have out-grown the height or weight limit of their booster seat Vehicle Seat Belt, seated in the rear
seat of the vehicle
72 THINGS TO KNOW BEFORE STARTING YOUR VEHICLE
Page 75 of 530
Infant And Child Restraints
Safety experts recommend that children ride rear-facing in
the vehicle until they are two years old or until they reach
either the height or weight limit of their rear-facing child
restraint. Two types of child restraints can be used rear-
facing: infant carriers and convertible child seats.
The infant carrier is only used rear-facing in the vehicle. It
is recommended for children from birth until they reach
the weight or height limit of the infant carrier. Convertible
child seats can be used either rear-facing or forward-facing
in the vehicle. Convertible child seats often have a higher
weight limit in the rear-facing direction than infant carriers
do, so they can be used rear-facing by children who have
outgrown their infant carrier but are still less than at least
two years old. Children should remain rear-facing until
they reach the highest weight or height allowed by their
convertible child seat.
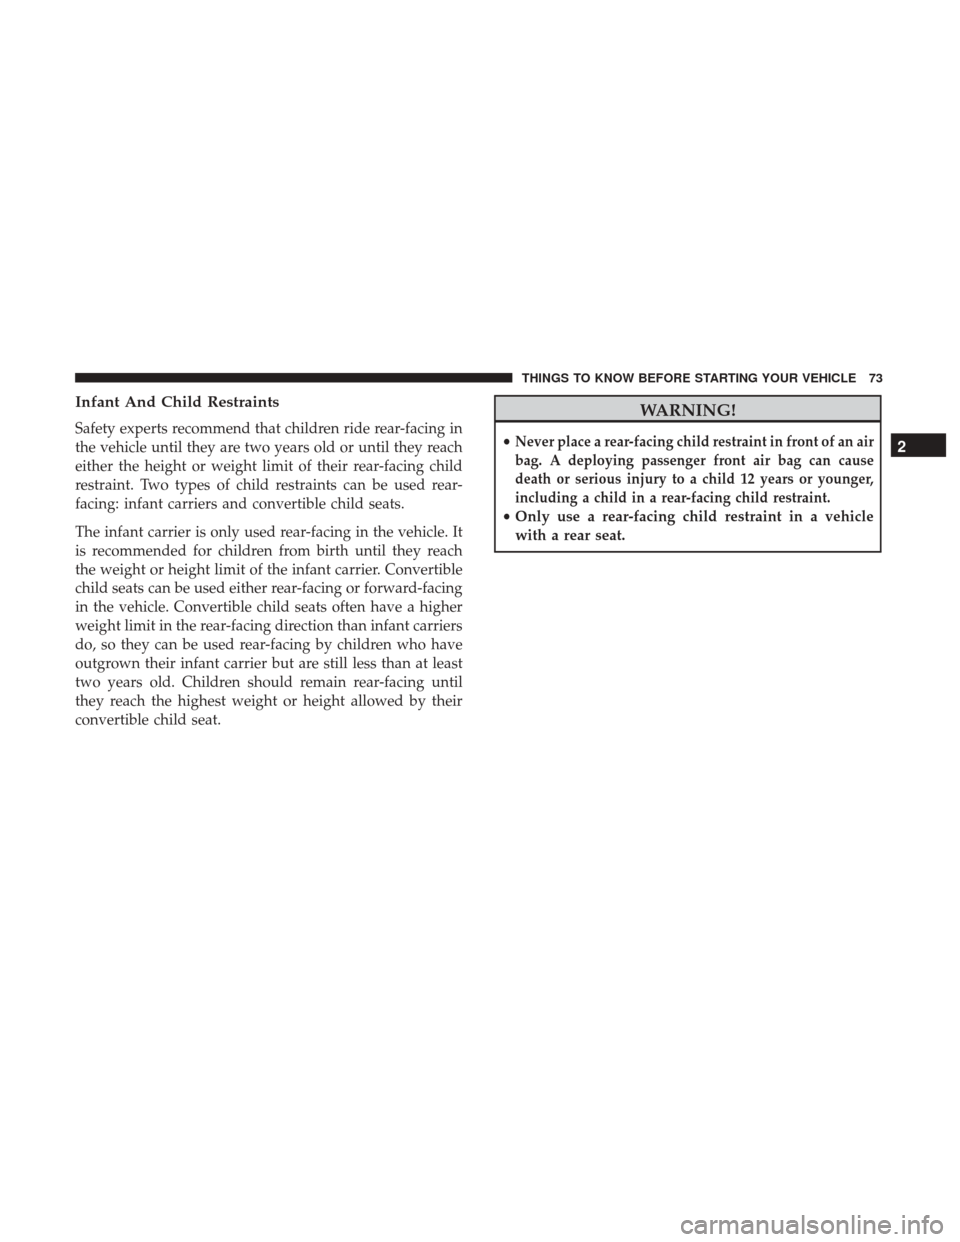
WARNING!
•Never place a rear-facing child restraint in front of an air
bag. A deploying passenger front air bag can cause
death or serious injury to a child 12 years or younger,
including a child in a rear-facing child restraint.
•Only use a rear-facing child restraint in a vehicle
with a rear seat.
2
THINGS TO KNOW BEFORE STARTING YOUR VEHICLE 73
Page 76 of 530
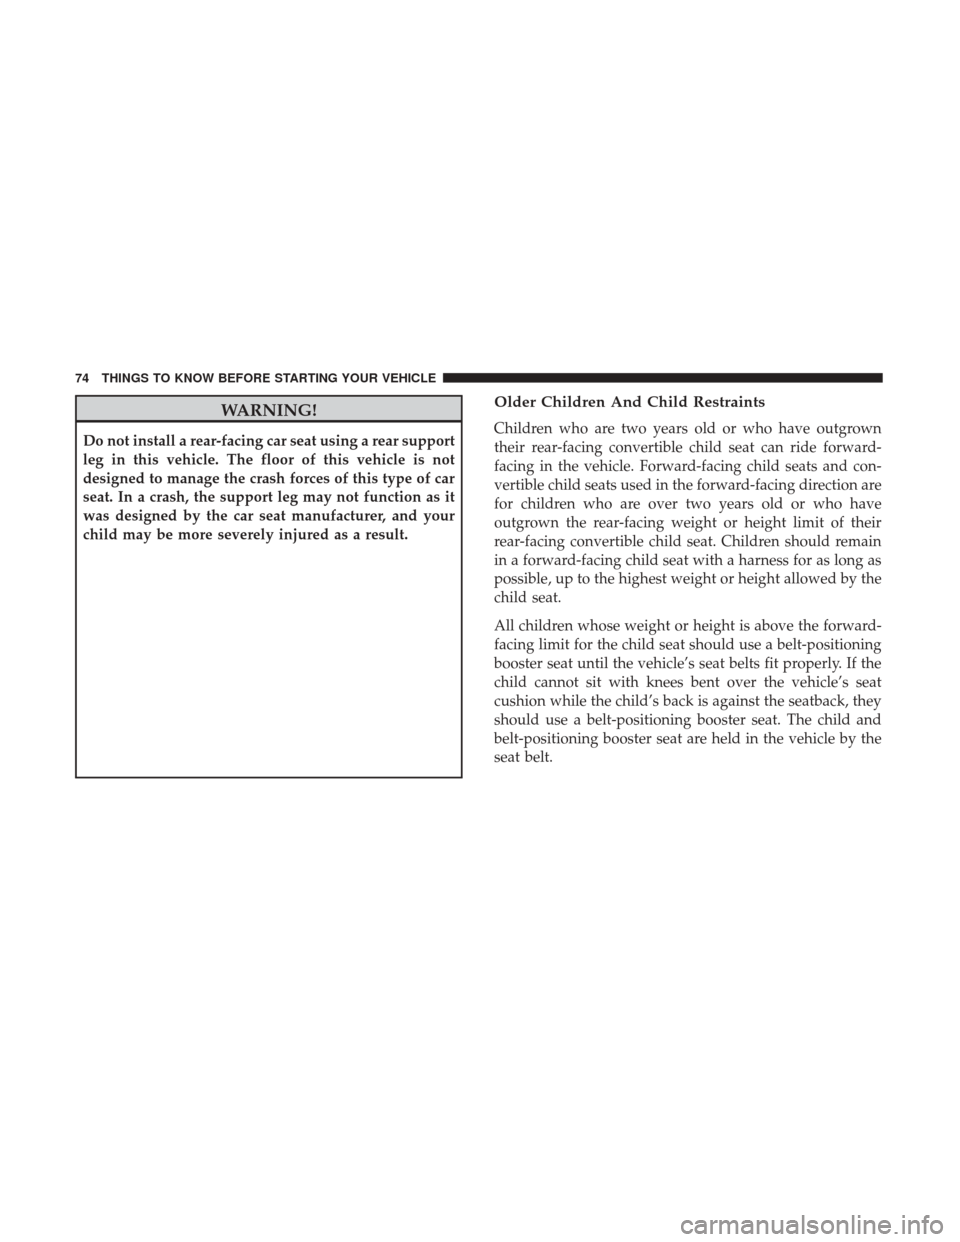
WARNING!
Do not install a rear-facing car seat using a rear support
leg in this vehicle. The floor of this vehicle is not
designed to manage the crash forces of this type of car
seat. In a crash, the support leg may not function as it
was designed by the car seat manufacturer, and your
child may be more severely injured as a result.
Older Children And Child Restraints
Children who are two years old or who have outgrown
their rear-facing convertible child seat can ride forward-
facing in the vehicle. Forward-facing child seats and con-
vertible child seats used in the forward-facing direction are
for children who are over two years old or who have
outgrown the rear-facing weight or height limit of their
rear-facing convertible child seat. Children should remain
in a forward-facing child seat with a harness for as long as
possible, up to the highest weight or height allowed by the
child seat.
All children whose weight or height is above the forward-
facing limit for the child seat should use a belt-positioning
booster seat until the vehicle’s seat belts fit properly. If the
child cannot sit with knees bent over the vehicle’s seat
cushion while the child’s back is against the seatback, they
should use a belt-positioning booster seat. The child and
belt-positioning booster seat are held in the vehicle by the
seat belt.
74 THINGS TO KNOW BEFORE STARTING YOUR VEHICLE
Page 78 of 530
WARNING!
Never allow a child to put the shoulder belt under an
arm or behind their back. In a crash, the shoulder belt
will not protect a child properly, which may result in
serious injury or death. A child must always wear both
the lap and shoulder portions of the seat belt correctly.
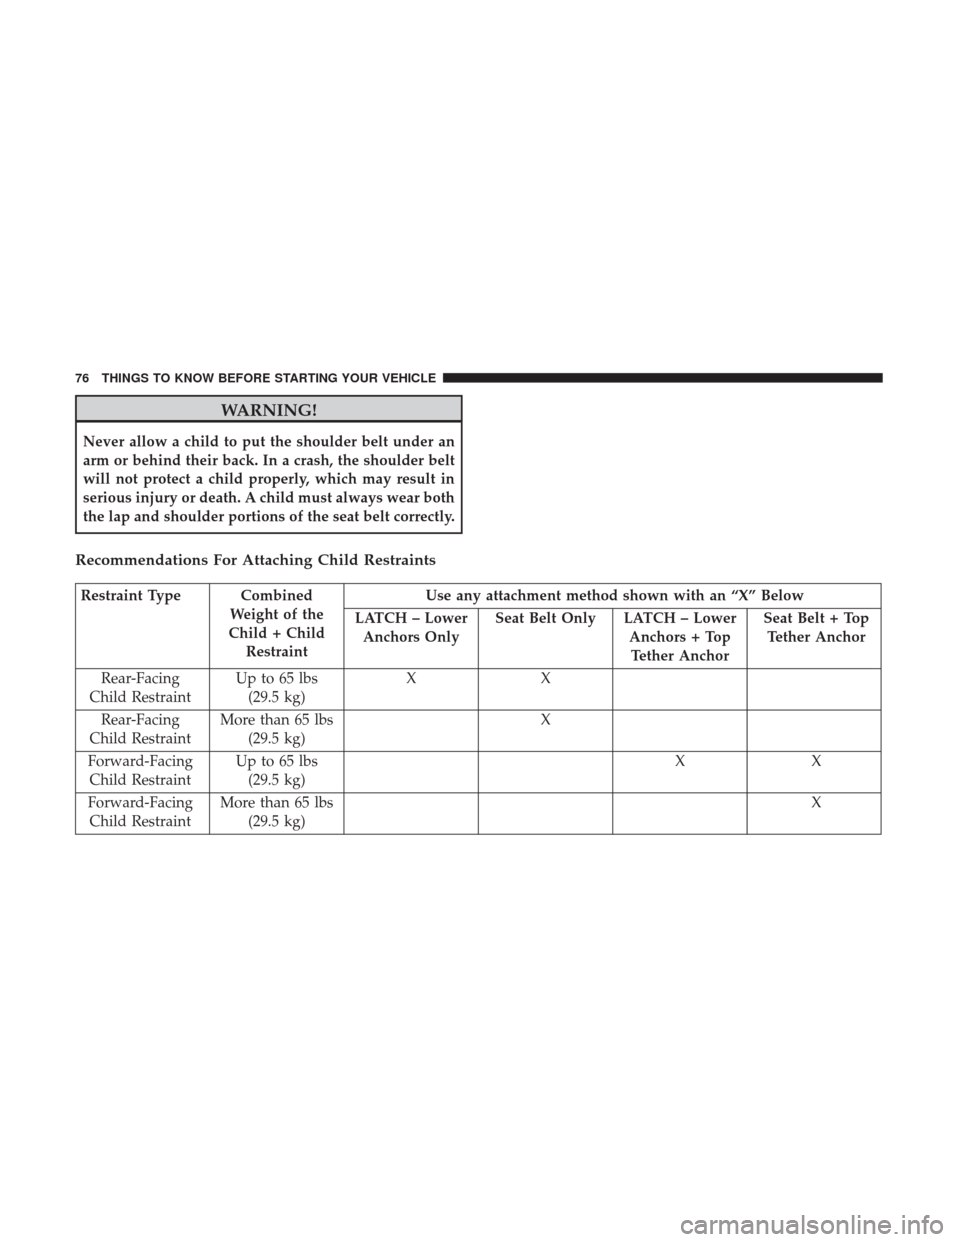
Recommendations For Attaching Child Restraints
Restraint Type CombinedWeight of the
Child + Child Restraint Use any attachment method shown with an “X” Below
LATCH – Lower Anchors Only Seat Belt Only LATCH – Lower
Anchors + TopTether Anchor Seat Belt + Top
Tether Anchor
Rear-Facing
Child Restraint Up to 65 lbs
(29.5 kg) XX
Rear-Facing
Child Restraint More than 65 lbs
(29.5 kg) X
Forward-Facing Child Restraint Up to 65 lbs
(29.5 kg) XX
Forward-Facing Child Restraint More than 65 lbs
(29.5 kg) X
76 THINGS TO KNOW BEFORE STARTING YOUR VEHICLE
Page 81 of 530
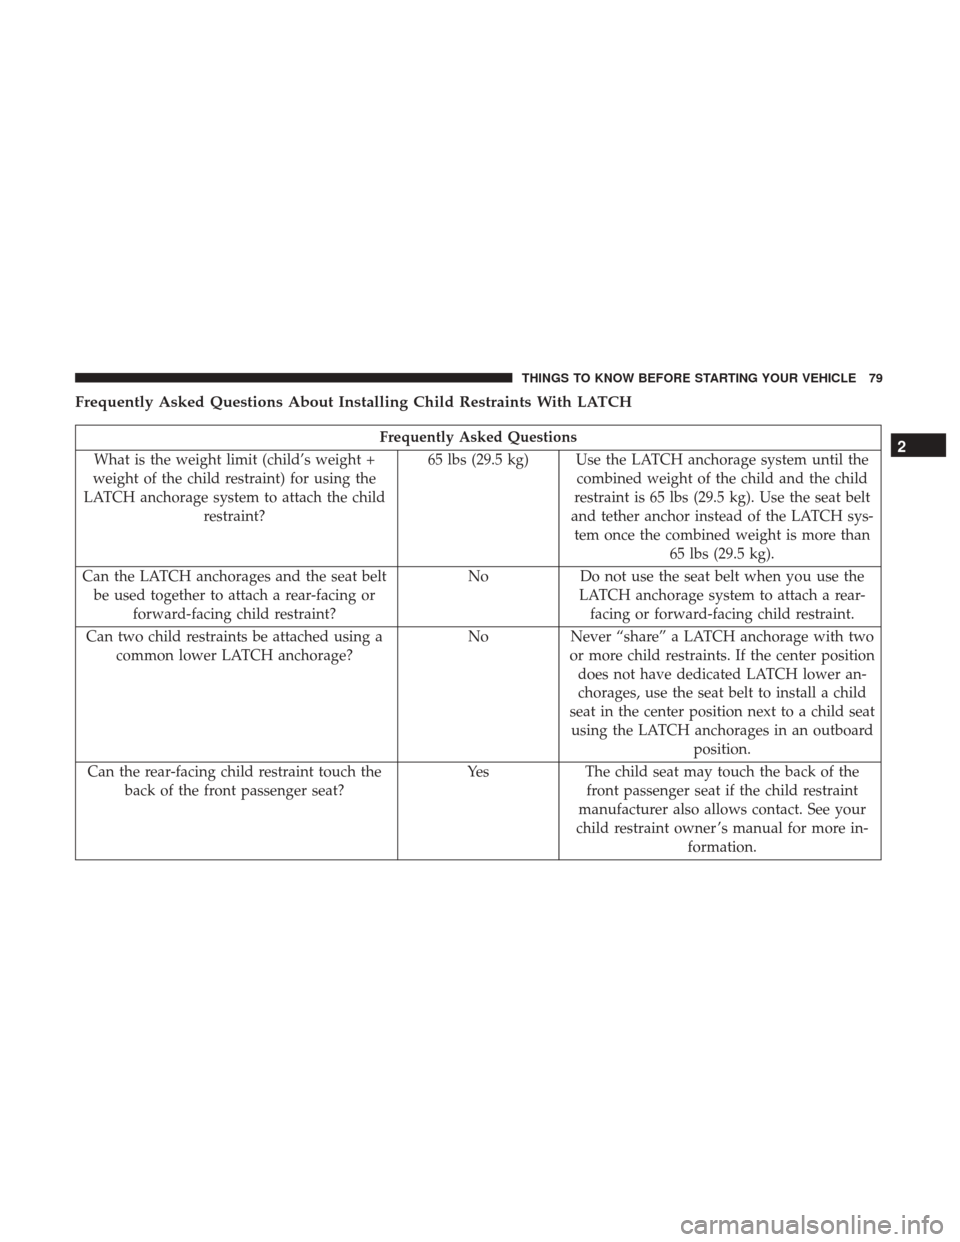
Frequently Asked Questions About Installing Child Restraints With LATCH
Frequently Asked Questions
What is the weight limit (child’s weight +
weight of the child restraint) for using the
LATCH anchorage system to attach the child restraint? 65 lbs (29.5 kg) Use the LATCH anchorage system until the
combined weight of the child and the child
restraint is 65 lbs (29.5 kg). Use the seat belt
and tether anchor instead of the LATCH sys- tem once the combined weight is more than 65 lbs (29.5 kg).
Can the LATCH anchorages and the seat belt be used together to attach a rear-facing or forward-facing child restraint? No
Do not use the seat belt when you use the
LATCH anchorage system to attach a rear- facing or forward-facing child restraint.
Can two child restraints be attached using a common lower LATCH anchorage? No
Never “share” a LATCH anchorage with two
or more child restraints. If the center position does not have dedicated LATCH lower an-chorages, use the seat belt to install a child
seat in the center position next to a child seat using the LATCH anchorages in an outboard position.
Can the rear-facing child restraint touch the back of the front passenger seat? Yes
The child seat may touch the back of the
front passenger seat if the child restraint
manufacturer also allows contact. See your
child restraint owner ’s manual for more in- formation.2
THINGS TO KNOW BEFORE STARTING YOUR VEHICLE 79
Page 88 of 530
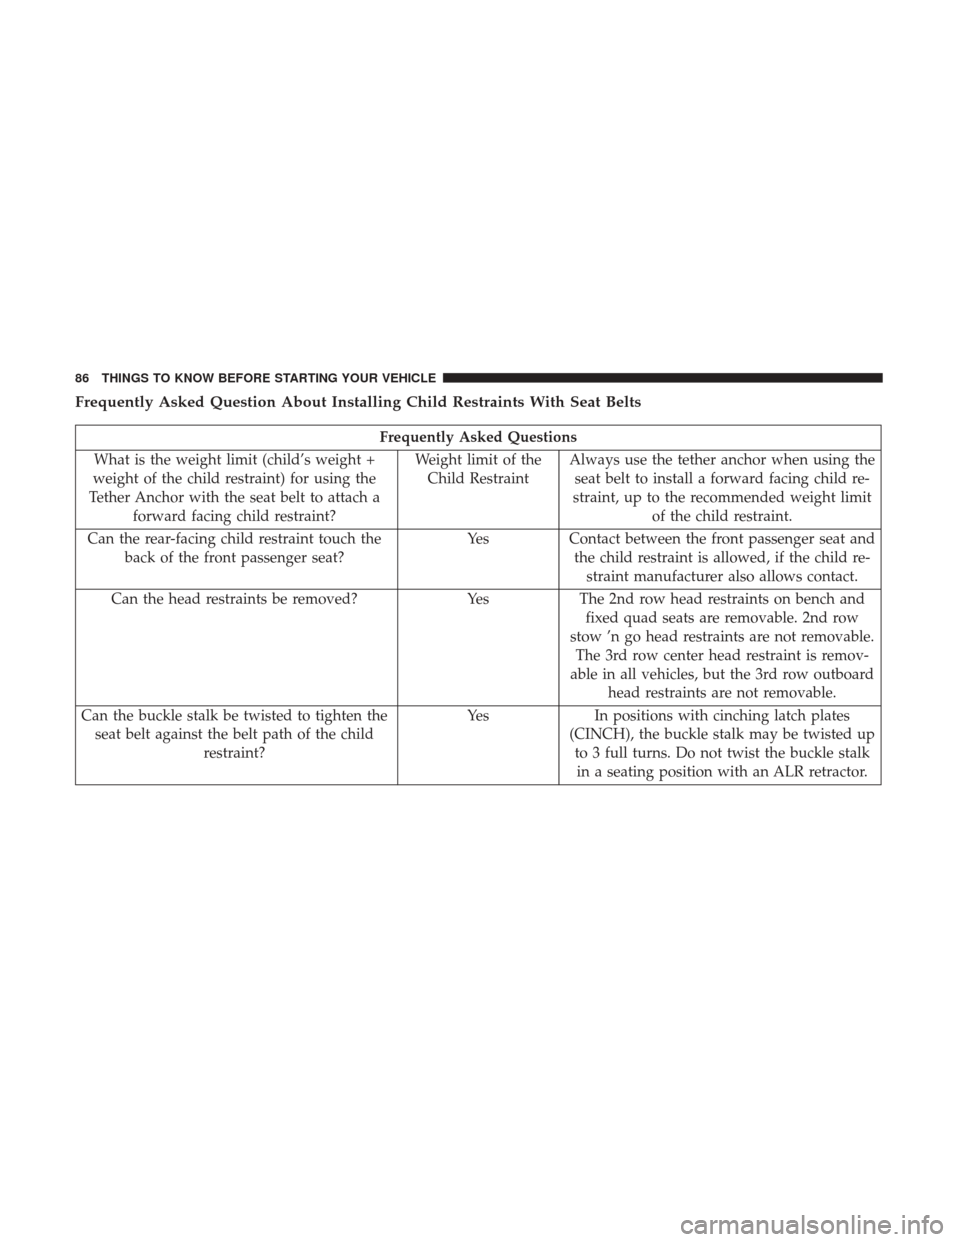
Frequently Asked Question About Installing Child Restraints With Seat Belts
Frequently Asked Questions
What is the weight limit (child’s weight +
weight of the child restraint) for using the
Tether Anchor with the seat belt to attach a forward facing child restraint? Weight limit of the
Child Restraint Always use the tether anchor when using the
seat belt to install a forward facing child re-
straint, up to the recommended weight limit of the child restraint.
Can the rear-facing child restraint touch the back of the front passenger seat? Yes
Contact between the front passenger seat and
the child restraint is allowed, if the child re- straint manufacturer also allows contact.
Can the head restraints be removed? YesThe 2nd row head restraints on bench and
fixed quad seats are removable. 2nd row
stow ’n go head restraints are not removable. The 3rd row center head restraint is remov-
able in all vehicles, but the 3rd row outboard head restraints are not removable.
Can the buckle stalk be twisted to tighten the seat belt against the belt path of the child restraint? Yes
In positions with cinching latch plates
(CINCH), the buckle stalk may be twisted up to 3 full turns. Do not twist the buckle stalkin a seating position with an ALR retractor.
86 THINGS TO KNOW BEFORE STARTING YOUR VEHICLE
Page 169 of 530
WARNING!
To avoid serious injury or death, never operate the
vehicle with occupants in the third row seat while in
the tailgate mode.
Plastic Grocery Bag Retainer Hooks
Retainer hooks which will hold plastic grocery bag handles
are built into the seatbacks of all rear seats and some front
seats. The floor supports the partial weight of the bagged
goods.
DRIVER MEMORY SEAT — IF EQUIPPED
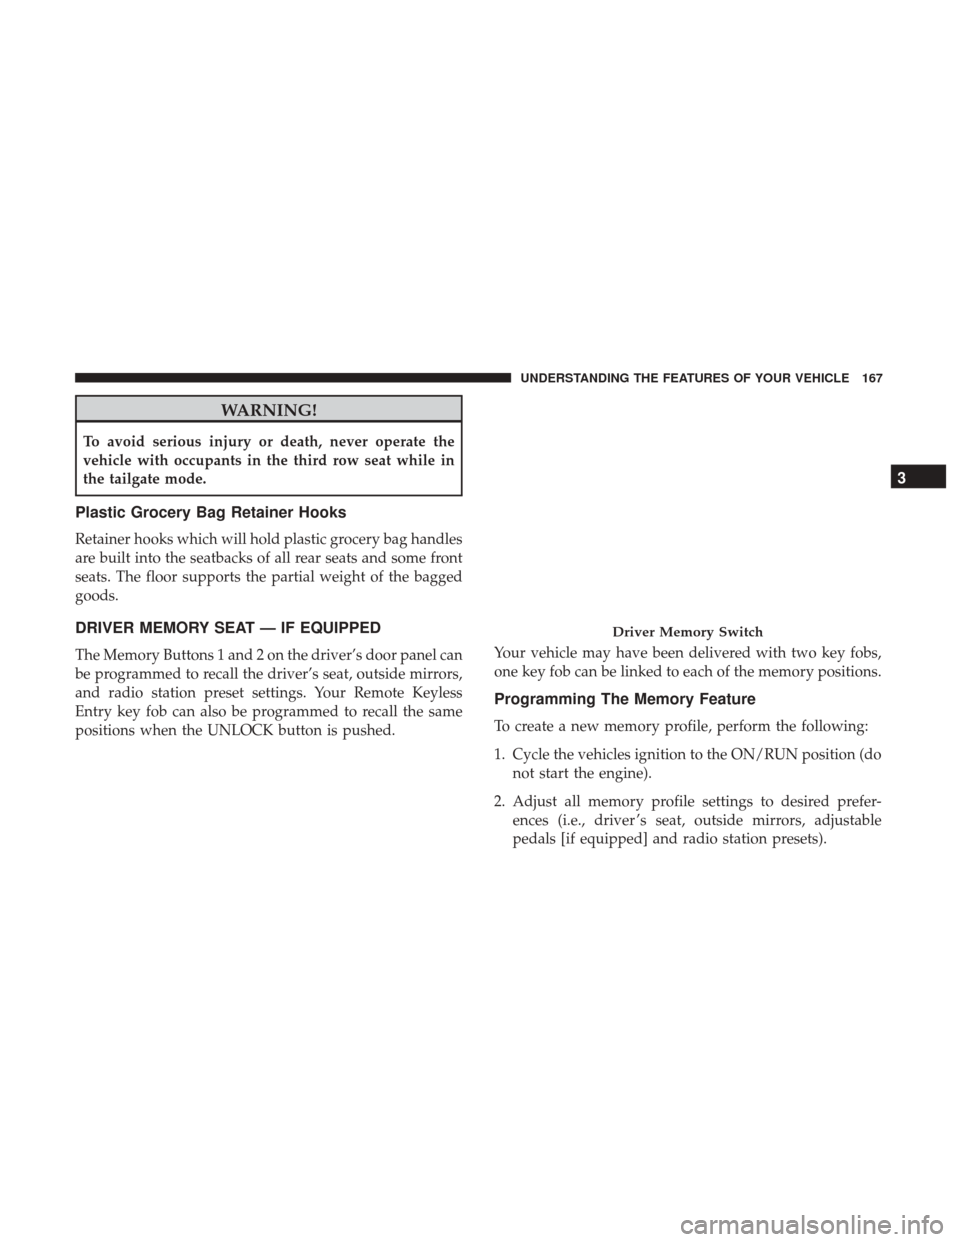
The Memory Buttons 1 and 2 on the driver’s door panel can
be programmed to recall the driver’s seat, outside mirrors,
and radio station preset settings. Your Remote Keyless
Entry key fob can also be programmed to recall the same
positions when the UNLOCK button is pushed.Your vehicle may have been delivered with two key fobs,
one key fob can be linked to each of the memory positions.
Programming The Memory Feature
To create a new memory profile, perform the following:
1. Cycle the vehicles ignition to the ON/RUN position (do
not start the engine).
2. Adjust all memory profile settings to desired prefer- ences (i.e., driver ’s seat, outside mirrors, adjustable
pedals [if equipped] and radio station presets).
Driver Memory Switch
3
UNDERSTANDING THE FEATURES OF YOUR VEHICLE 167
Page 227 of 530
NOTE:
•You can turn off the heated mirror feature at anytime by
pushing the rear window defroster switch a second time.
• To prevent excessive battery drain, use the rear window
defroster only when the engine is operating.
CAUTION!
Failure to follow these cautions can cause damage to
the heating elements:
•Use care when washing the inside of the rear win-
dow. Do not use abrasive window cleaners on the
interior surface of the window. Use a soft cloth and a
mild washing solution, wiping parallel to the heat-
ing elements. Labels can be peeled off after soaking
with warm water.
• Do not use scrapers, sharp instruments, or abrasive
window cleaners on the interior surface of the win-
dow.
• Keep all objects a safe distance from the window.
LOAD LEVELING SYSTEM — IF EQUIPPED
The automatic load leveling system will provide a level-
riding vehicle under most passenger and cargo loading
conditions.
A hydraulic pump contained within the shock absorbers
raises the rear of the vehicle to the correct height. It takes
approximately 1 mile (1.6 km) of driving for the leveling to
complete depending on road surface conditions.
If the leveled vehicle is not moved for approximately 15
hours, the leveling system will bleed itself down. The
vehicle must be driven to reset the system.
ROOF LUGGAGE RACK — IF EQUIPPED
The crossbars on your vehicle are delivered stowed within
the roof rack side rails. If adding cargo, deploy the cross-
bars. Distribute cargo weight evenly on the roof rack
crossbars, to maximum of 150 lbs (68 kg). The roof rack
does not increase the total load carrying capacity of the
vehicle. Be sure the total load of cargo inside the vehicle
plus that on the external rack does not exceed the maxi-
mum vehicle load capacity.
3
UNDERSTANDING THE FEATURES OF YOUR VEHICLE 225