2017 DODGE GRAND CARAVAN steering wheel
[x] Cancel search: steering wheelPage 261 of 530
INSTRUMENT CLUSTER DISPLAY— IF EQUIPPED
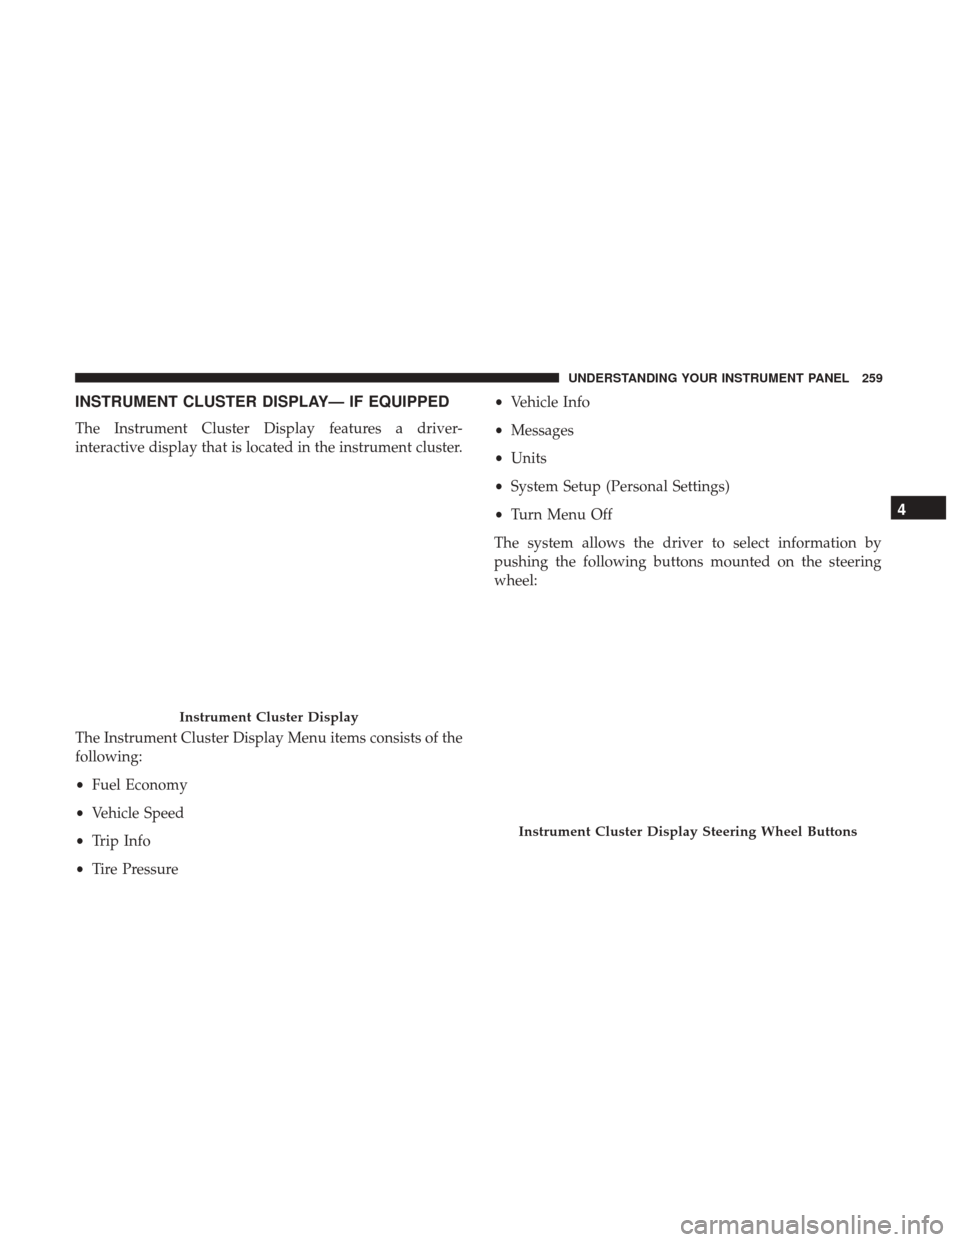
The Instrument Cluster Display features a driver-
interactive display that is located in the instrument cluster.
The Instrument Cluster Display Menu items consists of the
following:
•Fuel Economy
• Vehicle Speed
• Trip Info
• Tire Pressure •
Vehicle Info
• Messages
• Units
• System Setup (Personal Settings)
• Turn Menu Off
The system allows the driver to select information by
pushing the following buttons mounted on the steering
wheel:
Instrument Cluster Display
Instrument Cluster Display Steering Wheel Buttons
4
UNDERSTANDING YOUR INSTRUMENT PANEL 259
Page 272 of 530
next to the feature showing the system has been acti-
vated or the check-mark is removed showing the system
has been deactivated. Refer to “Rear Park Assist Sys-
tem” in “Understanding The Features Of Your Vehicle”
for system function and operating information.
Auto Lock Doors
When selected, all doors will lock automatically when the
vehicle reaches a speed of 15 mph (24 km/h). To make your
selection, push and release theRIGHT
arrow button
until a check-mark appears.
Auto Unlock Doors
When this feature is selected, all doors will unlock when
the vehicle is stopped and the transmission is in the PARK
or NEUTRAL position and the driver’s door is opened. To
make your selection, push and release the RIGHT
ar-
row button until a check-mark appears next to the
feature showing the system has been activated, or the
check-mark is removed showing the system has been
deactivated.
Remote Unlock Sequence
When Unlock Driver Door Only On 1st Press is selected,
only the driver ’s door will unlock on the first push of the
key fob UNLOCK button. When Unlock Driver Door OnlyOn 1st Press, you must push the key fob UNLOCK button
twice to unlock the passenger ’s doors. When
Unlock All
Doors On 1st Press is selected, all of the doors will unlock
on the first push of the key fob UNLOCK button. To make
your selection, push and release the RIGHT
arrow
button until a check-mark appears next to the feature
showing the system has been activated or the check-
mark is removed showing the system has been deacti-
vated.
Linked To Memory- If Equipped
When this feature is selected, the memory seat, mirror, and
radio settings will return to the memory set position when
the key fob UNLOCK button is pushed. If this feature is not
selected, then the memory seat, mirror, and radio settings
can only return to the memory set position using the door
mounted switch. To make your selection, push and release
the RIGHT
arrow button until a check-mark appears
next to the feature showing the system has been acti-
vated or the check-mark is removed showing the system
has been deactivated.
Remote Start Comfort Sys.
When this feature is selected and the remote start is
activated, the heated steering wheel and driver heated seat
features will automatically turn on in cold weather. These
270 UNDERSTANDING YOUR INSTRUMENT PANEL
Page 323 of 530
STEERING WHEEL AUDIO CONTROLS — IF
EQUIPPED
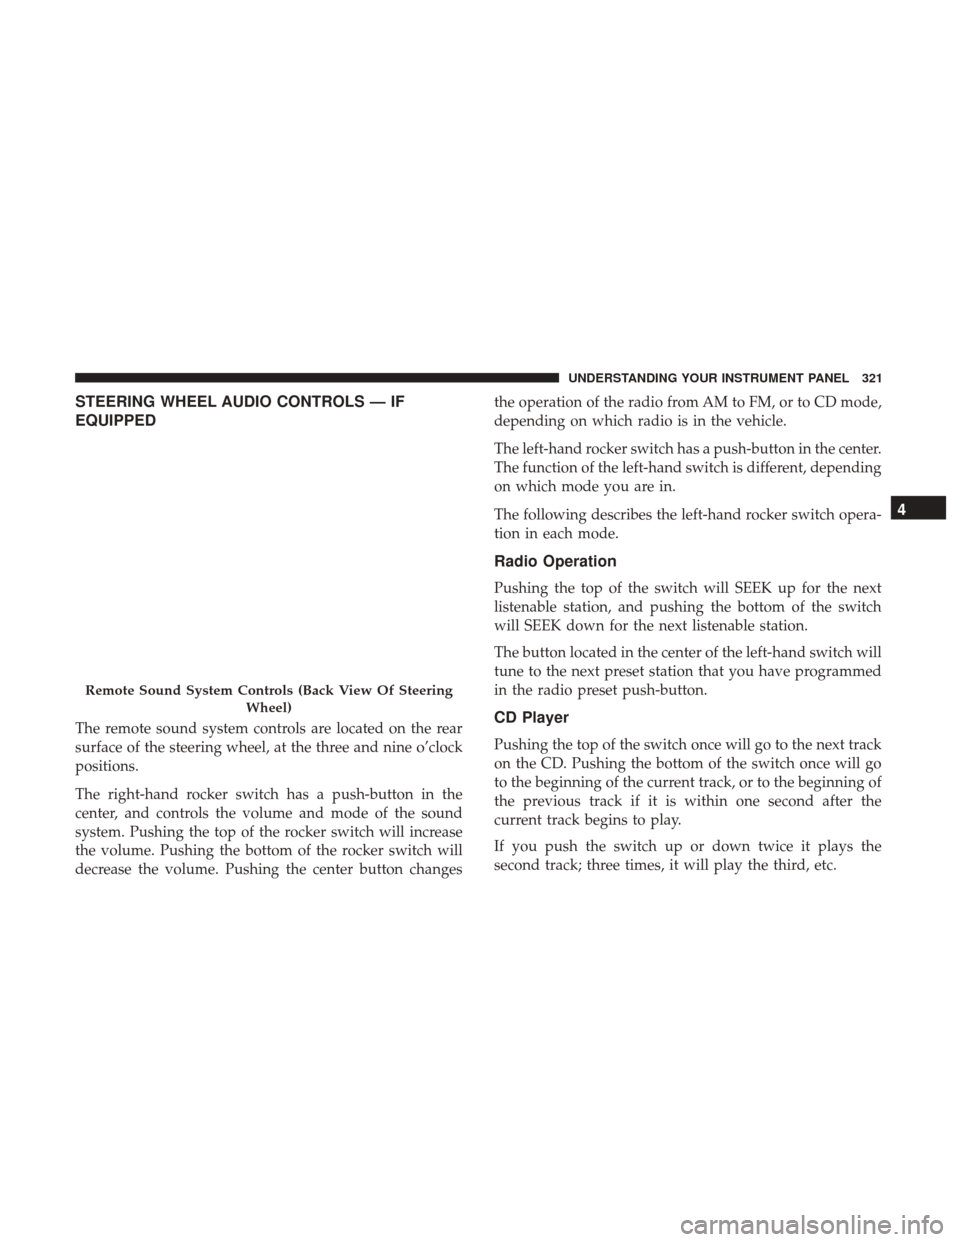
The remote sound system controls are located on the rear
surface of the steering wheel, at the three and nine o’clock
positions.
The right-hand rocker switch has a push-button in the
center, and controls the volume and mode of the sound
system. Pushing the top of the rocker switch will increase
the volume. Pushing the bottom of the rocker switch will
decrease the volume. Pushing the center button changesthe operation of the radio from AM to FM, or to CD mode,
depending on which radio is in the vehicle.
The left-hand rocker switch has a push-button in the center.
The function of the left-hand switch is different, depending
on which mode you are in.
The following describes the left-hand rocker switch opera-
tion in each mode.
Radio Operation
Pushing the top of the switch will SEEK up for the next
listenable station, and pushing the bottom of the switch
will SEEK down for the next listenable station.
The button located in the center of the left-hand switch will
tune to the next preset station that you have programmed
in the radio preset push-button.
CD Player
Pushing the top of the switch once will go to the next track
on the CD. Pushing the bottom of the switch once will go
to the beginning of the current track, or to the beginning of
the previous track if it is within one second after the
current track begins to play.
If you push the switch up or down twice it plays the
second track; three times, it will play the third, etc.
Remote Sound System Controls (Back View Of Steering
Wheel)
4
UNDERSTANDING YOUR INSTRUMENT PANEL 321
Page 358 of 530
POWER STEERING
The standard power steering system will give you good
vehicle response and increased ease of maneuverability in
tight spaces. The system will provide mechanical steering
capability if power assist is lost.
If for some reason the power assist is interrupted, it will
still be possible to steer your vehicle. Under these condi-
tions, you will observe a substantial increase in steering
effort, especially at very low vehicle speeds and during
parking maneuvers.
NOTE:
•Increased noise levels at the end of the steering wheel
travel are considered normal and do not indicate that
there is a problem with the power steering system.
• Upon initial start-up in cold weather, the power steering
pump may make noise for a short amount of time. This
is due to the cold, thick fluid in the steering system. This
noise should be considered normal, and it does not in
any way damage the steering system.
CAUTION!
Prolonged operation of the steering system at the end
of the steering wheel travel will increase the steering
fluid temperature and it should be avoided when
possible. Damage to the power steering pump may
occur.
Power Steering Fluid Check
Checking the power steering fluid level at a defined service
interval is not required. The fluid should only be checked
if a leak is suspected, abnormal noises are apparent,
and/or the system is not functioning as anticipated. Coor-
dinate inspection efforts through an authorized dealer.
CAUTION!
Do not use chemical flushes in your power steering
system as the chemicals can damage your power steer-
ing components. Such damage is not covered by the
New Vehicle Limited Warranty.
356 STARTING AND OPERATING
Page 362 of 530
Anti-Lock Brake System (ABS)
The Anti-Lock Brake System (ABS) provides increased
vehicle stability and brake performance under most brak-
ing conditions. The system automatically prevents wheel
lock, and enhances vehicle control during braking.
The ABS performs a self-check cycle to ensure that the ABS
is working properly each time the vehicle is started and
driven. During this self-check, you may hear a slight
clicking sound as well as some related motor noises.
ABS is activated during braking when the system detects
one or more wheels begins to lock. Road conditions such as
ice, snow, gravel, bumps, railroad tracks, loose debris, or
panic stops may increase the likelihood of ABS activa-
tion(s).
You also may experience the following when ABS activates:
•The ABS motor noise (it may continue to run for a short
time after the stop).
• The clicking sound of solenoid valves.
• Brake pedal pulsations.
• A slight drop of the brake pedal at the end of the stop.
These are all normal characteristics of ABS.
WARNING!
• The ABS contains sophisticated electronic equip-
ment that may be susceptible to interference caused
by improperly installed or high output radio trans-
mitting equipment. This interference can cause pos-
sible loss of anti-lock braking capability. Installation
of such equipment should be performed by qualified
professionals.
• Pumping of the Anti-Lock Brakes will diminish their
effectiveness and may lead to a collision. Pumping
makes the stopping distance longer. Just press firmly
on your brake pedal when you need to slow down or
stop.
• The ABS cannot prevent the natural laws of physics
from acting on the vehicle, nor can it increase brak-
ing or steering efficiency beyond that afforded by the
condition of the vehicle brakes and tires or the
traction afforded.
• The ABS cannot prevent collisions, including those
resulting from excessive speed in turns, following
another vehicle too closely, or hydroplaning.
• The capabilities of an ABS equipped vehicle must
never be exploited in a reckless or dangerous manner
(Continued)
360 STARTING AND OPERATING
Page 365 of 530
Towing With HSA
HSA will also provide assistance to mitigate roll back while
towing a trailer.
WARNING!
•If you use a trailer brake controller with your trailer,
the trailer brakes may be activated and deactivated
with the brake switch. If so, there may not be enough
brake pressure to hold both the vehicle and the
trailer on a hill when the brake pedal is released. In
order to avoid rolling down an incline while resum-
ing acceleration, manually activate the trailer brake
or apply more vehicle brake pressure prior to releas-
ing the brake pedal.
• HSA is not a parking brake. Always apply the
parking brake fully when leaving your vehicle. Also,
be certain to leave the transmission in PARK.
• Failure to follow these warnings may cause the
vehicle to roll down the incline and could collide
with another vehicle, object or person, and cause
serious or fatal injury. Always remember to use the
parking brake while parking on a hill and that the
driver is responsible for braking the vehicle.
Disabling And Enabling HSA
This feature can be turned on or turned off. To change the
current setting, proceed as follows:
• For vehicles equipped with the instrument cluster dis-
play, refer to “Instrument Cluster Display” in “Under-
standing Your Instrument Panel” for further informa-
tion.
• If disabling HSA using Uconnect Settings, refer to
“Uconnect Settings” in “Understanding Your Instrument
Panel” for further information.
For vehicles not equipped with the instrument cluster
display, perform the following steps:
1. Center the steering wheel (front wheels pointing straight forward).
2. Shift the transmission into PARK.
3. Apply the parking brake.
4. Start the engine.
5. Rotate the steering wheel slightly more than one-half turn to the left.
5
STARTING AND OPERATING 363
Page 366 of 530

6. Push the “ESC Off” button located in the lower switchbank below the climate control four times within twenty
seconds. The “ESC Off Indicator Light” should turn on
and turn off two times.
7. Rotate the steering wheel back to center and then an additional slighty more than one-half turn to the right.
8. Turn the ignition switch to the OFF position and then back to the ON position. If the sequence was completed
properly, the “ESC Off Indicator Light” will blink sev-
eral times to confirm HSA is disabled.
9. Repeat these steps if you want to return this feature to its previous setting.
Traction Control System (TCS)
This system monitors the amount of wheel spin of each of
the driven wheels. If wheel spin is detected, the TCS may
apply brake pressure to the spinning wheel(s) and/or
reduce engine power to provide enhanced acceleration and
stability. A feature of the TCS, Brake Limited Differential
(BLD), functions similar to a limited slip differential and
controls the wheel spin across a driven axle. If one wheel
on a driven axle is spinning faster than the other, the
system will apply the brake of the spinning wheel. This will allow more engine torque to be applied to the wheel
that is not spinning. BLD may remain enabled even if TCS
and ESC are in a reduced mode.
Electronic Stability Control (ESC)
This system enhances directional control and stability of
the vehicle under various driving conditions. ESC corrects
for oversteering or understeering of the vehicle by apply-
ing the brake of the appropriate wheel(s) to assist in
counteracting the oversteer or understeer condition. En-
gine power may also be reduced to help the vehicle
maintain the desired path.
ESC uses sensors in the vehicle to determine the vehicle
path intended by the driver and compares it to the actual
path of the vehicle. When the actual path does not match
the intended path, ESC applies the brake of the appropriate
wheel to assist in counteracting the oversteer or understeer
condition.
•
Oversteer - when the vehicle is turning more than
appropriate for the steering wheel position.
• Understeer - when the vehicle is turning less than
appropriate for the steering wheel position.
The “ESC Activation/Malfunction Indicator Light” located
in the instrument cluster will start to flash as soon as the
364 STARTING AND OPERATING
Page 367 of 530
ESC system becomes active. The “ESC Activation/
Malfunction Indicator Light” also flashes when the TCS is
active. If the “ESC Activation/Malfunction Indicator
Light” begins to flash during acceleration, ease up on the
accelerator and apply as little throttle as possible. Be sure to
adapt your speed and driving to the prevailing road
conditions.
WARNING!
•Electronic Stability Control (ESC) cannot prevent the
natural laws of physics from acting on the vehicle,
nor can it increase the traction afforded by prevailing
road conditions. ESC cannot prevent accidents, in-
cluding those resulting from excessive speed in
turns, driving on very slippery surfaces, or hydro-
planing. ESC also cannot prevent accidents resulting
from loss of vehicle control due to inappropriate
driver input for the conditions. Only a safe, attentive,
and skillful driver can prevent accidents. The capa-
bilities of an ESC equipped vehicle must never be
exploited in a reckless or dangerous manner which
could jeopardize the user ’s safety or the safety of
others.
(Continued)
WARNING! (Continued)
•Vehicle modifications, or failure to properly main-
tain your vehicle, may change the handling charac-
teristics of your vehicle, and may negatively affect
the performance of the ESC system. Changes to the
steering system, suspension, braking system, tire
type and size or wheel size may adversely affect ESC
performance. Improperly inflated and unevenly
worn tires may also degrade ESC performance. Any
vehicle modification or poor vehicle maintenance
that reduces the effectiveness of the ESC system can
increase the risk of loss of vehicle control, vehicle
rollover, personal injury and death.
ESC Operating Modes
NOTE: Depending upon model and mode of operation, the
ESC system may have multiple operating modes.
ESC On
This is the normal operating mode for the ESC. Whenever
the vehicle is started, the ESC system will be in this mode.
This mode should be used for most driving conditions.
Alternate ESC modes should only be used for specific
reasons as noted in the following paragraphs.
5
STARTING AND OPERATING 365