2017 DODGE GRAND CARAVAN oil change
[x] Cancel search: oil changePage 429 of 530
WARNING!(Continued)
in injuries that are serious or fatal to you, your
passengers, and others around you.
• Take care not to allow the contents of Tire Service Kit
to come in contact with hair, eyes, or clothing. Tire
Service Kit sealant is harmful if inhaled, swallowed,
or absorbed through the skin. It causes skin, eye, and
respiratory irritation. Flush immediately with plenty
of water if there is any contact with eyes or skin.
Change clothing as soon as possible, if there is any
contact with clothing.
• Tire Service Kit Sealant solution contains latex. In
case of an allergic reaction or rash, consult a physi-
cian immediately. Keep Tire Service Kit out of reach
of children. If swallowed, rinse mouth immediately
with plenty of water and drink plenty of water. Do
not induce vomiting! Consult a physician immedi-
ately.
Sealing A Tire With Tire Service Kit
(A) Whenever You Stop To Use Tire Service Kit:
1. Pull over to a safe location and turn on the vehicle’s
Hazard Warning flashers. 2. Verify that the valve stem (on the wheel with the
deflated tire) is in a position that is near to the ground.
This will allow the Tire Service Kit Hoses (6) and (7) to
reach the valve stem and keep the Tire Service Kit flat on
the ground. This will provide the best positioning of the
kit when injecting the sealant into the deflated tire and
running the air pump. Move the vehicle as necessary to
place the valve stem in this position before proceeding.
3. Place the transmission in PARK (auto transmission) or in Gear (manual transmission) and place the ignition in the
OFF position.
4. Set the parking brake.
(B) Setting Up To Use Tire Service Kit:
1. Push in the Mode Select Knob (5) and turn to the Sealant Mode position.
2. Uncoil the Sealant Hose (6) and then remove the cap from the fitting at the end of the hose.
3. Place the Tire Service Kit flat on the ground next to the deflated tire.
4. Remove the cap from the valve stem and then screw the fitting at the end of the Sealant Hose (6) onto the valve
stem.
6
WHAT TO DO IN EMERGENCIES 427
Page 466 of 530
oil level between the MIN and MAX markings on the
dipstick. Adding one quart of oil when the reading is at the
MIN mark will result in a MAX reading on these engines.
CAUTION!
Overfilling or underfilling will cause oil aeration, or
loss of oil pressure. This could damage your engine.
Change Engine Oil
The oil change indicator system will remind you that it is
time to take your vehicle in for scheduled maintenance.
Refer to the “Maintenance Schedule” for further informa-
tion.
NOTE:Under no circumstances should oil change inter-
vals exceed 10,000 miles (16,000 km), twelve months or 350
hours of engine run time, whichever comes first. The 350
hours of engine run or idle time is generally only a concern
for fleet customers.
Engine Oil Selection
For best performance and maximum protection under all
types of operating conditions, the manufacturer only rec-
ommends engine oils that are API Certified and meet the
requirements of FCA Material Standard MS-6395.
American Petroleum Institute (API) Engine Oil
Identification Symbol
This symbol means that the oil has been
certified by the American Petroleum In-
stitute (API). The manufacturer only rec-
ommends API Certified engine oils.
This symbol certifies 0W-20, 5W-20, 0W-
30, 5W-30 and 10W-30 engine oils.
CAUTION!
Do not use chemical flushes in your engine oil as the
chemicals can damage your engine. Such damage is not
covered by the New Vehicle Limited Warranty.
Engine Oil Viscosity (SAE Grade) — 3.6L Engine
MOPAR SAE 5W-20 engine oil approved to FCA Material
Standard MS-6395 such as Pennzoil, Shell Helix or equiva-
lent is recommended for all operating temperatures. This
engine oil improves low temperature starting and vehicle
fuel economy.
464 MAINTAINING YOUR VEHICLE
Page 467 of 530
The engine oil filler cap also shows the recommended
engine oil viscosity for your engine. For information on
engine oil filler cap location, refer to the “Engine Compart-
ment” illustration in this section.
NOTE:MOPAR SAE 5W-30 engine oil approved to FCA
Material Standard MS-6395 such as Pennzoil, Shell Helix or
equivalent may be used when SAE 5W-20 engine oil
meeting MS-6395 is not available.
Lubricants which do not have both the engine oil certifi-
cation mark and the correct SAE viscosity grade number
should not be used.
Synthetic Engine Oils
You may use synthetic engine oils provided the recom-
mended oil quality requirements are met, and the recom-
mended maintenance intervals for oil and filter changes are
followed.
Synthetic engine oils which do not have both the engine oil
certification mark and the correct SAE viscosity grade
number should not be used.
Materials Added To Engine Oil
The manufacturer strongly recommends against the addi-
tion of any additives (other than leak detection dyes) to the engine oil. Engine oil is an engineered product and its
performance may be impaired by supplemental additives.
Disposing Of Used Engine Oil And Oil Filters
Care should be taken in disposing of used engine oil and
oil filters from your vehicle. Used oil and oil filters,
indiscriminately discarded, can present a problem to the
environment. Contact your authorized dealer, service sta-
tion or governmental agency for advice on how and where
used oil and oil filters can be safely discarded in your area.
Engine Oil Filter
The engine oil filter should be replaced with a new filter at
every engine oil change.
Engine Oil Filter Selection
This manufacturer’s engines have a full-flow type oil filter.
Use a filter of this type for replacement. The quality of
replacement filters varies considerably. Only high quality
filters should be used to assure most efficient service.
MOPAR engine oil filters are a high quality oil filter and are
recommended.
7
MAINTAINING YOUR VEHICLE 465
Page 468 of 530
Engine Air Cleaner Filter
Refer to the “Maintenance Schedule” in the “Maintenance
Schedules” section for the proper maintenance intervals.
WARNING!
The air induction system (air cleaner, hoses, etc.) can
provide a measure of protection in the case of engine
backfire. Do not remove the air induction system (air
cleaner, hoses, etc.) unless such removal is necessary
for repair or maintenance. Make sure that no one is
near the engine compartment before starting the ve-
hicle with the air induction system (air cleaner, hoses,
etc.) removed. Failure to do so can result in serious
personal injury.
Engine Air Cleaner Filter Selection
The quality of replacement engine air cleaner filters varies
considerably. Only high quality filters should be used to
assure most efficient service. MOPAR engine air cleaner
filters are a high quality filter and are recommended.
Exhaust System
The best protection against carbon monoxide entry into the
vehicle body is a properly maintained engine exhaust
system.
If you notice a change in the sound of the exhaust system;
or if the exhaust fumes can be detected inside the vehicle;
or when the underside or rear of the vehicle is damaged;
have an authorized technician inspect the complete ex-
haust system and adjacent body areas for broken, dam-
aged, deteriorated, or mispositioned parts. Open seams or
loose connections could permit exhaust fumes to seep into
the passenger compartment. In addition, have the exhaust
system inspected each time the vehicle is raised for lubri-
cation or oil change. Replace as required.
WARNING!
•Exhaust gases can injure or kill. They contain carbon
monoxide (CO), which is colorless and odorless.
Breathing it can make you unconscious and can even-
tually poison you. To avoid breathing CO, refer to
“Safety Tips/Exhaust Gas” in “Things To Know Before
Starting Your Vehicle” for further information.
(Continued)
466 MAINTAINING YOUR VEHICLE
Page 502 of 530

MAINTENANCE SCHEDULE
Your vehicle is equipped with an automatic oil change
indicator system. The oil change indicator system will
remind you that it is time to take your vehicle in for
scheduled maintenance.
Based on engine operation conditions, the oil change
indicator message will illuminate. This means that service
is required for your vehicle. Operating conditions such as
frequent short-trips, trailer tow, extremely hot or cold
ambient temperatures, and E85 fuel usage will influence
when the “Oil Change Required” message is displayed.
Severe Operating Conditions can cause the change oil
message to illuminate as early as 3,500 miles (5,600 km)
since last reset. Have your vehicle serviced as soon as
possible, within the next 500 miles (805 km).
Your authorized dealer will reset the oil change indicator
message after completing the scheduled oil change. If a
scheduled oil change is performed by someone other than
your authorized dealer, the message can be reset by
referring to the steps described under “Instrument Cluster
Display” in “Understanding Your Instrument Panel” for
further information.NOTE:
Under no circumstances should oil change inter-
vals exceed 10,000 miles (16,000 km), twelve months or 350
hours of engine run time, whichever comes first. The 350
hours of engine run or idle time is generally only a concern
for fleet customers.
Severe Duty All Models
Change Engine Oil at 4,000 miles (6,500 km) if the vehicle
is operated in a dusty and off road environment or is
operated predominately at idle or only very low engine
RPM’s. This type of vehicle use is considered Severe Duty.
Once A Month Or Before A Long Trip:
• Check engine oil level.
• Check windshield washer fluid level.
• Check tire pressure and look for unusual wear or
damage. Rotate tires at the first sign of irregular wear,
even if it occurs before the oil indicator system turns on.
• Check the fluid levels of the coolant reservoir, brake
master cylinder, and power steering and fill as needed.
• Check function of all interior and exterior lights.
500 MAINTENANCE SCHEDULES
Page 503 of 530
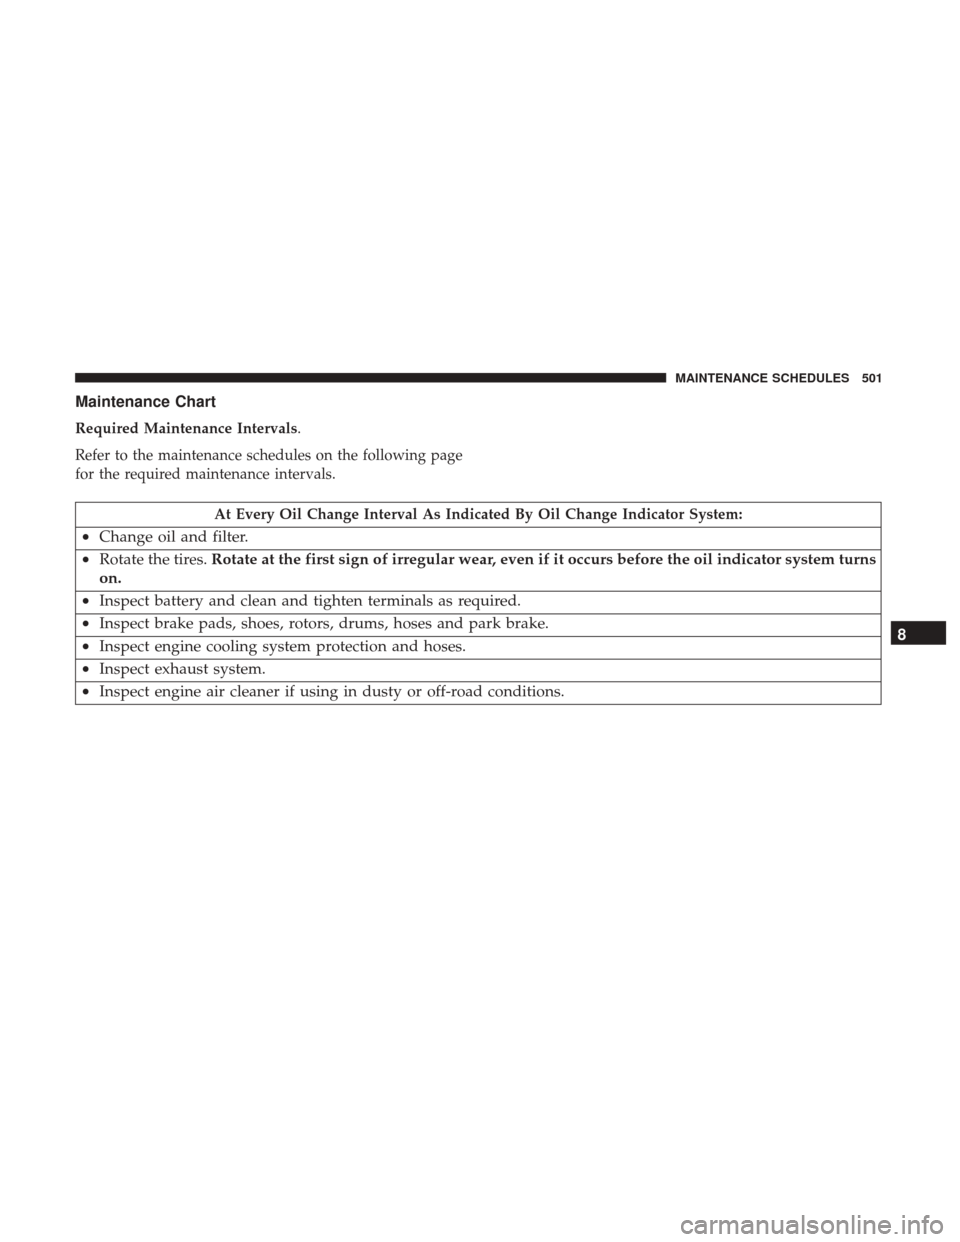
Maintenance Chart
Required Maintenance Intervals.
Refer to the maintenance schedules on the following page
for the required maintenance intervals.
At Every Oil Change Interval As Indicated By Oil Change Indicator System:
•Change oil and filter.
• Rotate the tires. Rotate at the first sign of irregular wear, even if it occurs before the oil indicator system turns
on.
• Inspect battery and clean and tighten terminals as required.
• Inspect brake pads, shoes, rotors, drums, hoses and park brake.
• Inspect engine cooling system protection and hoses.
• Inspect exhaust system.
• Inspect engine air cleaner if using in dusty or off-road conditions. 8
MAINTENANCE SCHEDULES 501
Page 522 of 530

Door..................................26
Lubrication, Body ..........................470
Luggage Rack (Roof Rack) ....................225
Lug Nuts ............................... .431
Maintenance Free Battery .....................468
Maintenance Procedures ..................... .463
Maintenance Schedule .......................500
Malfunction Indicator Light (Check Engine) . . . .252, 461
Manual, Service ............................510
Map/Reading Lights ........................194
Memory Feature (Memory Seat) ................167
Memory Seat ..........................104, 167
Methanol ............................... .399
Mini-Trip Computer ........................ .265
Mirrors ................................. .102
Automatic Dimming ..................... .102
Electric Remote ..........................104
Exterior Folding ........................ .103
Heated ............................... .104
Memory ...............................167
Outside ...............................103
Rearview ............................. .102
Vanity ............................... .105Mode
Fuel Saver ............................ .264
Modifications/Alterations, Vehicle ................6
Monitor, Tire Pressure System ..................391
MOPAR Parts ..........................462, 509
MTBE/ETBE ............................. .399
Multi-Function Control Lever ..................176
New Vehicle Break-In Period ...................92
Occupant Restraints .........................41
Octane Rating, Gasoline (Fuel) .................399
Oil, Engine ............................463, 496
Capacity ...............................495
Change Interval ........................ .464
Checking ............................. .463
Disposal ...............................465
Filter ............................. .465,496
Filter
Disposal .......................... .465
Identification Logo .......................464
Materials Added To .......................465
Pressure Warning Light ....................246
Recommendation .....................464, 495
Synthetic ............................. .465
Viscosity .......................... .464, 495
520 INDEX
Page 523 of 530
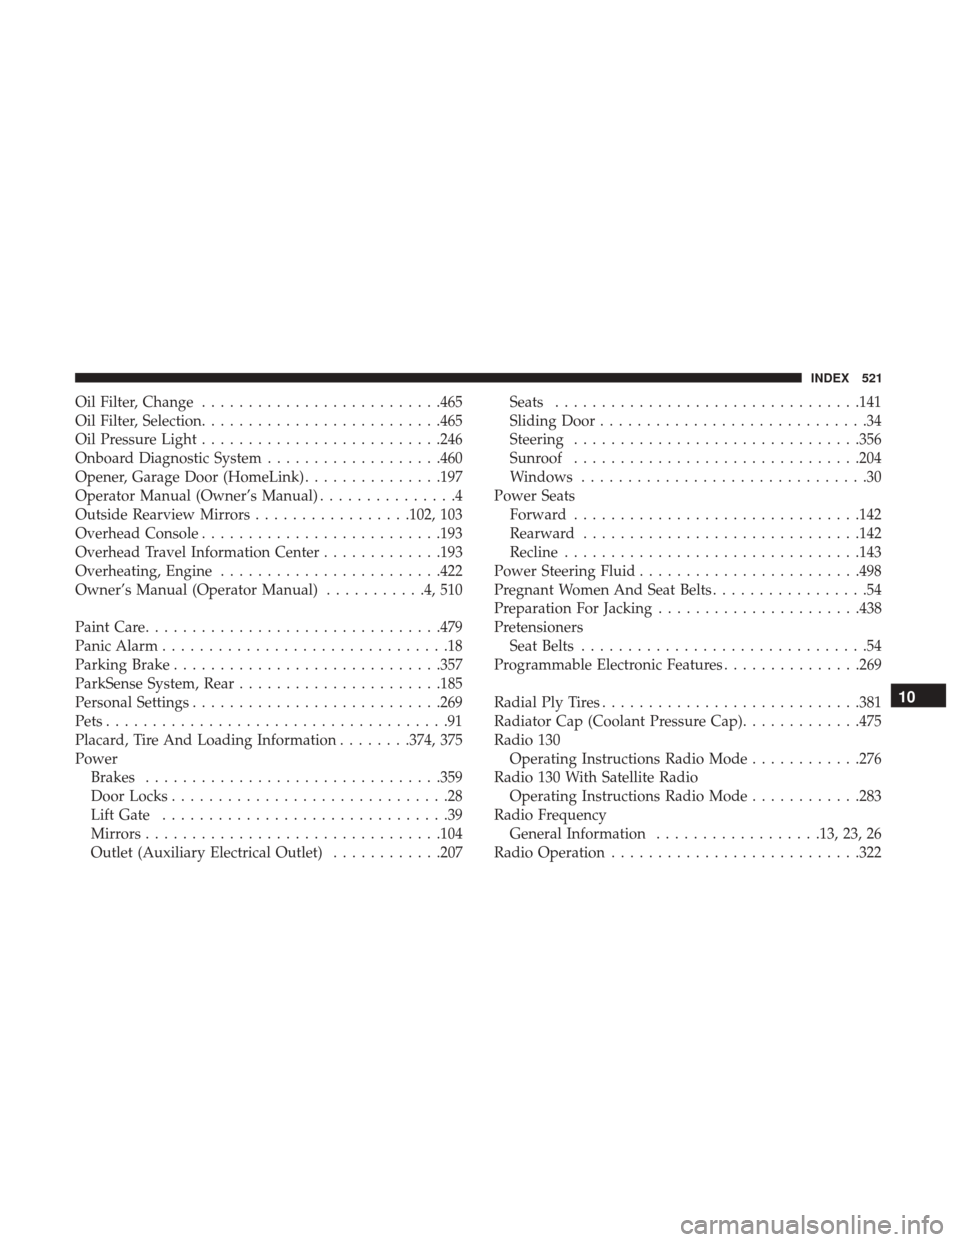
Oil Filter, Change..........................465
Oil Filter, Selection ..........................465
Oil Pressure Light ..........................246
Onboard Diagnostic System ...................460
Opener, Garage Door (HomeLink) ...............197
Operator Manual (Owner’s Manual) ...............4
Outside Rearview Mirrors .................102, 103
Overhead Console ..........................193
Overhead Travel Information Center .............193
Overheating, Engine ........................422
Owner’s Manual (Operator Manual) ...........4,510
Paint Care ............................... .479
Panic Alarm ...............................18
Parking Brake ............................ .357
ParkSense System, Rear ..................... .185
Personal Settings .......................... .269
Pets .....................................91
Placard, Tire And Loading Information ........374, 375
Power Brakes ............................... .359
Door Locks ..............................28
Lift Gate ...............................39
Mirrors ............................... .104
Outlet (Auxiliary Electrical Outlet) ............207Seats
.................................141
Sliding Door .............................34
Steering ...............................356
Sunroof ...............................204
Windows ...............................30
Power Seats Forward ...............................142
Rearward ............................. .142
Recline ............................... .143
Power Steering Fluid ........................498
Pregnant Women And Seat Belts .................54
Preparation For Jacking ..................... .438
Pretensioners Seat Belts ...............................54
Programmable Electronic Features ...............269
Radial Ply Tires ............................381
Radiator Cap
(Coolant Pressure Cap) .............475
Radio 130 Operating Instructions Radio Mode ............276
Radio 130 With Satellite Radio Operating Instructions Radio Mode ............283
Radio Frequency General Information ..................13, 23, 26
Radio Operation .......................... .32210
INDEX 521