2017 DODGE GRAND CARAVAN display
[x] Cancel search: displayPage 336 of 530
Floor ModeAir comes from the floor outlets.
Rear Automatic Temperature Control (ATC) — If
Equipped
The rear ATC system has floor air outlets at the rear of the
right side sliding door, and overhead outlets at each
outboard rear seating position. The system provides heated
air through the floor outlets or cool, dehumidified air
through the headliner outlets.
The rear system temperature control is on the front ATC
panel located on the instrument panel.
Pushing the Rear Temperature Lock button on the front
ATC panel, illuminates a lock symbol in the rear display.
The rear temperature and air source are controlled from the
front ATC panel.
Rear second row occupants can only adjust the rear ATC
control when the Rear Temperature Lock button is turned
off.
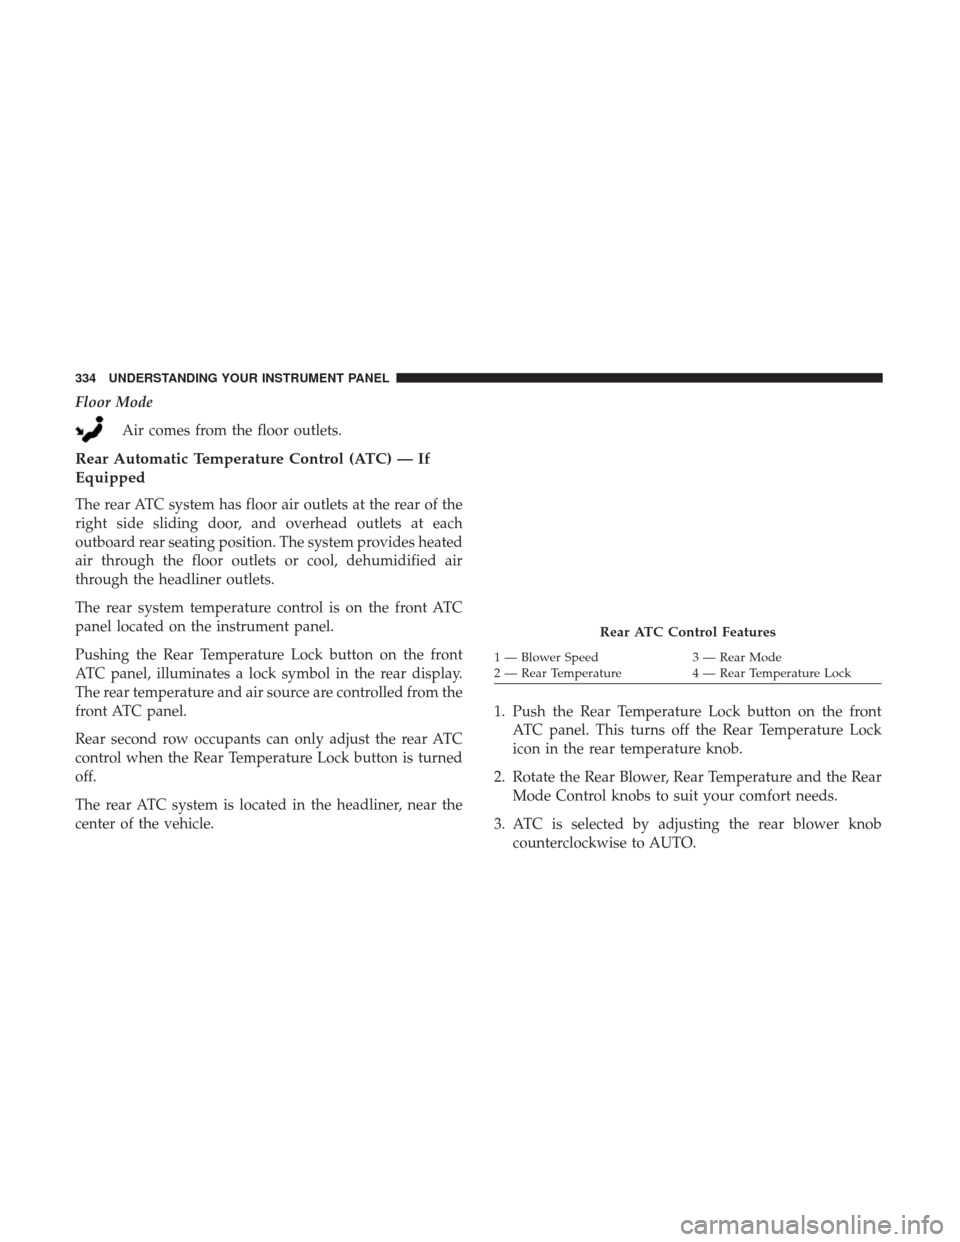
The rear ATC system is located in the headliner, near the
center of the vehicle. 1. Push the Rear Temperature Lock button on the front
ATC panel. This turns off the Rear Temperature Lock
icon in the rear temperature knob.
2. Rotate the Rear Blower, Rear Temperature and the Rear Mode Control knobs to suit your comfort needs.
3. ATC is selected by adjusting the rear blower knob counterclockwise to AUTO.
Rear ATC Control Features
1 — Blower Speed 3 — Rear Mode
2 — Rear Temperature 4 — Rear Temperature Lock
334 UNDERSTANDING YOUR INSTRUMENT PANEL
Page 337 of 530
Once the desired temperature is displayed, the ATC System
will automatically achieve and maintain that comfort level.
When the system is set up for your comfort level, it is not
necessary to change the settings. You will experience the
greatest efficiency by simply allowing the system to func-
tion automatically.
NOTE:
•It is not necessary to move the temperature settings. The
system automatically adjusts the temperature, mode and
fan speed to provide comfort as quickly as possible.
• The temperature can be displayed in English or Metric
units by selecting the “Display Units of Measure in”
customer-programmable feature. Refer to the “Instru-
ment Cluster Display” in this Section.
Rear Blower Control
The rear blower control knob can be manually set to off, or
any fixed blower speed, by rotating the knob from low to
high. This allows the rear seat occupants to control the
volume of air circulated in the rear of the vehicle.
CAUTION!
Interior air enters the Rear Automatic Temperature
Control System through an intake grille, located in the
right side trim panel behind the third row seats. The
heater outlets are located in the right side trim panel,
just behind the sliding door. Do not block or place
objects directly in front of the inlet grille or heater
outlets. The electrical system could overload causing
damage to the blower motor.
Rear Temperature Control
To change the temperature in the rear of the vehicle, rotate
the temperature knob counterclockwise to lower the tem-
perature, and clockwise to increase the temperature. The
rear temperature settings are displayed in the front ATC
panel.
When rear controls are locked by the front system, the Rear
Temperature Lock symbol on the temperature knob is
illuminated and any rear overhead adjustments are ig-
nored.
4
UNDERSTANDING YOUR INSTRUMENT PANEL 335
Page 349 of 530
•The overall driving performance will be more conserva-
tive.
• Some ECON mode functions may be temporarily inhib-
ited based on temperature and other factors.
Six-Speed Automatic Transmission
The transmission gear position display (located in the
instrument cluster) indicates the transmission gear range.
You must press the brake pedal to move the gear selector
out of PARK (Refer to “Brake/Transmission Shift Interlock
System” in this section). To drive, move the gear selector
from PARK or NEUTRAL to the DRIVE position.
The electronically-controlled transmission provides a pre-
cise shift schedule. The transmission electronics are self-
calibrating; therefore, the first few shifts on a new vehicle
may be somewhat abrupt. This is a normal condition, and
precision shifts will develop within a few hundred miles
(kilometers). Only shift from DRIVE to PARK or REVERSE when the
accelerator pedal is released and the vehicle is stopped. Be
sure to keep your foot on the brake pedal when shifting
between these gears.
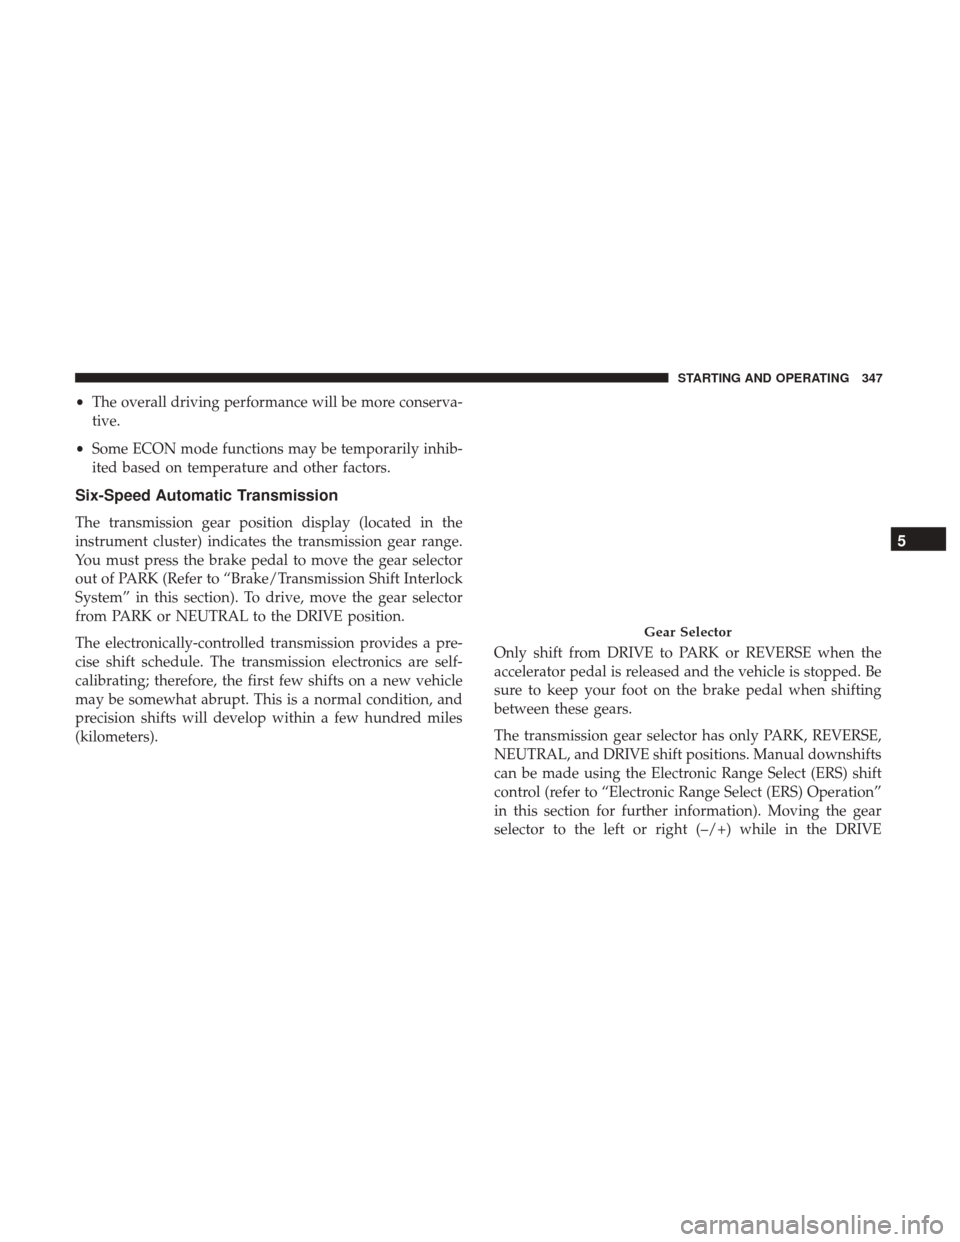
The transmission gear selector has only PARK, REVERSE,
NEUTRAL, and DRIVE shift positions. Manual downshifts
can be made using the Electronic Range Select (ERS) shift
control (refer to “Electronic Range Select (ERS) Operation”
in this section for further information). Moving the gear
selector to the left or right (–/+) while in the DRIVE
Gear Selector
5
STARTING AND OPERATING 347
Page 350 of 530
position will select the highest available transmission gear,
and will display that gear in the instrument cluster as 1, 2,
3, etc.
Gear Ranges
DO NOT race the engine when shifting from PARK or
NEUTRAL into another gear range.
NOTE:After selecting any gear range, wait a moment to
allow the selected gear to engage before accelerating. This
is especially important when the engine is cold.
PARK (P)
This range supplements the parking brake by locking the
transmission. The engine can be started in this range.
Never attempt to use PARK while the vehicle is in motion.
Apply the parking brake when leaving the vehicle in this
range.
When parking on a level surface, you may shift the
transmission into PARK first, and then apply the parking
brake.
When parking on a hill, apply the parking brake before
shifting the transmission to PARK, otherwise the load on
the transmission locking mechanism may make it difficult
to move the gear selector out of PARK. As an added precaution, turn the front wheels toward the curb on a
downhill grade, and away from the curb on an uphill
grade.
When exiting the vehicle, always:
•
Apply the parking brake.
• Shift the transmission into PARK.
• Turn the engine OFF.
• Remove the key fob.WARNING!
•Never use the PARK position as a substitute for the
parking brake. Always apply the parking brake fully
when parked to guard against vehicle movement and
possible injury or damage.
• Your vehicle could move and injure you and others if
it is not in PARK. Check by trying to move the gear
selector out of PARK with the brake pedal released.
Make sure the transmission is in PARK before leav-
ing the vehicle.
• It is dangerous to shift out of PARK or NEUTRAL if
the engine speed is higher than idle speed. If your
(Continued)
348 STARTING AND OPERATING
Page 351 of 530
WARNING!(Continued)
foot is not firmly pressing the brake pedal, the
vehicle could accelerate quickly forward or in re-
verse. You could lose control of the vehicle and hit
someone or something. Only shift into gear when the
engine is idling normally and your foot is firmly
pressing the brake pedal.
• Unintended movement of a vehicle could injure
those in or near the vehicle. As with all vehicles, you
should never exit a vehicle while the engine is
running. Before exiting a vehicle, always apply the
parking brake, shift the transmission into PARK,
turn the engine OFF, and remove the key fob. When
the ignition is in the LOCK/OFF (key removal)
position (or, with Keyless Enter-N-Go, when the
ignition is in the OFF mode), the transmission is
locked in PARK, securing the vehicle against un-
wanted movement.
• When leaving the vehicle, always make sure the
ignition is in the OFF mode, remove the key fob from
the vehicle, and lock the vehicle.
• Never leave children alone in a vehicle, or with
access to an unlocked vehicle. Allowing children to
(Continued)
WARNING! (Continued)
be in a vehicle unattended is dangerous for a number
of reasons. A child or others could be seriously or
fatally injured. Children should be warned not to
touch the parking brake, brake pedal or the trans-
mission gear selector.
• Do not leave the key fob in or near the vehicle (or in
a location accessible to children), and do not leave
the ignition (in a vehicle equipped with Keyless
Enter-N-Go) in the ACC or ON/RUN mode. A child
could operate power windows, other controls, or
move the vehicle.
The following indicators should be used to ensure that you
have engaged the transmission into the PARK position:
• When shifting into PARK, firmly move the gear selector
all the way forward and to the left until it stops and is
fully seated.
• Look at the transmission gear position display and
verify that it indicates the PARK position (P).
• With brake pedal released, verify that the gear selector
will not move out of PARK.
5
STARTING AND OPERATING 349
Page 354 of 530
NOTE:Even if the transmission can be reset, we recom-
mend that you visit your authorized dealer at your earliest
possible convenience. Your authorized dealer has diagnos-
tic equipment to determine if the problem could recur.
If the transmission cannot be reset, authorized dealer
service is required.
Electronic Range Select (ERS) Operation
The Electronic Range Select (ERS) shift control allows the
driver to limit the highest available gear when the trans-
mission is in DRIVE. For example, if you set the transmis-
sion gear limit to 4 (fourth gear), the transmission will not
shift above fourth gear (except to prevent engine over-
speed), but will shift through the lower gears normally.
You can switch between DRIVE and ERS mode at any
vehicle speed. When the gear selector is in the DRIVE
position, the transmission will operate automatically, shift-
ing between all available gears. Tapping the gear selector to the left (-) will activate ERS mode, display the current gear
in the instrument cluster, and set that gear as the top
available gear. Once in ERS mode, tapping the gear selector
to the left (-) or right (+) will change the top available gear.
To exit ERS mode, simply hold the gear selector to the right
(+) until the gear limit display disappears from the instru-
ment cluster.WARNING!
Do not downshift for additional engine braking on a
slippery surface. The drive wheels could lose their grip
and the vehicle could skid, causing a collision or
personal injury.
Transmission Gear Position Dis-
play
123456D
Actual Gear(s) Allowed 1 1–2 1–3 1–4 1–5 1–6 1–6
352 STARTING AND OPERATING
Page 365 of 530
Towing With HSA
HSA will also provide assistance to mitigate roll back while
towing a trailer.
WARNING!
•If you use a trailer brake controller with your trailer,
the trailer brakes may be activated and deactivated
with the brake switch. If so, there may not be enough
brake pressure to hold both the vehicle and the
trailer on a hill when the brake pedal is released. In
order to avoid rolling down an incline while resum-
ing acceleration, manually activate the trailer brake
or apply more vehicle brake pressure prior to releas-
ing the brake pedal.
• HSA is not a parking brake. Always apply the
parking brake fully when leaving your vehicle. Also,
be certain to leave the transmission in PARK.
• Failure to follow these warnings may cause the
vehicle to roll down the incline and could collide
with another vehicle, object or person, and cause
serious or fatal injury. Always remember to use the
parking brake while parking on a hill and that the
driver is responsible for braking the vehicle.
Disabling And Enabling HSA
This feature can be turned on or turned off. To change the
current setting, proceed as follows:
• For vehicles equipped with the instrument cluster dis-
play, refer to “Instrument Cluster Display” in “Under-
standing Your Instrument Panel” for further informa-
tion.
• If disabling HSA using Uconnect Settings, refer to
“Uconnect Settings” in “Understanding Your Instrument
Panel” for further information.
For vehicles not equipped with the instrument cluster
display, perform the following steps:
1. Center the steering wheel (front wheels pointing straight forward).
2. Shift the transmission into PARK.
3. Apply the parking brake.
4. Start the engine.
5. Rotate the steering wheel slightly more than one-half turn to the left.
5
STARTING AND OPERATING 363
Page 396 of 530

The Basic TPMS consists of the following components:
•Receiver Module
• Four Tire Pressure Monitoring Sensors
• TPMS Telltale Warning Light
Tire Pressure Monitoring Low Tire Pressure
Warnings
The “Tire Pressure Monitoring Telltale Light”
will illuminate in the instrument cluster, a “LOW
TIRE PRESSURE” message will display in the
instrument cluster, and an audible chime will be
activated when one or more of the four active road tire
pressures are low. Should this occur, you should stop as
soon as possible, check the inflation pressure of each tire on
your vehicle, and inflate each tire to the vehicle’s recom-
mended cold tire placard pressure value (located on the
placard label on the driver’s-side B-Pillar).
NOTE: When filling warm tires, the tire pressure may
need to be increased up to an additional 4 psi (30 kPa)
above the recommended cold placard pressure in order to
turn the Tire Pressure Monitoring Telltale Light off. The system will automatically update and the “Tire Pres-
sure Monitoring Telltale Light” will extinguish once the
updated tire pressures have been received.
NOTE:
The vehicle may need to be driven for up to 20
minutes above 15 mph (24 km/h) to receive this informa-
tion.
SERVICE TPM SYSTEM
The “Tire Pressure Monitoring Telltale Light” will flash on
and off for 75 seconds, and remain on solid when a system
fault is detected. The system fault will also sound a chime.
If the ignition switch is cycled, this sequence will repeat,
providing the system fault still exists. The “Tire Pressure
Monitoring Telltale Light” will turn off when the fault
condition no longer exists. A system fault can occur with
any of the following scenarios:
• Jamming due to electronic devices or driving next to
facilities emitting the same radio frequencies as the
TPMS sensors.
• Installing some form of aftermarket window tinting that
affects radio wave signals.
• Accumulation of excessive snow and/or ice around the
wheels or wheel housings.
394 STARTING AND OPERATING