Page 209 of 306
207
QUESTIONRESPONSE SOLUTION
With the engine off, the audio system switches
off after a few minutes of use. When the engine is switched off, the audio
system operating time depends on the battery
charge.
The switch-off is normal: the audio system
switches to economy mode and switches off to
prevent discharging the vehicle's battery.Turn the ignition on to increase charge of the
battery.
The message "the audio system is overheated"
appears on the display. In order to protect the installation if the
surrounding temperature is too high, the audio
system switches to an automatic thermal
protection mode leading to a reduction of the
volume or stopping of the playing of the CD.Switch the audio system off for a few minutes to
allow the system to cool.
.
AUDIO and TELEMATICS
Page 210 of 306

208
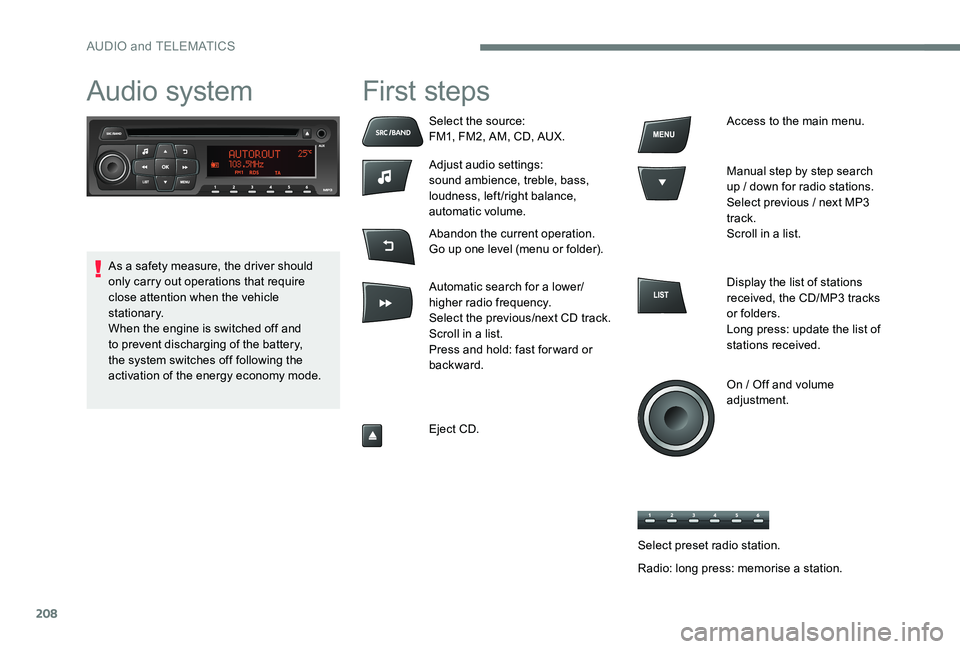
Audio system First steps
Select the source:
FM1, FM2, AM, CD, AUX.
Adjust audio settings:
sound ambience, treble, bass,
loudness, left/right balance,
automatic volume.
Abandon the current operation.
Go up one level (menu or folder).
Automatic search for a lower/
higher radio frequency.
Select the previous/next CD track.
Scroll in a list.
Press and hold: fast for ward or
backward.
Eject CD.Access to the main menu.
Manual step by step search
up / down for radio stations.
Select previous / next MP3
track.
Scroll in a list.
Display the list of stations
received, the CD/MP3 tracks
or folders.
Long press: update the list of
stations received.
On / Off and volume
adjustment.
As a safety measure, the driver should
only carry out operations that require
close attention when the vehicle
stationary.
When the engine is switched off and
to prevent discharging of the battery,
the system switches off following the
activation of the energy economy mode.
Select preset radio station.
Radio: long press: memorise a station.
AUDIO and TELEMATICS
Page 211 of 306
209
Audio
Radio
Selecting a station
Press the SRC/BAND button
repeatedly to select the FM1, FM2
or AM waveband.
The external environment (hills, buildings,
tunnels, basement car parks, ...) may
block reception, including in RDS mode.
This is a normal effect of the way in
which radio waves are transmitted and
does not indicate any failure of the audio
equipment.
Select a preset radio station.
Make a long press on one of the buttons to
preset the current radio station. The name of
the station is displayed and an audible signal
confirms that it has been preset.
A long press on LIST builds or
updates the list of stations; audio
reception is cut momentarily. Press LIST
to display the
list of stations received, in
alphabetical order.
Select the desired radio station
and confirm by pressing OK.
A press changes to the next or
previous letter (e.g. A, B, D, F,
G, J, K, ...).
Press a button to listen to the corresponding
preset station.
.
AUDIO and TELEMATICS
Page 212 of 306

210
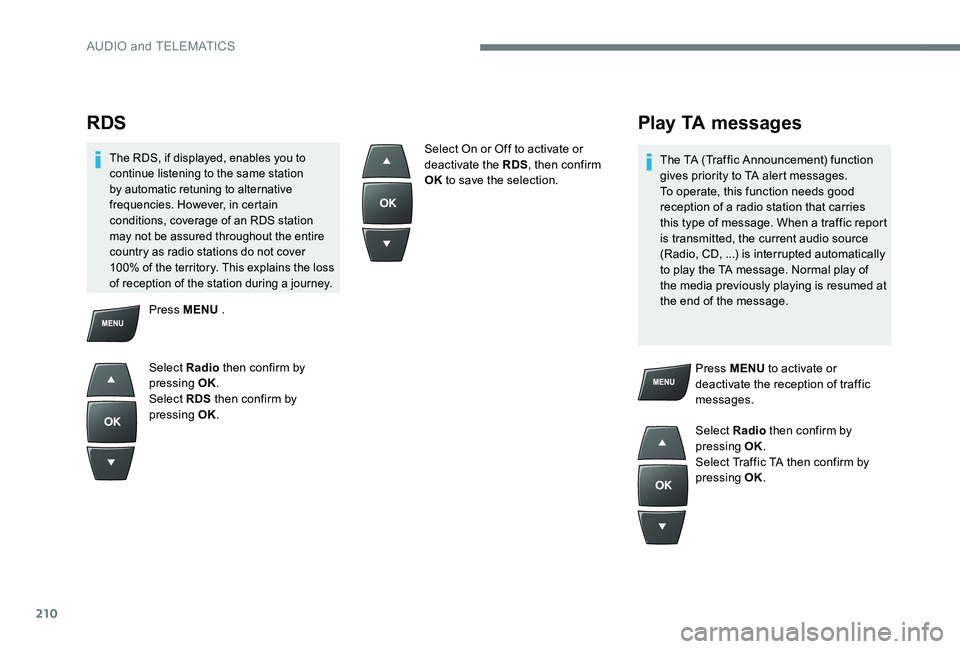
RDS
The RDS, if displayed, enables you to
continue listening to the same station
by automatic retuning to alternative
frequencies. However, in certain
conditions, coverage of an RDS station
may not be assured throughout the entire
country as radio stations do not cover
100% of the territory. This explains the loss
of reception of the station during a journey.
Play TA messages
The TA (Traffic Announcement) function
gives priority to TA alert messages.
To operate, this function needs good
reception of a radio station that carries
this type of message. When a traffic report
is transmitted, the current audio source
(Radio, CD, ...) is interrupted automatically
to play the TA message. Normal play of
the media previously playing is resumed at
the end of the message.Press MENU to activate or
deactivate the reception of traffic
messages.
Select Radio then confirm by
pressing OK.
Select Traffic TA then confirm by
pressing OK.
Press MENU
.
Select Radio then confirm by
pressing OK.
Select RDS then confirm by
pressing OK. Select On or Off to activate or
deactivate the RDS
, then confirm
OK to save the selection.
AUDIO and TELEMATICS
Page 213 of 306

211
Audio CD
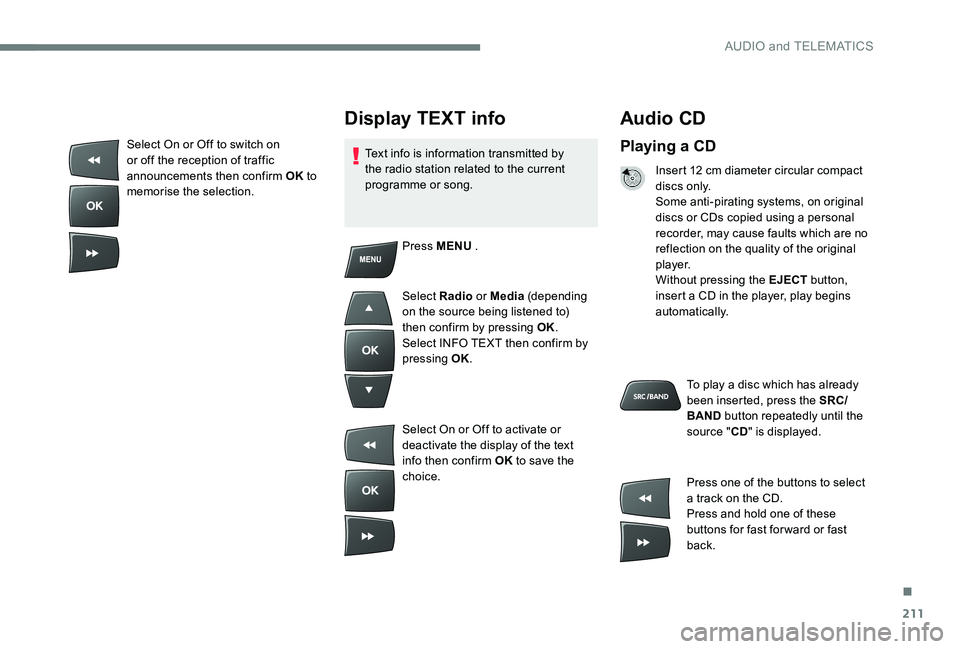
Playing a CD
Insert 12 cm diameter circular compact
di s c s o n l y.
Some anti-pirating systems, on original
discs or CDs copied using a personal
recorder, may cause faults which are no
reflection on the quality of the original
p l aye r.
Without pressing the EJECT button,
insert a CD in the player, play begins
automatically.
To play a disc which has already
been inserted, press the SRC/
BAND button repeatedly until the
source " CD" is displayed.
Press one of the buttons to select
a track on the CD.
Press and hold one of these
buttons for fast for ward or fast
back.
Display TEXT info
Text info is information transmitted by
the radio station related to the current
programme or song.
Press MENU .
Select Radio or Media (depending
on the source being listened to)
then confirm by pressing OK.
Select INFO TEXT then confirm by
pressing OK.
Select On or Off to activate or
deactivate the display of the text
info then confirm OK to save the
choice.
Select On or Off to switch on
or off the reception of traffic
announcements then confirm OK
to
memorise the selection.
.
AUDIO and TELEMATICS
Page 214 of 306

212
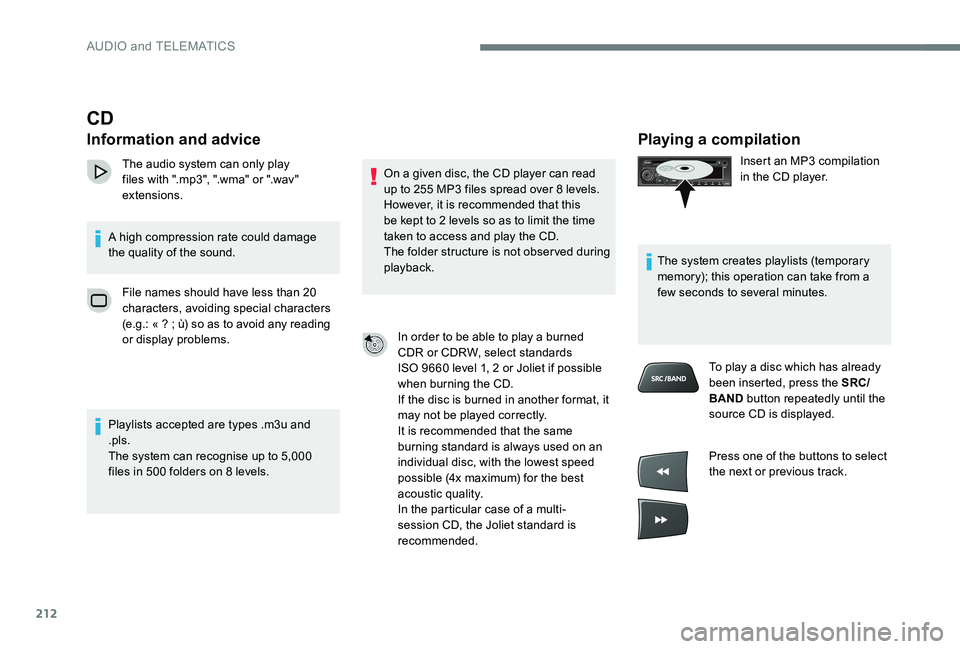
Playing a compilation
Insert an MP3 compilation
in the CD player.
The system creates playlists (temporary
memory); this operation can take from a
few seconds to several minutes. To play a disc which has already
been inserted, press the SRC/
BAND button repeatedly until the
source CD is displayed.
Press one of the buttons to select
the next or previous track.
CD
Information and advice
The audio system can only play
files with ".mp3", ".wma" or ".wav"
extensions.
A high compression rate could damage
the quality of the sound. File names should have less than 20
characters, avoiding special characters
(e.g.: « ? ; ù) so as to avoid any reading
or display problems.
Playlists accepted are types .m3u and
.pls.
The system can recognise up to 5,000
files in 500 folders on 8 levels. On a given disc, the CD player can read
up to 255 MP3 files spread over 8 levels.
However, it is recommended that this
be kept to 2 levels so as to limit the time
taken to access and play the CD.
The folder structure is not observed during
playback.
In order to be able to play a burned
CDR or CDRW, select standards
ISO
9660 level 1, 2 or Joliet if possible
when burning the CD.
If the disc is burned in another format, it
may not be played correctly.
It is recommended that the same
burning standard is always used on an
individual disc, with the lowest speed
possible (4x maximum) for the best
acoustic quality.
In the particular case of a multi-
session CD, the Joliet standard is
recommended.
AUDIO and TELEMATICS
Page 215 of 306
213
Auxiliary input (AUX)
JACK socket
The auxiliary Jack input makes it possible
to connect a portable device.
The display and management of controls
is on the portable device.
Connect the portable device to the auxiliary
Jack socket using a suitable cable (not
supplied).
Press the SRC/BAND button
repeatedly until the source
appears AUX.
First adjust the volume on your portable device. Then adjust the volume of the
audio system.
Jump a page.
Select a folder /Playlist.
Start play of the chosen track.
Up a level in the menu.
Press one of the buttons to
select the next or previous folder
in the order chosen.
Press and hold one of these
buttons for fast for ward or fast
back.
Press LIST
to display the
structure of the folders in the
compilation.
Select a line in the list.
.
AUDIO and TELEMATICS
Page 216 of 306
214
Audio settings
The audio AMBIANCE, TREBLE
and BASS settings are different and
independent for each sound source.Press ¯ to display the audio
settings menu.
The settings available are:
-
AMBIANCE,
-
BASS,
-
TREBLE,
-
LOUDNESS,
-
BALANCE,
-
A
UTO VOLUME.
Select the setting to adjust.
Adjust the setting then confirm by
pressing OK.
Play mode
The play modes available are:
- N ormal: the tracks are played in order,
depending on the classification of the
selected files.
-
R
andom: the tracks in an album or
folder are played in a random order.
-
R
andom all: all of the tracks saved in
the media are played in random order.
-
R
epeat: the tracks played are only
those from the current album or folder. Press MENU
.
Select Media then confirm by
pressing OK.
Select the desired play mode
and confirm OK to save the
modifications.
AUDIO and TELEMATICS