2017 CHEVROLET ORLANDO light
[x] Cancel search: lightPage 21 of 372

Black plate (15,1)Chevrolet Orlando Owner Manual - 2013 - CRC - 6/5/12
In Brief 1-15
Storing a Favorite Station
Stations from all bands can be
stored in the favorite lists in any
order. Up to six stations can be
stored in each favorite page and the
number of available favorite pages
can be set.
To store the station to a position in
the list, press the corresponding
numeric button 1 to 6 until a beep is
heard.
For more information, see“Storing a
Station as a Favorite” inAM-FM
Radio on page 7‑7.
Setting the Clock
Adjusting the Time
1. Press the CONFIG button and select Time Settings.
2. Select Set Time.
3. Turn the MENU knob to adjust the highlighted number.
4. Press the MENU knob to select the next number. 5. To save the time and return to
the Time Settings menu, press
the BACK button at any time or
press the MENU knob after
adjusting the minutes.
Setting the 12/24 Hour Format
1. Press the CONFIG button and select Time Settings.
2. Highlight 12/24 Hour Format.
3. Press the MENU knob to select the 12 hour or 24 hour display
format.
For more information, see Clock on
page 5‑5.Satellite Radio
Vehicles with a SiriusXM® satellite
radio tuner and a valid SiriusXM
satellite radio subscription can
receive SiriusXM programming.
SiriusXM Satellite Radio
Service
SiriusXM is a satellite radio service
based in the 48 contiguous United
States and 10 Canadian provinces.
SiriusXM satellite radio has a wide
variety of programming and
commercial-free music, coast to
coast, and in digital-quality sound.
A fee is required to receive the
SiriusXM service.
Refer to:
.www.siriusxm.com or call
1-866-635-2349 (U.S.).
.www.xmradio.ca or call
1-877-209-0079 (Canada).
See Satellite Radio on page 7‑9.
Page 25 of 372

Black plate (19,1)Chevrolet Orlando Owner Manual - 2013 - CRC - 6/5/12
In Brief 1-19
StabiliTrak®System
The StabiliTrak system assists with
directional control of the vehicle in
difficult driving conditions. The
system is on when the vehicle is
started.
.To turn off both Traction Control
and StabiliTrak, press and hold
the TCS/StabiliTrak button,
until
iandgilluminate and the
appropriate DIC message
displays. See Ride Control
System Messages on page 5‑28.
The TCS/StabiliTrak button has
the
gsymbol and is located on
the instrument panel,
.Press the TCS/StabiliTrak button
again to turn on both systems.
For more information, see
StabiliTrak
®System on page 9‑29.
Tire Pressure Monitor
This vehicle may have a Tire
Pressure Monitor System (TPMS).
The low tire pressure warning light
alerts to a significant loss in
pressure of one of the vehicle's
tires. If the warning light comes on,
stop as soon as possible and inflate
the tires to the recommended
pressure shown on the Tire and
Loading Information label. See
Vehicle Load Limits on page 9‑9.
The warning light will remain on until
the tire pressure is corrected. The low tire pressure warning light
may come on in cool weather when
the vehicle is first started, and then
turn off as the vehicle is driven. This
may be an early indicator that the
tire pressures are getting low and
the tires need to be inflated to the
proper pressure.
The TPMS does not replace normal
monthly tire maintenance. Maintain
the correct tire pressures.
See
Tire Pressure Monitor System
on page 10‑44.
Tire Sealant and
Compressor Kit
This vehicle may come with a spare
tire and tire changing equipment or
a tire sealant and compressor kit.
The kit can be used to temporarily
seal small punctures in the tread
area of the tire. See Tire Sealant
and Compressor Kit on page 10‑58.
If the vehicle came with a spare tire
and tire changing equipment, see If
a Tire Goes Flat on page 10‑56.
Page 33 of 372

Black plate (5,1)Chevrolet Orlando Owner Manual - 2013 - CRC - 6/5/12
Keys, Doors, and Windows 2-5
3. Insert the new battery, positiveside facing up. Push the battery
down until it is held in place.
Replace with a CR2032 or
equivalent battery.
4. Snap the battery cover back on to the transmitter.
Remote Vehicle Start
The vehicle may have this feature
that allows you to start the engine
from outside the vehicle.
/(Remote Vehicle Start): This
button will be on the RKE
transmitter if the vehicle has remote
start.
The climate control system will use
the previous settings during a
remote start. The rear defog may
come on during remote start based
on cold ambient conditions. The
rear fog indicator light does not
come on during remote start. If the
vehicle has heated seats, they may
come on during a remote start. See
Heated Front Seats on page 3‑6. Laws in some local communities
may restrict the use of remote
starters. For example, some laws
require a person using remote start
to have the vehicle in view. Check
local regulations for any
requirements.
Other conditions can affect the
performance of the transmitter. See
Remote Keyless Entry (RKE)
System on page 2‑2.
Starting the Vehicle
To start the engine using the remote
start feature:
1. Aim the RKE transmitter at the
vehicle.
2. Press and release
Q.
3. Immediately after completing Step 2, press and hold
/for at
least two seconds or until the
turn signal lamps flash. The turn
signal lamps flashing confirms
the request to remote start the
vehicle has been received. When the engine starts, the parking
lamps will turn on and remain on as
long as the engine is running. The
doors will be locked and the climate
control system may come on.
The engine will continue to run for
10 minutes. Repeat the steps for a
10-minute time extension. Remote
start can be extended only once.
Start the vehicle before driving.
Extending Engine Run Time
For a 10-minute extension, repeat
Steps 1–3 while the engine is still
running. The remote start can be
extended once.
When the remote start is extended,
the second 10 minutes will start
immediately.
For example, if the engine has
been running for five minutes, and
10 minutes are added, the engine
will run for a total of 15 minutes.
Page 35 of 372

Black plate (7,1)Chevrolet Orlando Owner Manual - 2013 - CRC - 6/5/12
Keys, Doors, and Windows 2-7
To lock or unlock a door from
outside the vehicle, use the Remote
Keyless Entry (RKE) transmitter.
From inside the vehicle, use the
power door lock switch.
The doors can also be unlocked
from the inside by pulling the door
handle. Pulling the door handle
again unlatches the door.
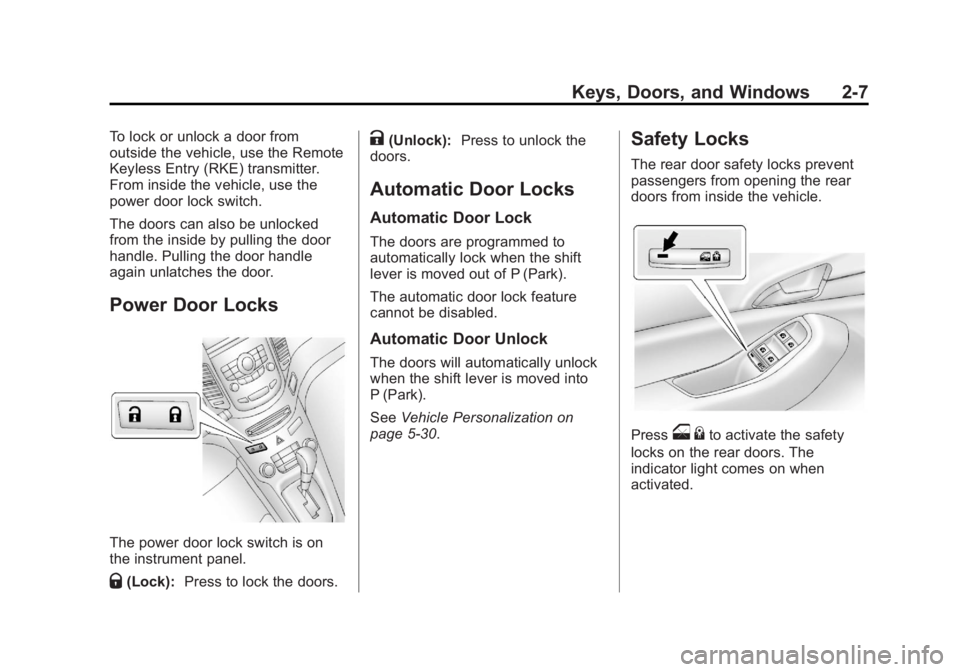
Power Door Locks
The power door lock switch is on
the instrument panel.
Q(Lock):Press to lock the doors.
K(Unlock): Press to unlock the
doors.
Automatic Door Locks
Automatic Door Lock
The doors are programmed to
automatically lock when the shift
lever is moved out of P (Park).
The automatic door lock feature
cannot be disabled.
Automatic Door Unlock
The doors will automatically unlock
when the shift lever is moved into
P (Park).
See Vehicle Personalization on
page 5‑30.
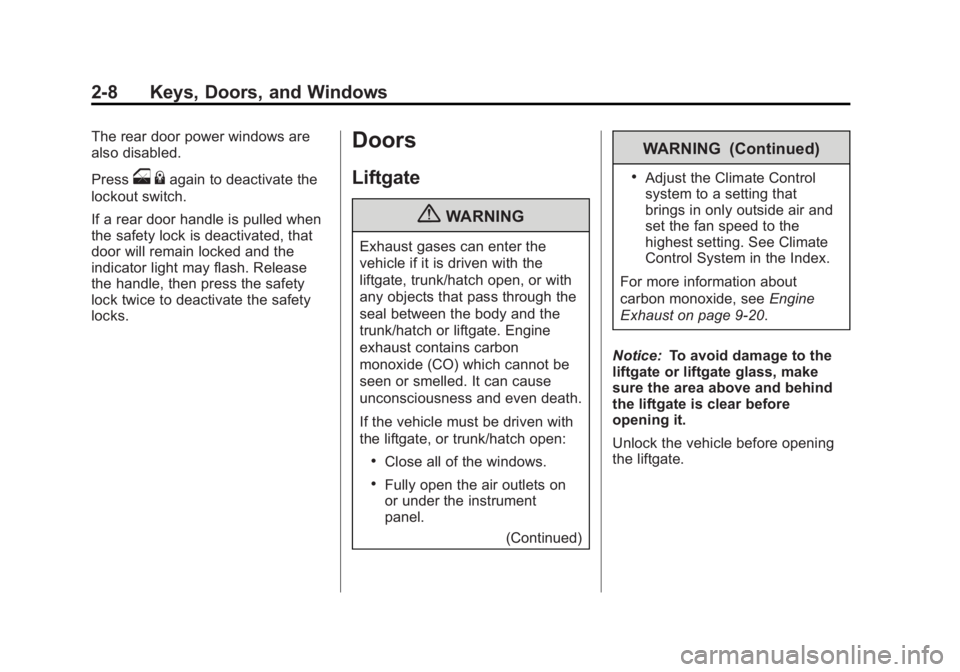
Safety Locks
The rear door safety locks prevent
passengers from opening the rear
doors from inside the vehicle.
Presso {to activate the safety
locks on the rear doors. The
indicator light comes on when
activated.
Page 36 of 372

Black plate (8,1)Chevrolet Orlando Owner Manual - 2013 - CRC - 6/5/12
2-8 Keys, Doors, and Windows
The rear door power windows are
also disabled.
Press
o{again to deactivate the
lockout switch.
If a rear door handle is pulled when
the safety lock is deactivated, that
door will remain locked and the
indicator light may flash. Release
the handle, then press the safety
lock twice to deactivate the safety
locks.
Doors
Liftgate
{WARNING
Exhaust gases can enter the
vehicle if it is driven with the
liftgate, trunk/hatch open, or with
any objects that pass through the
seal between the body and the
trunk/hatch or liftgate. Engine
exhaust contains carbon
monoxide (CO) which cannot be
seen or smelled. It can cause
unconsciousness and even death.
If the vehicle must be driven with
the liftgate, or trunk/hatch open:
.Close all of the windows.
.Fully open the air outlets on
or under the instrument
panel.
(Continued)
WARNING (Continued)
.Adjust the Climate Control
system to a setting that
brings in only outside air and
set the fan speed to the
highest setting. See Climate
Control System in the Index.
For more information about
carbon monoxide, see Engine
Exhaust on page 9‑20.
Notice: To avoid damage to the
liftgate or liftgate glass, make
sure the area above and behind
the liftgate is clear before
opening it.
Unlock the vehicle before opening
the liftgate.
Page 37 of 372

Black plate (9,1)Chevrolet Orlando Owner Manual - 2013 - CRC - 6/5/12
Keys, Doors, and Windows 2-9
Press the touch pad located in the
handle of the liftgate, above the
license plate, and lift up to open.
Do not press the touch pad while
closing the liftgate. This will cause
the liftgate to be unlatched.
Always close the liftgate before
driving.Vehicle Security
This vehicle has theft-deterrent
features; however, they do not make
the vehicle impossible to steal.
Vehicle Alarm System
This vehicle has a anti-theft alarm
system.
The LED light, instrument panel
near the windshield, indicates the
status of the system.
Arming the System
1. Close all doors, trunk, andliftgate.
2. Lock the vehicle using the transmitter or the power door
lock button with the door open.
The LED on the instrument
panel should come on and stay
on for about 30 seconds.
3. After 30 seconds, or if the
Q
button on the transmitter is
pressed again, the alarm system will arm, and the LED will begin
to slowly flash indicating the
alarm is operating.
If a door, the hood, or liftgate is
opened without first unlocking with
the transmitter, the turn signals will
flash and the horn will sound for
about 30 seconds. The alarm
system will then re-arm to monitor
for the next unauthorized event.
The theft-deterrent alarm system will
not activate if the doors are locked
with the key.
Disarming the System
To disarm the system, either unlock
the doors using the transmitter,
or start the vehicle.
To avoid setting off the alarm by
accident:
.Lock the vehicle with the
transmitter after all occupants
have left the vehicle and all
doors are closed.
Page 38 of 372

Black plate (10,1)Chevrolet Orlando Owner Manual - 2013 - CRC - 6/5/12
2-10 Keys, Doors, and Windows
.Always unlock a door with the
transmitter. Unlocking the driver
door with the mechanical backup
key will not disarm the alarm.
If you set off the alarm by accident,
turn off the alarm by pressing on the
transmitter, or start the vehicle with
a recognized transmitter in the
vehicle. the alarm will not stop if you
unlock the driver door with the key.
How to Detect a Tamper
Condition
IfKis pressed and the horn chirps
three times, an attempted break-in
has occurred while the system was
armed.
If the alarm has been activated, the
THEFT ATTEMPTED message will
appear on the DIC.
See Key and Lock Messages on
page 5‑27.
Immobilizer
See Radio Frequency Statement on
page 13‑15 for information
regarding Part 15 of the Federal
Communications Commission (FCC)
rules and Industry Canada
Standards RSS-GEN/210/220/310.
Immobilizer Operation
This vehicle has a passive
theft-deterrent system.
The system does not have to be
manually armed or disarmed.
The vehicle is automatically
immobilized when the key is
removed from the ignition.
The system is automatically
disarmed when the vehicle is
started with the correct key. The
key uses a transponder that
matches an immobilizer control unit in the vehicle and automatically
disarms the system. Only an
authorized key starts the vehicle.
The vehicle may not start if the key
is damaged.
The security light in the instrument
cluster comes on if there is a
problem with arming or disarming
the theft-deterrent system.
When trying to start the vehicle, the
security light comes on briefly when
the ignition is turned on.
If the engine does not start and the
security light stays on, there is a
problem with the system. Turn the
ignition off and try again.
Page 39 of 372

Black plate (11,1)Chevrolet Orlando Owner Manual - 2013 - CRC - 6/5/12
Keys, Doors, and Windows 2-11
If the engine still does not start, and
the key appears to be undamaged
or the light continues to stay on, try
another ignition key. If the engine
does not start with the other key, the
vehicle needs service. If the vehicle
does start, the first key may be
damaged. See your dealer who can
service the theft-deterrent system
and have a new key made.
Do not leave the key or device that
disarms or deactivates the
theft-deterrent system in the vehicle.Exterior Mirrors
Convex Mirrors
{WARNING
A convex mirror can make things,
like other vehicles, look farther
away than they really are. If you
cut too sharply into the right lane,
you could hit a vehicle on the
right. Check the inside mirror or
glance over your shoulder before
changing lanes.
The convex shaped mirror reduces
blind spots. The shape of the mirror
makes objects appear smaller,
which will affect the ability to
estimate distances.
Manual Mirrors
Some vehicles have outside mirrors
that can be manually adjusted.
Controls for the outside manual
mirrors are located next to each
mirror.