Page 245 of 372

Black plate (17,1)Chevrolet Orlando Owner Manual - 2013 - CRC - 6/5/12
Vehicle Care 10-17
Engine Overheating
The vehicle has an engine coolant
temperature gauge to warn of
engine overheating. SeeEngine
Coolant Temperature Gauge on
page 5‑10.
The decision may be made not
to lift the hood when this warning
appears, but instead get service
help right away. See Roadside
Assistance Program on page 13‑5.
If the decision to lift the hood is
made, make sure the vehicle is
parked on a level surface.
Then check to see if the engine
cooling fan is running. If the engine
is overheating, the fan should be
running. If they are not, do not
continue to run the engine and have
the vehicle serviced.
Notice: Engine damage from
running the engine without
coolant is not covered by the
warranty.
If Steam is Coming from the
Engine Compartment
{WARNING
Steam from an overheated engine
can burn you badly, even if you
just open the hood. Stay away
from the engine if you see or hear
steam coming from it. Just turn it
off and get everyone away from
the vehicle until it cools down.
Wait until there is no sign of
steam or coolant before you open
the hood.
If you keep driving when the
engine is overheated, the liquids
in it can catch fire. You or others
could be badly burned. Stop the
engine if it overheats, and get out
of the vehicle until the engine
is cool.
If No Steam is Coming from
the Engine Compartment
If the engine coolant temperature
gauge is in the overheat zone but
no steam can be seen or heard, the
problem may not be too serious.
Sometimes the engine can get a
little too hot when the vehicle:
.Climbs a long hill on a hot day.
.Stops after high-speed driving.
.Idles for long periods in traffic.
.Tows a trailer.
If the engine coolant temperature
gauge is in the overheat zone with
no sign of steam:
1. Turn the air conditioning off.
2. Turn the heater on to the highest temperature and to the highest
fan speed. Open the windows as
necessary.
Page 253 of 372
Black plate (25,1)Chevrolet Orlando Owner Manual - 2013 - CRC - 6/5/12
Vehicle Care 10-25
Headlamp Aiming
Headlamp aim has been preset and
should need no further adjustment.
If the vehicle is damaged in a crash,
the headlamp aim may be affected.
If adjustment to the headlamps is
necessary, see your dealer.
Bulb Replacement
For the proper type of replacement
bulbs, seeReplacement Bulbs on
page 10‑30.
For any bulb‐changing procedure
not listed in this section, contact
your dealer.
Halogen Bulbs
{WARNING
Halogen bulbs have pressurized
gas inside and can burst if you
drop or scratch the bulb. You or
others could be injured. Be sure
to read and follow the instructions
on the bulb package.
Headlamps, Front Turn
Signal, Sidemarker, and
Parking Lamps
High-Beam Headlamp/
Low-Beam Headlamp
1. Connector Retaining Tab
2. Connector Release
3. Headlamp Bulb
To replace one of these bulbs:
1. Open the hood. See Hood on
page 10‑4.
Page 254 of 372

Black plate (26,1)Chevrolet Orlando Owner Manual - 2013 - CRC - 6/5/12
10-26 Vehicle Care
2. Remove the connectorretaining tab (1).
3. Disconnect the wiring harness connector from the bulb (3) by
pressing the connector
release (2) and pulling
straight back.
4. Remove the bulb (3) from the headlamp assembly by turning
counterclockwise and pulling
straight back.
5. Install the new bulb in the headlamp assembly by turning
clockwise.
6. Install the wiring harness connector to the bulb. Be sure
the connector release (2) locks
into place.
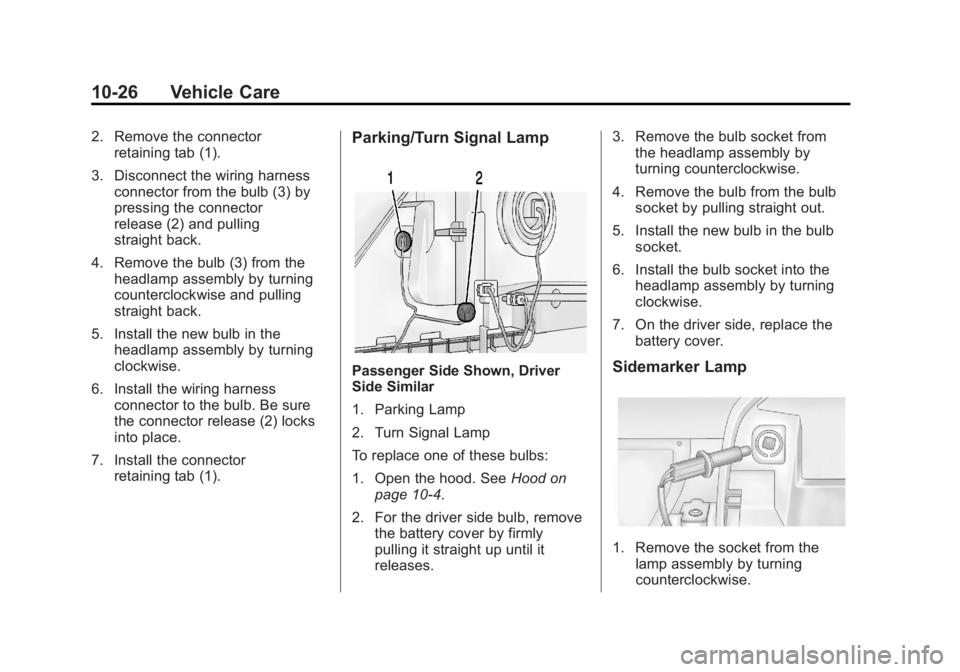
7. Install the connector retaining tab (1).Parking/Turn Signal Lamp
Passenger Side Shown, Driver
Side Similar
1. Parking Lamp
2. Turn Signal Lamp
To replace one of these bulbs:
1. Open the hood. See Hood on
page 10‑4.
2. For the driver side bulb, remove the battery cover by firmly
pulling it straight up until it
releases. 3. Remove the bulb socket from
the headlamp assembly by
turning counterclockwise.
4. Remove the bulb from the bulb socket by pulling straight out.
5. Install the new bulb in the bulb socket.
6. Install the bulb socket into the headlamp assembly by turning
clockwise.
7. On the driver side, replace the battery cover.Sidemarker Lamp
1. Remove the socket from thelamp assembly by turning
counterclockwise.