2017 CHEVROLET ORLANDO brake light
[x] Cancel search: brake lightPage 1 of 372

Black plate (1,1)Chevrolet Orlando Owner Manual - 2013 - CRC - 6/5/12
2013 Chevrolet Orlando Owner ManualM
In Brief. . . . . . . . . . . . . . . . . . . . . . . . 1-1
Instrument Panel . . . . . . . . . . . . . . 1-2
Initial Drive Information . . . . . . . . 1-4
Vehicle Features . . . . . . . . . . . . . 1-14
Performance and Maintenance . . . . . . . . . . . . . . . . 1-18
Keys, Doors, and Windows . . . . . . . . . . . . . . . . . . . . 2-1
Keys and Locks . . . . . . . . . . . . . . . 2-1
Doors . . . . . . . . . . . . . . . . . . . . . . . . . . 2-8
Vehicle Security . . . . . . . . . . . . . . . . 2-9
Exterior Mirrors . . . . . . . . . . . . . . . 2-11
Interior Mirrors . . . . . . . . . . . . . . . . 2-12
Windows . . . . . . . . . . . . . . . . . . . . . 2-14
Roof . . . . . . . . . . . . . . . . . . . . . . . . . . 2-16
Seats and Restraints . . . . . . . . . 3-1
Head Restraints . . . . . . . . . . . . . . . 3-2
Front Seats . . . . . . . . . . . . . . . . . . . . 3-3
Rear Seats . . . . . . . . . . . . . . . . . . . . 3-8
Safety Belts . . . . . . . . . . . . . . . . . . 3-15
Airbag System . . . . . . . . . . . . . . . . 3-24
Child Restraints . . . . . . . . . . . . . . 3-32 Storage
. . . . . . . . . . . . . . . . . . . . . . . 4-1
Storage Compartments . . . . . . . . 4-1
Additional Storage Features . . . 4-2
Roof Rack System . . . . . . . . . . . . . 4-5
Instruments and Controls . . . . 5-1
Controls . . . . . . . . . . . . . . . . . . . . . . . 5-2
Warning Lights, Gauges, and
Indicators . . . . . . . . . . . . . . . . . . . . 5-7
Information Displays . . . . . . . . . . 5-21
Vehicle Messages . . . . . . . . . . . . 5-24
Vehicle Personalization . . . . . . . 5-30
Lighting . . . . . . . . . . . . . . . . . . . . . . . 6-1
Exterior Lighting . . . . . . . . . . . . . . . 6-1
Interior Lighting . . . . . . . . . . . . . . . . 6-6
Lighting Features . . . . . . . . . . . . . . 6-7
Infotainment System . . . . . . . . . 7-1
Introduction . . . . . . . . . . . . . . . . . . . . 7-1
Radio . . . . . . . . . . . . . . . . . . . . . . . . . . 7-7
Audio Players . . . . . . . . . . . . . . . . 7-13
Phone . . . . . . . . . . . . . . . . . . . . . . . . 7-18
Trademarks and License Agreements . . . . . . . . . . . . . . . . . 7-29 Climate Controls
. . . . . . . . . . . . . 8-1
Climate Control Systems . . . . . . 8-1
Air Vents . . . . . . . . . . . . . . . . . . . . . . . 8-6
Driving and Operating . . . . . . . . 9-1
Driving Information . . . . . . . . . . . . . 9-2
Starting and Operating . . . . . . . 9-13
Engine Exhaust . . . . . . . . . . . . . . 9-20
Automatic Transmission . . . . . . 9-21
Manual Transmission . . . . . . . . . 9-24
Brakes . . . . . . . . . . . . . . . . . . . . . . . 9-26
Ride Control Systems . . . . . . . . 9-28
Cruise Control . . . . . . . . . . . . . . . . 9-31
Object Detection Systems . . . . 9-33
Fuel . . . . . . . . . . . . . . . . . . . . . . . . . . 9-38
Towing . . . . . . . . . . . . . . . . . . . . . . . 9-42
Conversions and Add-Ons . . . 9-47
Vehicle Care . . . . . . . . . . . . . . . . . 10-1
General Information . . . . . . . . . . 10-2
Vehicle Checks . . . . . . . . . . . . . . . 10-4
Headlamp Aiming . . . . . . . . . . . 10-25
Bulb Replacement . . . . . . . . . . 10-25
Electrical System . . . . . . . . . . . . 10-30
Wheels and Tires . . . . . . . . . . . 10-37
Page 5 of 372

Black plate (5,1)Chevrolet Orlando Owner Manual - 2013 - CRC - 6/5/12
Introduction v
Vehicle Symbol Chart
Here are some additional symbols
that may be found on the vehicle
and what they mean. For more
information on the symbol, refer to
the Index.
9:Airbag Readiness Light
#:Air Conditioning
!:Antilock Brake System (ABS)
%:Audio Steering Wheel Controls
or OnStar®
$: Brake System Warning Light
":Charging System
I:Cruise Control
B: Engine Coolant Temperature
O:Exterior Lamps
#:Fog Lamps
.: Fuel Gauge
+:Fuses
3: Headlamp High/Low-Beam
Changer
j: LATCH System Child
Restraints
*: Malfunction Indicator Lamp
::Oil Pressure
}:Power
/:Remote Vehicle Start
>:Safety Belt Reminders
7:Tire Pressure Monitor
d:Traction Control/StabiliTrak®
M:Windshield Washer Fluid
Page 9 of 372

Black plate (3,1)Chevrolet Orlando Owner Manual - 2013 - CRC - 6/5/12
In Brief 1-3
1.Air Vents on page 8‑6.
2. Turn and Lane-Change Lever. See Turn and Lane-Change
Signals on page 6‑4.
Headlamp High/Low-Beam
Changer on page 6‑2.
3. Instrument Cluster on page 5‑8.
4. Windshield Wiper/Washer on
page 5‑3.
Rear Window Wiper/Washer on
page 5‑4.
5. Infotainment on page 7‑1.
6. Infotainment Display.
7. Light Sensor. See Automatic
Headlamp System on page 6‑3.
8. Instrument Panel Storage on
page 4‑1.
USB Port and Auxiliary Input
Jack (Inside Instrument Panel
Storage). See Auxiliary Devices
on page 7‑15
9. CD Player on page 7‑13. 10. TCS/StabiliTrak Button. See
StabiliTrak®System on
page 9‑29.
11. Exterior Lamp Controls on
page 6‑1.
Instrument Panel Illumination
Control on page 6‑6.
Front Fog Lamps on page 6‑5.
12. Hood Release. See Hood on
page 10‑4.
13. Front Storage on page 4‑1.
14. Data Link Connector (DLC) (Out of View). See Malfunction
Indicator Lamp on page 5‑12.
15. Cruise Control on page 9‑31.
16. Steering Wheel Adjustment on
page 5‑2.
17. Horn on page 5‑3.
18. Steering Wheel Controls on
page 5‑3.
19. Power Door Locks on
page 2‑7. 20.
Heated Front Seats on
page 3‑6 (If Equipped).
21. Climate Control Systems on
page 8‑1.
Automatic Climate Control
System on page 8‑3.
22. Shift Lever. See Automatic
Transmission on page 9‑21 or
Manual Transmission on
page 9‑24.
23. Parking Brake on page 9‑27.
24. Power Outlets on page 5‑6.
25. Hazard Warning Flashers on
page 6‑4.
26. Passenger Safety Belt Reminder Light. See Safety
Belt Reminders on page 5‑10.
Page 101 of 372
Black plate (1,1)Chevrolet Orlando Owner Manual - 2013 - CRC - 6/5/12
Instruments and Controls 5-1
Instruments and
Controls
Controls
Steering Wheel Adjustment . . . 5-2
Steering Wheel Controls . . . . . . 5-3
Horn . . . . . . . . . . . . . . . . . . . . . . . . . . 5-3
Windshield Wiper/Washer . . . . . 5-3
Rear Window Wiper/Washer . . . . . . . . . . . . . . . . . . . . . . 5-4
Compass . . . . . . . . . . . . . . . . . . . . . 5-5
Clock . . . . . . . . . . . . . . . . . . . . . . . . . 5-5
Power Outlets . . . . . . . . . . . . . . . . . 5-6
Cigarette Lighter . . . . . . . . . . . . . . 5-6
Ashtrays . . . . . . . . . . . . . . . . . . . . . . 5-7
Warning Lights, Gauges, and
Indicators
Warning Lights, Gauges, and Indicators . . . . . . . . . . . . . . . . . . . . 5-7
Instrument Cluster . . . . . . . . . . . . 5-8
Speedometer . . . . . . . . . . . . . . . . . 5-9
Odometer . . . . . . . . . . . . . . . . . . . . . 5-9
Tachometer . . . . . . . . . . . . . . . . . . . 5-9
Fuel Gauge . . . . . . . . . . . . . . . . . . . 5-9
Engine Coolant Temperature
Gauge . . . . . . . . . . . . . . . . . . . . . . 5-10 Safety Belt Reminders . . . . . . . 5-10
Airbag Readiness Light . . . . . . 5-11
Charging System Light . . . . . . . 5-11
Malfunction
Indicator Lamp . . . . . . . . . . . . . 5-12
Service Vehicle Soon Light . . . . . . . . . . . . . . . . . . . . . . . 5-14
Brake System Warning Light . . . . . . . . . . . . . . . . . . . . . . . 5-14
Antilock Brake System (ABS) Warning Light . . . . . . . . . . . . . . 5-15
Up-Shift Light . . . . . . . . . . . . . . . . 5-16
Power Steering Warning Light . . . . . . . . . . . . . . . . . . . . . . . 5-16
Traction Off Light . . . . . . . . . . . . 5-16
StabiliTrak
®OFF Light . . . . . . . 5-17
Traction Control System (TCS)/StabiliTrak
®Light . . . . 5-17
Tire Pressure Light . . . . . . . . . . 5-17
Engine Oil Pressure Light . . . . 5-18
Low Fuel Warning Light . . . . . . 5-18
Security Light . . . . . . . . . . . . . . . . 5-19
Reduced Engine Power Light . . . . . . . . . . . . . . . . . . . . . . . 5-19
High-Beam On Light . . . . . . . . . 5-19
Daytime Running Lamps (DRL) Indicator Light . . . . . . . 5-20
Front Fog Lamp Light . . . . . . . . 5-20 Lamps On Reminder . . . . . . . . . 5-20
Cruise Control Light . . . . . . . . . 5-20
Door Ajar Light . . . . . . . . . . . . . . 5-21
Information Displays
Driver Information
Center (DIC) . . . . . . . . . . . . . . . 5-21
Vehicle Messages
Vehicle Messages . . . . . . . . . . . 5-24
Battery Voltage and ChargingMessages . . . . . . . . . . . . . . . . . . 5-25
Brake System Messages . . . . 5-25
Compass Messages . . . . . . . . . 5-25
Cruise Control Messages . . . . 5-25
Door Ajar Messages . . . . . . . . . 5-25
Engine Cooling System Messages . . . . . . . . . . . . . . . . . . 5-26
Engine Oil Messages . . . . . . . . 5-26
Engine Power Messages . . . . 5-27
Fuel System Messages . . . . . . 5-27
Key and Lock Messages . . . . . 5-27
Lamp Messages . . . . . . . . . . . . . 5-27
Object Detection System Messages . . . . . . . . . . . . . . . . . . 5-28
Ride Control System Messages . . . . . . . . . . . . . . . . . . 5-28
Airbag System Messages . . . . 5-28
Security Messages . . . . . . . . . . 5-28
Page 114 of 372
Black plate (14,1)Chevrolet Orlando Owner Manual - 2013 - CRC - 6/5/12
5-14 Instruments and Controls
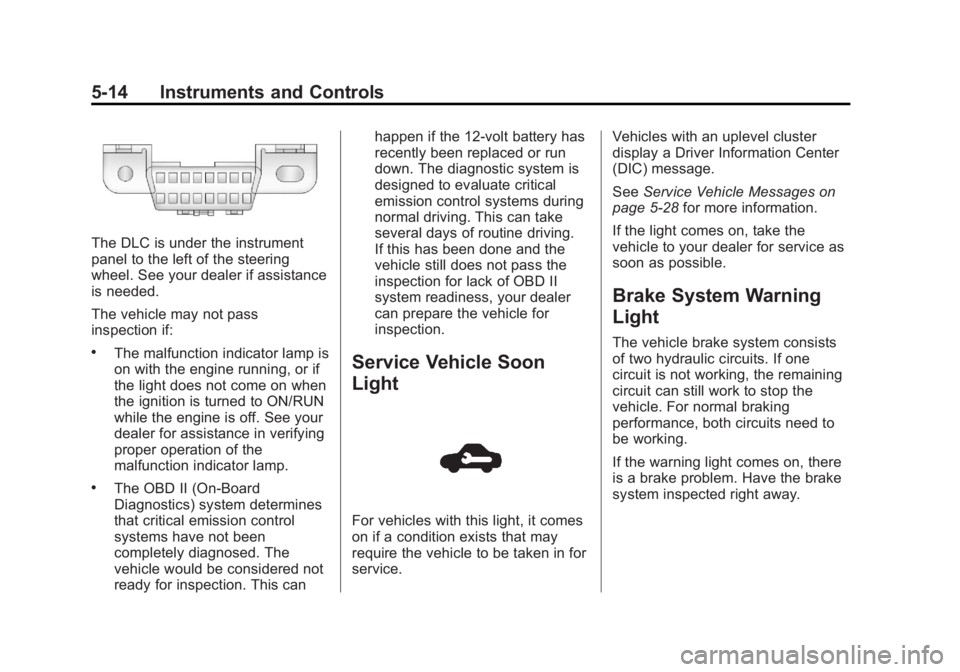
The DLC is under the instrument
panel to the left of the steering
wheel. See your dealer if assistance
is needed.
The vehicle may not pass
inspection if:
.The malfunction indicator lamp is
on with the engine running, or if
the light does not come on when
the ignition is turned to ON/RUN
while the engine is off. See your
dealer for assistance in verifying
proper operation of the
malfunction indicator lamp.
.The OBD II (On-Board
Diagnostics) system determines
that critical emission control
systems have not been
completely diagnosed. The
vehicle would be considered not
ready for inspection. This canhappen if the 12-volt battery has
recently been replaced or run
down. The diagnostic system is
designed to evaluate critical
emission control systems during
normal driving. This can take
several days of routine driving.
If this has been done and the
vehicle still does not pass the
inspection for lack of OBD II
system readiness, your dealer
can prepare the vehicle for
inspection.
Service Vehicle Soon
Light
For vehicles with this light, it comes
on if a condition exists that may
require the vehicle to be taken in for
service.
Vehicles with an uplevel cluster
display a Driver Information Center
(DIC) message.
See
Service Vehicle Messages on
page 5‑28 for more information.
If the light comes on, take the
vehicle to your dealer for service as
soon as possible.
Brake System Warning
Light
The vehicle brake system consists
of two hydraulic circuits. If one
circuit is not working, the remaining
circuit can still work to stop the
vehicle. For normal braking
performance, both circuits need to
be working.
If the warning light comes on, there
is a brake problem. Have the brake
system inspected right away.
Page 115 of 372
Black plate (15,1)Chevrolet Orlando Owner Manual - 2013 - CRC - 6/5/12
Instruments and Controls 5-15
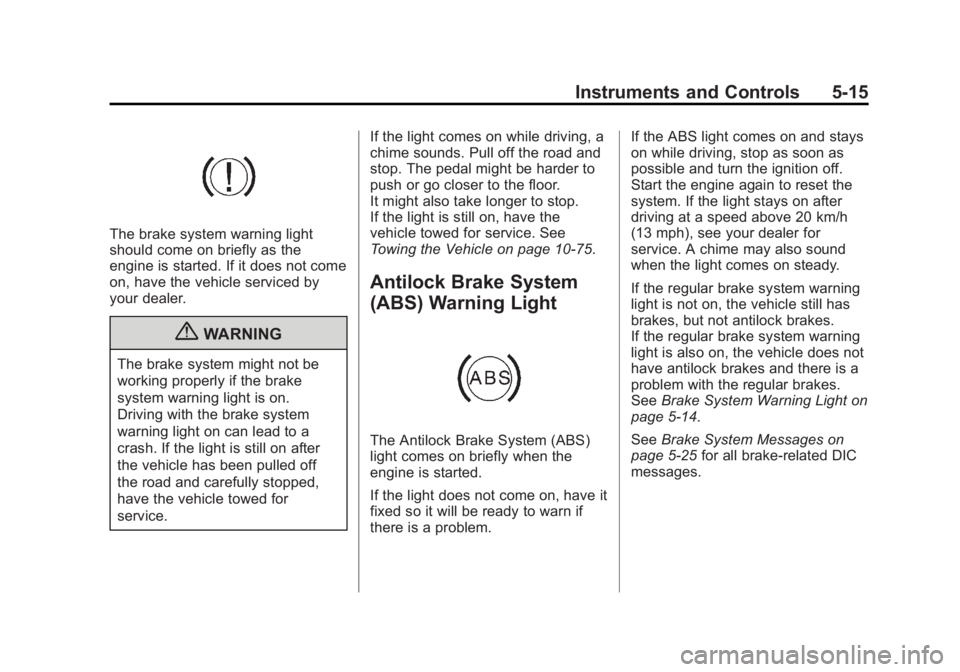
The brake system warning light
should come on briefly as the
engine is started. If it does not come
on, have the vehicle serviced by
your dealer.
{WARNING
The brake system might not be
working properly if the brake
system warning light is on.
Driving with the brake system
warning light on can lead to a
crash. If the light is still on after
the vehicle has been pulled off
the road and carefully stopped,
have the vehicle towed for
service.If the light comes on while driving, a
chime sounds. Pull off the road and
stop. The pedal might be harder to
push or go closer to the floor.
It might also take longer to stop.
If the light is still on, have the
vehicle towed for service. See
Towing the Vehicle on page 10‑75.
Antilock Brake System
(ABS) Warning Light
The Antilock Brake System (ABS)
light comes on briefly when the
engine is started.
If the light does not come on, have it
fixed so it will be ready to warn if
there is a problem. If the ABS light comes on and stays
on while driving, stop as soon as
possible and turn the ignition off.
Start the engine again to reset the
system. If the light stays on after
driving at a speed above 20 km/h
(13 mph), see your dealer for
service. A chime may also sound
when the light comes on steady.
If the regular brake system warning
light is not on, the vehicle still has
brakes, but not antilock brakes.
If the regular brake system warning
light is also on, the vehicle does not
have antilock brakes and there is a
problem with the regular brakes.
See
Brake System Warning Light on
page 5‑14.
See Brake System Messages on
page 5‑25 for all brake‐related DIC
messages.
Page 185 of 372
Black plate (5,1)Chevrolet Orlando Owner Manual - 2013 - CRC - 6/5/12
Driving and Operating 9-5
Defensive drivers avoid most skids
by taking reasonable care suited to
existing conditions, and by not
overdriving those conditions. But
skids are always possible.
If the vehicle starts to slide, follow
these suggestions:
.Ease your foot off the
accelerator pedal and steer the
way you want the vehicle to go.
The vehicle may straighten out.
Be ready for a second skid if it
occurs.
.Slow down and adjust your
driving according to weather
conditions. Stopping distance
can be longer and vehicle
control can be affected when
traction is reduced by water,
snow, ice, gravel, or other
material on the road. Learn to
recognize warning clues—such
as enough water, ice, or packed
snow on the road to make a
mirrored surface —and slow
down when you have any doubt.
.Try to avoid sudden steering,
acceleration, or braking,
including reducing vehicle speed
by shifting to a lower gear. Any
sudden changes could cause
the tires to slide.
Remember: Antilock brakes help
avoid only the braking skid.
Driving on Wet Roads
Rain and wet roads can reduce
vehicle traction and affect your
ability to stop and accelerate.
Always drive slower in these types
of driving conditions and avoid
driving through large puddles and
deep‐standing or flowing water.
{WARNING
Wet brakes can cause crashes.
They might not work as well in a
quick stop and could cause
pulling to one side. You could
lose control of the vehicle. (Continued)
WARNING (Continued)
After driving through a large
puddle of water or a car/vehicle
wash, lightly apply the brake
pedal until the brakes work
normally.
Flowing or rushing water creates
strong forces. Driving through
flowing water could cause the
vehicle to be carried away. If this
happens, you and other vehicle
occupants could drown. Do not
ignore police warnings and be
very cautious about trying to drive
through flowing water.
Hydroplaning
Hydroplaning is dangerous. Water
can build up under the vehicle's
tires so they actually ride on the
water. This can happen if the road is
wet enough and you are going fast
enough. When the vehicle is
hydroplaning, it has little or no
contact with the road.
Page 195 of 372
Black plate (15,1)Chevrolet Orlando Owner Manual - 2013 - CRC - 6/5/12
Driving and Operating 9-15
Do not turn the engine off when the
vehicle is moving. This will cause a
loss of power assist in the brake
and steering systems and disable
the airbags.
If the vehicle must be shut off in an
emergency:
1. Brake using a firm and steadypressure. Do not pump the
brakes repeatedly. This may
deplete power assist, requiring
increased brake pedal force.
2. Shift the vehicle to neutral. This can be done while the vehicle is
moving. After shifting to neutral,
firmly apply the brakes and steer
the vehicle to a safe location.
3. Come to a complete stop. Shift to P (Park) with an automatic
transmission, or Neutral with a
manual transmission. Turn the
ignition to LOCK/OFF.
4. Set the parking brake. See Parking Brake on page 9‑27.{WARNING
Turning off the vehicle while
moving may cause loss of power
assist in the brake and steering
systems and disable the airbags.
While driving, only shut the
vehicle off in an emergency.
If the vehicle cannot be pulled over,
and must be shut off while driving,
turn the ignition to ACC/
ACCESSORY.
2 (ACC/ACCESSORY): This
position provides power to some of
the electrical accessories. It unlocks
the steering wheel. To move the key
from ACC/ACCESSORY to LOCK/
OFF, the shift lever must be in
P (Park).
3 (ON/RUN): The ignition switch
stays in this position when the
engine is running. This position can
be used to operate the electrical
accessories, as well as to display
some warning and indicator lights. This position can also be used for
service and diagnostics, and to
verify the proper operation of the
malfunction indicator lamp as may
be required for emission inspection
purposes.
The battery could be drained if the
key is left in the ACC/ACCESSORY
or ON/RUN position with the engine
off. The vehicle might not restart if
the battery is allowed to drain for an
extended period of time.
4 (START):
This position starts the
engine. When the engine starts,
release the key. The ignition switch
will return to ON/RUN for normal
driving.
A warning tone sounds when the
driver door is opened and the key is
in the ignition. If the key becomes
difficult to turn, see Keys on
page 2‑1.