2017 CHEVROLET ORLANDO AUX
[x] Cancel search: AUXPage 9 of 372

Black plate (3,1)Chevrolet Orlando Owner Manual - 2013 - CRC - 6/5/12
In Brief 1-3
1.Air Vents on page 8‑6.
2. Turn and Lane-Change Lever. See Turn and Lane-Change
Signals on page 6‑4.
Headlamp High/Low-Beam
Changer on page 6‑2.
3. Instrument Cluster on page 5‑8.
4. Windshield Wiper/Washer on
page 5‑3.
Rear Window Wiper/Washer on
page 5‑4.
5. Infotainment on page 7‑1.
6. Infotainment Display.
7. Light Sensor. See Automatic
Headlamp System on page 6‑3.
8. Instrument Panel Storage on
page 4‑1.
USB Port and Auxiliary Input
Jack (Inside Instrument Panel
Storage). See Auxiliary Devices
on page 7‑15
9. CD Player on page 7‑13. 10. TCS/StabiliTrak Button. See
StabiliTrak®System on
page 9‑29.
11. Exterior Lamp Controls on
page 6‑1.
Instrument Panel Illumination
Control on page 6‑6.
Front Fog Lamps on page 6‑5.
12. Hood Release. See Hood on
page 10‑4.
13. Front Storage on page 4‑1.
14. Data Link Connector (DLC) (Out of View). See Malfunction
Indicator Lamp on page 5‑12.
15. Cruise Control on page 9‑31.
16. Steering Wheel Adjustment on
page 5‑2.
17. Horn on page 5‑3.
18. Steering Wheel Controls on
page 5‑3.
19. Power Door Locks on
page 2‑7. 20.
Heated Front Seats on
page 3‑6 (If Equipped).
21. Climate Control Systems on
page 8‑1.
Automatic Climate Control
System on page 8‑3.
22. Shift Lever. See Automatic
Transmission on page 9‑21 or
Manual Transmission on
page 9‑24.
23. Parking Brake on page 9‑27.
24. Power Outlets on page 5‑6.
25. Hazard Warning Flashers on
page 6‑4.
26. Passenger Safety Belt Reminder Light. See Safety
Belt Reminders on page 5‑10.
Page 22 of 372
Black plate (16,1)Chevrolet Orlando Owner Manual - 2013 - CRC - 6/5/12
1-16 In Brief
Portable Audio Devices
Some vehicles have a 3.5 mm
(1/8 in) auxiliary input and a USB
port in the center console bin.
External devices such as iPods®,
laptop computers, MP3 players, CD
changers, and USB drives may be
connected, depending on the audio
system.
SeeAuxiliary Devices on page 7‑15.
Bluetooth®
The Bluetooth® system allows
users with a Bluetooth-enabled
mobile phone to make and receive
hands-free calls using the vehicle
audio system and controls.
The Bluetooth-enabled mobile
phone must be paired with the
in-vehicle Bluetooth system before it
can be used in the vehicle. Not all
phones will support all functions. See
Bluetooth (Overview) on
page 7‑18 orBluetooth (Voice
Recognition) on page 7‑23 or
Bluetooth (Infotainment Controls) on
page 7‑19.
Steering Wheel Controls
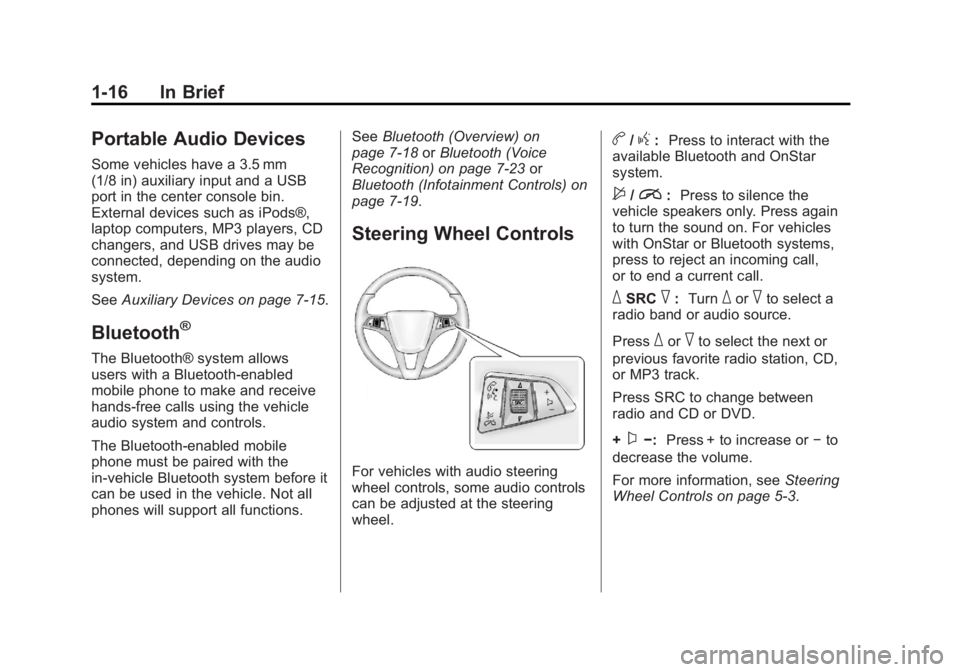
For vehicles with audio steering
wheel controls, some audio controls
can be adjusted at the steering
wheel.
b/g: Press to interact with the
available Bluetooth and OnStar
system.
$/i: Press to silence the
vehicle speakers only. Press again
to turn the sound on. For vehicles
with OnStar or Bluetooth systems,
press to reject an incoming call,
or to end a current call.
_SRC^: Turn_or^to select a
radio band or audio source.
Press
_or^to select the next or
previous favorite radio station, CD,
or MP3 track.
Press SRC to change between
radio and CD or DVD.
+
x−: Press + to increase or −to
decrease the volume.
For more information, see Steering
Wheel Controls on page 5‑3.
Page 95 of 372
Black plate (1,1)Chevrolet Orlando Owner Manual - 2013 - CRC - 6/5/12
Storage 4-1
Storage
Storage Compartments
Instrument Panel Storage . . . . . 4-1
Glove Box . . . . . . . . . . . . . . . . . . . . 4-1
Front Storage . . . . . . . . . . . . . . . . . 4-1
Center Console Storage . . . . . . 4-2
Additional Storage Features
Cargo Cover . . . . . . . . . . . . . . . . . . 4-2
Lashing Eyes . . . . . . . . . . . . . . . . . 4-4
Cargo ManagementSystem . . . . . . . . . . . . . . . . . . . . . . 4-4
Convenience Net . . . . . . . . . . . . . 4-4
Roof Rack System
Roof Rack System . . . . . . . . . . . . 4-5
Storage
Compartments
Instrument Panel Storage
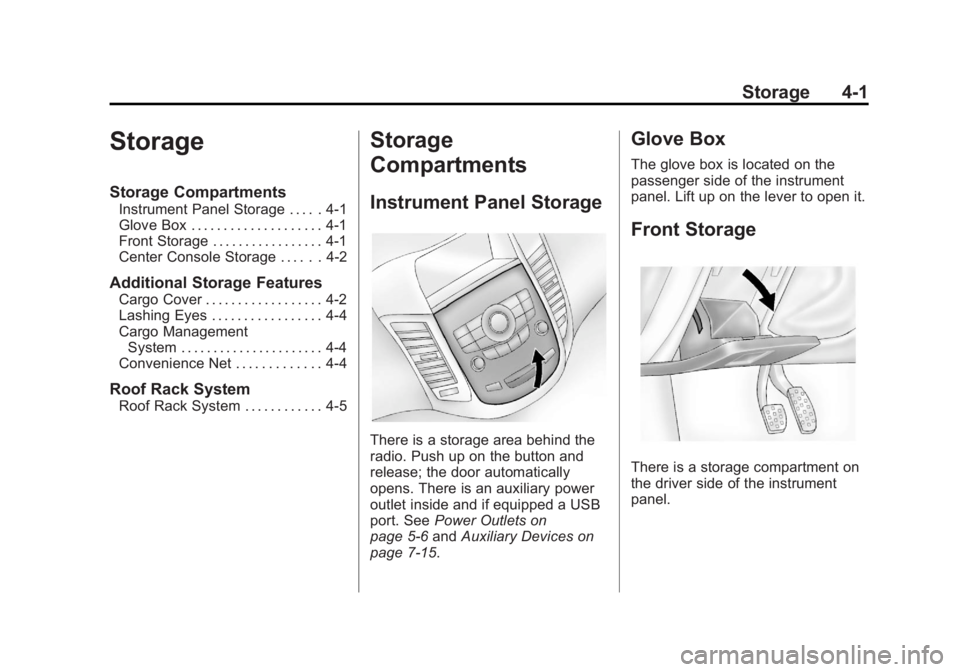
There is a storage area behind the
radio. Push up on the button and
release; the door automatically
opens. There is an auxiliary power
outlet inside and if equipped a USB
port. See Power Outlets on
page 5‑6 andAuxiliary Devices on
page 7‑15.
Glove Box
The glove box is located on the
passenger side of the instrument
panel. Lift up on the lever to open it.
Front Storage
There is a storage compartment on
the driver side of the instrument
panel.
Page 143 of 372

Black plate (1,1)Chevrolet Orlando Owner Manual - 2013 - CRC - 6/5/12
Infotainment System 7-1
Infotainment
System
Introduction
Infotainment . . . . . . . . . . . . . . . . . . . 7-1
Theft-Deterrent Feature . . . . . . . 7-2
Overview . . . . . . . . . . . . . . . . . . . . . . 7-3
Operation . . . . . . . . . . . . . . . . . . . . . 7-4
Radio
AM-FM Radio . . . . . . . . . . . . . . . . . 7-7
Satellite Radio . . . . . . . . . . . . . . . . 7-9
Radio Reception . . . . . . . . . . . . . 7-12
Satellite Radio Antenna . . . . . . 7-12
Multi-Band Antenna . . . . . . . . . . 7-12
Audio Players
CD Player . . . . . . . . . . . . . . . . . . . 7-13
Auxiliary Devices . . . . . . . . . . . . 7-15
Phone
Bluetooth (Overview) . . . . . . . . 7-18
Bluetooth (InfotainmentControls) . . . . . . . . . . . . . . . . . . . 7-19
Bluetooth (Voice Recognition) . . . . . . . . . . . . . . . 7-23
Trademarks and License
Agreements
Trademarks and LicenseAgreements . . . . . . . . . . . . . . . . 7-29
Introduction
Infotainment
Read the following pages to
become familiar with the audio
system's features.
{WARNING
Taking your eyes off the road for
extended periods could cause a
crash resulting in injury or death
to you or others. Do not give
extended attention to infotainment
tasks while driving.
This system provides access to
many audio and non-audio listings.
Page 146 of 372
Black plate (4,1)Chevrolet Orlando Owner Manual - 2013 - CRC - 6/5/12
7-4 Infotainment System
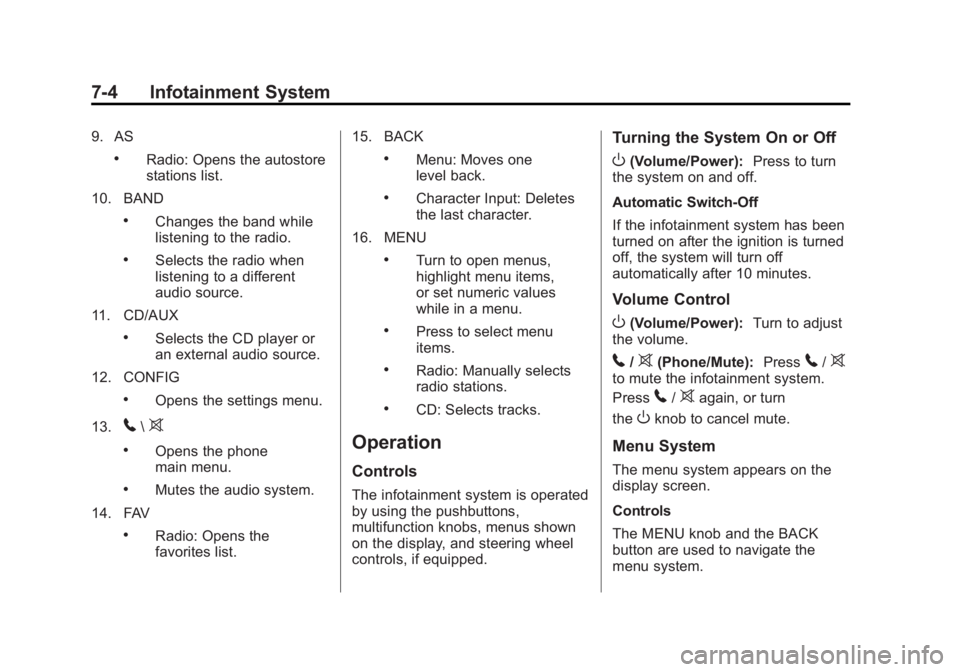
9. AS
.Radio: Opens the autostore
stations list.
10. BAND
.Changes the band while
listening to the radio.
.Selects the radio when
listening to a different
audio source.
11. CD/AUX
.Selects the CD player or
an external audio source.
12. CONFIG
.Opens the settings menu.
13.
5\>
.Opens the phone
main menu.
.Mutes the audio system.
14. FAV
.Radio: Opens the
favorites list. 15. BACK
.Menu: Moves one
level back.
.Character Input: Deletes
the last character.
16. MENU
.Turn to open menus,
highlight menu items,
or set numeric values
while in a menu.
.Press to select menu
items.
.Radio: Manually selects
radio stations.
.CD: Selects tracks.
Operation
Controls
The infotainment system is operated
by using the pushbuttons,
multifunction knobs, menus shown
on the display, and steering wheel
controls, if equipped.
Turning the System On or Off
O(Volume/Power): Press to turn
the system on and off.
Automatic Switch-Off
If the infotainment system has been
turned on after the ignition is turned
off, the system will turn off
automatically after 10 minutes.
Volume Control
O(Volume/Power): Turn to adjust
the volume.
5/>(Phone/Mute): Press5/>to mute the infotainment system.
Press
5/>again, or turn
the
Oknob to cancel mute.
Menu System
The menu system appears on the
display screen.
Controls
The MENU knob and the BACK
button are used to navigate the
menu system.
Page 155 of 372
Black plate (13,1)Chevrolet Orlando Owner Manual - 2013 - CRC - 6/5/12
Infotainment System 7-13
Audio Players
CD Player
The CD player can play audio CDs
and MP3 CDs.
The CD player will not play
8 cm (3 in) CDs.
Care of CDs
Sound quality can be reduced due
to disc quality, recording method,
quality of the music recorded, and
how the disc has been handled.
Handle discs carefully and store
them in their original cases or other
protective cases away from direct
sunlight and dust. If the bottom
surface of a disc is damaged, the
disc may not play properly or at all.
Do not touch the bottom surface of
a disc while handling it; this could
damage the surface. Pick up discs
by grasping the outer edges or the
edge of the hole and the outer edge.
If the bottom surface of a disc is
dirty, take a soft lint-free cloth,
or dampen a clean soft cloth in amild neutral detergent solution
mixed with water, and clean it. Wipe
the disc from the center to the
outer edge.
Care of the CD Player
Do not add a label to a disc, as it
could get caught in the CD player.
If a label is needed, label the top of
the recorded disc with a
marking pen.
Do not use disc lens cleaners
because they could contaminate the
lens of the disc optics and damage
the CD player.
Notice:
If a label is added to a
CD, more than one CD is inserted
into the slot at a time, or an
attempt is made to play scratched
or damaged CDs, the CD player
could be damaged. While using
the CD player, use only CDs in
good condition without any label,
load one CD at a time, and keep
the CD player and the loading slot
free of foreign materials, liquids,
and debris.
Control Buttons
The buttons used to control the CD
player are:
CD/AUX: Press to use the CD
player.
lorg: Press to select tracks or
to fast forward or rewind within a
track.
INFO: Press to display additional
information about the current track
that may be available.
MENU: Turn to enter the menu.
SELECT: Press to select an item.
Y(Eject):Press to eject the disc.
Inserting a CD
With the printed side facing up,
insert a disc into the CD slot until it
is drawn in.
Removing a CD
PressY.
The disc is pushed out of the
CD slot.
Page 156 of 372
Black plate (14,1)Chevrolet Orlando Owner Manual - 2013 - CRC - 6/5/12
7-14 Infotainment System
If the disc is not removed after it is
ejected, it is pulled back in after a
few seconds.
Playing a CD or MP3 CD
Press the CD/AUX button if there is
a disc in the player; it begins
playing.
Information about the disc and
current track is shown on the
display depending on the data
stored.
Selecting a CD Track
Using the control buttons:
.Pressgorlto select the
previous or next track.
Using the CD Menu:
1. Turn the MENU knob.
2. Select Tracks list.
3. Select the track. Playing Tracks in Random Order
Turn the MENU knob and then set
Shuffle Songs to On.
Fast Forward and Rewind
Press and hold
lorgto fast
forward or rewind within the current
track.
Selecting an MP3 Track
Using the control buttons:
.Pressgorlto select the
previous or next track.
Using the CD Menu:
1. Turn the MENU knob.
2. Select Playlists/Folders.
3. Select the playlist or folder.
4. Select the track. Searching for MP3 Tracks
The search feature may take some
time to display the information after
reading the disc due to the amount
of information stored on the disc.
FM automatically plays while the
disc is being read.
Tracks can be searched by:
.Playlists
.Artists
.Albums
.Song Titles
.Genres
.Folder View
To search for tracks:
1. Turn the MENU knob.
2. Select Search.
3. Select: Playlists, Artists, Albums, Song Titles, Genres,
or Folder View.
4. Select the track.
Page 157 of 372
Black plate (15,1)Chevrolet Orlando Owner Manual - 2013 - CRC - 6/5/12
Infotainment System 7-15
Auxiliary Devices
The optional AUX input allows
portable devices to connect to the
vehicle using the 3.5 mm (1/8 in)
auxiliary jack or USB port.
Portable devices are controlled by
using the menu system described in
Operation on page 7‑4.
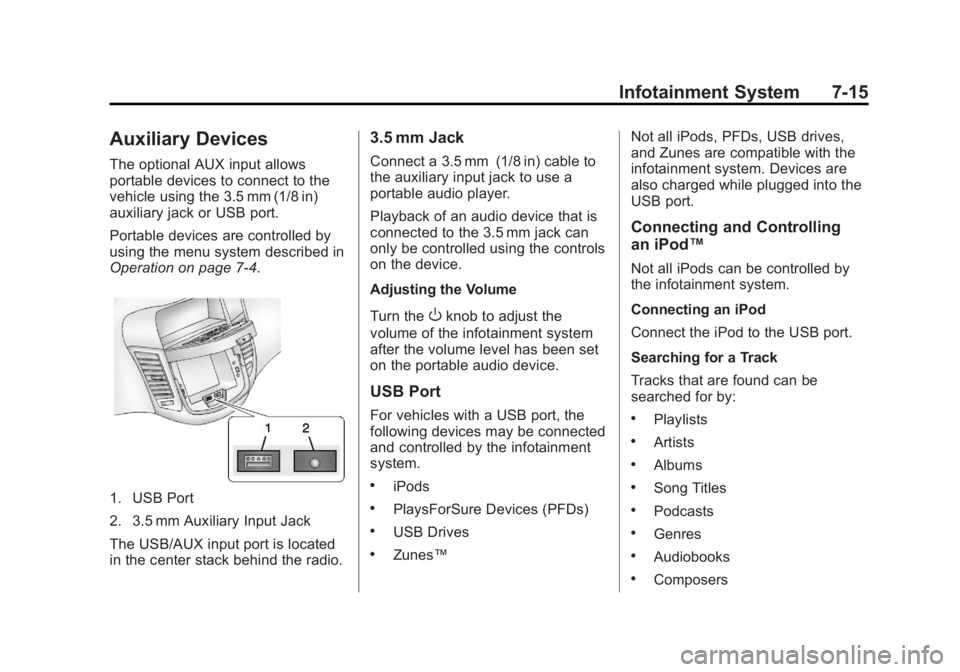
1. USB Port
2. 3.5 mm Auxiliary Input Jack
The USB/AUX input port is located
in the center stack behind the radio.
3.5 mm Jack
Connect a 3.5 mm (1/8 in) cable to
the auxiliary input jack to use a
portable audio player.
Playback of an audio device that is
connected to the 3.5 mm jack can
only be controlled using the controls
on the device.
Adjusting the Volume
Turn the
Oknob to adjust the
volume of the infotainment system
after the volume level has been set
on the portable audio device.
USB Port
For vehicles with a USB port, the
following devices may be connected
and controlled by the infotainment
system.
.iPods
.PlaysForSure Devices (PFDs)
.USB Drives
.Zunes™ Not all iPods, PFDs, USB drives,
and Zunes are compatible with the
infotainment system. Devices are
also charged while plugged into the
USB port.
Connecting and Controlling
an iPod™
Not all iPods can be controlled by
the infotainment system.
Connecting an iPod
Connect the iPod to the USB port.
Searching for a Track
Tracks that are found can be
searched for by:
.Playlists
.Artists
.Albums
.Song Titles
.Podcasts
.Genres
.Audiobooks
.Composers