2017 CHEVROLET MALIBU warning light
[x] Cancel search: warning lightPage 273 of 419
Chevrolet Malibu Owner Manual (GMNA-Localizing-U.S./Canada/Mexico-10122664) - 2017 - crc - 5/23/16
272 Driving and Operating
Warning (Continued)
.Fill the container no morethan 95% full to allow forexpansion.
.Do not smoke, lightmatches, or use lighterswhile pumping fuel.
.Avoid using cell phones orother electronic devices.
Trailer Towing
General Towing
Information
Only use towing equipment that hasbeen designed for the vehicle.Contact your dealer or traileringdealer for assistance with preparingthe vehicle for towing a trailer. Readthe entire section before towing atrailer.
When towing with the 2.0L L4engine, only use unleaded gasolinewith an octane rating of 89 orhigher. Using gasoline with a loweroctane rating while towing maydamage the engine and may not becovered by the vehicle warranty.SeeFuel0268.
For towing a disabled vehicle, seeTo w i n g t h e V e h i c l e0355.Fortowing the vehicle behind anothervehicle such as a motor home, seeRecreational Vehicle Towing0356.
Driving Characteristics
and Towing Tips
Driving with a Trailer
When towing a trailer:
.Become familiar with the stateand local laws that applyspecifically to trailer towing.
.Do not tow a trailer during thefirst 800 km (500 mi), to preventdamage to the engine, axle,or other parts.
.Then, during the first 800 km(500 mi) of trailer towing, do notdrive over 80 km/h (50 mph) anddo not make starts at full throttle.
.The vehicle can tow in D (Drive)but Manual Mode isrecommended. SeeManualMode0235.Usealowergearifthe transmission shifts too often.
.Turn off Parking Assist whentowing.
.Do not use Adaptive CruiseControl when towing.
Page 278 of 419
Chevrolet Malibu Owner Manual (GMNA-Localizing-U.S./Canada/Mexico-10122664) - 2017 - crc - 5/23/16
Driving and Operating 277
carbon monoxide (CO) from theexhaust can get into the vehicle.SeeEngine Exhaust0232.
Safety Chains
Always attach chains between thevehicle and the trailer. Cross thesafety chains under the tongue ofthe trailer to help prevent the tonguefrom contacting the road if itbecomes separated from the hitch.Leave enough slack so the rig canturn. Never allow safety chains todrag on the ground.
Trailer Brakes
Does the trailer have its ownbrakes? Be sure to read and followthe instructions for the trailer brakesso they are installed, adjusted, andmaintained properly.
Because the vehicle has antilockbrakes, do not tap into the vehicle'sbrake system. If this is done, bothbrake systems will not work well orat all.
Conversions and
Add-Ons
Add-On Electrical
Equipment
{Warning
The Data Link Connector (DLC) is
used for vehicle service and
Emission Inspection/Maintenance
testing. SeeMalfunction Indicator
Lamp (Check Engine Light)
0122.Adeviceconnectedtothe
DLC—such as an aftermarket
fleet or driver-behavior tracking
device—may interfere with
vehicle systems. This could affect
vehicle operation and cause a
crash. Such devices may also
access information stored in the
vehicle’ssystems.
Caution
Some electrical equipment can
damage the vehicle or cause
components to not work and
would not be covered by the
vehicle warranty. Always check
with your dealer before adding
electrical equipment.
Add-on equipment can drain thevehicle's 12-volt battery, even if thevehicle is not operating.
The vehicle has an airbag system.Before attempting to add anythingelectrical to the vehicle, seeServicing the Airbag-EquippedVehicle081andAdding Equipmentto the Airbag-EquippedVehicle081.
Page 279 of 419
Chevrolet Malibu Owner Manual (GMNA-Localizing-U.S./Canada/Mexico-10122664) - 2017 - crc - 5/23/16
278 Vehicle Care
Vehicle Care
General Information
General Information . . . . . . . . . . 279California Proposition65 Warning . . . . . . . . . . . . . . . . . 279California PerchlorateMaterials Requirements . . . . . 279Accessories andModifications . . . . . . . . . . . . . . . . 280
Vehicle Checks
Doing Your OwnService Work . . . . . . . . . . . . . . . 280Hood . . . . . . . . . . . . . . . . . . . . . . . . . 281Engine CompartmentOverview . . . . . . . . . . . . . . . . . . . . 283Engine Oil . . . . . . . . . . . . . . . . . . . . 288Engine Oil Life System . . . . . . . 291Automatic TransmissionFluid . . . . . . . . . . . . . . . . . . . . . . . . 292Engine Air Cleaner/Filter . . . . . . 292Cooling System (Engine) . . . . . 293Cooling System (PowerElectronics) . . . . . . . . . . . . . . . . . 294Engine Coolant . . . . . . . . . . . . . . . 295Engine Overheating . . . . . . . . . . 297Washer Fluid . . . . . . . . . . . . . . . . . 299Brakes . . . . . . . . . . . . . . . . . . . . . . . 299Brake Fluid . . . . . . . . . . . . . . . . . . . 300
Battery - North America . . . . . . 301Starter Switch Check . . . . . . . . . 303Automatic Transmission ShiftLock Control FunctionCheck . . . . . . . . . . . . . . . . . . . . . . . 303Park Brake and P (Park)Mechanism Check . . . . . . . . . . 303Wiper Blade Replacement . . . . 304
Headlamp Aiming
Headlamp Aiming . . . . . . . . . . . . 305
Bulb Replacement
Bulb Replacement . . . . . . . . . . . . 305Halogen Bulbs . . . . . . . . . . . . . . . . 305LED Lighting . . . . . . . . . . . . . . . . . 305Headlamps, Front Turn Signal,Sidemarker, and ParkingLamps . . . . . . . . . . . . . . . . . . . . . . 305Ta i l l a m p s , T u r n S i g n a l ,Stoplamps, and Back-UpLamps (LS and LT) . . . . . . . . . . 307Ta i l l a m p s , T u r n S i g n a l ,Stoplamps, and Back-UpLamps (LTZ) . . . . . . . . . . . . . . . . 308License Plate Lamp . . . . . . . . . . 308Replacement Bulbs . . . . . . . . . . . 309
Electrical System
High Voltage Devices andWiring . . . . . . . . . . . . . . . . . . . . . . . 309Electrical System Overload . . . 310
Fuses . . . . . . . . . . . . . . . . . . . . . . . . 310Engine Compartment FuseBlock . . . . . . . . . . . . . . . . . . . . . . . . 311Instrument Panel FuseBlock . . . . . . . . . . . . . . . . . . . . . . . . 315
Wheels and Tires
Tires . . . . . . . . . . . . . . . . . . . . . . . . . . 317All-Season Tires . . . . . . . . . . . . . . 318Winter Tires . . . . . . . . . . . . . . . . . . 318Low-Profile Tires . . . . . . . . . . . . . 319Summer Tires . . . . . . . . . . . . . . . . 319Tire Sidewall Labeling . . . . . . . . 320Tire Designations . . . . . . . . . . . . . 322Tire Terminology andDefinitions . . . . . . . . . . . . . . . . . . 322Tire Pressure . . . . . . . . . . . . . . . . . 325Tire Pressure for High-SpeedOperation . . . . . . . . . . . . . . . . . . . 326Tire Pressure MonitorSystem . . . . . . . . . . . . . . . . . . . . . . 327Tire Pressure MonitorOperation . . . . . . . . . . . . . . . . . . . 328Tire Inspection . . . . . . . . . . . . . . . . 331Tire Rotation . . . . . . . . . . . . . . . . . 331When It Is Time for NewTires . . . . . . . . . . . . . . . . . . . . . . . . 332Buying New Tires . . . . . . . . . . . . . 333Different Size Tires andWheels . . . . . . . . . . . . . . . . . . . . . . 334
Page 302 of 419
Chevrolet Malibu Owner Manual (GMNA-Localizing-U.S./Canada/Mexico-10122664) - 2017 - crc - 5/23/16
Vehicle Care 301
{Warning
If too much brake fluid is added, it
can spill on the engine and burn,
if the engine is hot enough. You
or others could be burned, and
the vehicle could be damaged.
Add brake fluid only when work is
done on the brake hydraulic
system.
When the brake fluid falls to a lowlevel, the brake warning light comeson. SeeBrake System WarningLight0124.
Brake fluid absorbs water over timewhich degrades the effectiveness ofthe brake fluid. Replace brake fluidat the specified intervals to preventincreased stopping distance. SeeMaintenance Schedule0369.
What to Add
Use only GM approved DOT 3brake fluid from a clean, sealedcontainer. SeeRecommendedFluids and Lubricants0377.
{Warning
The wrong or contaminated brake
fluid could result in damage to the
brake system. This could result in
the loss of braking leading to a
possible injury. Always use the
proper GM approved brake fluid.
Caution
If brake fluid is spilled on the
vehicle's painted surfaces, the
paint finish can be damaged.
Immediately wash off any painted
surface.
Battery - North America
The original equipment battery ismaintenance free. Do not removethe cap and do not add fluid.
The non-hybrid vehicle has astandard 12-volt battery under thehood. SeeEngine CompartmentOverview0283.
Refer to the replacement numbershown on the original battery labelwhen a new 12-volt battery isneeded.
Hybrid Vehicle
The hybrid vehicle 12-volt battery isin the trunk on the driver side.Hybrid vehicles also have a highvoltage battery. Only a trainedservice technician with the properknowledge and tools should inspect,test, or replace the high voltagebattery. See your dealer if the highvoltage battery needs service. Thedealer has information on how torecycle the high voltage battery.
The hybrid high voltage battery iscooled with air drawn from thevehicle interior. The cold air intakefor the battery is under the rearseat. Do not block the area in frontof the cold air intake.
Page 306 of 419
Chevrolet Malibu Owner Manual (GMNA-Localizing-U.S./Canada/Mexico-10122664) - 2017 - crc - 5/23/16
Vehicle Care 305
Headlamp Aiming
Headlamp aim has been preset andshould need no further adjustment.
If the vehicle is damaged in a crash,the headlamp aim may be affected.If adjustment to the headlamps isnecessary, see your dealer.
Bulb Replacement
For the proper type of replacementbulbs, seeReplacementBulbs0309.
For any bulb-changing procedurenot listed in this section, contactyour dealer.
Halogen Bulbs
{Warning
Halogen bulbs have pressurized
gas inside and can burst if you
drop or scratch the bulb. You or
others could be injured. Be sure
to read and follow the instructions
on the bulb package.
LED Lighting
This vehicle has several LED lamps.For replacement of any LED lightingassembly, contact your dealer.
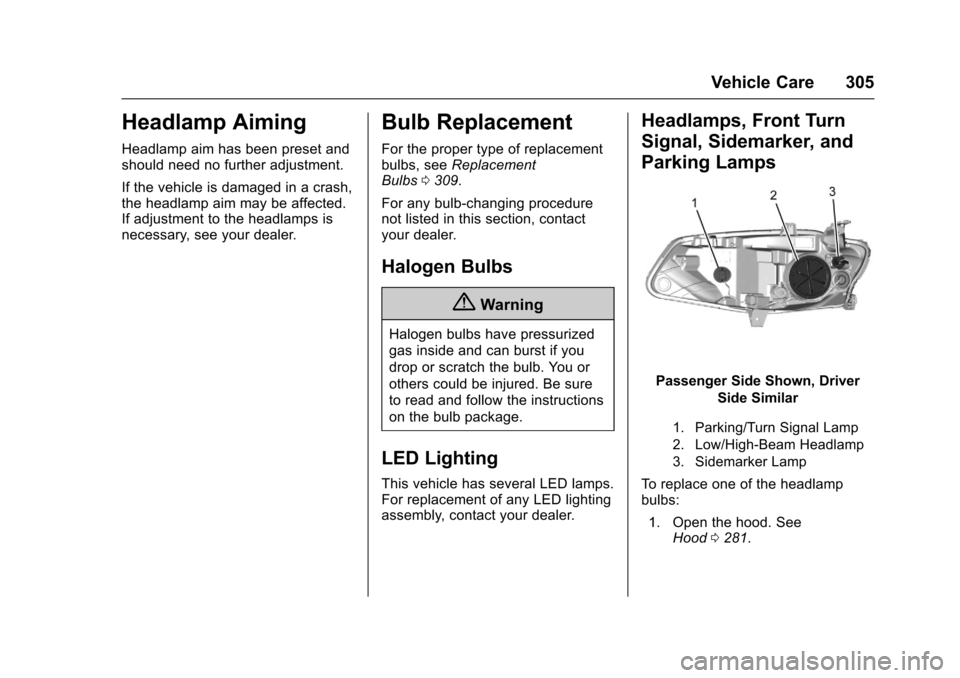
Headlamps, Front Turn
Signal, Sidemarker, and
Parking Lamps
Passenger Side Shown, Driver
Side Similar
1. Parking/Turn Signal Lamp
2. Low/High-Beam Headlamp
3. Sidemarker Lamp
To r e p l a c e o n e o f t h e h e a d l a m pbulbs:
1. Open the hood. SeeHood0281.
Page 329 of 419
Chevrolet Malibu Owner Manual (GMNA-Localizing-U.S./Canada/Mexico-10122664) - 2017 - crc - 5/23/16
328 Vehicle Care
Tire Pressure Monitor
Operation
This vehicle may have a TirePressure Monitor System (TPMS).The TPMS is designed to warn thedriver when a low tire pressurecondition exists. TPMS sensors aremounted onto each tire and wheelassembly, excluding the spare tireand wheel assembly. The TPMSsensors monitor the air pressure inthe tires and transmits the tirepressure readings to a receiverlocated in the vehicle.
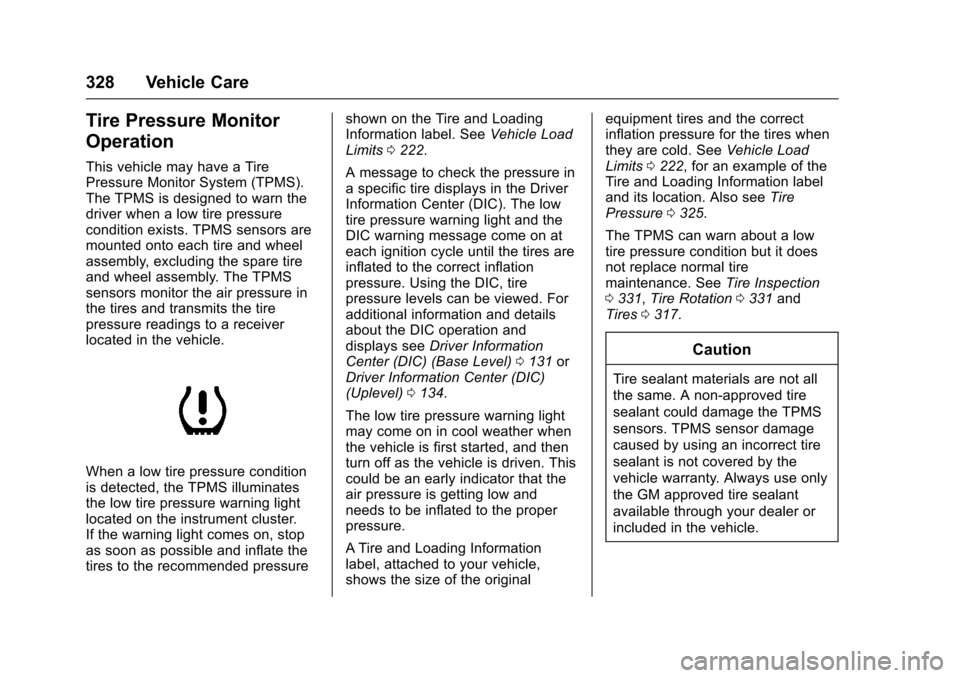
When a low tire pressure conditionis detected, the TPMS illuminatesthe low tire pressure warning lightlocated on the instrument cluster.If the warning light comes on, stopas soon as possible and inflate thetires to the recommended pressure
shown on the Tire and LoadingInformation label. SeeVehicle LoadLimits0222.
AmessagetocheckthepressureinaspecifictiredisplaysintheDriverInformation Center (DIC). The lowtire pressure warning light and theDIC warning message come on ateach ignition cycle until the tires areinflated to the correct inflationpressure. Using the DIC, tirepressure levels can be viewed. Foradditional information and detailsabout the DIC operation anddisplays seeDriver InformationCenter (DIC) (Base Level)0131orDriver Information Center (DIC)(Uplevel)0134.
The low tire pressure warning lightmay come on in cool weather whenthe vehicle is first started, and thenturn off as the vehicle is driven. Thiscould be an early indicator that theair pressure is getting low andneeds to be inflated to the properpressure.
ATire and Loading Informationlabel, attached to your vehicle,shows the size of the original
equipment tires and the correctinflation pressure for the tires whenthey are cold. SeeVehicle LoadLimits0222,foranexampleoftheTire and Loading Information labeland its location. Also seeTirePressure0325.
The TPMS can warn about a lowtire pressure condition but it doesnot replace normal tiremaintenance. SeeTire Inspection0331,Tire Rotation0331andTires0317.
Caution
Tire sealant materials are not all
the same. A non-approved tire
sealant could damage the TPMS
sensors. TPMS sensor damage
caused by using an incorrect tire
sealant is not covered by the
vehicle warranty. Always use only
the GM approved tire sealant
available through your dealer or
included in the vehicle.
Page 330 of 419
Chevrolet Malibu Owner Manual (GMNA-Localizing-U.S./Canada/Mexico-10122664) - 2017 - crc - 5/23/16
Vehicle Care 329
Factory-installed Tire Inflator Kitsuse a GM-approved liquid tiresealant. Using non-approved tiresealants could damage the TPMSsensors. SeeTire Sealant andCompressor Kit0339forinformation regarding the inflator kitmaterials and instructions.
TPMS Malfunction Light and
Message
The TPMS will not function properlyif one or more of the TPMS sensorsare missing or inoperable. When thesystem detects a malfunction, thelow tire warning light flashes forabout one minute and then stays onfor the remainder of the ignitioncycle. A DIC warning message alsodisplays. The malfunction light andDIC warning message come on ateach ignition cycle until the problemis corrected. Some of the conditionsthat can cause these to comeon are:
.One of the road tires has beenreplaced with the spare tire. Thespare tire does not have aTPMS sensor. The malfunctionlight and DIC message should
go off after the road tire isreplaced and the sensormatching process is performedsuccessfully. See“TPMS SensorMatching Process”later in thissection.
.The TPMS sensor matchingprocess was not done or notcompleted successfully afterrotating the tires. Themalfunction light and the DICmessage should go off aftersuccessfully completing thesensor matching process. See"TPMS Sensor MatchingProcess" later in this section.
.One or more TPMS sensors aremissing or damaged. Themalfunction light and the DICmessage should go off when theTPMS sensors are installed andthe sensor matching process isperformed successfully. Seeyour dealer for service.
.Replacement tires or wheels donot match the original equipmenttires or wheels. Tires and wheelsother than those recommended
could prevent the TPMS fromfunctioning properly. SeeBuyingNew Tires0333.
.Operating electronic devices orbeing near facilities using radiowave frequencies similar to theTPMS could cause the TPMSsensors to malfunction.
If the TPMS is not functioningproperly it cannot detect or signal alow tire condition. See your dealerfor service if the TPMS malfunctionlight and DIC message comes onand stays on.
TPMS Sensor Matching
Process
Each TPMS sensor has a uniqueidentification code. The identificationcode needs to be matched to a newtire/wheel position after rotating thevehicle’stiresorreplacingoneormore of the TPMS sensors. TheTPMS sensor matching processshould also be performed afterreplacing a spare tire with a roadtire containing the TPMS sensor.The malfunction light and the DICmessage should go off at the nextignition cycle. The sensors are
Page 333 of 419
Chevrolet Malibu Owner Manual (GMNA-Localizing-U.S./Canada/Mexico-10122664) - 2017 - crc - 5/23/16
332 Vehicle Care
Check that all wheel nuts are
properly tightened. See“Wheel
Nut Torque”underCapacities
and Specifications0381.
{Warning
Rust or dirt on a wheel, or on the
parts to which it is fastened, can
make wheel nuts become loose
after time. The wheel could come
off and cause an accident. When
changing a wheel, remove any
rust or dirt from places where the
wheel attaches to the vehicle. In
an emergency, a cloth or a paper
towel can be used; however, use
ascraperorwirebrushlaterto
remove all rust or dirt.
Lightly coat the center of the
wheel hub with wheel bearing
grease after a wheel change or
tire rotation to prevent corrosion
or rust build-up. Do not get
grease on the flat wheel
mounting surface or on the
wheel nuts or bolts.
When It Is Time for New
Tires
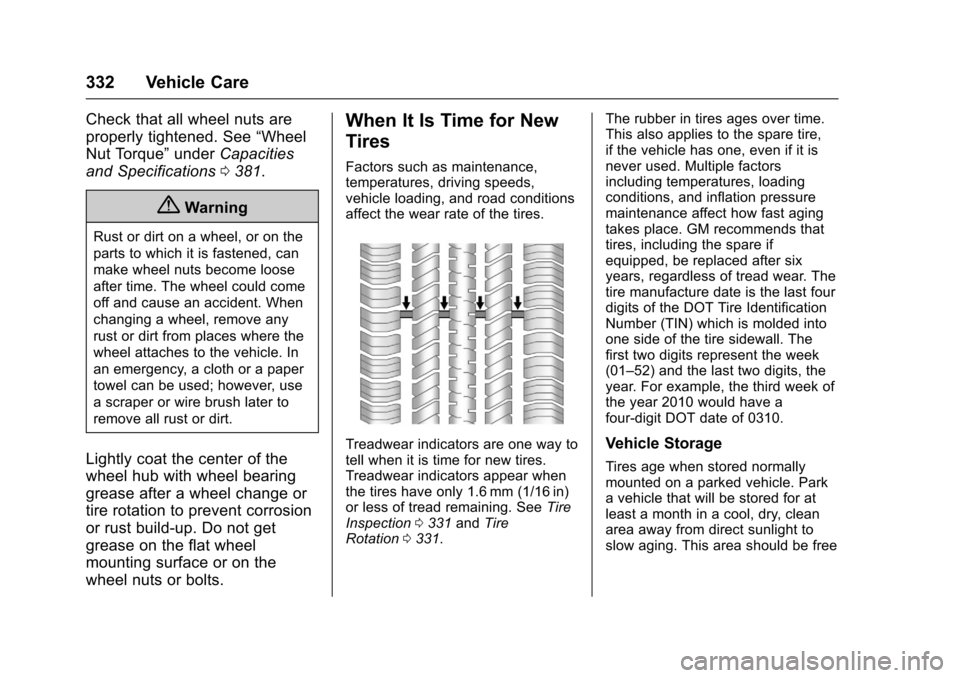
Factors such as maintenance,temperatures, driving speeds,vehicle loading, and road conditionsaffect the wear rate of the tires.
Treadwear indicators are one way totell when it is time for new tires.Treadwear indicators appear whenthe tires have only 1.6 mm (1/16 in)or less of tread remaining. SeeTireInspection0331andTireRotation0331.
The rubber in tires ages over time.This also applies to the spare tire,if the vehicle has one, even if it isnever used. Multiple factorsincluding temperatures, loadingconditions, and inflation pressuremaintenance affect how fast agingtakes place. GM recommends thattires, including the spare ifequipped, be replaced after sixyears, regardless of tread wear. Thetire manufacture date is the last fourdigits of the DOT Tire IdentificationNumber (TIN) which is molded intoone side of the tire sidewall. Thefirst two digits represent the week(01–52) and the last two digits, theyear. For example, the third week ofthe year 2010 would have afour-digit DOT date of 0310.
Vehicle Storage
Tires age when stored normallymounted on a parked vehicle. Parkavehiclethatwillbestoredforatleast a month in a cool, dry, cleanarea away from direct sunlight toslow aging. This area should be free