2017 CHEVROLET MALIBU clock
[x] Cancel search: clockPage 36 of 419
Chevrolet Malibu Owner Manual (GMNA-Localizing-U.S./Canada/Mexico-10122664) - 2017 - crc - 5/23/16
Keys, Doors, and Windows 35
untilQon the interior door is
pressed, or until the vehicle isturned on.
Remote Left In Vehicle Alert
When the vehicle is turned off and aremote is left in the vehicle, the hornwill chirp three times after all doorsare closed. To turn on or off seeVehicle Personalization0147.
Remote No Longer In Vehicle Alert
If the vehicle is on, with a dooropen, and then all doors are closed,the vehicle will check for an RKEtransmitter(s) inside. If an RKEtransmitter is not detected, the DICwill display NO REMOTEDETECTED and the horn will chirpthree times.
This occurs only once each time thevehicle is driven. SeeVehiclePersonalization0147
Keyless Trunk Opening
Press the touch pad on the rear ofthe trunk to open it if the RKEtransmitter is within 1 m (3 ft) of thetrunk.
Keyed Access
To a c c e s s a v e h i c l e w i t h a d e a dtransmitter battery, seeDoorLocks040.
Programming Transmitters to
the Vehicle
Only RKE transmitters programmedto the vehicle will work. If atransmitter is lost or stolen, areplacement can be purchased andprogrammed through your dealer.The vehicle can be reprogrammedso that lost or stolen transmitters nolonger work. Any remainingtransmitters will need to bereprogrammed. Each vehicle canhave up to eight transmittersmatched to it.
Programming with RecognizedTransmitters
Anewtransmittercanbeprogrammed to the vehicle whenthere are two recognizedtransmitters. To program, the vehiclemust be off and all of thetransmitters, both currentlyrecognized and new, must bewith you.
1. Place the two recognizedtransmitter(s) in the transmitterpocket with the buttons facingthe rear of the vehicle. Thetransmitter pocket is inside thecenter console storage area.
2. Remove the key lock cylindercap on the driver door handle.SeeDoor Locks040.Insertthe vehicle key of the newtransmitter into the key lockcylinder on the outside of thedriver door and turn the keycounterclockwise five timeswithin 10 seconds.
The Driver Information Center(DIC) displays READY FORREMOTE #2, 3, 4 or 5.
Page 37 of 419
Chevrolet Malibu Owner Manual (GMNA-Localizing-U.S./Canada/Mexico-10122664) - 2017 - crc - 5/23/16
36 Keys, Doors, and Windows
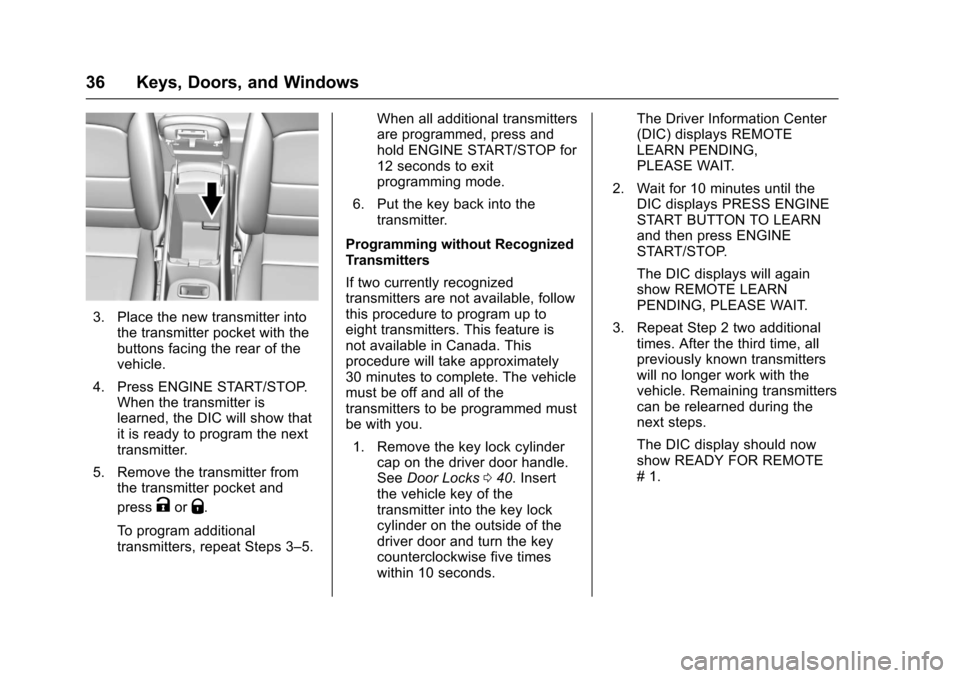
3. Place the new transmitter intothe transmitter pocket with thebuttons facing the rear of thevehicle.
4. Press ENGINE START/STOP.When the transmitter islearned, the DIC will show thatit is ready to program the nexttransmitter.
5. Remove the transmitter fromthe transmitter pocket and
pressKorQ.
To p r o g r a m a d d i t i o n a ltransmitters, repeat Steps 3–5.
When all additional transmittersare programmed, press andhold ENGINE START/STOP for12 seconds to exitprogramming mode.
6. Put the key back into thetransmitter.
Programming without RecognizedTransmitters
If two currently recognizedtransmitters are not available, followthis procedure to program up toeight transmitters. This feature isnot available in Canada. Thisprocedure will take approximately30 minutes to complete. The vehiclemust be off and all of thetransmitters to be programmed mustbe with you.
1. Remove the key lock cylindercap on the driver door handle.SeeDoor Locks040.Insertthe vehicle key of thetransmitter into the key lockcylinder on the outside of thedriver door and turn the keycounterclockwise five timeswithin 10 seconds.
The Driver Information Center(DIC) displays REMOTELEARN PENDING,PLEASE WAIT.
2. Wait for 10 minutes until theDIC displays PRESS ENGINESTART BUTTON TO LEARNand then press ENGINESTART/STOP.
The DIC displays will againshow REMOTE LEARNPENDING, PLEASE WAIT.
3. Repeat Step 2 two additionaltimes. After the third time, allpreviously known transmitterswill no longer work with thevehicle. Remaining transmitterscan be relearned during thenext steps.
The DIC display should nowshow READY FOR REMOTE#1.
Page 104 of 419
Chevrolet Malibu Owner Manual (GMNA-Localizing-U.S./Canada/Mexico-10122664) - 2017 - crc - 5/23/16
Instruments and Controls 103
Instruments and
Controls
Controls
Steering Wheel Adjustment . . . 104Steering Wheel Controls . . . . . . 104Heated Steering Wheel . . . . . . . 105Horn . . . . . . . . . . . . . . . . . . . . . . . . . . 105Windshield Wiper/Washer . . . . 105Compass . . . . . . . . . . . . . . . . . . . . . 106Clock . . . . . . . . . . . . . . . . . . . . . . . . . 107Power Outlets . . . . . . . . . . . . . . . . 108Wireless Charging . . . . . . . . . . . . 109
Warning Lights, Gauges, and
Indicators
Warning Lights, Gauges, andIndicators . . . . . . . . . . . . . . . . . . . . 111Instrument Cluster (BaseLevel) . . . . . . . . . . . . . . . . . . . . . . . 112Instrument Cluster(Uplevel) . . . . . . . . . . . . . . . . . . . . 114Speedometer . . . . . . . . . . . . . . . . . 117Odometer . . . . . . . . . . . . . . . . . . . . . 117Trip Odometer . . . . . . . . . . . . . . . . 117Ta c h o m e t e r ( N o n - H y b r i d ) . . . . . 11 7Fuel Gauge . . . . . . . . . . . . . . . . . . . 118Power Indicator Gauge(Hybrid) . . . . . . . . . . . . . . . . . . . . . 119
Engine Coolant TemperatureGauge . . . . . . . . . . . . . . . . . . . . . . 119Safety Belt Reminders . . . . . . . . 120Airbag Readiness Light . . . . . . . 120Passenger Airbag StatusIndicator . . . . . . . . . . . . . . . . . . . . 121Charging System Light . . . . . . . 122Malfunction Indicator Lamp(Check Engine Light) . . . . . . . . 122Brake System WarningLight . . . . . . . . . . . . . . . . . . . . . . . . 124Electric Parking BrakeLight . . . . . . . . . . . . . . . . . . . . . . . . 124Service Electric Parking BrakeLight . . . . . . . . . . . . . . . . . . . . . . . . 125Antilock Brake System (ABS)Warning Light . . . . . . . . . . . . . . . 125Lane Keep Assist (LKA)Light . . . . . . . . . . . . . . . . . . . . . . . . 125Vehicle Ahead Indicator . . . . . . 126Pedestrian Ahead Indicator . . . 126Traction Off Light . . . . . . . . . . . . . 126StabiliTrak®OFF Light . . . . . . . . 127Traction Control System (TCS)/StabiliTrak®Light . . . . . . . . . . . 127Tire Pressure Light . . . . . . . . . . . 127Engine Oil Pressure Light . . . . 128Low Fuel Warning Light(Uplevel) . . . . . . . . . . . . . . . . . . . . 128Low Fuel Warning Light (BaseLevel) . . . . . . . . . . . . . . . . . . . . . . . 129
Security Light . . . . . . . . . . . . . . . . . 129Vehicle Ready Light(Hybrid) . . . . . . . . . . . . . . . . . . . . . 129High-Beam On Light . . . . . . . . . . 129Lamps On Reminder . . . . . . . . . 130Cruise Control Light . . . . . . . . . . 130Door Ajar Light (Uplevel) . . . . . 130
Information Displays
Power Flows (Hybrid) . . . . . . . . . 131Energy Information(Hybrid) . . . . . . . . . . . . . . . . . . . . . 131Driver Information Center (DIC)(Base Level) . . . . . . . . . . . . . . . . 131Driver Information Center (DIC)(Uplevel) . . . . . . . . . . . . . . . . . . . . 134
Vehicle Messages
Vehicle Messages . . . . . . . . . . . . 138Battery Voltage and ChargingMessages . . . . . . . . . . . . . . . . . . . 138Brake System Messages . . . . . 138Compass Messages . . . . . . . . . . 139Cruise Control Messages . . . . . 139Door Ajar Messages . . . . . . . . . . 140Engine Cooling SystemMessages . . . . . . . . . . . . . . . . . . . 140Engine Oil Messages . . . . . . . . . 141Engine Power Messages . . . . . 141Fuel System Messages . . . . . . . 141Key and Lock Messages . . . . . 141
Page 108 of 419
Chevrolet Malibu Owner Manual (GMNA-Localizing-U.S./Canada/Mexico-10122664) - 2017 - crc - 5/23/16
Instruments and Controls 107
aheadingagain.SeeCompassMessages0139for the messagesthat may be displayed for thecompass.
Clock
Radio without Touchscreen
The infotainment system controlsare used to access the time anddate settings through the menusystem. SeeOperation0176onhow to use the menu system.
Setting the Time and Date
1. Press MENU, then selectSettings.
2. Select Time and Date.
3. Select Set Time or Set Date.
4. Turn MENU to change thevalue.
5. Press MENU to select the nextvalue.
6. Turn MENU to change thevalue.
7. To exit without saving, pressBACK at any time; or to saveand return to the Time andDate menu, press MENUmultiple times.
Auto Set
When Auto Set is enabled, the timecannot be manually set.
From the Set Time or SetDate menu:
1. Press the preset button underAuto Set.
2. Turn MENU to select Off(Manual) or On-Cell Network,then press MENU to select itand return to the Time andDate menu.
3. To exit without saving, pressBACK at any time.
Setting the 12/24 Hour Format
From the Set Time menu:
1. Press the preset button under12-24 HR to change between12 hour and 24 hour modes.
2. To return to the Time and Datemenu, press BACK at any time.
Radio with Touchscreen
The infotainment system controlsare used to access the time anddate settings through the menusystem. SeeOperation0176onhow to use the menu system.
Setting the Time and Date
When Auto Set is enabled the timecannot be manually set.
1. Press{,thentouchSettings.
2. Touch Time and Date, then SetTime or Set Date.
3. Touch + or✓to adjust thevalue.
4. TouchRorQto adjust AM or
PM for 12 hour format.
5. Touch0to return to the
Time and Date menu.
Auto Set
1. Press{,thentouchSettings.
2. Touch Time and Date, thenAuto Set.
3. Select from the availableselections.
Page 149 of 419
Chevrolet Malibu Owner Manual (GMNA-Localizing-U.S./Canada/Mexico-10122664) - 2017 - crc - 5/23/16
148 Instruments and Controls
Entering the PersonalizationMenus
Select Settings from the home page.
The following menus may beavailable:
.Phone Connection (MTP Only)
.Time and Date
.To n e S e t t i n g s
.Auto Volume Control
.Maximum Startup Volume
.Vehicle Settings
Phone Connection (MTP Only)
Select and the following maydisplay:
.Charging Only
.Scan Music Folder Only
.Scan All Folders
Charging Only
This feature will charge a MediaTransfer Protocol (MTP) devicewhen connected to the USB port.Bluetooth®audio will beunavailable.
Turn MENU to highlight, then pressto select.
Scan Music Folder Only
This feature will scan and indexmusic folders on an MTP devicewhen connected to the USB port.
Turn MENU to highlight, then pressto select.
Scan All Folders
This feature will scan and index allfolders on an MTP device whenconnected to the USB port.
Turn MENU to highlight, then pressto select.
Time and Date
Select Time and Date to adjust theclock. SeeClock0107.
Tone Settings
Select to set the radio tone. See“To n e S e t t i n g s”under“RadioControls without Touchscreen”inOperation0176.
Auto Volume Control
This feature automatically adjuststhe radio volume based on thespeed of the vehicle.
Select the desired value.
Maximum Startup Volume
When the vehicle is started and theradio volume is greater than this setlevel, the volume is adjusted to thislevel.
Select the desired value.
Vehicle Settings
Select and the following maydisplay:
.Climate and Air Quality
.Comfort and Convenience
.Languages
.Lighting
.Power Door Locks
.Remote Lock, Unlock, Start
.Return to Factory Settings
.Software Information
.Va l e t M o d e
Page 153 of 419
Chevrolet Malibu Owner Manual (GMNA-Localizing-U.S./Canada/Mexico-10122664) - 2017 - crc - 5/23/16
152 Instruments and Controls
The following are all possiblepersonalization features. Dependingon the vehicle, some may not beavailable.
{:Press to access the HomePage Menu.
QorR:To u c h t o s c r o l l t h r o u g h t h emenus or setup items.
0:To u c h t o e x i t o r r e t u r n t o t h eprevious screen or menu.
To a c c e s s t h e m e n u :
1. Press{.
2. Touch Settings.
To u c h t h e m e n u i t e m t o s e l e c t i t .Each of the menus is detailed in thefollowing information.
Settings menus and functions mayvary depending on vehicle options.
The following list of menu items maybe available:
.Time and Date
.Language
.Rear Seat Reminder
.Va l e t M o d e
.Te e n D r i v e r
.Radio
.Vehicle
.Bluetooth
.Apple CarPlay
.Android Auto
.Voice
.USB Auto Launch
.Turn Display Off
.Rear Camera
.Return to Factory Settings
.Software Information
Time and Date
Select Time and Date to adjust theclock. SeeClock0107.
Language
Select, then select from theavailable language(s).
Rear Seat Reminder
This allows for a chime and amessage‘Look in Rear Seat’whenthe rear door has been openedbefore or during operation of thevehicle.
Select Off or On.
Valet Mode (If Equipped)
This will lock the infotainmentsystem and steering wheel controls.It may also limit access to vehiclestorage locations (if equipped).
To e n a b l e v a l e t m o d e :
1. Enter a four-digit code on thekeypad.
2. Touch Enter to go to theconfirmation screen.
3. Re-enter the four-digit code.
To u c h L O C K o r U N L O C K t o l o c k o runlock the system. Touch Back togo back to the previous menu.
Teen Driver
See“Te e n D r i v e r”under“Settings”in the infotainment manual.
Page 168 of 419
Chevrolet Malibu Owner Manual (GMNA-Localizing-U.S./Canada/Mexico-10122664) - 2017 - crc - 5/23/16
Lighting 167
Turn and Lane-Change
Signals
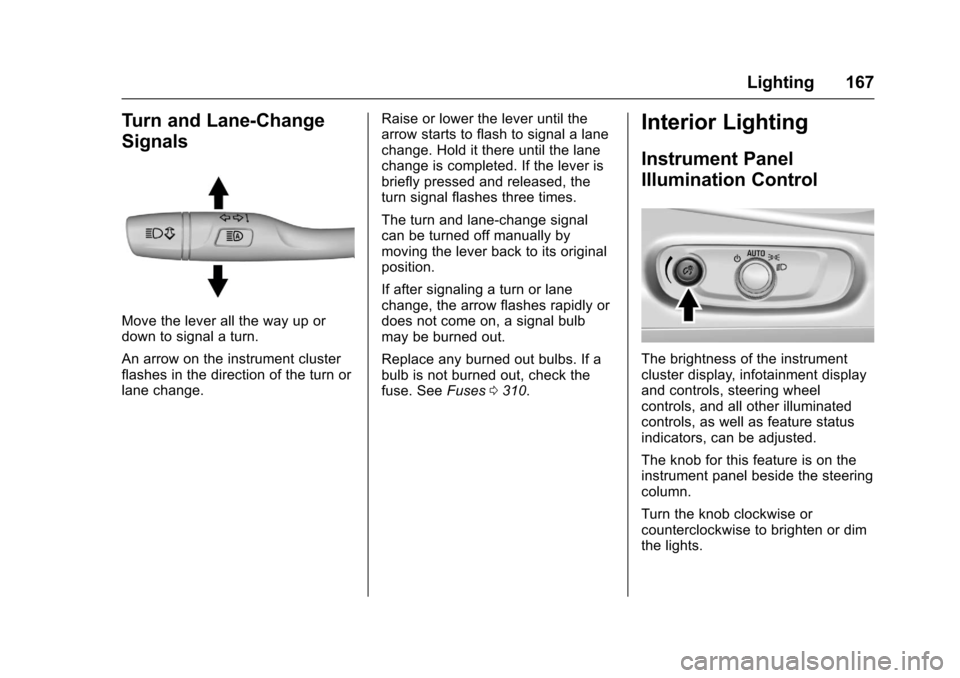
Move the lever all the way up ordown to signal a turn.
An arrow on the instrument clusterflashes in the direction of the turn orlane change.
Raise or lower the lever until thearrow starts to flash to signal a lanechange. Hold it there until the lanechange is completed. If the lever isbriefly pressed and released, theturn signal flashes three times.
The turn and lane-change signalcan be turned off manually bymoving the lever back to its originalposition.
If after signaling a turn or lanechange, the arrow flashes rapidly ordoes not come on, a signal bulbmay be burned out.
Replace any burned out bulbs. If abulb is not burned out, check thefuse. SeeFuses0310.
Interior Lighting
Instrument Panel
Illumination Control
The brightness of the instrumentcluster display, infotainment displayand controls, steering wheelcontrols, and all other illuminatedcontrols, as well as feature statusindicators, can be adjusted.
The knob for this feature is on theinstrument panel beside the steeringcolumn.
Turn the knob clockwise orcounterclockwise to brighten or dimthe lights.
Page 190 of 419
Chevrolet Malibu Owner Manual (GMNA-Localizing-U.S./Canada/Mexico-10122664) - 2017 - crc - 5/23/16
Infotainment System 189
Browse Music
1. Touch Browse Music.
2. Touch the desired music.
To n e S e t t i n g s
To u c h To n e S e t t i n g s . T h e To n eSettings menu is displayed. See“To n e S e t t i n g s”under“RadioControls”inOperation0176
Auto Volume
To u c h A u t o V o l u m e . T h e A u t oVolume menu is displayed. See“Auto Volume”under“RadioControls”inOperation0176.
Picture System Information
The infotainment system can viewpicture files stored on a USBstorage device and devices thatsupport Media TransferProtocol (MTP).
.Supported file extensions: .jpg,.bmp, .png, .gif.
.Animated GIF files are notsupported.
.Some files may not operate dueto a different recording format orthe condition of the file.
Viewing Pictures
1. Connect the USB device to theUSB port.
2. Touch the screen to open to fullscreen. Touch the screen againto return to the previousscreen.
If the USB device is alreadyconnected:
1. Press{.
2. Touch GALLERY.
Some features are disabled whilethe vehicle is in motion.
Viewing a Slide Show
1. Touchzfrom the picture
screen.
2. Touch the screen to cancel theslide show during the slideshow playback.
Viewing a Previous or NextPicture
To u c hSorTfrom the picture
screen.
Rotating a Picture
To u c hwfrom the picture screen.
Enlarging a Picture
To u c hxfrom the picture screen.
Using the USB Picture Menu
1. Touch MENU from the picturescreen.
2. Touch the appropriate menu:
.Slide Show Time: Allowsselection of the slide showinterval.
.Clock, Temp. Display:Allows selection of On orOff to show the clock andtemperature on the fullscreen.
.Display Settings: Adjustsfor Brightness and Contrast.
3. Touch0to exit.