2017 CHEVROLET EXPRESS CARGO VAN start stop button
[x] Cancel search: start stop buttonPage 28 of 346
Chevrolet Express Owner Manual (GMNA-Localizing-U.S./Canada/Mexico-9967827) - 2017 - crc - 5/2/16
Keys, Doors, and Windows 27
Caution
When replacing the battery, do
not touch any of the circuitry on
the transmitter. Static from your
body could damage the
transmitter.
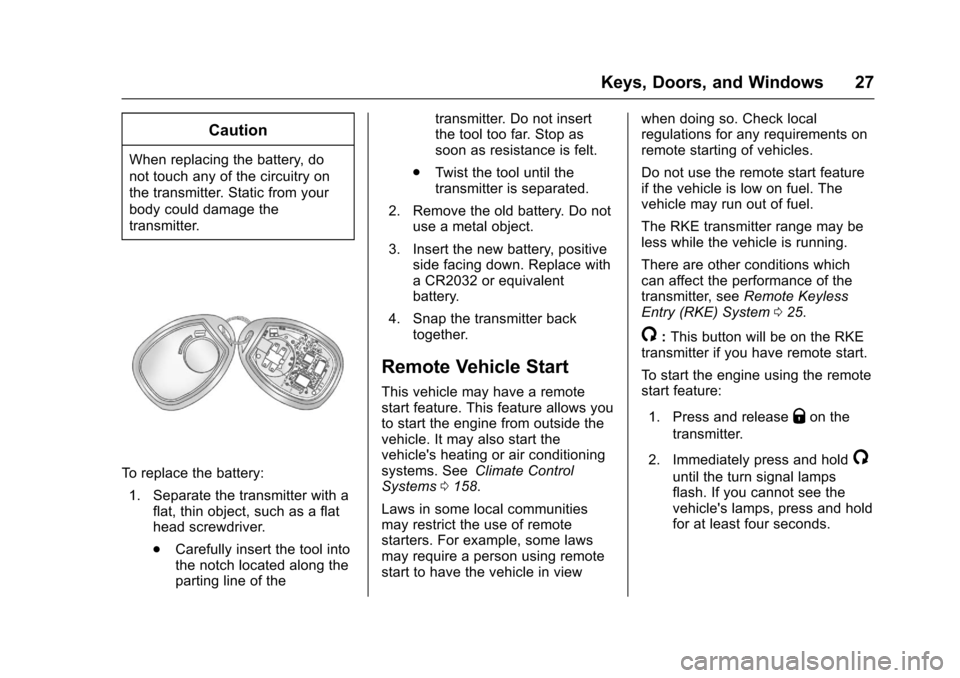
To r e p l a c e t h e b a t t e r y :
1. Separate the transmitter with aflat, thin object, such as a flathead screwdriver.
.Carefully insert the tool intothe notch located along theparting line of the
transmitter. Do not insertthe tool too far. Stop assoon as resistance is felt.
.Tw i s t t h e t o o l u n t i l t h etransmitter is separated.
2. Remove the old battery. Do notuse a metal object.
3. Insert the new battery, positiveside facing down. Replace withaCR2032orequivalentbattery.
4. Snap the transmitter backtogether.
Remote Vehicle Start
This vehicle may have a remotestart feature. This feature allows youto start the engine from outside thevehicle. It may also start thevehicle's heating or air conditioningsystems. SeeClimate ControlSystems0158.
Laws in some local communitiesmay restrict the use of remotestarters. For example, some lawsmay require a person using remotestart to have the vehicle in view
when doing so. Check localregulations for any requirements onremote starting of vehicles.
Do not use the remote start featureif the vehicle is low on fuel. Thevehicle may run out of fuel.
The RKE transmitter range may beless while the vehicle is running.
There are other conditions whichcan affect the performance of thetransmitter, seeRemote KeylessEntry (RKE) System025.
/:This button will be on the RKEtransmitter if you have remote start.
To s t a r t t h e e n g i n e u s i n g t h e r e m o t estart feature:
1. Press and releaseQon the
transmitter.
2. Immediately press and hold/
until the turn signal lampsflash. If you cannot see thevehicle's lamps, press and holdfor at least four seconds.
Page 110 of 346
Chevrolet Express Owner Manual (GMNA-Localizing-U.S./Canada/Mexico-9967827) - 2017 - crc - 5/2/16
Instruments and Controls 109
Trip/Fuel Menu Items
3:Press this button to scrollthrough the following menu items:
Odometer
Press3until XX km (mi)
displays. This display shows thedistance the vehicle has beendriven in either kilometers (km) ormiles (mi).
Trip Odometers
Press3until A or B displays.
This display shows the currentdistance traveled in eitherkilometers (km) or miles (mi) sincethe last reset for each trip odometer.Both trip odometers can be used atthe same time.
Each trip odometer can be reset to
zero separately by pressingVwhile
the desired trip odometer isdisplayed.
The trip odometer has a featurecalled the retro-active reset. Thiscan be used to set the trip odometerto the number of kilometers (miles)driven since the ignition was last
turned on. This can be used if thetrip odometer is not reset at thebeginning of the trip.
To u s e t h e r e t r o - a c t i v e r e s e t f e a t u r e ,
press and holdVfor at least
four seconds. The trip odometer willdisplay the number ofkilometers (km) or miles (mi) drivensince the ignition was last turned onand the vehicle was moving. Oncethe vehicle begins moving, the tripodometer will accumulate mileage.For example, if the vehicle wasdriven 8 km (5 miles) before it isstarted again, and then theretro-active reset feature isactivated, the display will show 8 km(5 miles). As the vehicle beginsmoving, the display will thenincrease to 8.1 km (5.1 miles),8.2 km (5.2 miles), etc.
If the retro-active reset feature isactivated after the vehicle is started,but before it begins moving, thedisplay will show the number ofkilometers (km) or miles (mi) thatwere driven during the last ignitioncycle.
Fuel Range
Press3until FUEL RANGE
displays. This display shows theapproximate number of remainingkilometers (km) or miles (mi) thevehicle can be driven withoutrefueling. The display will showLOW if the fuel level is low.
The fuel range estimate is based onan average of the fuel economyover recent driving history and theamount of fuel remaining in the fueltank. This estimate will change ifdriving conditions change. Forexample, if driving in traffic andmaking frequent stops, this displaymay read one number, but if thevehicle is driven on a freeway, thenumber may change even thoughthe same amount of fuel is in thefuel tank. This is because differentdriving conditions produce differentfuel economies. Generally, freewaydriving produces better fueleconomy than city driving.
If the vehicle is low on fuel, theFUEL LEVEL LOW message will bedisplayed. SeeFuel SystemMessages011 5.
Page 179 of 346
Chevrolet Express Owner Manual (GMNA-Localizing-U.S./Canada/Mexico-9967827) - 2017 - crc - 5/6/16
178 Driving and Operating
Operate the engine andtransmission gently to allow theoil to warm up and lubricate allmoving parts.
When the Low Fuel warninglamp is on and the FUELLEVEL LOW message isdisplayed in the DriverInformation Center (DIC), theComputer-Controlled CrankingSystem is disabled to preventpossible vehicle componentdamage. When this happens,hold the ignition switch in theSTART position to continueengine cranking.
Caution
Cranking the engine for long
periods of time, by returning the
ignition to the START position
immediately after cranking has
ended, can overheat and damage
the cranking motor, and drain the
battery. Wait at least 15 seconds
between each try, to let the
cranking motor cool down.
2. If the engine does not startafter 5-10 seconds, especiallyin very cold weather (below✓18 °C or 0 °F), it could beflooded with too muchgasoline. Try pushing theaccelerator pedal all the way tothe floor and holding it there asyou hold the key in START forup to 15 seconds. Wait at least15 seconds between each try,to allow the cranking motor tocool down. When the enginestarts, let go of the key andaccelerator. If the vehicle startsbriefly but then stops again, dothe same thing. This clears theextra gasoline from the engine.Do not race the engineimmediately after starting it.Operate the engine andtransmission gently until the oilwarms up and lubricates allmoving parts.
Fast Idle System
If equipped, this feature is availableonly with cruise control. The manualfast idle switch is operated using thecruise control buttons on the leftside of the steering wheel.
This system can be used toincrease engine idle speedwhenever the following conditionsare met:
.The parking brake is set.
.The brake pedal is not pressed.
.The vehicle must not be movingand the accelerator must not bepressed.
To c o n t r o l t h e f a s t i d l e :
.To e n a b l e t h e F a s t I d l e S y s t e m ,press and release the cruisecontrol on/off button and ensurethat the switch indicator lightis lit.
.Press and release the cruisecontrol SET- button. Enginespeed will be held atapproximately 1200 rpm.
Page 187 of 346
Chevrolet Express Owner Manual (GMNA-Localizing-U.S./Canada/Mexico-9967827) - 2017 - crc - 5/6/16
186 Driving and Operating
brakes off and on. See“RangeSelection Mode”underManualMode0186.
If you manually select 2 (Second) inan automatic transmission, thetransmission will start insecond gear. You can use thisfeature for reducing the speed of therear wheels when trying to start thevehicle from a stop on slippery roadsurfaces.
1:This position reduces vehiclespeed without using the brakes.Yo u c a n u s e i t f o r m a j o r / s e v e r edowngrades where the vehiclewould otherwise accelerate due tosteepness of grade. When you shiftto 1 (First) it provides the lowestgear appropriate to current roadspeed and continues to downshiftas the vehicle slows, eventuallydownshifting to 1 (First) gear. Thetransmission can be held in 1 (First)gear using Range Selection Modeor the shift lever. See“RangeSelection Mode”underManualMode0186.
Caution
Spinning the tires or holding the
vehicle in one place on a hill
using only the accelerator pedal
may damage the transmission.
The repair will not be covered by
the vehicle warranty. If you are
stuck, do not spin the tires. When
stopping on a hill, use the brakes
to hold the vehicle in place.
Normal Mode Grade Braking
This mode is enabled when thevehicle is started, but is not enabledin Range Selection Mode. It assistsin maintaining desired vehiclespeeds when driving on downhillgrades by using the engine andtransmission to slow the vehicle.The first time the system activatesfor each ignition key cycle, a DICmessage will be displayed. SeeTr a n s m i s s i o n M e s s a g e s011 8.
To d i s a b l e o r e n a b l e N o r m a l M o d eGrade Braking within the currentignition key cycle, press and holdthe Tow/Haul button for
three seconds. A DIC messagedisplays. SeeTr a n s m i s s i o nMessages011 8.
For other forms of grade braking,seeTo w / H a u l M o d e0187andCruise Control0192.
Manual Mode
Range Selection Mode
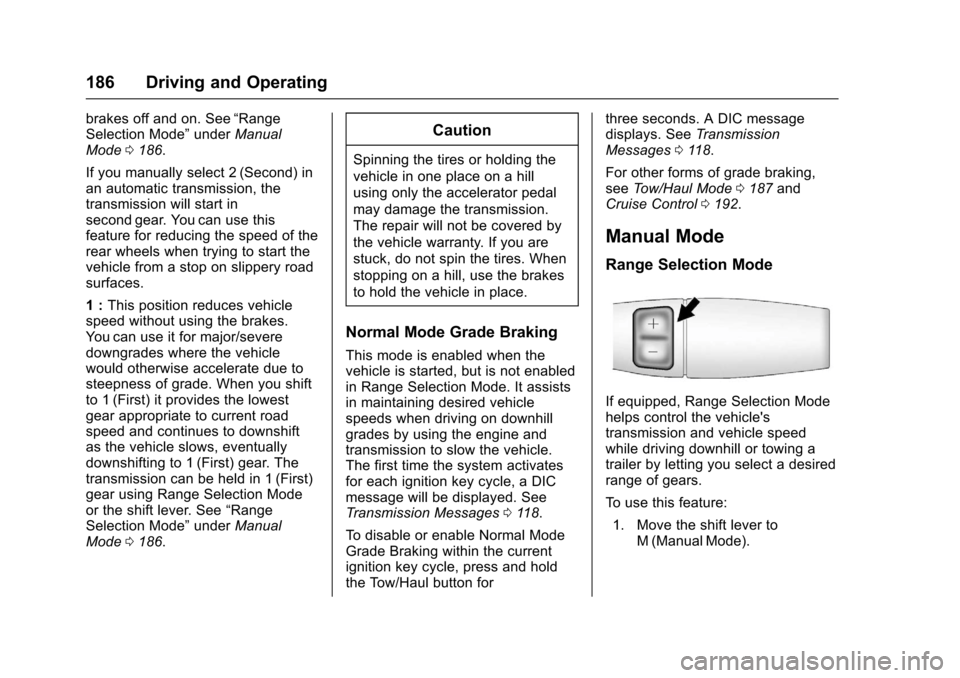
If equipped, Range Selection Modehelps control the vehicle'stransmission and vehicle speedwhile driving downhill or towing atrailer by letting you select a desiredrange of gears.
To u s e t h i s f e a t u r e :
1. Move the shift lever toM(ManualMode).
Page 263 of 346

Chevrolet Express Owner Manual (GMNA-Localizing-U.S./Canada/Mexico-9967827) - 2017 - crc - 5/2/16
262 Vehicle Care
lead to tire failure. Under-inflationalso reduces fuel efficiency and tiretread life, and may affect thevehicle's handling and stoppingability.
Please note that the TPMS is not asubstitute for proper tiremaintenance, and it is the driver'sresponsibility to maintain correct tirepressure, even if under-inflation hasnot reached the level to triggerillumination of the TPMS low tirepressure telltale.
Yo u r v e h i c l e h a s a l s o b e e nequipped with a TPMS malfunctionindicator to indicate when thesystem is not operating properly.The TPMS malfunction indicator iscombined with the low tire pressuretelltale. When the system detects amalfunction, the telltale will flash forapproximately one minute and thenremain continuously illuminated.This sequence will continue uponsubsequent vehicle start-ups aslong as the malfunction exists.
When the malfunction indicator isilluminated, the system may not beable to detect or signal low tire
pressure as intended. TPMSmalfunctions may occur for a varietyof reasons, including the installationof replacement or alternate tires orwheels on the vehicle that preventthe TPMS from functioning properly.Always check the TPMS malfunctiontelltale after replacing one or moretires or wheels on your vehicle toensure that the replacement oralternate tires and wheels allow theTPMS to continue to functionproperly.
SeeTire Pressure MonitorOperation0262.
SeeRadio FrequencyStatement0322.
Tire Pressure Monitor
Operation
This vehicle may have a TirePressure Monitor System (TPMS).The TPMS is designed to warn thedriver when a low tire pressurecondition exists. TPMS sensors aremounted onto each tire and wheelassembly, excluding the spare tireand wheel assembly. The TPMSsensors monitor the air pressure in
the tires and transmit the tirepressure readings to a receiverlocated in the vehicle.
When a low tire pressure conditionis detected, the TPMS illuminatesthe low tire pressure warning lightlocated on the instrument cluster.If the warning light comes on, stopas soon as possible and inflate thetires to the recommended pressureshown on the Tire and LoadingInformation label. SeeVehicle LoadLimits0171.
AmessagetocheckthepressureinaspecifictiredisplaysintheDriverInformation Center (DIC). The lowtire pressure warning light and theDIC warning message come on ateach ignition cycle until the tires areinflated to the correct inflationpressure. If the vehicle has DICbuttons, tire pressure levels can beviewed. For additional information
Page 265 of 346
Chevrolet Express Owner Manual (GMNA-Localizing-U.S./Canada/Mexico-9967827) - 2017 - crc - 5/2/16
264 Vehicle Care
the sensor matching process isperformed successfully. Seeyour dealer for service.
.Replacement tires or wheels donot match the original equipmenttires or wheels. Tires and wheelsother than those recommendedcould prevent the TPMS fromfunctioning properly. SeeBuyingNew Tires0268.
.Operating electronic devices orbeing near facilities using radiowave frequencies similar to theTPMS could cause the TPMSsensors to malfunction.
If the TPMS is not functioningproperly, it cannot detect or signal alow tire condition. See your dealerfor service if the TPMS malfunctionlight and DIC message come onand stay on.
TPMS Sensor Matching
Process
Each TPMS sensor has a uniqueidentification code. The identificationcode needs to be matched to a newtire/wheel position after rotating thevehicle’stiresorreplacingoneor
more of the TPMS sensors. Also,the TPMS sensor matching processshould be performed after replacingasparetirewitharoadtirecontaining the TPMS sensor. Themalfunction light and the DICmessage should go off at the nextignition cycle. The sensors arematched to the tire/wheel positions,using a TPMS relearn tool, in thefollowing order: driver side front tire,passenger side front tire, passengerside rear tire, and driver side rear.See your dealer for service or topurchase a relearn tool. A TPMSrelearn tool can also be purchased.See Tire Pressure Monitor SensorActivation Tool atwww.gmtoolsandequipment.com orcall 1-800-GM TOOLS(1-800-468-6657).
There are two minutes to match thefirst tire/wheel position, andfive minutes overall to match all fourtire/wheel positions. If it takeslonger, the matching process stopsand must be restarted.
The TPMS sensor matchingprocess is:
1. Set the parking brake.
2. Turn the ignition to ON/RUNwith the engine off.
3. Press the Remote Keyless
Entry (RKE) transmitter'sQ
andKbuttons at the same
time for approximatelyfive seconds. The horn soundstwice to signal the receiver is inrelearn mode and TIRELEARNING ACTIVE messagedisplays on the DIC screen.
If the vehicle does not haveRKE, press the DriverInformation Center (DIC)vehicle information button untilthe PRESSVTO RELEARNTIRE POSITIONS messagedisplays. The horn soundstwice to signal the receiver is inrelearn mode and TIRELEARNING ACTIVE messagedisplays on the DIC screen.
4. Start with the driver sidefront tire.