2017 CHEVROLET COLORADO torque
[x] Cancel search: torquePage 240 of 419
Chevrolet Colorado Owner Manual (GMNA-Localizing-U.S./Canada/Mexico-10122675) - 2017 - crc - 8/22/16
Driving and Operating 239
Torque Lock
If you are parking on a hill and youdo not shift the transmission intoP(Park) properly, the weight of thevehicle may put too much force onthe parking pawl in thetransmission. You may find it difficultto pull the shift lever out of P (Park).This is called torque lock. Toprevent torque lock, set the parkingbrake and then shift into P (Park)properly before you leave the driverseat. To find out how, seeShiftingInto Park0238.
When you are ready to drive, movethe shift lever out of P (Park) beforeyou release the parking brake.
If torque lock does occur, you mayneed to have another vehicle pushyours a little uphill to take some ofthe pressure from the parking pawlin the transmission. You will then beable to pull the shift lever out ofP(Park).
Shifting out of Park
This vehicle is equipped with anelectronic shift lock release system.The shift lock release isdesigned to:
.Prevent ignition key removalunless the shift lever is inP(Park).
.Prevent movement of the shiftlever out of P (Park), unless theignition is in ON/RUN and theregular brake pedal is applied.
To s h i f t o u t o f P ( P a r k ) :
1. Apply the brake pedal.
2. Press the button on the shiftlever.
3. Move the shift lever to thedesired position.
If you still are unable to shift out ofP(Park):
1. Ease the pressure on the shiftlever.
2. While holding down the brakepedal and pressing the shiftlever button, move the shiftlever all the way into P (Park).
3. While holding the shift leverbutton, move the shift lever tothe desired position.
If you are still having a problemshifting, then have the vehicleserviced soon.
This vehicle may have the SafetyBelt Assurance System, which mayprevent the vehicle from shifting outof P (Park). SeeSafety BeltMessages0136.
Parking
If the vehicle has a manualtransmission, before you get out ofthe vehicle, move the shift lever intoR(Reverse), and firmly apply theparking brake. Once the shift leverhas been placed into R (Reverse)with the clutch pedal pressed in,turn the ignition key to LOCK/OFF,remove the key and release theclutch.
If you are parking on a hill, or if thevehicle is pulling a trailer, seeDriving Characteristics and TowingTips0270.
Page 246 of 419
Chevrolet Colorado Owner Manual (GMNA-Localizing-U.S./Canada/Mexico-10122675) - 2017 - crc - 8/22/16
Driving and Operating 245
Gear before shifting from D(Drive) to M (Manual Mode)6th 5th 4th 3rd 2nd 1st
Range after shifting from D(Drive) to M (Manual Mode)M4 M4 M3 M2 M2 M1
Grade Braking is not available whenRange Selection Mode is active.SeeTo w / H a u l M o d e0245.
While using Range Selection Mode,cruise control and the Tow/HaulMode can be used.
Caution
Spinning the tires or holding the
vehicle in one place on a hill
using only the accelerator pedal
may damage the transmission.
The repair will not be covered by
the vehicle warranty. If you are
stuck, do not spin the tires. When
stopping on a hill, use the brakes
to hold the vehicle in place.
Low Traction Mode
Low Traction Mode assists invehicle acceleration when roadconditions are slippery, such as withice or snow. While the vehicle is at astop, select M2 using RangeSelection Mode. This will limittorque to the wheels and help toprevent the tires from spinning.
Tow/Haul Mode
If equipped, Tow/Haul Mode adjuststhe transmission shift pattern toreduce shift cycling. This providesincreased performance, vehiclecontrol, and transmission coolingwhen driving down steep hills ormountain grades, towing, or haulingheavy loads.
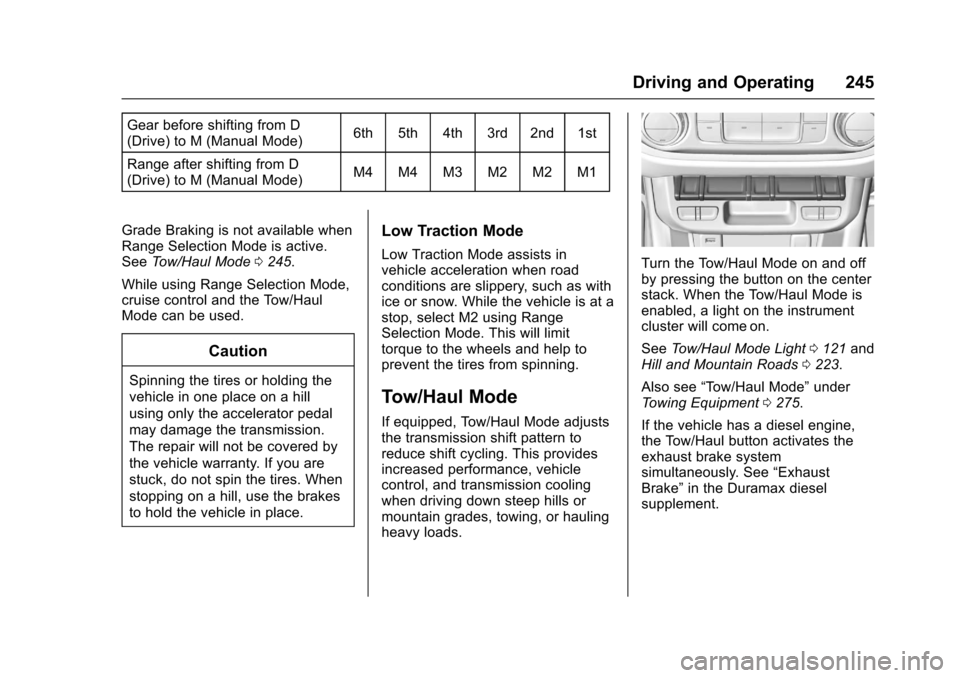
Turn the Tow/Haul Mode on and offby pressing the button on the centerstack. When the Tow/Haul Mode isenabled, a light on the instrumentcluster will come on.
SeeTo w / H a u l M o d e L i g h t0121andHill and Mountain Roads0223.
Also see“To w / H a u l M o d e”underTo w i n g E q u i p m e n t0275.
If the vehicle has a diesel engine,the Tow/Haul button activates theexhaust brake systemsimultaneously. See“ExhaustBrake”in the Duramax dieselsupplement.
Page 250 of 419

Chevrolet Colorado Owner Manual (GMNA-Localizing-U.S./Canada/Mexico-10122675) - 2017 - crc - 8/22/16
Driving and Operating 249
2m(Two-Wheel Drive High) :Use
for driving on most streets andhighways. The front axle is notengaged. This setting provides thebest fuel economy.
4n(Four-Wheel Drive Low) :This
setting engages the front axle and
delivers extra torque. Choose 4nif
driving off-road in deep sand, deepmud, or deep snow, and whileclimbing or descending steep hills.When engaged, keep vehicle speedbelow 72 km/h (45 mph).
Shifting into 4nwill turn Traction
Control and StabiliTrak off. SeeTr a c t i o n C o n t r o l / E l e c t r o n i c S t a b i l i t yControl0256.
4m(Four-Wheel Drive High) :Use
when extra traction is needed. Thefront axle engages and helps whendriving on snowy or icy roads, andwhen off-roading. The vehicle can
be shifted from 2mto 4mwhile the
vehicle is moving.
Shifting Into 4m
Turn the knob to 4mat any speed
up to 121 km/h (75 mph), except
from 4n.Theindicatorlightwillflash
while shifting and will remain on theselected setting.
Shifting Into 2m
Turn the knob to 2mat any speed,
except when shifting from 4n.
Shifting Into 4n
When 4nis engaged, vehicle speed
should be kept below 72 km/h(45 mph).
1. The ignition must be in ON/RUN and the vehicle must bestopped or moving less than5km/h (3mph) with thetransmission in N (Neutral). It isbest for the vehicle to bemoving 1.6 to 3.2 km/h(1 to 2 mph).
2. Turn the knob to 4n.Waitfor
the 4nindicator light to stop
flashing before shifting thetransmission into gear.
If the transmission is in gear and/ormoving more than 5 km/h (3 mph),
the 4nindicator light will flash for
30 seconds and not complete theshift. After 30 seconds the transfer
case will shift to 4m.Turntheknob
to 4mto see the indicator. With the
vehicle moving less than 5 km/h(3 mph), and the transmission inN(Neutral), attempt the shift again.
Shifting Out of 4n
1. To shift out of 4nthe vehicle
must be stopped or movingless than 5 km/h (3 mph) withthe transmission in N (Neutral)and the ignition in ON/RUN.It is best for the vehicle to bemoving 1.6 to 3.2 km/h(1 to 2 mph).
Page 252 of 419
Chevrolet Colorado Owner Manual (GMNA-Localizing-U.S./Canada/Mexico-10122675) - 2017 - crc - 8/22/16
Driving and Operating 251
Automatic Transfer Case
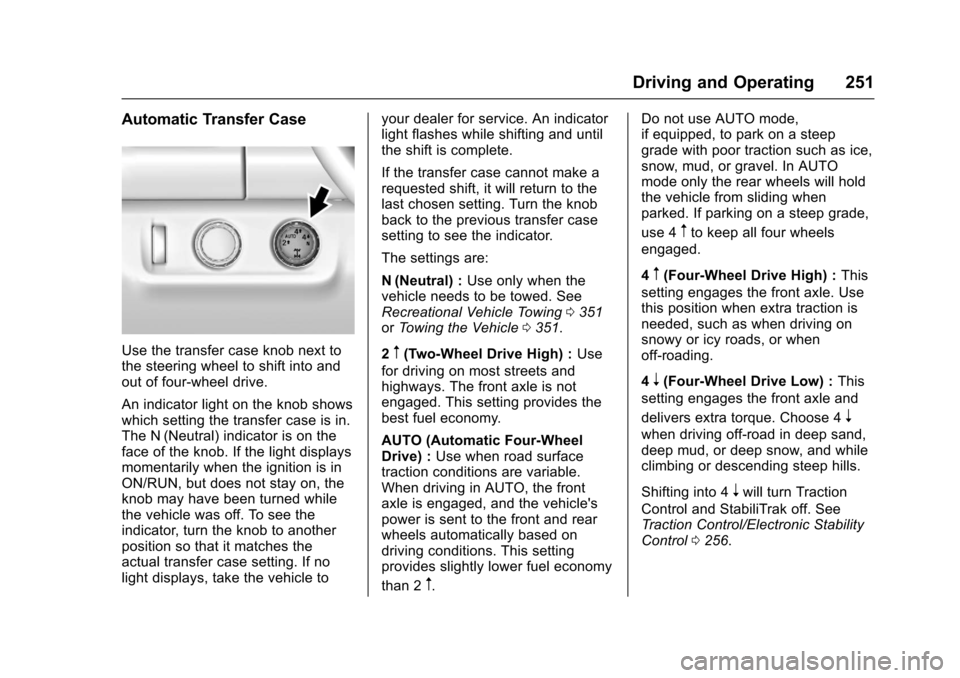
Use the transfer case knob next tothe steering wheel to shift into andout of four-wheel drive.
An indicator light on the knob showswhich setting the transfer case is in.The N (Neutral) indicator is on theface of the knob. If the light displaysmomentarily when the ignition is inON/RUN, but does not stay on, theknob may have been turned whilethe vehicle was off. To see theindicator, turn the knob to anotherposition so that it matches theactual transfer case setting. If nolight displays, take the vehicle to
your dealer for service. An indicatorlight flashes while shifting and untilthe shift is complete.
If the transfer case cannot make arequested shift, it will return to thelast chosen setting. Turn the knobback to the previous transfer casesetting to see the indicator.
The settings are:
N(Neutral) :Use only when thevehicle needs to be towed. SeeRecreational Vehicle Towing0351orTo w i n g t h e V e h i c l e0351.
2m(Two-Wheel Drive High) :Use
for driving on most streets andhighways. The front axle is notengaged. This setting provides thebest fuel economy.
AUTO (Automatic Four-WheelDrive) :Use when road surfacetraction conditions are variable.When driving in AUTO, the frontaxle is engaged, and the vehicle'spower is sent to the front and rearwheels automatically based ondriving conditions. This settingprovides slightly lower fuel economy
than 2m.
Do not use AUTO mode,if equipped, to park on a steepgrade with poor traction such as ice,snow, mud, or gravel. In AUTOmode only the rear wheels will holdthe vehicle from sliding whenparked. If parking on a steep grade,
use 4mto keep all four wheels
engaged.
4m(Four-Wheel Drive High) :This
setting engages the front axle. Usethis position when extra traction isneeded, such as when driving onsnowy or icy roads, or whenoff-roading.
4n(Four-Wheel Drive Low) :This
setting engages the front axle and
delivers extra torque. Choose 4n
when driving off-road in deep sand,deep mud, or deep snow, and whileclimbing or descending steep hills.
Shifting into 4nwill turn Traction
Control and StabiliTrak off. SeeTr a c t i o n C o n t r o l / E l e c t r o n i c S t a b i l i t yControl0256.
Page 278 of 419
Chevrolet Colorado Owner Manual (GMNA-Localizing-U.S./Canada/Mexico-10122675) - 2017 - crc - 8/22/16
Driving and Operating 277
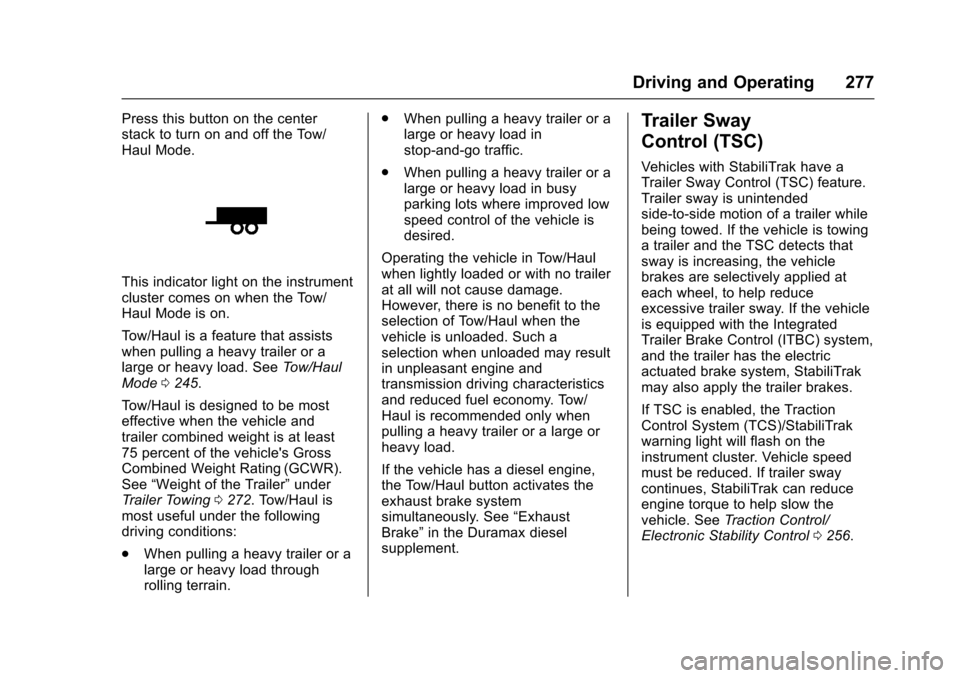
Press this button on the centerstack to turn on and off the Tow/Haul Mode.
This indicator light on the instrumentcluster comes on when the Tow/Haul Mode is on.
To w / H a u l i s a f e a t u r e t h a t a s s i s t swhen pulling a heavy trailer or alarge or heavy load. SeeTo w / H a u lMode0245.
To w / H a u l i s d e s i g n e d t o b e m o s teffective when the vehicle andtrailer combined weight is at least75 percent of the vehicle's GrossCombined Weight Rating (GCWR).See“Weight of the Trailer”underTr a i l e r To w i n g0272.Tow/Haulismost useful under the followingdriving conditions:
.When pulling a heavy trailer or alarge or heavy load throughrolling terrain.
.When pulling a heavy trailer or alarge or heavy load instop-and-go traffic.
.When pulling a heavy trailer or alarge or heavy load in busyparking lots where improved lowspeed control of the vehicle isdesired.
Operating the vehicle in Tow/Haulwhen lightly loaded or with no trailerat all will not cause damage.However, there is no benefit to theselection of Tow/Haul when thevehicle is unloaded. Such aselection when unloaded may resultin unpleasant engine andtransmission driving characteristicsand reduced fuel economy. Tow/Haul is recommended only whenpulling a heavy trailer or a large orheavy load.
If the vehicle has a diesel engine,the Tow/Haul button activates theexhaust brake systemsimultaneously. See“ExhaustBrake”in the Duramax dieselsupplement.
Trailer Sway
Control (TSC)
Vehicles with StabiliTrak have aTrailer Sway Control (TSC) feature.Trailer sway is unintendedside-to-side motion of a trailer whilebeing towed. If the vehicle is towingatrailerandtheTSCdetectsthatsway is increasing, the vehiclebrakes are selectively applied ateach wheel, to help reduceexcessive trailer sway. If the vehicleis equipped with the IntegratedTrailer Brake Control (ITBC) system,and the trailer has the electricactuated brake system, StabiliTrakmay also apply the trailer brakes.
If TSC is enabled, the TractionControl System (TCS)/StabiliTrakwarning light will flash on theinstrument cluster. Vehicle speedmust be reduced. If trailer swaycontinues, StabiliTrak can reduceengine torque to help slow thevehicle. SeeTr a c t i o n C o n t r o l /Electronic Stability Control0256.
Page 300 of 419

Chevrolet Colorado Owner Manual (GMNA-Localizing-U.S./Canada/Mexico-10122675) - 2017 - crc - 8/22/16
Vehicle Care 299
heard all the time the vehicle ismoving, except when applying thebrake pedal firmly.
{Warning
The brake wear warning sound
means that soon the brakes will
not work well. That could lead to
acrash.Whenthebrakewear
warning sound is heard, have the
vehicle serviced.
Caution
Continuing to drive with worn-out
brake pads could result in costly
brake repair.
Some driving conditions or climatescan cause a brake squeal when thebrakes are first applied or lightlyapplied. This does not meansomething is wrong with the brakes.
Properly torqued wheel nuts arenecessary to help prevent brakepulsation. When tires are rotated,inspect brake pads for wear andevenly tighten wheel nuts in theproper sequence to torquespecifications inCapacities andSpecifications0380.
Brake linings should always bereplaced as complete axle sets.
Brake Pedal Travel
See your dealer if the brake pedaldoes not return to normal height,or if there is a rapid increase inpedal travel. This could be a signthat brake service may be required.
Replacing Brake System Parts
Always replace brake system partswith new, approved replacementparts. If this is not done, the brakesmay not work properly. The brakingperformance expected can changein many other ways if the wrongreplacement brake parts areinstalled or parts are improperlyinstalled.
Brake Fluid
The brake/clutch master cylinderreservoir is filled with GM approvedDOT 3 brake fluid as indicated onthe reservoir cap. SeeEngineCompartment Overview0283forthe location of the reservoir.
Checking Brake Fluid
Place the vehicle in P (Park) orNeutral with the parking brakeapplied if equipped with a manualtransmission. On a level surface,the brake fluid level should bebetween the minimum andmaximum marks on the brake fluidreservoir.
Page 331 of 419
Chevrolet Colorado Owner Manual (GMNA-Localizing-U.S./Canada/Mexico-10122675) - 2017 - crc - 8/22/16
330 Vehicle Care
Reset the Tire Pressure Monitor
System. SeeTire Pressure
Monitor Operation0326.
Check that all wheel nuts are
properly tightened. See“Wheel
Nut Torque”underCapacities
and Specifications0380.
{Warning
Rust or dirt on a wheel, or on the
parts to which it is fastened, can
make wheel nuts become loose
after time. The wheel could come
off and cause an accident. When
changing a wheel, remove any
rust or dirt from places where the
wheel attaches to the vehicle. In
an emergency, a cloth or a paper
towel can be used; however, use
ascraperorwirebrushlaterto
remove all rust or dirt.
Lightly coat the center of the
wheel hub with wheel bearing
grease after a wheel change or
tire rotation to prevent corrosion
or rust build-up. Do not get
grease on the flat wheel
mounting surface or on the
wheel nuts or bolts.
When It Is Time for New
Tires
Factors, such as maintenance,temperatures, driving speeds,vehicle loading, and road conditionsaffect the wear rate of the tires.
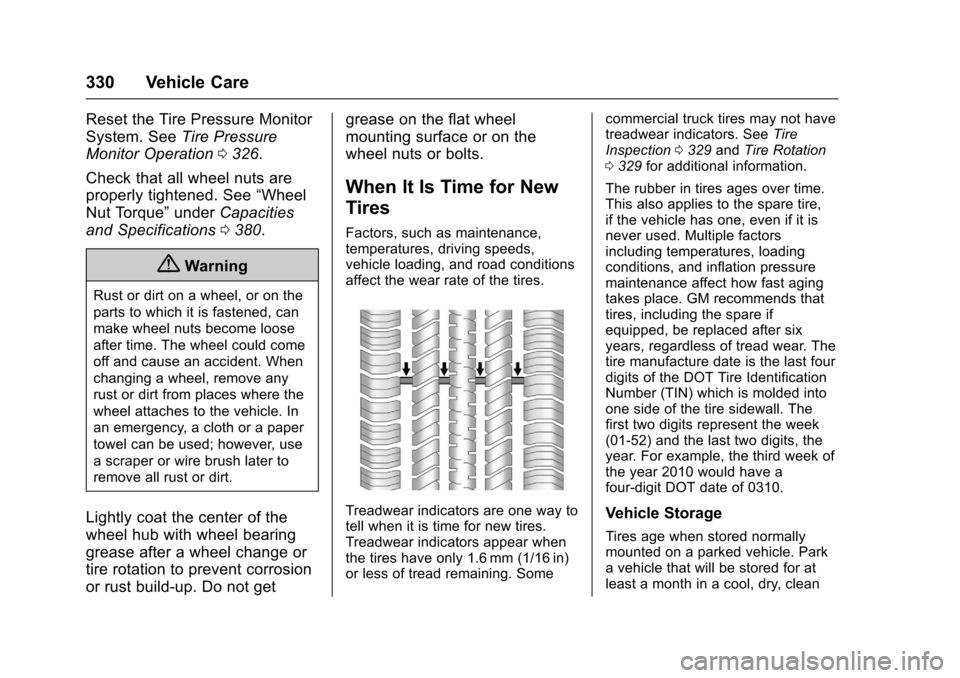
Treadwear indicators are one way totell when it is time for new tires.Treadwear indicators appear whenthe tires have only 1.6 mm (1/16 in)or less of tread remaining. Some
commercial truck tires may not havetreadwear indicators. SeeTireInspection0329andTire Rotation0329for additional information.
The rubber in tires ages over time.This also applies to the spare tire,if the vehicle has one, even if it isnever used. Multiple factorsincluding temperatures, loadingconditions, and inflation pressuremaintenance affect how fast agingtakes place. GM recommends thattires, including the spare ifequipped, be replaced after sixyears, regardless of tread wear. Thetire manufacture date is the last fourdigits of the DOT Tire IdentificationNumber (TIN) which is molded intoone side of the tire sidewall. Thefirst two digits represent the week(01-52) and the last two digits, theyear. For example, the third week ofthe year 2010 would have afour-digit DOT date of 0310.
Vehicle Storage
Tires age when stored normallymounted on a parked vehicle. Parkavehiclethatwillbestoredforatleast a month in a cool, dry, clean
Page 344 of 419
Chevrolet Colorado Owner Manual (GMNA-Localizing-U.S./Canada/Mexico-10122675) - 2017 - crc - 8/22/16
Vehicle Care 343
11 . Ti g h t e n e a c h w h e e l n u t b yhand. Then use the wheelwrench to tighten the nuts untilthe wheel is held againstthe hub.
12. Turn the wheel wrenchcounterclockwise to lower thevehicle. Lower the jackcompletely.
{Warning
If wheel studs are damaged, they
can break. If all the studs on a
wheel broke, the wheel could
come off and cause a crash.
If any stud is damaged because
of a loose-running wheel, it could
be that all of the studs are
damaged. To be sure, replace all
studs on the wheel. If the stud
holes in a wheel have become
larger, the wheel could collapse in
operation. Replace any wheel if
its stud holes have become larger
or distorted in any way. Inspect
hubs and hub⇣piloted wheels for
damage. Because of loose
(Continued)
Warning (Continued)
running wheels, piloting pad
damage may occur and require
replacement of the entire hub, for
proper centering of the wheels.
When replacing studs, hubs,
wheel nuts or wheels, be sure to
use GM original equipment parts.
{Warning
Wheel nuts that are improperly or
incorrectly tightened can cause
the wheels to become loose or
come off. The wheel nuts should
be tightened with a torque wrench
to the proper torque specification
after replacing. Follow the torque
specification supplied by the
aftermarket manufacturer when
using accessory locking wheel
nuts. SeeCapacities and
Specifications0380for original
equipment wheel nut torque
specifications.
Caution
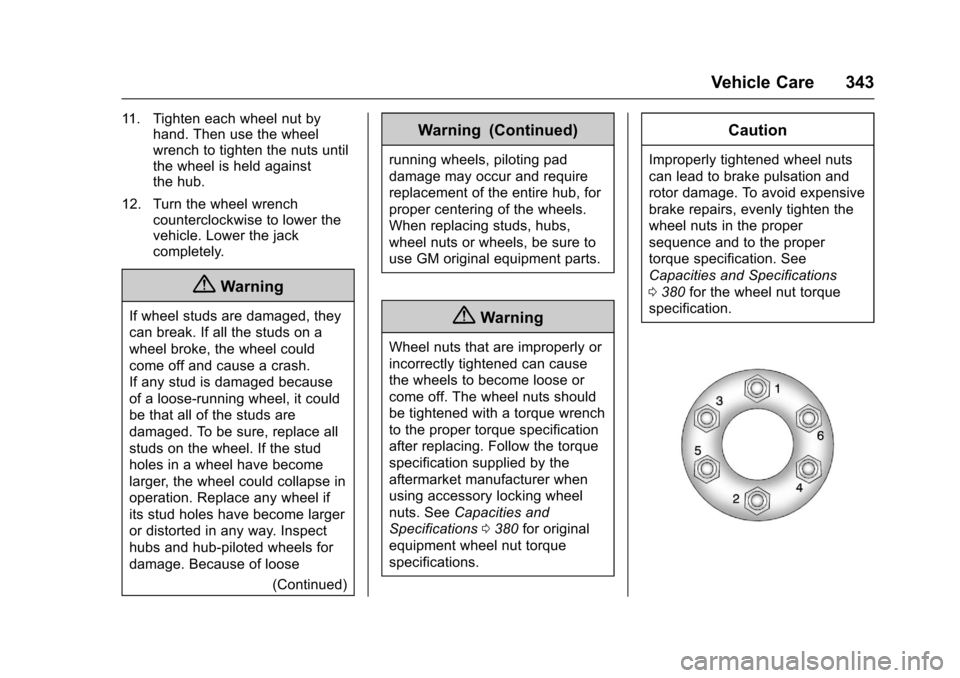
Improperly tightened wheel nuts
can lead to brake pulsation and
rotor damage. To avoid expensive
brake repairs, evenly tighten the
wheel nuts in the proper
sequence and to the proper
torque specification. See
Capacities and Specifications
0380for the wheel nut torque
specification.