2017 BUICK ENVISION seat
[x] Cancel search: seatPage 2 of 20

2
Power Liftgate Control
Power Mirror/ Window Controls
Instrument Panel
Driver Information Center Controls/ Audio Steering Wheel Controls
Engine Start/Stop Button
Cruise Control/Forward Collision AlertF/Heated Steering WheelF/Voice Recognition Buttons
Tilt/Telescoping Steering Wheel Lever
Head-Up Display ControlsF
Symbols
Check Engine
Engine Oil Pressure
Lane Keep Assist
Airbag Readiness
Cruise Control Set
Service Electric Parking Brake
Traction Control/StabiliTrak Active
Charging System
Security
Engine Coolant Temperature
Brake System Warning
BRAKE Electric Parking Brake
Power Door Lock Buttons
Turn Signal Lever/ IntelliBeam ButtonF
Driver Information Center
Hazard Warning Flashers ButtonWindshield Wipers Lever
Memory Seat ButtonsF
Exterior/ Interior Lamp Controls
Page 3 of 20

3
Refer to your Owner Manual to learn about the information being relayed by the lights, gauges and indicators on the instrument cluster.
See In Brief in your Owner Manual.
Infotainment System Touch Screen
Infotainment System Controls
Parking Assist Button
Lane Keep Assist ButtonF
Electric Parking Brake SwitchDriver’s Heated/VentedF Seat Buttons
Traction Control and StabiliTrak ButtonPassenger’s Heated/VentedF Seat Buttons
Automatic Parking Assist ButtonF
Climate Controls
F Optional equipment
Adaptive Forward Lighting
Lights On Reminder
Antilock Brake System Warning
Low Tire Pressure
Door Ajar
Vehicle Ahead
StabiliTrak Off
Driver Safety Belt Reminder
2 Passenger Safety Belt Reminder
Uplevel DIC displayF shown
Page 4 of 20
4
Remote Keyless Entry (RKE) Transmitter
Keyless Access System
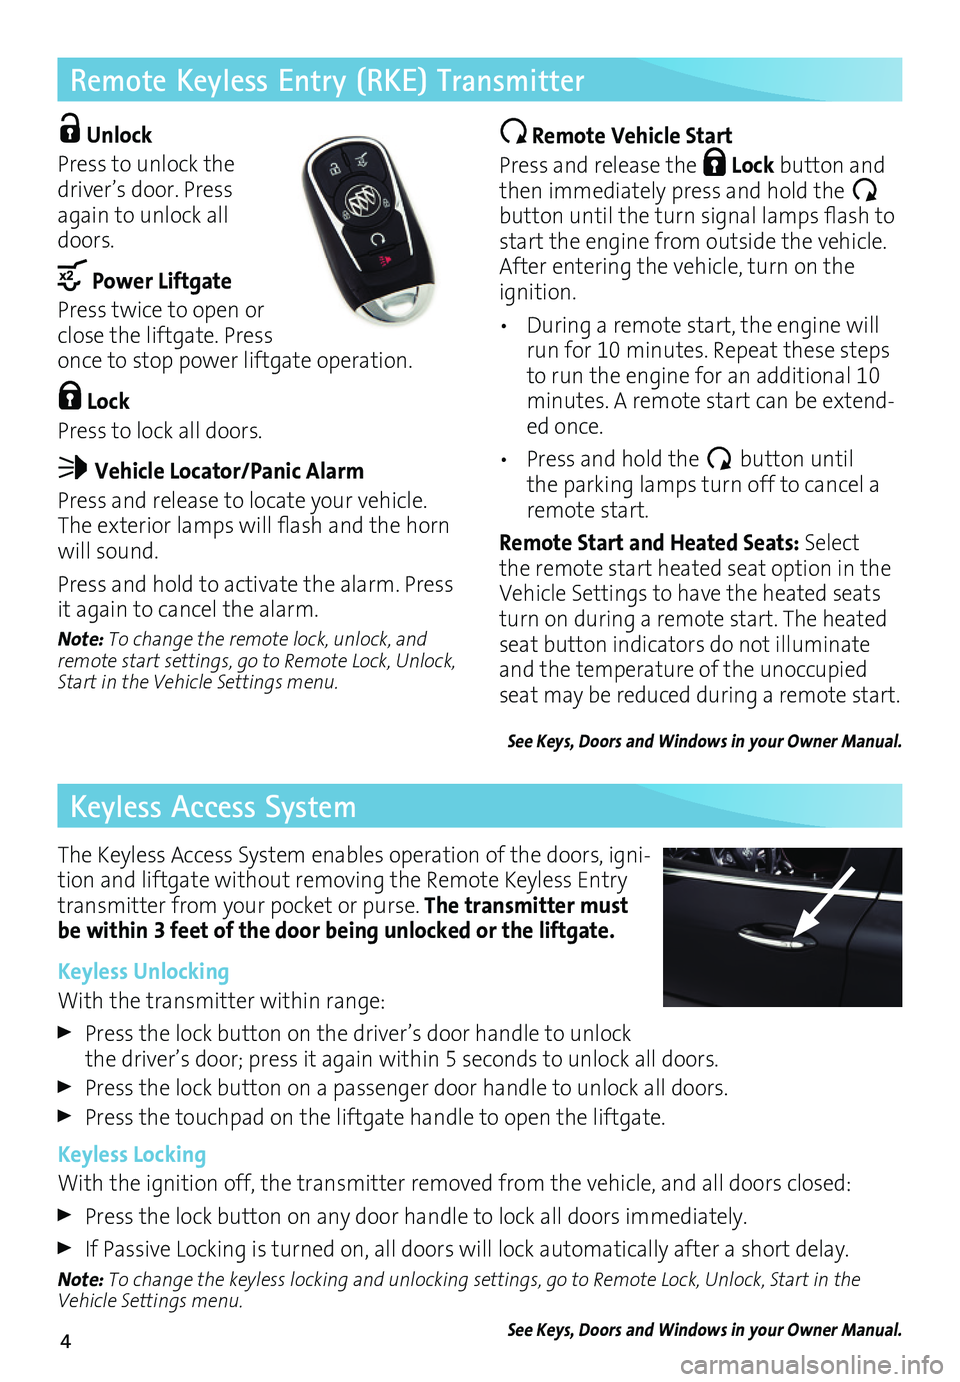
Unlock
Press to unlock the driver’s door. Press again to unlock all doors.
Power Liftgate
Press twice to open or close the liftgate. Press once to stop power liftgate operation.
Lock
Press to lock all doors.
Vehicle Locator/Panic Alarm
Press and release to locate your vehicle. The exterior lamps will flash and the horn will sound.
Press and hold to activate the alarm. Press it again to cancel the alarm.
Note: To change the remote lock, unlock, and remote start settings, go to Remote Lock, Unlock, Start in the Vehicle Settings menu.
Remote Vehicle Start
Press and release the Lock button and then immediately press and hold the button until the turn signal lamps flash to start the engine from outside the vehicle. After entering the vehicle, turn on the ignition.
• During a remote start, the engine will run for 10 minutes. Repeat these steps to run the engine for an additional 10 minutes. A remote start can be extend-ed once.
• Press and hold the button until the parking lamps turn off to cancel a remote start.
Remote Start and Heated Seats: Select the remote start heated seat option in the Vehicle Settings to have the heated seats turn on during a remote start. The heated seat button indicators do not illuminate and the temperature of the unoccupied seat may be reduced during a remote start.
See Keys, Doors and Windows in your Owner Manual.
The Keyless Access System enables operation of the doors, igni-tion and liftgate without removing the Remote Keyless Entry transmitter from your pocket or purse. The transmitter must be within 3 feet of the door being unlocked or the liftgate.
Keyless Unlocking
With the transmitter within range:
Press the lock button on the driver’s door handle to unlock the driver’s door; press it again within 5 seconds to unlock all doors.
Press the lock button on a passenger door handle to unlock all doors.
Press the touchpad on the liftgate handle to open the liftgate.
Keyless Locking
With the ignition off, the transmitter removed from the vehicle, and all doors closed:
Press the lock button on any door handle to lock all doors immediately.
If Passive Locking is turned on, all doors will lock automatically after a short delay.
Note: To change the keyless locking and unlocking settings, go to Remote Lock, Unlock, Start in the Vehicle Settings menu.
See Keys, Doors and Windows in your Owner Manual.
Page 6 of 20
6
Front Seats
Memory SeatsF
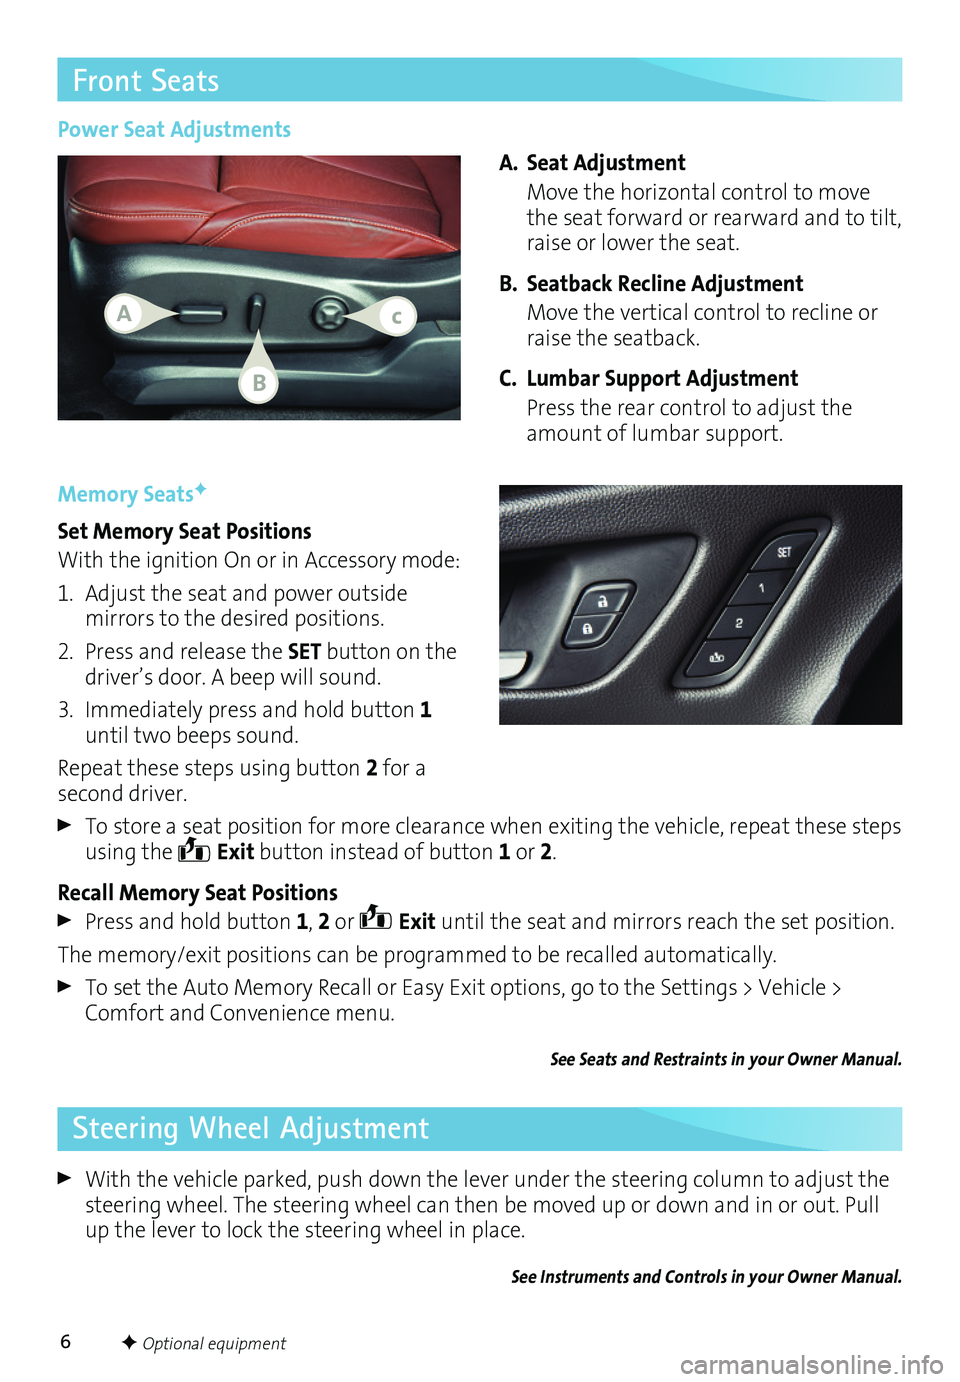
Set Memory Seat Positions
With the ignition On or in Accessory mode:
1. Adjust the seat and power outside mirrors to the desired positions.
2. Press and release the SET button on the driver’s door. A beep will sound.
3. Immediately press and hold button 1 until two beeps sound.
Repeat these steps using button 2 for a second driver.
To store a seat position for more clearance when exiting the vehicle, repeat these steps using the Exit button instead of button 1 or 2.
Recall Memory Seat Positions
Press and hold button 1, 2 or Exit until the seat and mirrors reach the set position.
The memory/exit positions can be programmed to be recalled automatically.
To set the Auto Memory Recall or Easy Exit options, go to the Settings > Vehicle > Comfort and Convenience menu.
See Seats and Restraints in your Owner Manual.
Power Seat Adjustments
A. Seat Adjustment
Move the horizontal control to move the seat forward or rearward and to tilt, raise or lower the seat.
B. Seatback Recline Adjustment
Move the vertical control to recline or raise the seatback.
C. Lumbar Support Adjustment
Press the rear control to adjust the amount of lumbar support.
Steering Wheel Adjustment
With the vehicle parked, push down the lever under the steering column to adjust the steering wheel. The steering wheel can then be moved up or down and in or out. Pull up the lever to lock the steering wheel in place.
See Instruments and Controls in your Owner Manual.
Ac
B
F Optional equipment
Page 7 of 20
7
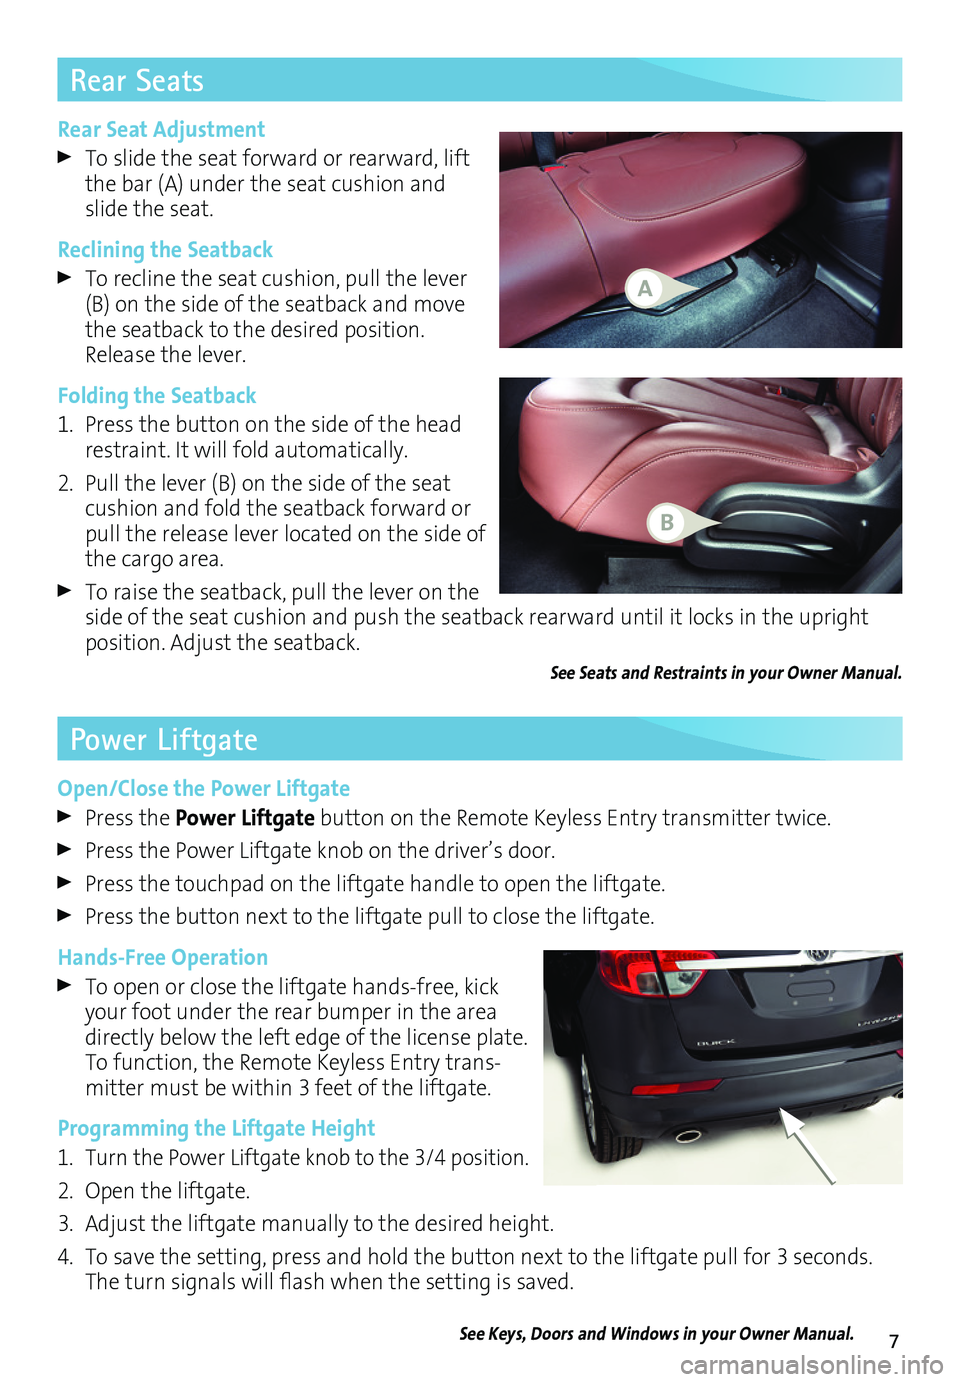
Rear Seat Adjustment
To slide the seat forward or rearward, lift the bar (A) under the seat cushion and slide the seat.
Reclining the Seatback
To recline the seat cushion, pull the lever (B) on the side of the seatback and move the seatback to the desired position. Release the lever.
Folding the Seatback
1. Press the button on the side of the head restraint. It will fold automatically.
2. Pull the lever (B) on the side of the seat cushion and fold the seatback forward or pull the release lever located on the side of the cargo area.
To raise the seatback, pull the lever on the side of the seat cushion and push the seatback rearward until it locks in the upright position. Adjust the seatback.
See Seats and Restraints in your Owner Manual.
Rear Seats
Power Liftgate
Open/Close the Power Liftgate
Press the Power Liftgate button on the Remote Keyless Entry transmitter twice.
Press the Power Liftgate knob on the driver’s door.
Press the touchpad on the liftgate handle to open the liftgate.
Press the button next to the liftgate pull to close the liftgate.
Hands-Free Operation
To open or close the liftgate hands-free, kick your foot under the rear bumper in the area directly below the left edge of the license plate. To function, the Remote Keyless Entry trans-mitter must be within 3 feet of the liftgate.
Programming the Liftgate Height
1. Turn the Power Liftgate knob to the 3/4 position.
2. Open the liftgate.
3. Adjust the liftgate manually to the desired height.
4. To save the setting, press and hold the button next to the liftgate pull for 3 seconds. The turn signals will flash when the setting is saved.
See Keys, Doors and Windows in your Owner Manual.
A
B
Page 14 of 20
14F Optional equipment
Automatic Climate Controls
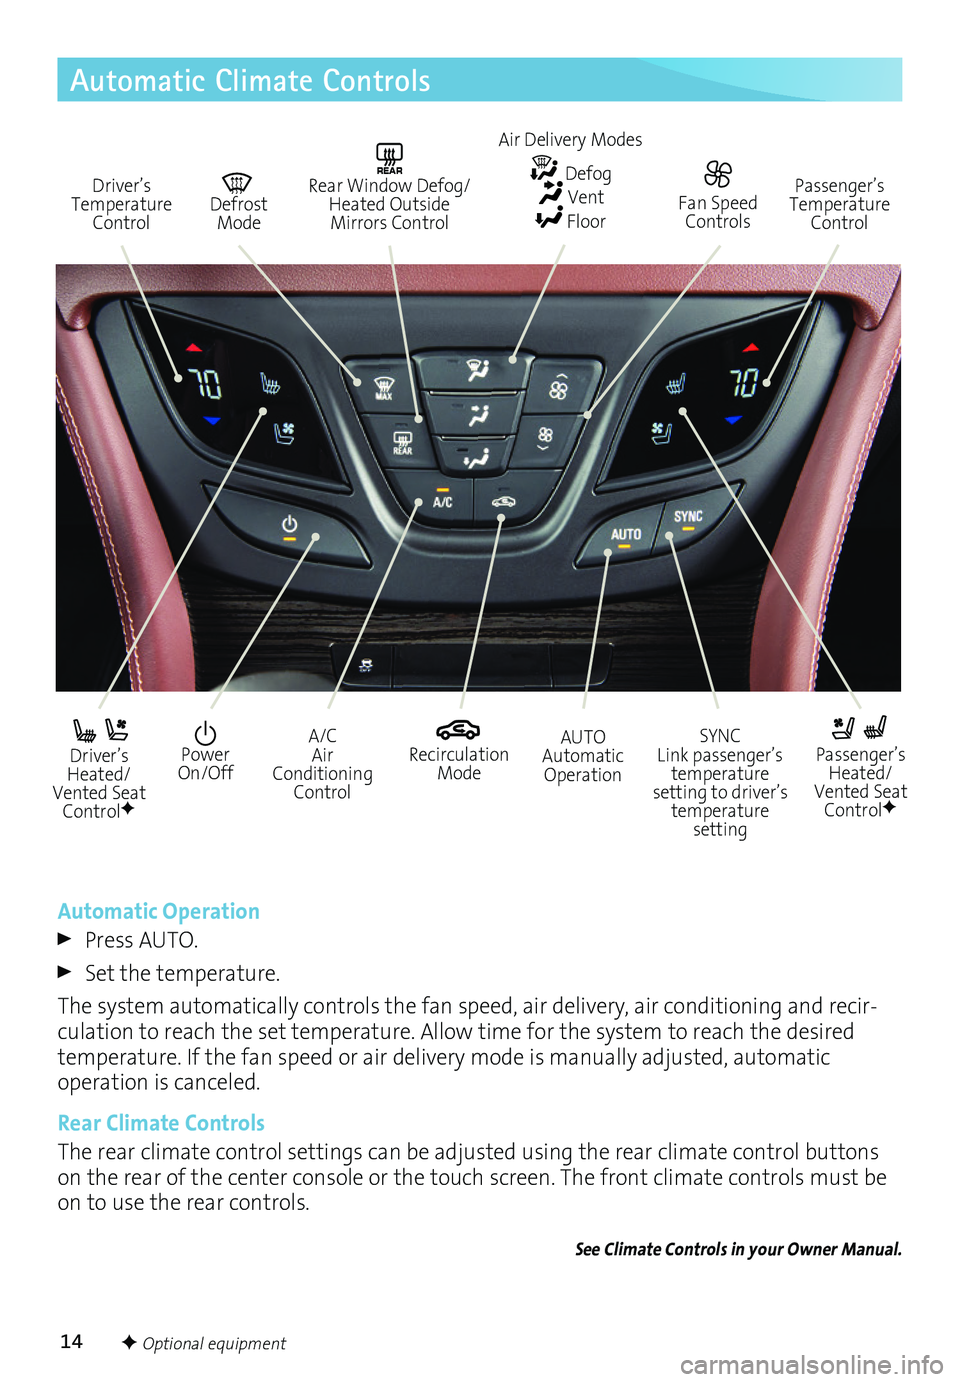
Driver’s Temperature Control
REAR Rear Window Defog/Heated Outside Mirrors Control
Defrost Mode
Passenger’s Temperature Control
Driver’s Heated/Vented Seat ControlF
Passenger’s Heated/Vented Seat ControlF
Recirculation Mode
Power On/Off
A/C Air Conditioning Control
SYNC Link passenger’s temperature setting to driver’s temperature setting
AUTO Automatic Operation
Automatic Operation
Press AUTO.
Set the temperature.
The system automatically controls the fan speed, air delivery, air conditioning and recir-culation to reach the set temperature. Allow time for the system to reach the desired
temperature. If the fan speed or air delivery mode is manually adjusted, automatic
operation is canceled.
Rear Climate Controls
The rear climate control settings can be adjusted using the rear climate control buttons on the rear of the center console or the touch screen. The front climate controls must be on to use the rear controls.
See Climate Controls in your Owner Manual.
Fan Speed Controls
Air Delivery Modes
Defog Vent Floor
Page 18 of 20
18
Driving Assistance Systems
Safety Alert SeatF
The driver’s seat pulses — left side, right side or simultaneously — to alert the driver of potential hazards.
Audible alerts or seat pulsing alerts may be selected. To change the alert settings, go to Settings > Vehicle > Collision/Detection Systems > Alert Type.
Side Blind Zone Alert with Lane Change AlertF
While driving, the system displays a warning symbol on the left or right side mirror when a vehicle is detected in that side blind zone area or rapidly approaching that area. The warning symbol flashes if a turn signal is activated when a vehicle has been detected.
To turn the system on or off, go to Settings > Vehicle > Collision/Detection Systems > Lane Change Alert.
Lane Keep Assist with Lane Departure WarningF
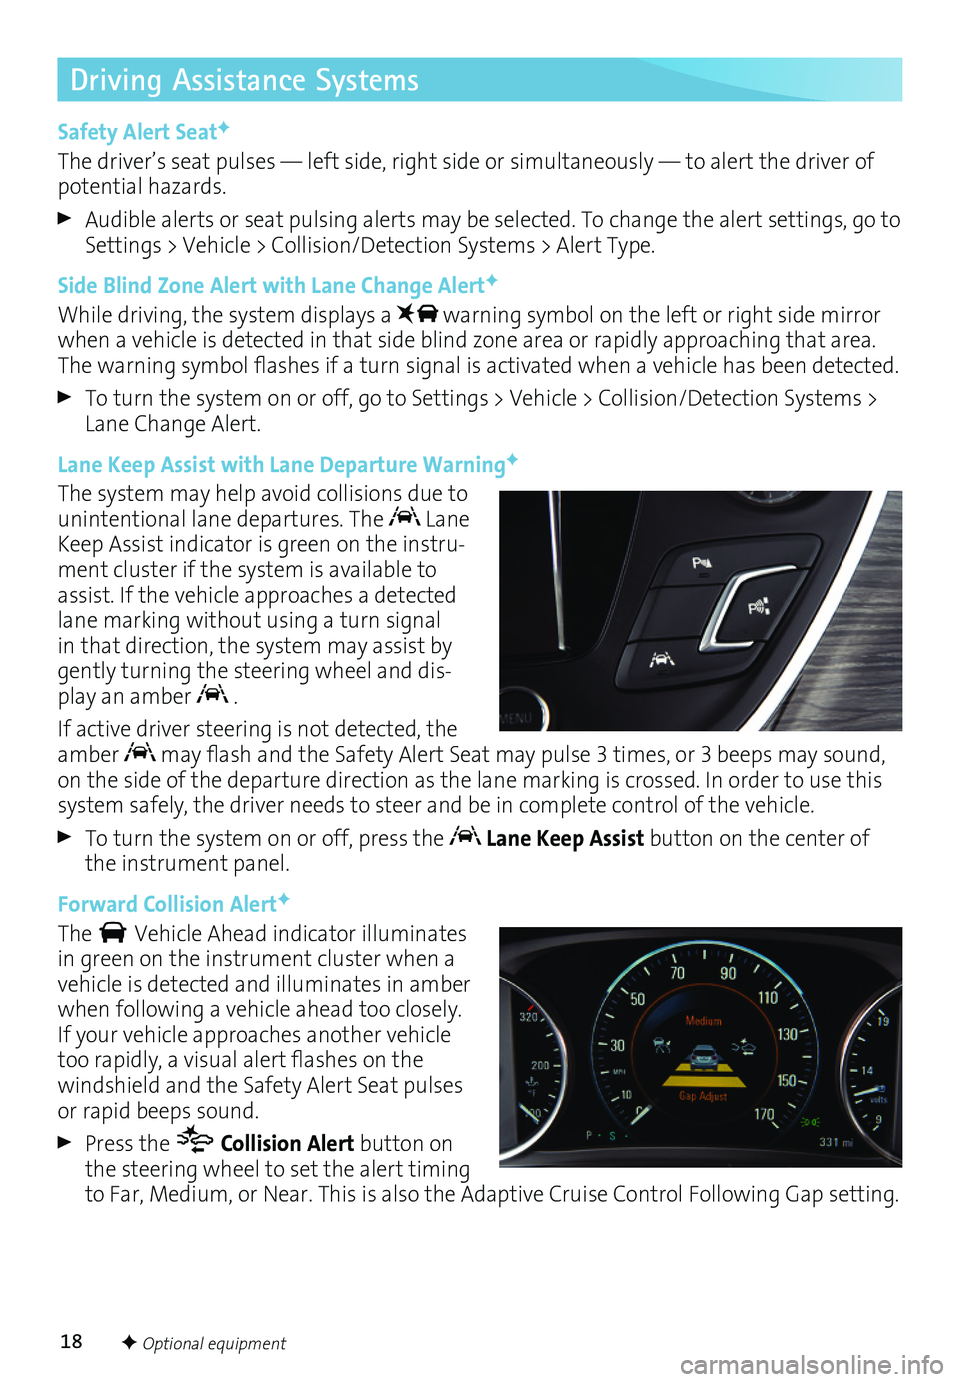
The system may help avoid collisions due to unintentional lane departures. The Lane Keep Assist indicator is green on the instru-ment cluster if the system is available to assist. If the vehicle approaches a detected lane marking without using a turn signal in that direction, the system may assist by gently turning the steering wheel and dis-play an amber .
If active driver steering is not detected, the amber may flash and the Safety Alert Seat may pulse 3 times, or 3 beeps may sound, on the side of the departure direction as the lane marking is crossed. In order to use this system safely, the driver needs to steer and be in complete control of the vehicle.
To turn the system on or off, press the Lane Keep Assist button on the center of the instrument panel.
Forward Collision AlertF
The Vehicle Ahead indicator illuminates in green on the instrument cluster when a vehicle is detected and illuminates in amber when following a vehicle ahead too closely. If your vehicle approaches another vehicle too rapidly, a visual alert flashes on the windshield and the Safety Alert Seat pulses or rapid beeps sound.
Press the Collision Alert button on the steering wheel to set the alert timing to Far, Medium, or Near. This is also the Adaptive Cruise Control Following Gap setting.
F Optional equipment
Page 19 of 20
19F Optional equipment
Driving Assistance Systems
Forward Automatic BrakingF
The brakes may be applied in potential collision situations to help reduce damage or help avoid collisions with vehicles directly ahead.
To set the Forward Automatic Braking and Forward Collision Alert systems to Alert and Brake, Alert, or Off, go to Settings > Vehicle > Collision/Detection Systems > Auto Collision Prep.
See Driving and Operating in your Owner Manual.
Parking Assistance Systems
Rear Vision Camera/Surround VisionF
When the vehicle is in Reverse, the Rear Vision Camera displays a view of the area behind the vehicle on the touch screen. Vehicle speed must be below 5 mph.
The Surround Vision system displays front and rear camera views along with a bird’s-eye view of the area surrounding the vehicle on the touch screen when the vehicle is in Reverse or Drive below 5 mph.
Front and Rear Park Assist/Rear Cross Traffic AlertF
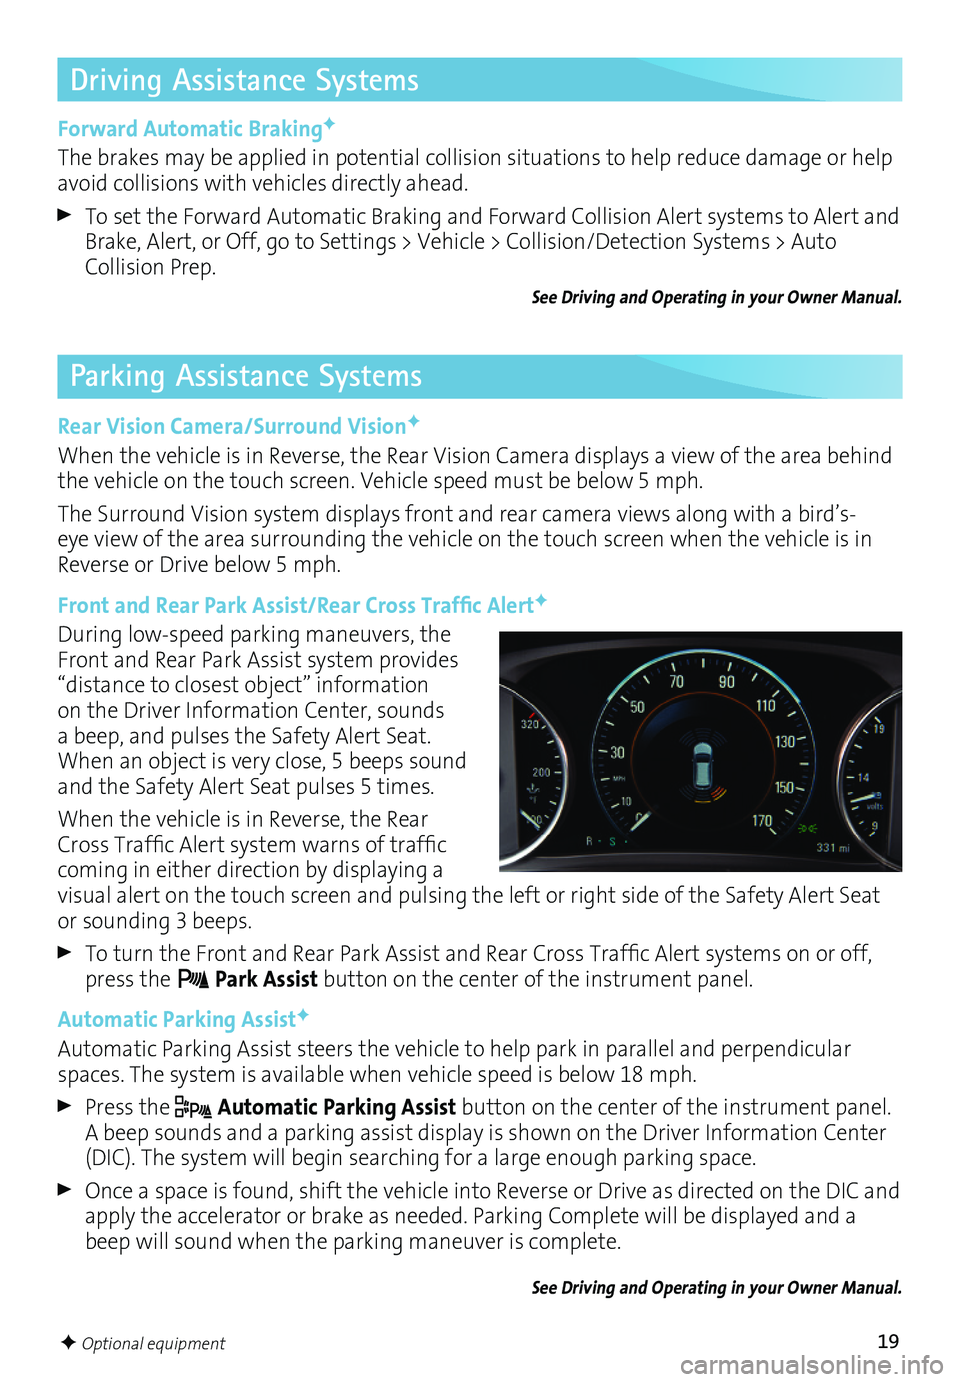
During low-speed parking maneuvers, the Front and Rear Park Assist system provides “distance to closest object” information on the Driver Information Center, sounds a beep, and pulses the Safety Alert Seat. When an object is very close, 5 beeps sound and the Safety Alert Seat pulses 5 times.
When the vehicle is in Reverse, the Rear Cross Traffic Alert system warns of traffic coming in either direction by displaying a visual alert on the touch screen and pulsing the left or right side of the Safety Alert Seat or sounding 3 beeps.
To turn the Front and Rear Park Assist and Rear Cross Traffic Alert systems on or off, press the Park Assist button on the center of the instrument panel.
Automatic Parking AssistF
Automatic Parking Assist steers the vehicle to help park in parallel and perpendicular spaces. The system is available when vehicle speed is below 18 mph.
Press the Automatic Parking Assist button on the center of the instrument panel. A beep sounds and a parking assist display is shown on the Driver Information Center (DIC). The system will begin searching for a large enough parking space.
Once a space is found, shift the vehicle into Reverse or Drive as directed on the DIC and apply the accelerator or brake as needed. Parking Complete will be displayed and a beep will sound when the parking maneuver is complete.
See Driving and Operating in your Owner Manual.