Page 2 of 20
2
Power Liftgate Control
Power Mirror/ Window Controls
Instrument Panel
Driver Information Center Controls/ Audio Steering Wheel Controls
Engine Start/Stop Button
Cruise Control/Forward Collision AlertF/Heated Steering WheelF/Voice Recognition Buttons
Tilt/Telescoping Steering Wheel Lever
Head-Up Display ControlsF
Symbols
Check Engine
Engine Oil Pressure
Lane Keep Assist
Airbag Readiness
Cruise Control Set
Service Electric Parking Brake
Traction Control/StabiliTrak Active
Charging System
Security
Engine Coolant Temperature
Brake System Warning
BRAKE Electric Parking Brake
Power Door Lock Buttons
Turn Signal Lever/ IntelliBeam ButtonF
Driver Information Center
Hazard Warning Flashers ButtonWindshield Wipers Lever
Memory Seat ButtonsF
Exterior/ Interior Lamp Controls
Page 3 of 20
3
Refer to your Owner Manual to learn about the information being relayed by the lights, gauges and indicators on the instrument cluster.
See In Brief in your Owner Manual.
Infotainment System Touch Screen
Infotainment System Controls
Parking Assist Button
Lane Keep Assist ButtonF
Electric Parking Brake SwitchDriver’s Heated/VentedF Seat Buttons
Traction Control and StabiliTrak ButtonPassenger’s Heated/VentedF Seat Buttons
Automatic Parking Assist ButtonF
Climate Controls
F Optional equipment
Adaptive Forward Lighting
Lights On Reminder
Antilock Brake System Warning
Low Tire Pressure
Door Ajar
Vehicle Ahead
StabiliTrak Off
Driver Safety Belt Reminder
2 Passenger Safety Belt Reminder
Uplevel DIC displayF shown
Page 11 of 20

11
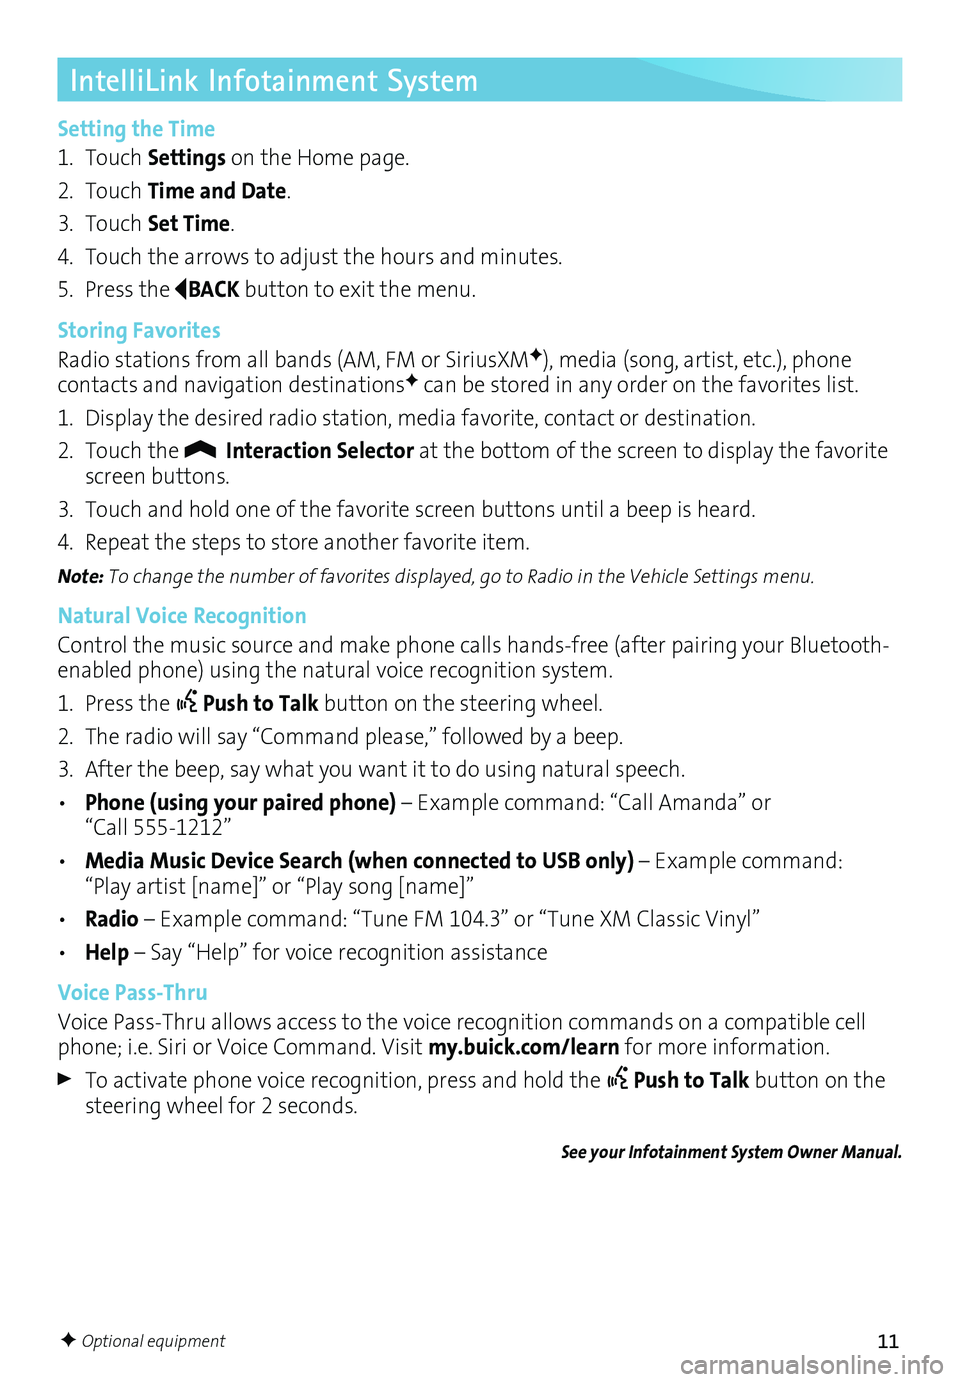
IntelliLink Infotainment System
Setting the Time
1. Touch Settings on the Home page.
2. Touch Time and Date.
3. Touch Set Time.
4. Touch the arrows to adjust the hours and minutes.
5. Press the BACK button to exit the menu.
Storing Favorites
Radio stations from all bands (AM, FM or SiriusXMF), media (song, artist, etc.), phone
contacts and navigation destinationsF can be stored in any order on the favorites list.
1. Display the desired radio station, media favorite, contact or destination.
2. Touch the Interaction Selector at the bottom of the screen to display the favorite screen buttons.
3. Touch and hold one of the favorite screen buttons until a beep is heard.
4. Repeat the steps to store another favorite item.
Note: To change the number of favorites displayed, go to Radio in the Vehicle Settings menu.
Natural Voice Recognition
Control the music source and make phone calls hands-free (after pairing your Bluetooth-enabled phone) using the natural voice recognition system.
1. Press the Push to Talk button on the steering wheel.
2. The radio will say “Command please,” followed by a beep.
3. After the beep, say what you want it to do using natural speech.
• Phone (using your paired phone) – Example command: “Call Amanda” or “Call 555-1212”
• Media Music Device Search (when connected to USB only) – Example command: “Play artist [name]” or “Play song [name]”
• Radio – Example command: “Tune FM 104.3” or “Tune XM Classic Vinyl”
• Help – Say “Help” for voice recognition assistance
Voice Pass-Thru
Voice Pass-Thru allows access to the voice recognition commands on a compatible cell phone; i.e. Siri or Voice Command. Visit my.buick.com/learn for more information.
To activate phone voice recognition, press and hold the Push to Talk button on the steering wheel for 2 seconds.
See your Infotainment System Owner Manual.
F Optional equipment
Page 13 of 20

13
OnStar® with 4G LTE and Wi-Fi®
Vehicle Personalization
Windshield Wipers
With OnStar 4G LTE and Wi-Fi, up to seven devices (smartphones, tablets and laptops) can be connected to high-speed internet through the vehicle’s built-in Wi-Fi hotspot.
To retrieve the SSID and password for the hotspot, press the OnStar Voice Command button on the overhead console or rearview mirror, wait for the prompt, and then say “Wi-Fi settings.” The information will be displayed on the screen.
For assistance, press the blue OnStar button or call 1-888-4-ONSTAR (1-888-466-7827).
Note: See onstar.com for a detailed instruction guide, vehicle availability, details, and system limitations.
See OnStar in your Owner Manual.
Some vehicle features can be customized using the Settings menus and the touch screen buttons. The Settings menus may include Time and Date, Language, Radio, Vehicle, Bluetooth, Display, Rear Camera, Return to Factory Settings and others.
1. Press the MENU knob or touch Settings on the Home page.
2. Select the desired menu item.
3. Select the desired feature and setting.
4. Press BACK to exit each menu.See Instruments and Controls in your Owner Manual.
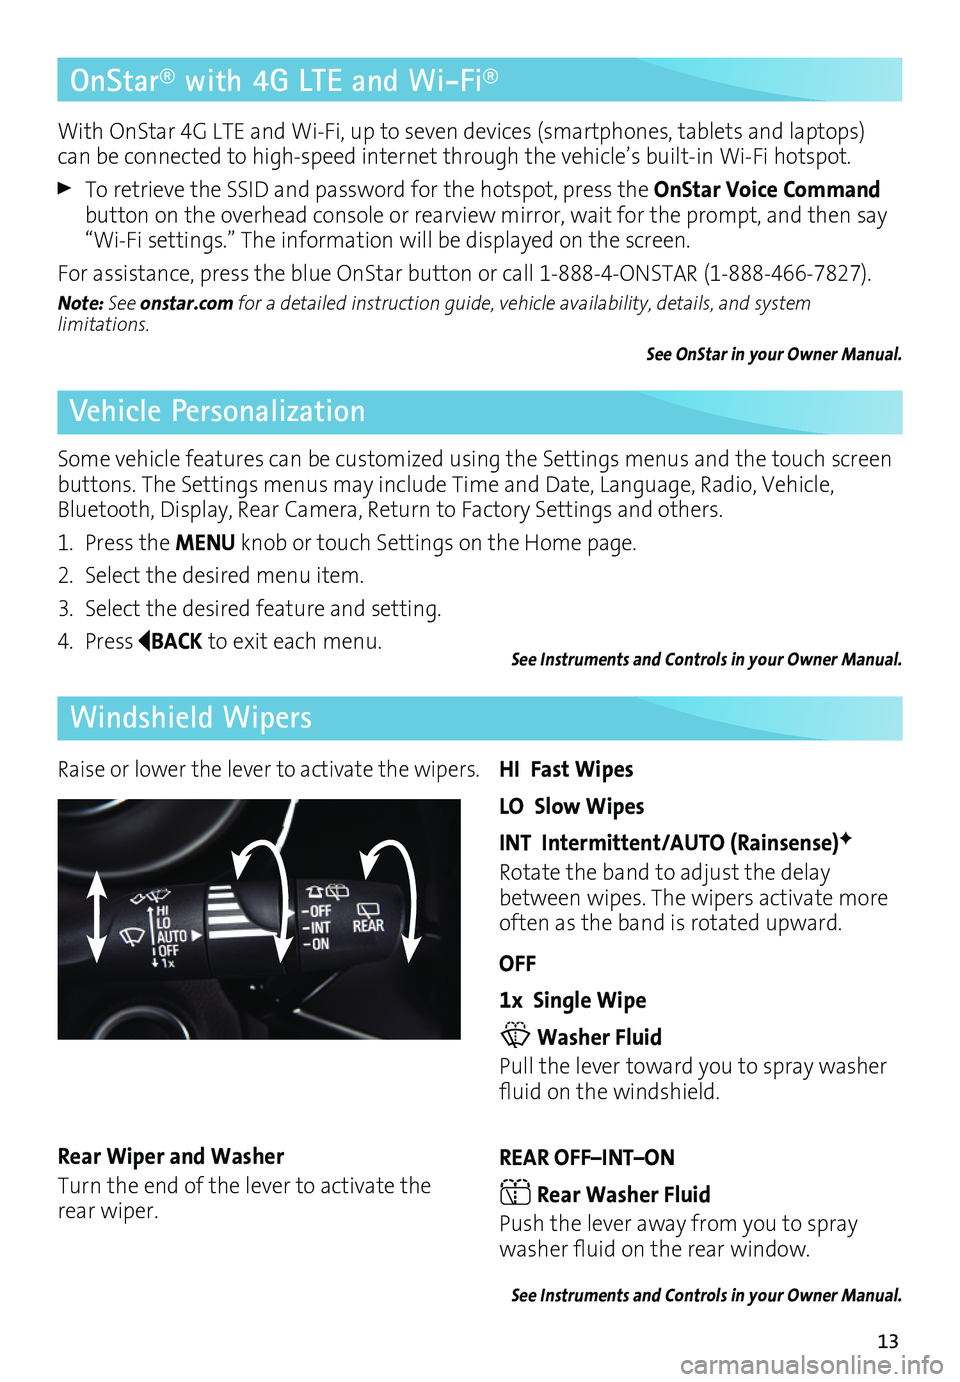
Raise or lower the lever to activate the wipers.HI Fast Wipes
LO Slow Wipes
INT Intermittent/AUTO (Rainsense)F
Rotate the band to adjust the delay between wipes. The wipers activate more often as the band is rotated upward.
OFF
1x Single Wipe
Washer Fluid
Pull the lever toward you to spray washer fluid on the windshield.
REAR OFF–INT–ON
Rear Washer Fluid
Push the lever away from you to spray washer fluid on the rear window.
See Instruments and Controls in your Owner Manual.
Rear Wiper and Washer
Turn the end of the lever to activate the rear wiper.
Page 14 of 20

14F Optional equipment
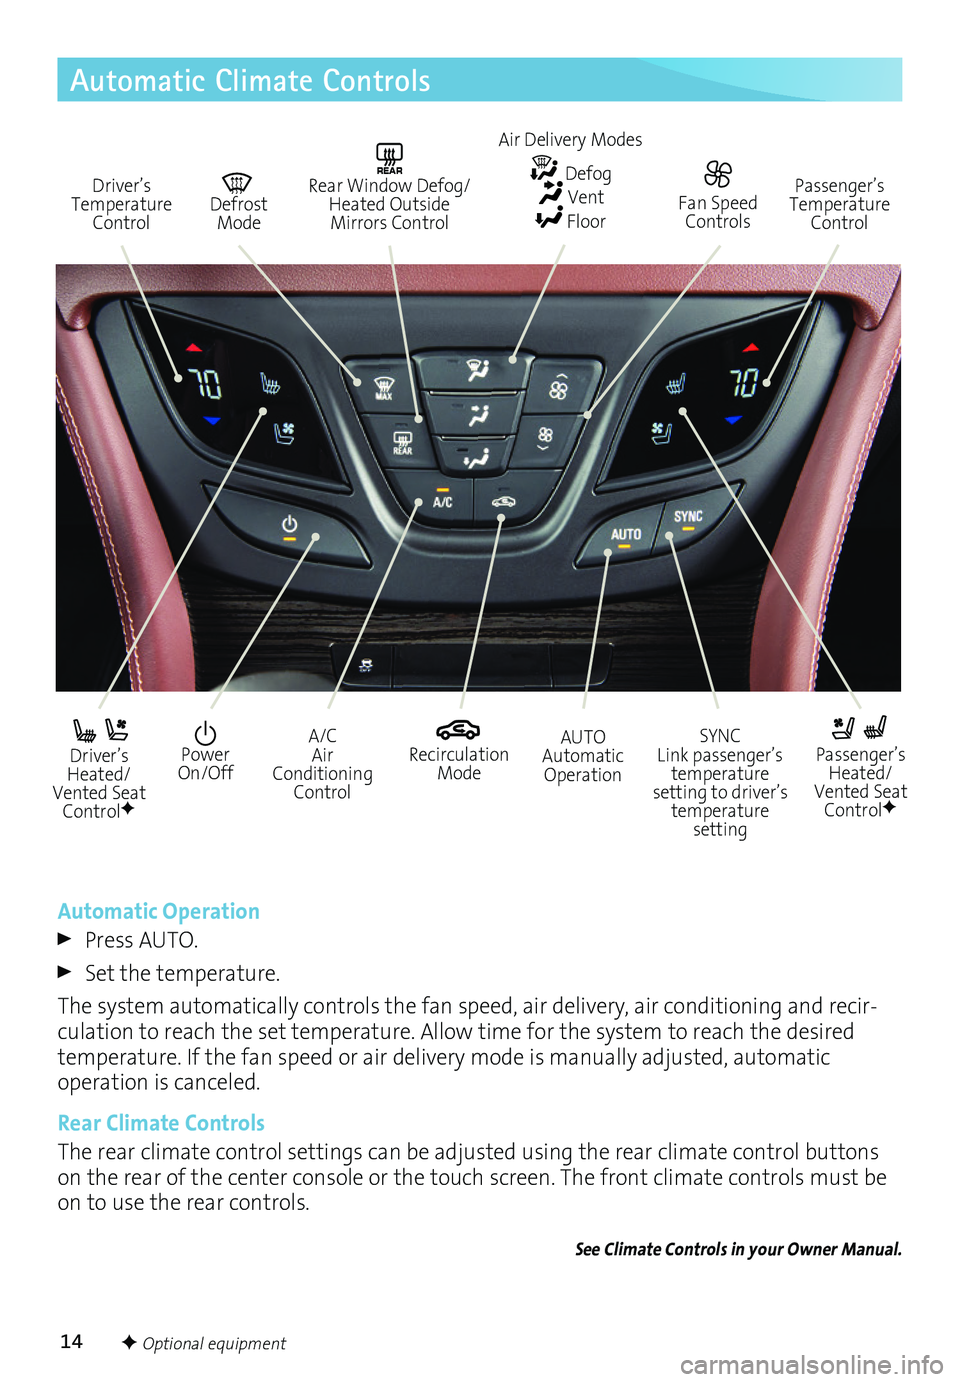
Automatic Climate Controls
Driver’s Temperature Control
REAR Rear Window Defog/Heated Outside Mirrors Control
Defrost Mode
Passenger’s Temperature Control
Driver’s Heated/Vented Seat ControlF
Passenger’s Heated/Vented Seat ControlF
Recirculation Mode
Power On/Off
A/C Air Conditioning Control
SYNC Link passenger’s temperature setting to driver’s temperature setting
AUTO Automatic Operation
Automatic Operation
Press AUTO.
Set the temperature.
The system automatically controls the fan speed, air delivery, air conditioning and recir-culation to reach the set temperature. Allow time for the system to reach the desired
temperature. If the fan speed or air delivery mode is manually adjusted, automatic
operation is canceled.
Rear Climate Controls
The rear climate control settings can be adjusted using the rear climate control buttons on the rear of the center console or the touch screen. The front climate controls must be on to use the rear controls.
See Climate Controls in your Owner Manual.
Fan Speed Controls
Air Delivery Modes
Defog Vent Floor