2017 BMW 6 SERIES GRAN COUPE lock
[x] Cancel search: lockPage 219 of 261
Closing the hood
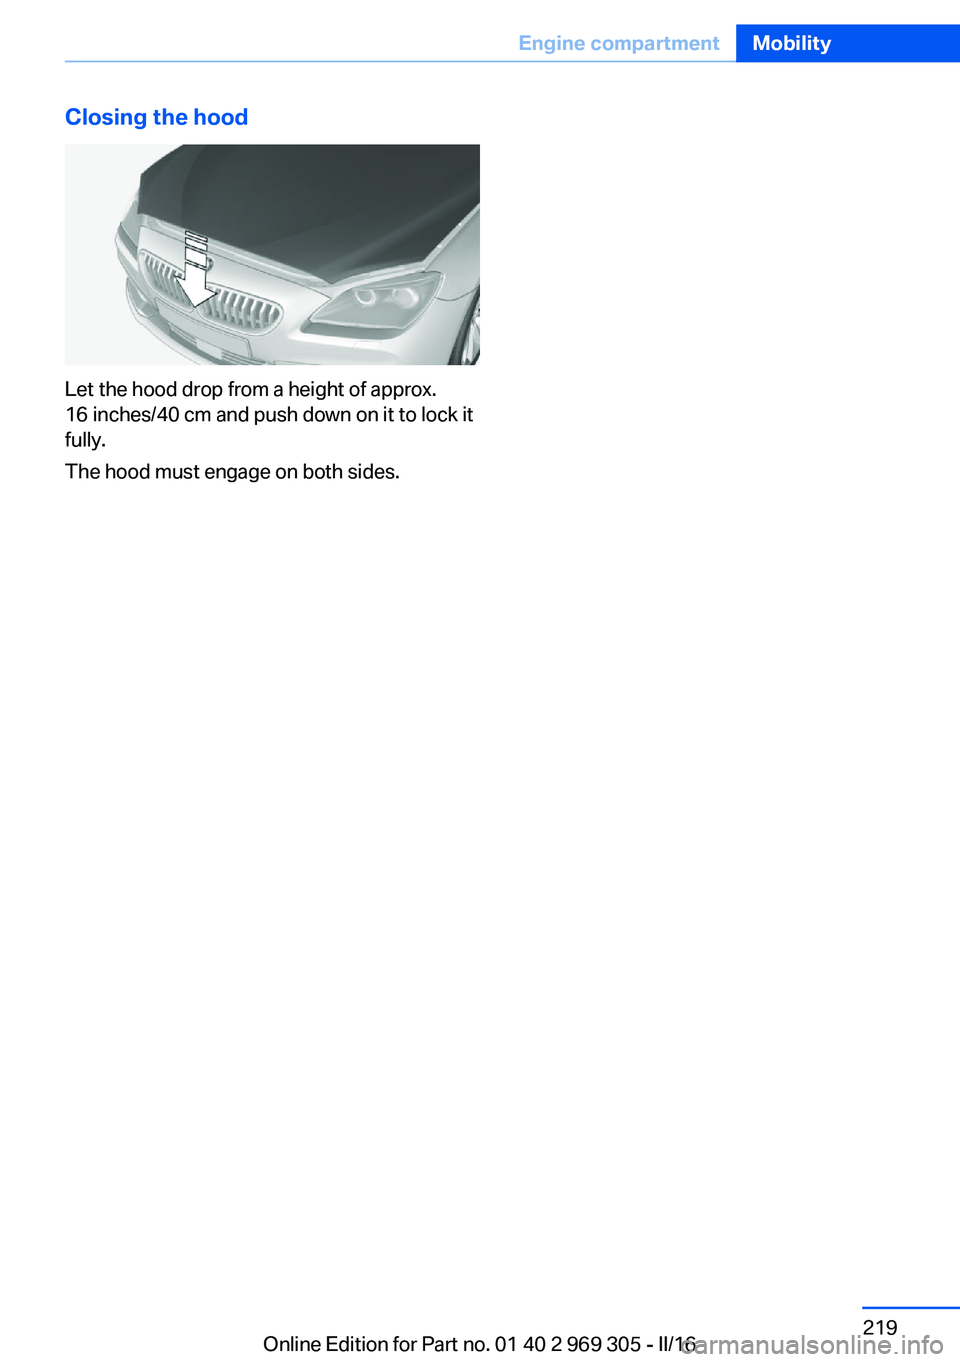
Let the hood drop from a height of approx.
16 inches/40 cm and push down on it to lock it
fully.
The hood must engage on both sides.
Seite 219Engine compartmentMobility219
Online Edition for Part no. 01 40 2 969 305 - II/16
Page 222 of 261
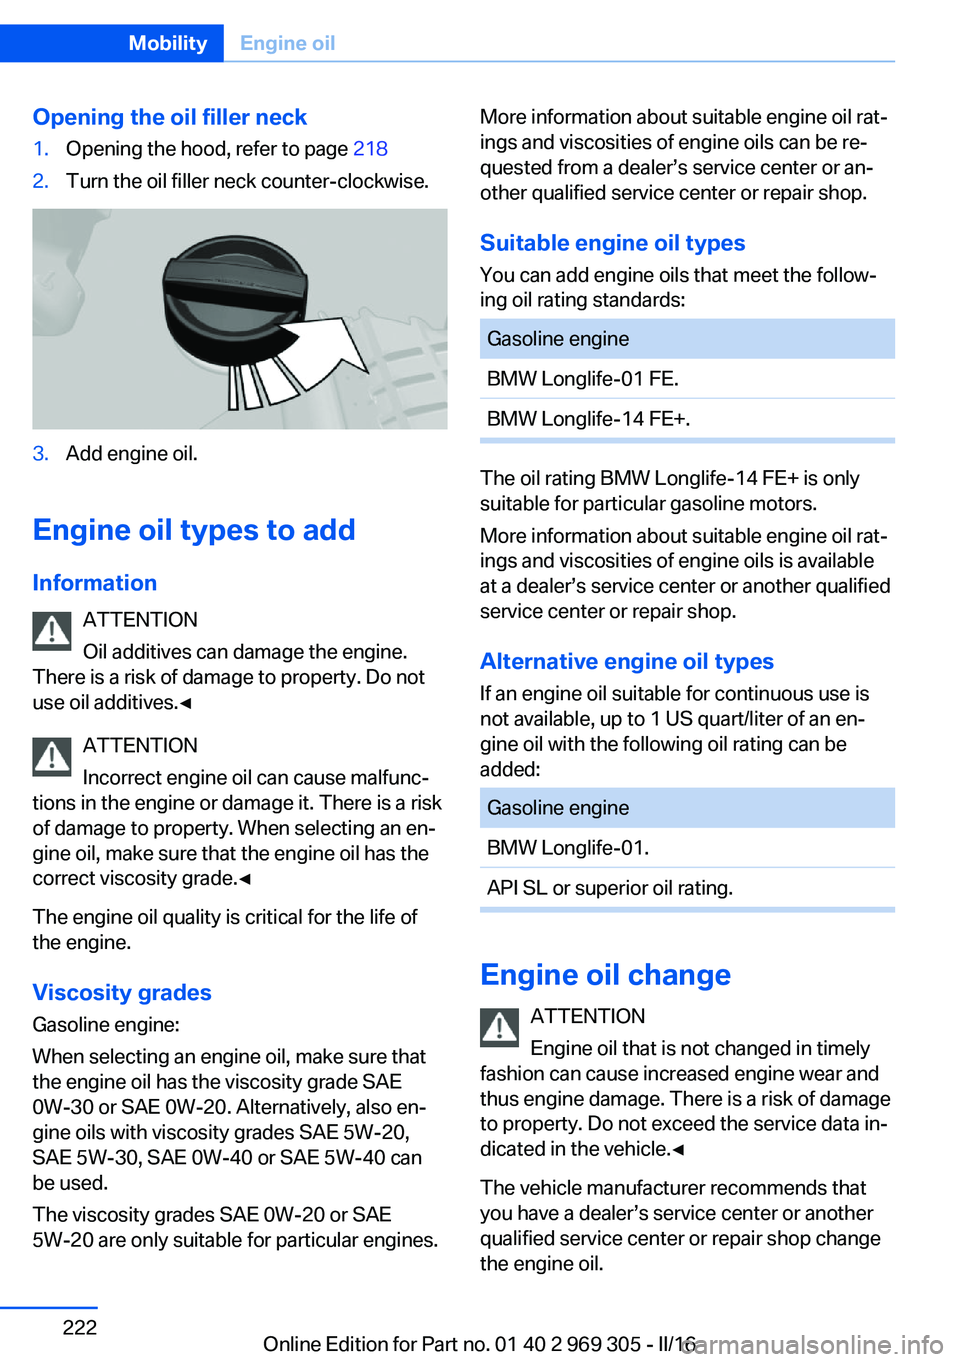
Opening the oil filler neck1.Opening the hood, refer to page 2182.Turn the oil filler neck counter-clockwise.3.Add engine oil.
Engine oil types to add
Information ATTENTION
Oil additives can damage the engine.
There is a risk of damage to property. Do not
use oil additives.◀
ATTENTION
Incorrect engine oil can cause malfunc‐
tions in the engine or damage it. There is a risk
of damage to property. When selecting an en‐
gine oil, make sure that the engine oil has the
correct viscosity grade.◀
The engine oil quality is critical for the life of
the engine.
Viscosity gradesGasoline engine:
When selecting an engine oil, make sure that
the engine oil has the viscosity grade SAE
0W-30 or SAE 0W-20. Alternatively, also en‐
gine oils with viscosity grades SAE 5W-20,
SAE 5W-30, SAE 0W-40 or SAE 5W-40 can
be used.
The viscosity grades SAE 0W-20 or SAE
5W-20 are only suitable for particular engines.
More information about suitable engine oil rat‐
ings and viscosities of engine oils can be re‐
quested from a dealer’s service center or an‐
other qualified service center or repair shop.
Suitable engine oil types
You can add engine oils that meet the follow‐
ing oil rating standards:Gasoline engineBMW Longlife-01 FE.BMW Longlife-14 FE+.
The oil rating BMW Longlife-14 FE+ is only
suitable for particular gasoline motors.
More information about suitable engine oil rat‐
ings and viscosities of engine oils is available
at a dealer’s service center or another qualified
service center or repair shop.
Alternative engine oil typesIf an engine oil suitable for continuous use is
not available, up to 1 US quart/liter of an en‐ gine oil with the following oil rating can be
added:
Gasoline engineBMW Longlife-01.API SL or superior oil rating.
Engine oil change
ATTENTION
Engine oil that is not changed in timely
fashion can cause increased engine wear and
thus engine damage. There is a risk of damage
to property. Do not exceed the service data in‐
dicated in the vehicle.◀
The vehicle manufacturer recommends that
you have a dealer’s service center or another
qualified service center or repair shop change
the engine oil.
Seite 222MobilityEngine oil222
Online Edition for Part no. 01 40 2 969 305 - II/16
Page 224 of 261
CoolantVehicle features and optionsThis chapter describes all standard, country-
specific and optional features offered with the
series. It also describes features that are not
necessarily available in your car, e. g., due to
the selected options or country versions. This
also applies to safety-related functions and
systems. The respectively applicable country
provisions must be observed when using the
respective features and systems.
Information WARNING
With the engine hot and the cooling sys‐
tem open, coolant can escape and lead to
scalding. There is a a risk of injury. Only open
the cooling system with the engine cooled
down.◀
WARNING
Additives are harmful and incorrect addi‐
tives can damage the engine. There is a risk of
injury and risk of property damage. Do not al‐
low additives to come into contact with skin,
eyes or articles of clothing. Use suitable addi‐
tives only.◀
Coolant consists of water and additives.
Not all commercially available additives are
suitable for the vehicle. Information about suit‐
able additives is available from a dealer’s serv‐
ice center or another qualified service center or
repair shop.
Coolant level
General information
If there is no Min. and Max. mark in the filler
neck of the coolant reservoir, have the coolantlevel checked if needed by a dealer’s service
center or another qualified service center or re‐
pair shop and add coolant as needed.
Overview
Depending on the engine installation, the cool‐
ant reservoir is located on the right side or the
left side of the engine compartment.
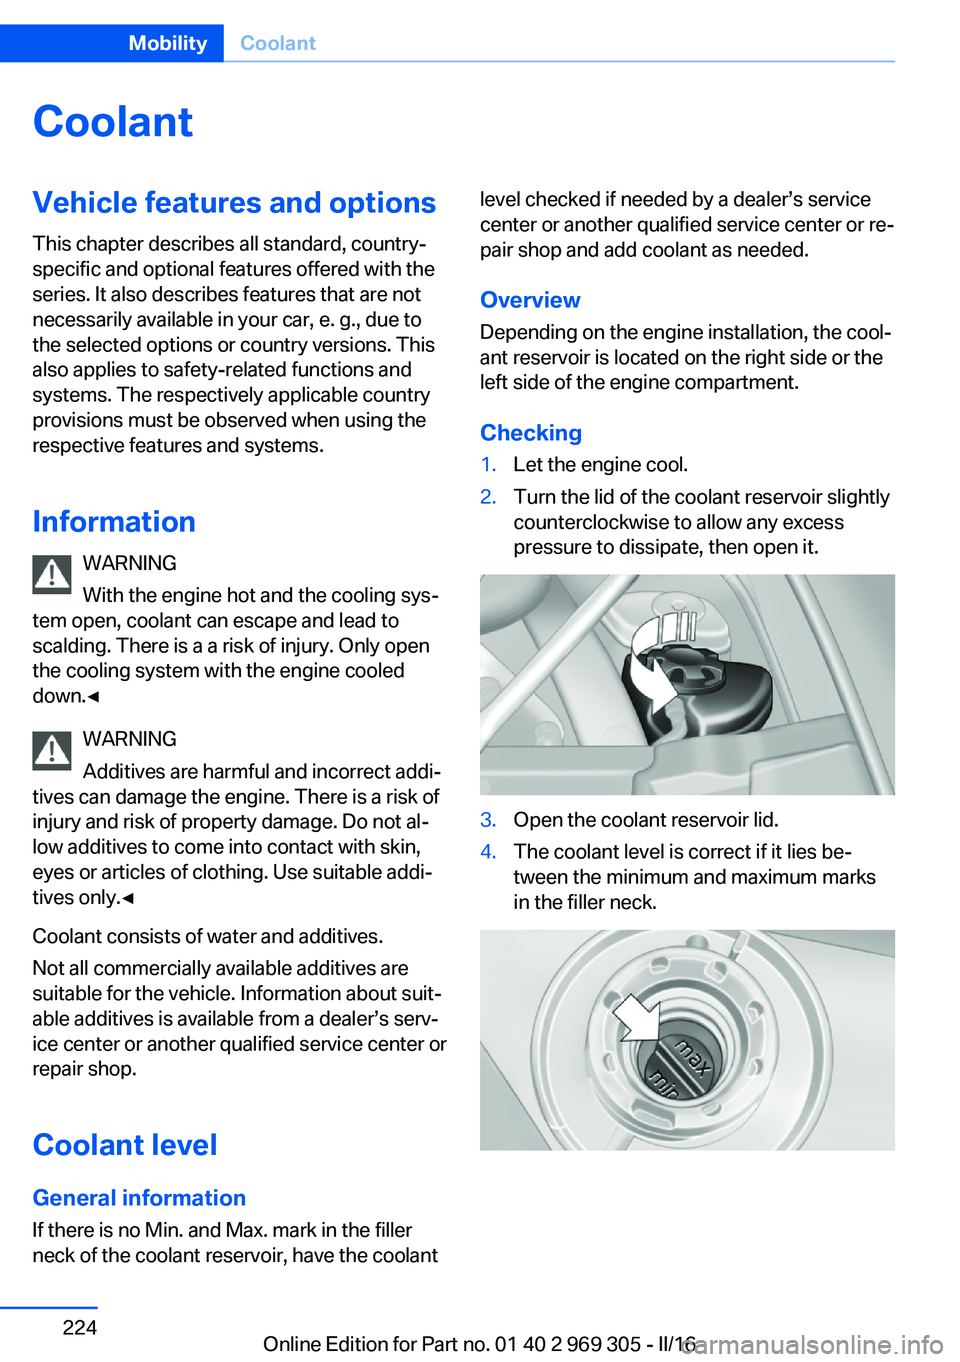
Checking1.Let the engine cool.2.Turn the lid of the coolant reservoir slightly
counterclockwise to allow any excess
pressure to dissipate, then open it.3.Open the coolant reservoir lid.4.The coolant level is correct if it lies be‐
tween the minimum and maximum marks
in the filler neck.Seite 224MobilityCoolant224
Online Edition for Part no. 01 40 2 969 305 - II/16
Page 225 of 261
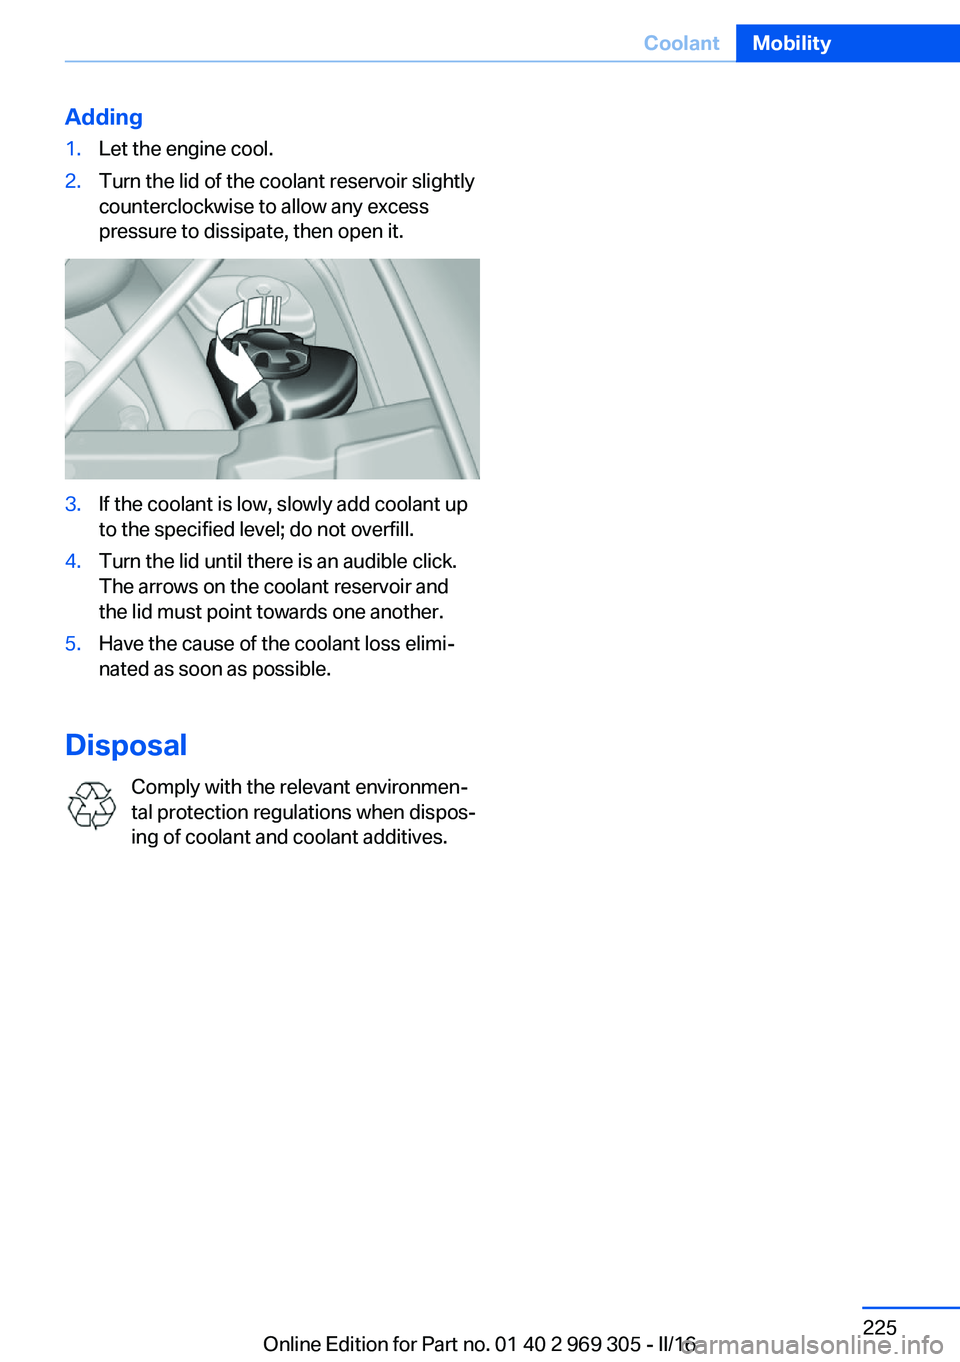
Adding1.Let the engine cool.2.Turn the lid of the coolant reservoir slightly
counterclockwise to allow any excess
pressure to dissipate, then open it.3.If the coolant is low, slowly add coolant up
to the specified level; do not overfill.4.Turn the lid until there is an audible click.
The arrows on the coolant reservoir and
the lid must point towards one another.5.Have the cause of the coolant loss elimi‐
nated as soon as possible.
Disposal
Comply with the relevant environmen‐
tal protection regulations when dispos‐
ing of coolant and coolant additives.
Seite 225CoolantMobility225
Online Edition for Part no. 01 40 2 969 305 - II/16
Page 228 of 261
Replacing componentsVehicle features and optionsThis chapter describes all standard, country-
specific and optional features offered with the
series. It also describes features that are not
necessarily available in your car, e. g., due to
the selected options or country versions. This
also applies to safety-related functions and
systems. The respectively applicable country
provisions must be observed when using the
respective features and systems.
Onboard vehicle tool kit
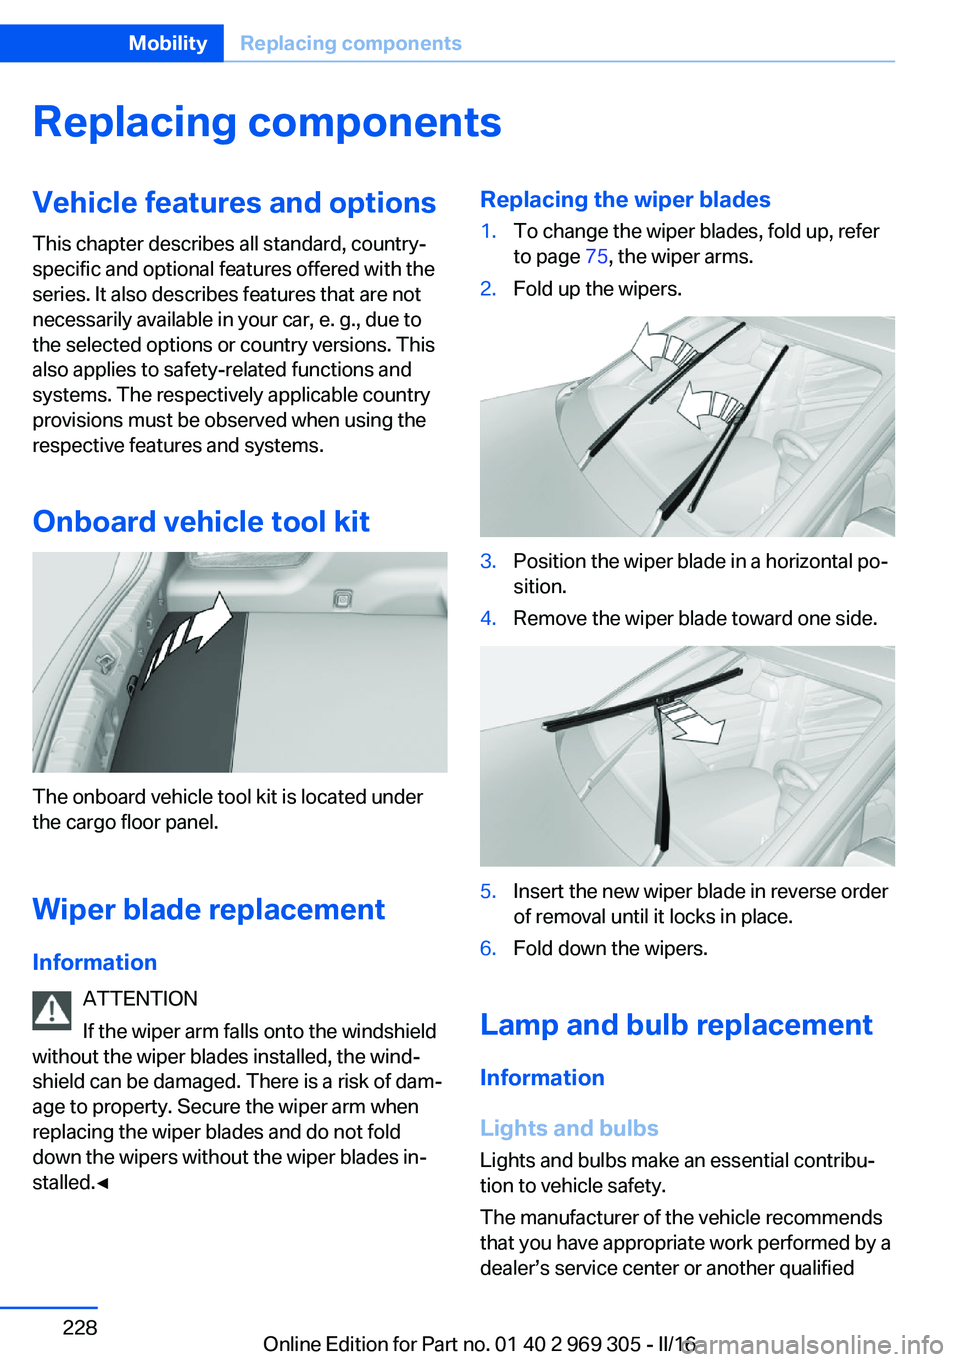
The onboard vehicle tool kit is located under
the cargo floor panel.
Wiper blade replacement Information ATTENTION
If the wiper arm falls onto the windshield
without the wiper blades installed, the wind‐
shield can be damaged. There is a risk of dam‐
age to property. Secure the wiper arm when
replacing the wiper blades and do not fold
down the wipers without the wiper blades in‐
stalled.◀
Replacing the wiper blades1.To change the wiper blades, fold up, refer
to page 75, the wiper arms.2.Fold up the wipers.3.Position the wiper blade in a horizontal po‐
sition.4.Remove the wiper blade toward one side.5.Insert the new wiper blade in reverse order
of removal until it locks in place.6.Fold down the wipers.
Lamp and bulb replacement
Information
Lights and bulbs
Lights and bulbs make an essential contribu‐
tion to vehicle safety.
The manufacturer of the vehicle recommends
that you have appropriate work performed by a
dealer’s service center or another qualified
Seite 228MobilityReplacing components228
Online Edition for Part no. 01 40 2 969 305 - II/16
Page 231 of 261
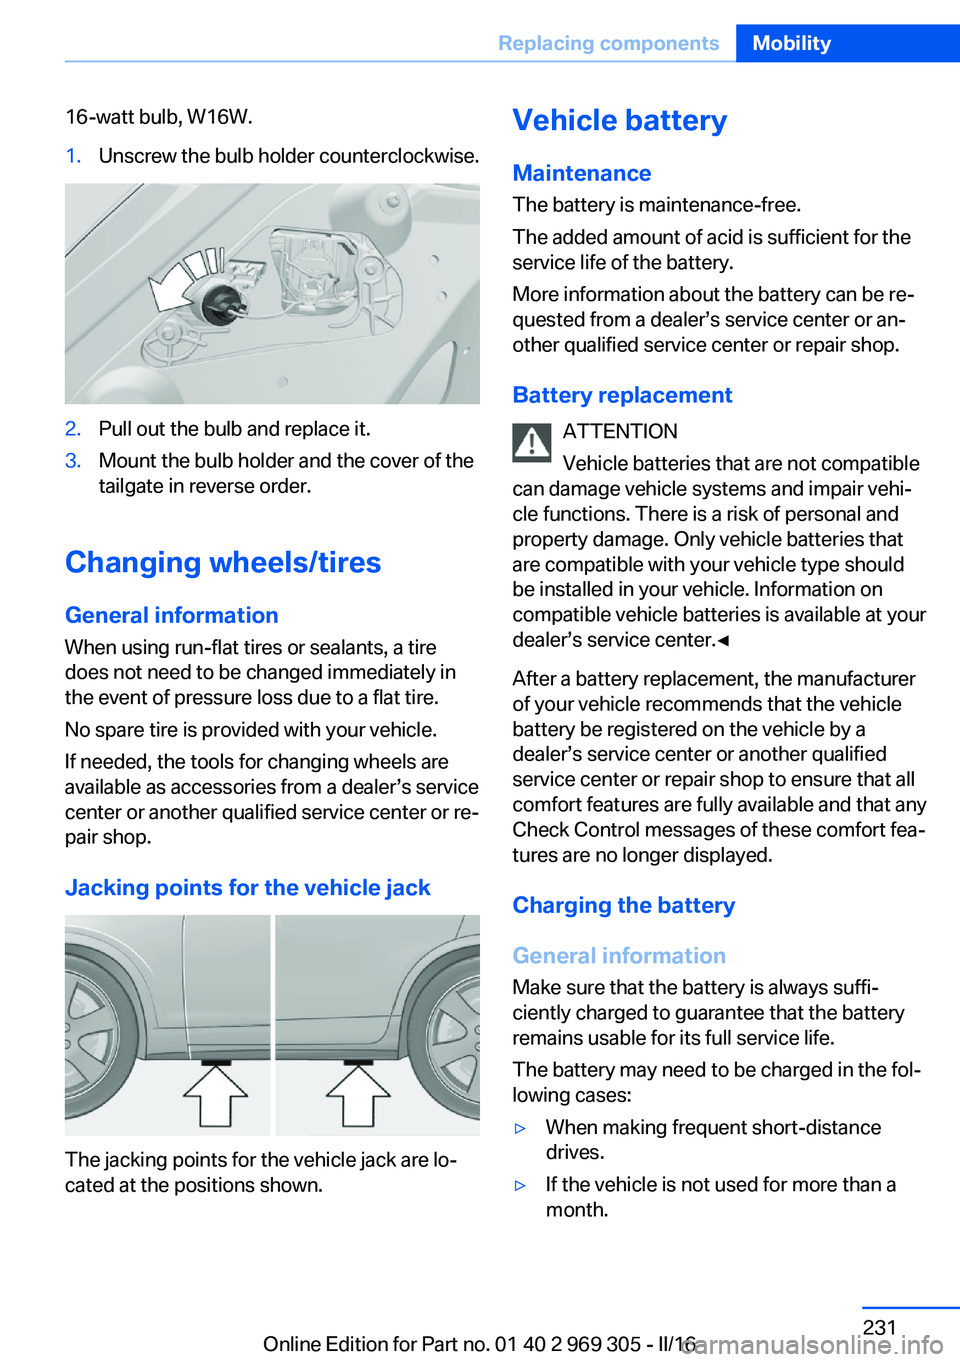
16-watt bulb, W16W.1.Unscrew the bulb holder counterclockwise.2.Pull out the bulb and replace it.3.Mount the bulb holder and the cover of the
tailgate in reverse order.
Changing wheels/tires
General information
When using run-flat tires or sealants, a tire
does not need to be changed immediately in
the event of pressure loss due to a flat tire.
No spare tire is provided with your vehicle.
If needed, the tools for changing wheels are
available as accessories from a dealer’s service
center or another qualified service center or re‐
pair shop.
Jacking points for the vehicle jack
The jacking points for the vehicle jack are lo‐
cated at the positions shown.
Vehicle battery
Maintenance
The battery is maintenance-free.
The added amount of acid is sufficient for the
service life of the battery.
More information about the battery can be re‐
quested from a dealer’s service center or an‐ other qualified service center or repair shop.
Battery replacement ATTENTION
Vehicle batteries that are not compatible
can damage vehicle systems and impair vehi‐
cle functions. There is a risk of personal and
property damage. Only vehicle batteries that
are compatible with your vehicle type should
be installed in your vehicle. Information on
compatible vehicle batteries is available at your
dealer’s service center.◀
After a battery replacement, the manufacturer
of your vehicle recommends that the vehicle
battery be registered on the vehicle by a
dealer’s service center or another qualified
service center or repair shop to ensure that all
comfort features are fully available and that any
Check Control messages of these comfort fea‐
tures are no longer displayed.
Charging the battery
General information
Make sure that the battery is always suffi‐
ciently charged to guarantee that the battery
remains usable for its full service life.
The battery may need to be charged in the fol‐
lowing cases:▷When making frequent short-distance
drives.▷If the vehicle is not used for more than a
month.Seite 231Replacing componentsMobility231
Online Edition for Part no. 01 40 2 969 305 - II/16
Page 234 of 261
steps to help you under certain circum‐
stances.
For this, data are transmitted to the BMW
Response Center which serve to deter‐
mine the necessary rescue measures. E.g.
the current position of the vehicle, if it can
be established.▷If the LED is flashing green, but the BMW
Response Center can no longer be heard
via the speaker, you can nevertheless still
be heard at the BMW Response Center.
Initiating an Emergency Request
automatically
Under certain conditions, an Emergency Re‐
quest is automatically initiated immediately af‐
ter a severe accident. Automatic Collision Noti‐
fication is not affected by pressing the SOS
button.
Roadside Assistance
Service availability Roadside Assistance can be reached around
the clock in many countries. You can obtain as‐
sistance there in the event of a vehicle break‐
down.
Roadside Assistance The Roadside Assistance phone number can
be viewed on the iDrive or a connection to
Roadside Assistance can be established di‐
rectly.
Warning triangle
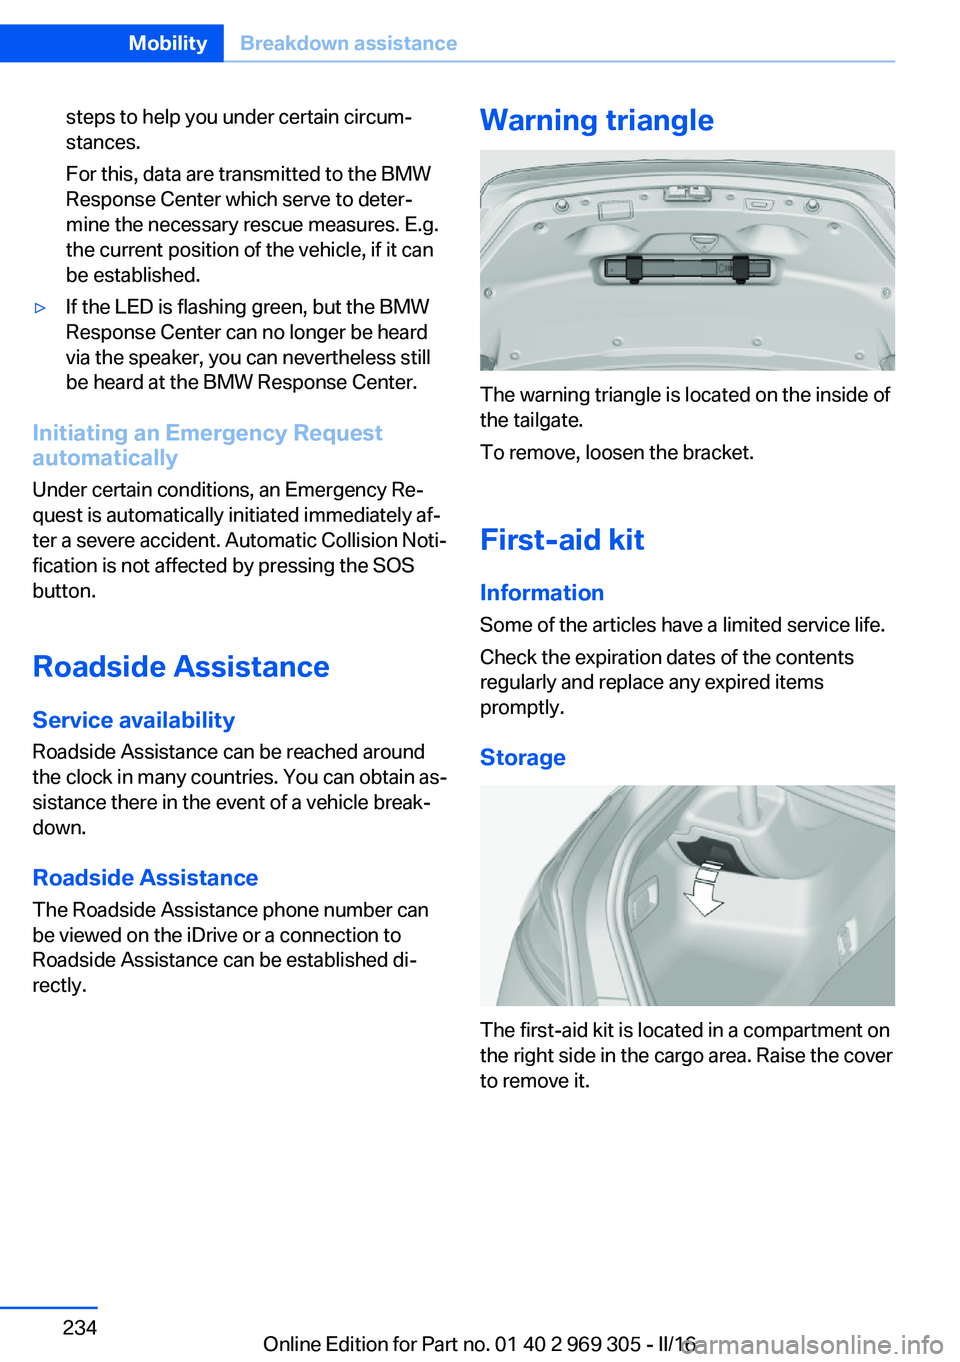
The warning triangle is located on the inside of
the tailgate.
To remove, loosen the bracket.
First-aid kit InformationSome of the articles have a limited service life.
Check the expiration dates of the contents
regularly and replace any expired items
promptly.
Storage
The first-aid kit is located in a compartment on
the right side in the cargo area. Raise the cover
to remove it.
Seite 234MobilityBreakdown assistance234
Online Edition for Part no. 01 40 2 969 305 - II/16
Page 236 of 261
corresponding engine or body ground of
the vehicle to be started.
Starting the engine
Never use spray fluids to start the engine.
1.Start the engine of the assisting vehicle
and let it run for several minutes at an in‐
creased idle speed.2.Start the engine of the vehicle that is to be
started in the usual way.
If the first starting attempt is not success‐
ful, wait a few minutes before making an‐
other attempt in order to allow the dis‐
charged battery to recharge.3.Let both engines run for several minutes.4.Disconnect the jumper cables in the re‐
verse order.
Check the battery and recharge if needed.
Tow-starting and towing Information WARNING
Due to system limits, individual functions
can malfunction during tow-starting/towing
with the Intelligent Safety systems activated,
e.g., approach control warning with light brak‐
ing function. There is risk of an accident.
Switch all Intelligent Safety systems off prior to
tow-starting/towing.◀
Steptronic transmission: transporting
the vehicle
Information
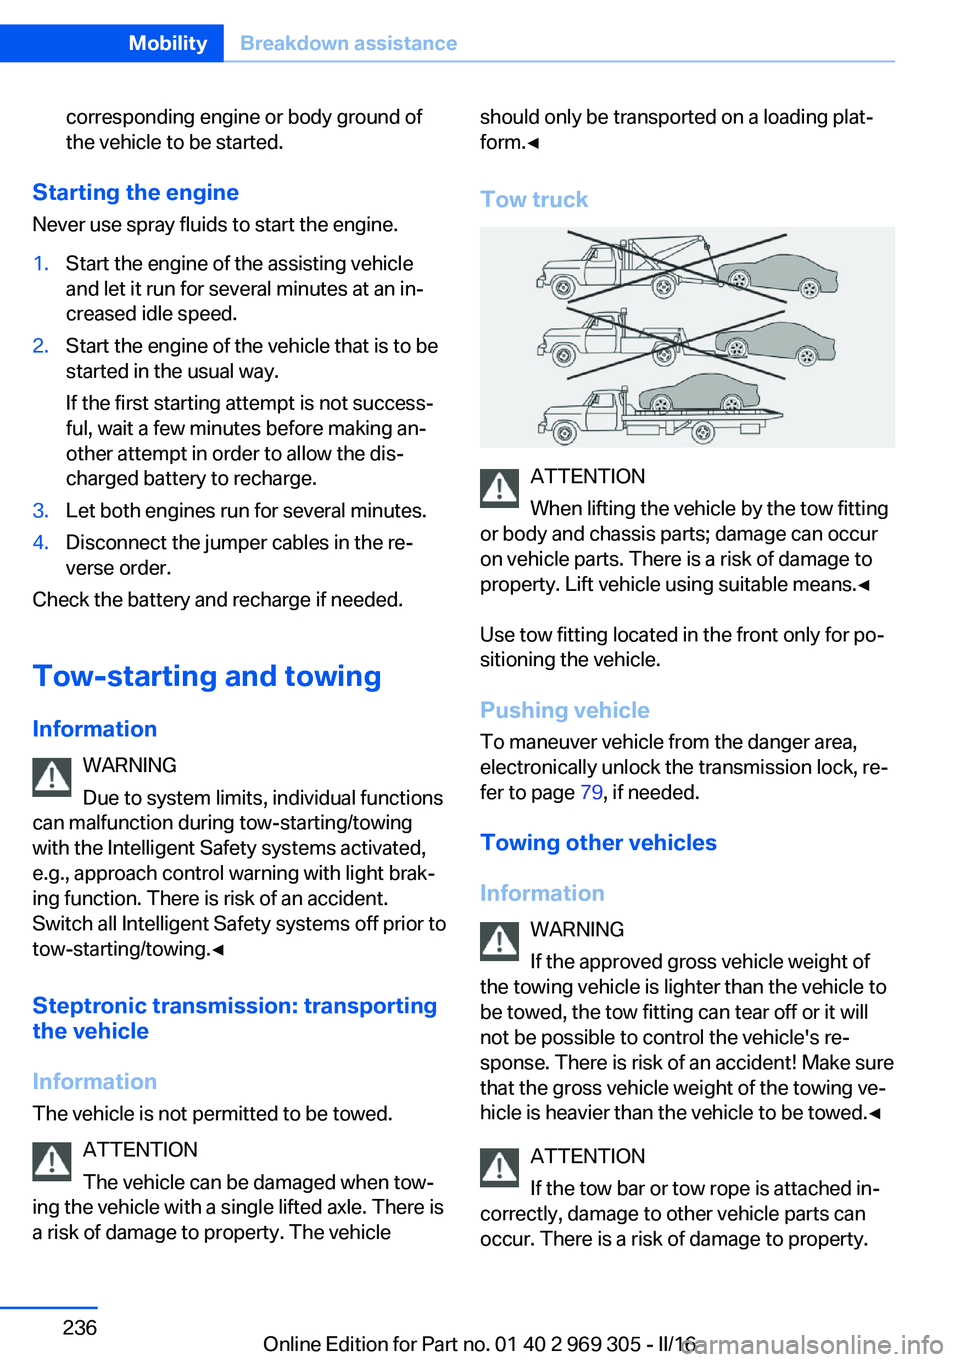
The vehicle is not permitted to be towed.
ATTENTION
The vehicle can be damaged when tow‐
ing the vehicle with a single lifted axle. There is a risk of damage to property. The vehicle
should only be transported on a loading plat‐
form.◀
Tow truck
ATTENTION
When lifting the vehicle by the tow fitting
or body and chassis parts; damage can occur
on vehicle parts. There is a risk of damage to
property. Lift vehicle using suitable means.◀
Use tow fitting located in the front only for po‐
sitioning the vehicle.
Pushing vehicle To maneuver vehicle from the danger area,
electronically unlock the transmission lock, re‐
fer to page 79, if needed.
Towing other vehicles
Information WARNING
If the approved gross vehicle weight of
the towing vehicle is lighter than the vehicle to
be towed, the tow fitting can tear off or it will
not be possible to control the vehicle's re‐
sponse. There is risk of an accident! Make sure
that the gross vehicle weight of the towing ve‐
hicle is heavier than the vehicle to be towed.◀
ATTENTION
If the tow bar or tow rope is attached in‐
correctly, damage to other vehicle parts can
occur. There is a risk of damage to property.
Seite 236MobilityBreakdown assistance236
Online Edition for Part no. 01 40 2 969 305 - II/16