2017 AUDI TT ROADSTER ECO mode
[x] Cancel search: ECO modePage 9 of 314
co
co
.... N
" N .... 0
" "' c:o
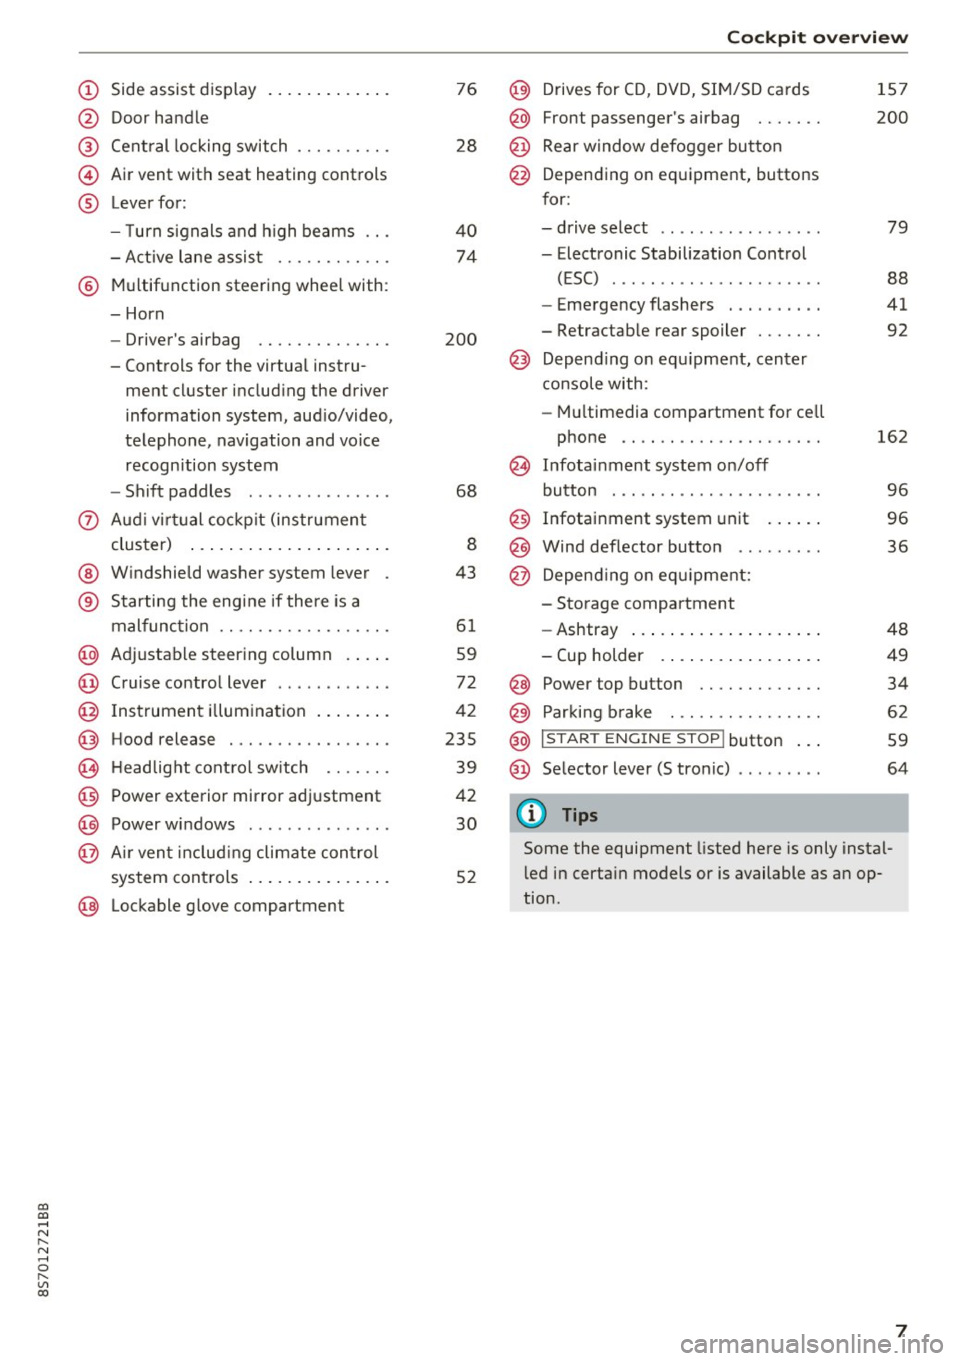
(!) Side assist display ..... ... .. .. .
@ Door handle
®
©
®
Cent ral locking switch
Air vent with seat heating controls
Lever for:
- T urn s ignals and h igh beams .. .
- Active lane assis t ......... .. .
® Multifunction steering wheel with :
- Horn
- Driver's ai rbag .. ......... .. .
- Controls for the virtual instru-
ment cluster includ ing the driver
information system, aud io/video,
telephone, navigation and voice
recogn ition system
- Shift paddles . .... ..... ... . .
0 Aud i v ir tu al co ckpit (instrument
cluster) ... .... .. .... ... .. .. .
@ W indshield washer system lever
® S tarting the engi ne if the re is a
mal func tion .. ........... .. .. .
@ Adjustab le st eering column . ... .
@ Cruise co ntrol lever .. ..... ... . .
@ Ins trument i llum ination ... .. .. .
@ Hood release . .... ......... .. .
0 H eadlight cont rol sw itch .... .. .
@ Power exterior mirror adjustment
@ Power windows . .... ..... ... . .
@ A ir ven t incl uding climate con trol
system controls ... .... ... .. .. .
@ Lockable g love compartment
76
28
40
74
200
68
8
43
6 1
59
72
42
235
39
42
30
52
Coc kpit o ve rv iew
@) Drives for CD, DVD, SI M/SD cards
@ Front passenger's ai rbag ...... .
@ Rear window defogger bu tton
@ Depending on equipment, buttons
for:
- drive select .. .. ............ .
- Electronic Stabilization Control
(ESC) ..... .. .. ............ .
- Emergency flashers . ...... .. .
- Retractab le rear spoiler ...... .
@ Depend ing on equ ipment , center
co nsole with:
- Mu ltimedia compartment for cell
phone .... .. .............. .
~ Infotai nment system on/off
button . .. .. .. .. ............ .
@ Infotainment system unit ... .. .
@ Wind deflector button ........ .
@ Depending o n eq uipment:
- Storage compartment
- Ashtray ... .. ... .. .. ..... .. .
- Cup holder .. ... .. .. ..... .. .
@ Power top button ............ .
@ Parking b rake . .. ............ .
@ I S TAR T ENGINE ST OP I butto n ...
@ Selector lever (S tronic)
@ Tips
1S7
200
79
88
41
92
162
9 6
96
36
48
49
34
62
59
64
Some the equipment listed here is only instal
l ed in certa in models or is available as an op
tion.
7
Page 34 of 314
Opening and closing
the equipment. Peop le can be injured or prop
erty can be damaged if struck when closing.
(D Tips
- For secu rity reasons, we recommend that
you clear the programmed buttons before
selling the vehicle.
- For additional information about Homelink,
v is it
www .homelink .com.
- For the Declaration of Conformity with the
provisions from the FCC in the United States
and Industry Canada, see¢
page 296 .
Operation
Applies to: ve hicles w ith garage doo r opener (Homeli nk)
Fig. 26 Contro l pa nel above the inter io r rearview mirror
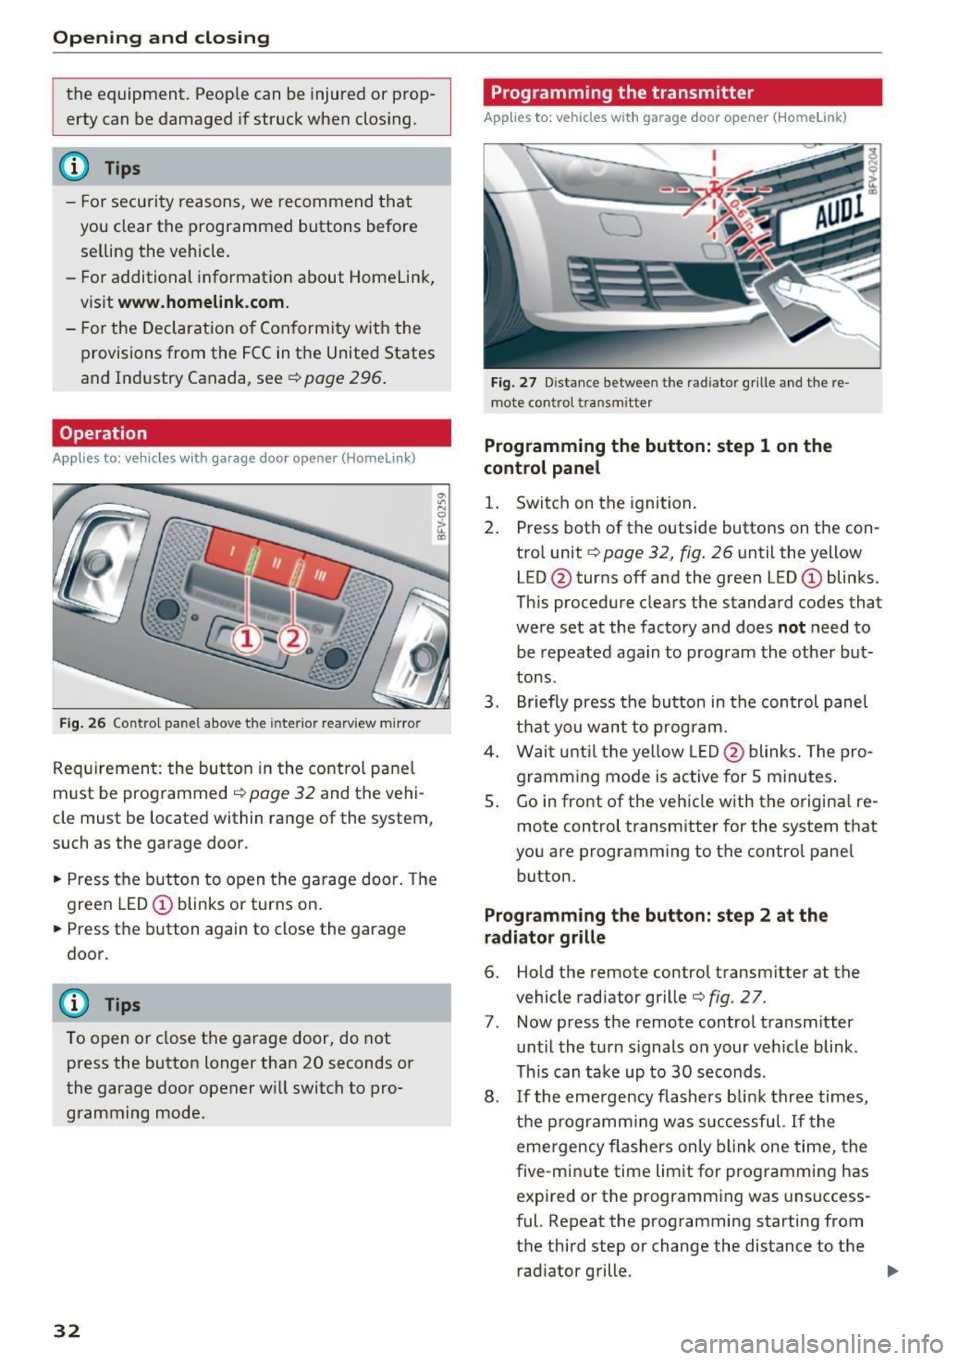
Requirement: the but ton in the control panel
m ust be programmed
i:!> page 32 and the vehi
cle must be located within range of the system,
such as the garage door .
.. Press the button to open the garage door. The
green LED
CD blinks or turns on.
.. Press the button again to close the garage
door.
(D} Tips
To open or close the garage door, do not
press the button longer than 20 seconds or
the garage door opener w ill switch to pro
gramming mode.
32
Programming the transmitter
App lies to : vehicles wit h garage door o pener (Horne link)
Fig. 27 D istance between the rad iator g rille and the re
mote contro l transm itter
Programming the button: step 1 on the
control panel
1. Switch on the ignition.
2. Press both of the outside buttons on the con
trol unit ¢
page 32, fig. 26 until the yellow
LED @turns off and the green LED
CD blinks.
This procedure clears the standard codes that
were set at the factory and does
not need to
be repeated again to program the other but
tons.
3. Briefly press the button in the control panel
that you want to program.
4. Wait until the yellow LED@blinks. The pro
gramming mode is active for S minutes.
5. Go in front of the vehicle w ith the origina l re
mote control transmitter for the system that
you are programming to the control panel button .
Programming the button: step 2 at the
radiator grille
6. Hold the remote control transmitter at the
vehicle radiator grille¢
fig. 27.
7 . Now press the remote control transm itter
until the turn signals on your veh icle blink .
This can take up to 30 seconds .
8. If the eme rgency flashers blink three times,
the programming was successful. If the
emergency flashers only blink one time, the
five -min ute time limit for programming has
expired or the programming was unsuccess
ful. Repeat the programming starting from
the third step or change the distance to the radiator grille.
Page 35 of 314
co
co
.... N
" N .... 0
" "' c:o
9. If the garage door or other systems do not
open with the Home link buttons even if the programm ing was successfu l, the system
may use a rolling code instead of a fixed
code. You must also then perform
ro lling
c o de progr amm ing
c:> page 33 .
The other two buttons in the contro l pane l can be
programmed using the instructions given above.
Star t wi th step 3 .
Dele ting button prog ramm ing
The programmed buttons cannot be de leted indi
vidually. They must be deleted all at once . Repro
gram the buttons if necessary.
"' Switch on the ignition.
.. Press both of the outside buttons on the con
trol unit until the yellow LED @turns off and
the green LED@ blinks.
Reprogramming button s
"'Switch on the ignition.
"'T o reprogram an individua l button, press the
desired b utton until the green LED(!) turns off
and the ye llow LED @star ts to blink (after ap
proximately 20 seconds). Release the button
immediately. The programming mode is active
for S m inutes.
"' Cont inue with step 5 .
@ Tips
-The distance needed between the remote
control transm itter and the Homelink mod
ule in the rad iator grille c:>
fig. 27 depends
on the system you are programm ing .
- Depending on the system model, you may need to release the button on the remote
control t ransm itter while it is programming
and press it again. Hold every posit ion you
try when programming for at least 15 sec
onds befo re trying a new posi tion. Keep an
eye on the vehicle turn signals while doing
this .
Op ening and cl osing
Rolling code programming
Applies to: vehicles with garage door opener (Home link)
On some systems, programming a rolling code is
also necessary.
Id enti fying a rolling c ode
"' Press the button in the control unit that is a l
ready programmed again and hold it down.
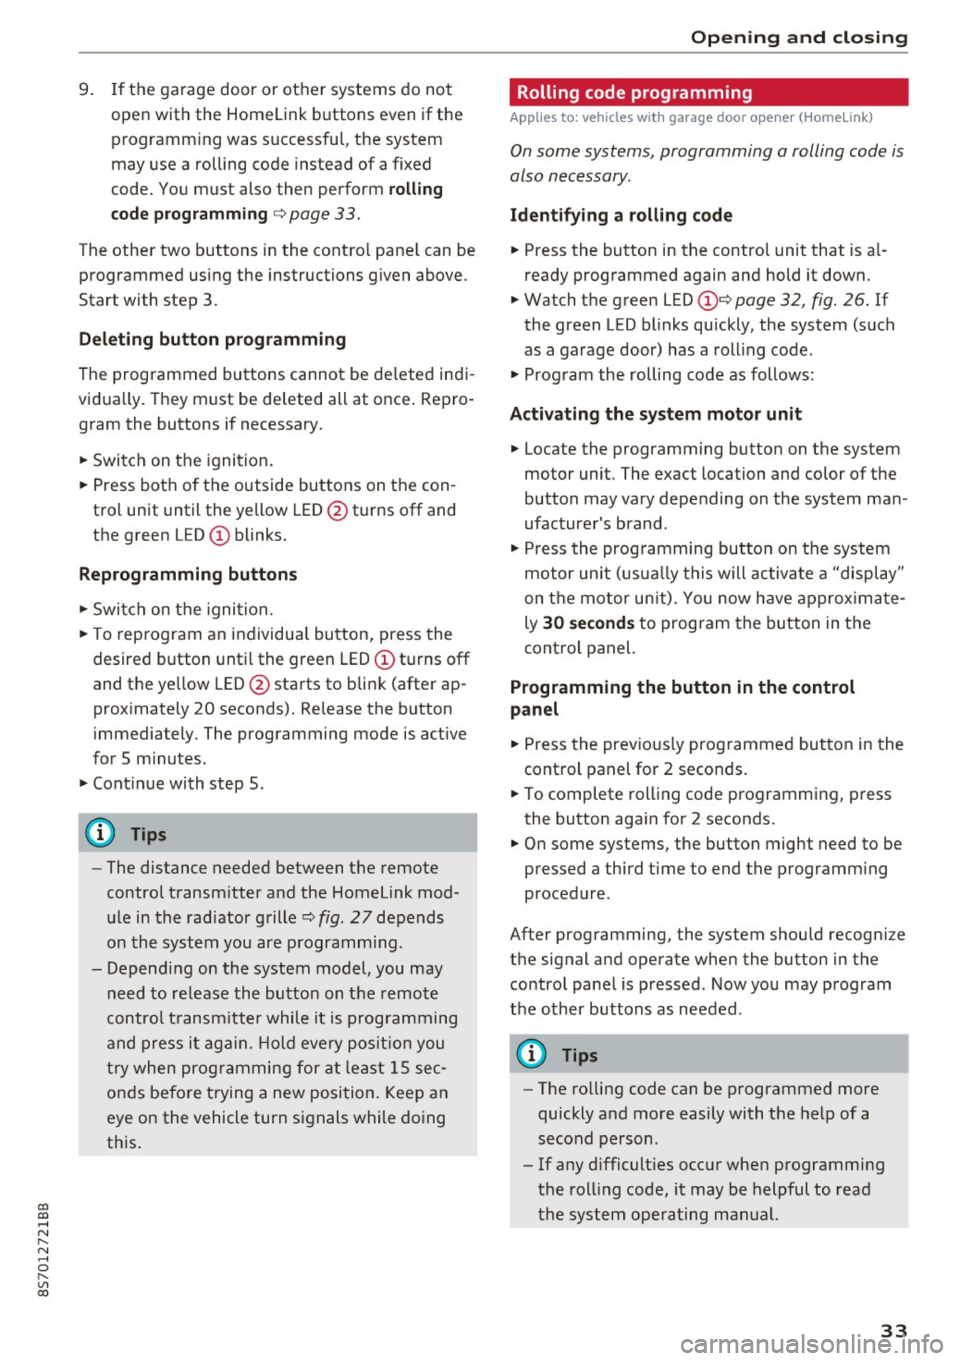
"' Watch the green LED (!)c:>
page 32 , fig. 26. If
the green L ED bl inks quickly, the system (such
as a garage door) has a roll ing code .
"' Program the rolling code as follows:
Acti vating the sys tem moto r unit
.. Locate the programming button on the system
motor unit. The exact location and color of the
button may vary depending on the system man
ufacturer 's brand .
"' Press the programming button on the system
motor unit (usua lly this will activa te a "display "
on the motor un it) . You now have approx ima te
ly
30 se cond s to prog ram the button in the
control panel.
Programming the button in the control
pan el
.. Press the previous ly programmed button in the
control panel for 2 seconds .
.. To complet e rolling code programming, press
the button again for 2 seconds.
.. On some systems, the button might need to be
pressed a third time to end the programm ing
procedure .
After programming, the system should recogni ze
the signal and operate when the button in the
control panel is pressed . Now you may program
the other buttons as needed .
(D Tips
-The ro lling code can be programmed more
quickly and more easily with the help of a
second person .
- If any d ifficult ies occur when programm ing
the roll ing code, it may be helpful to read
the system operating manual.
33
Page 46 of 314
Lights and Vi sion
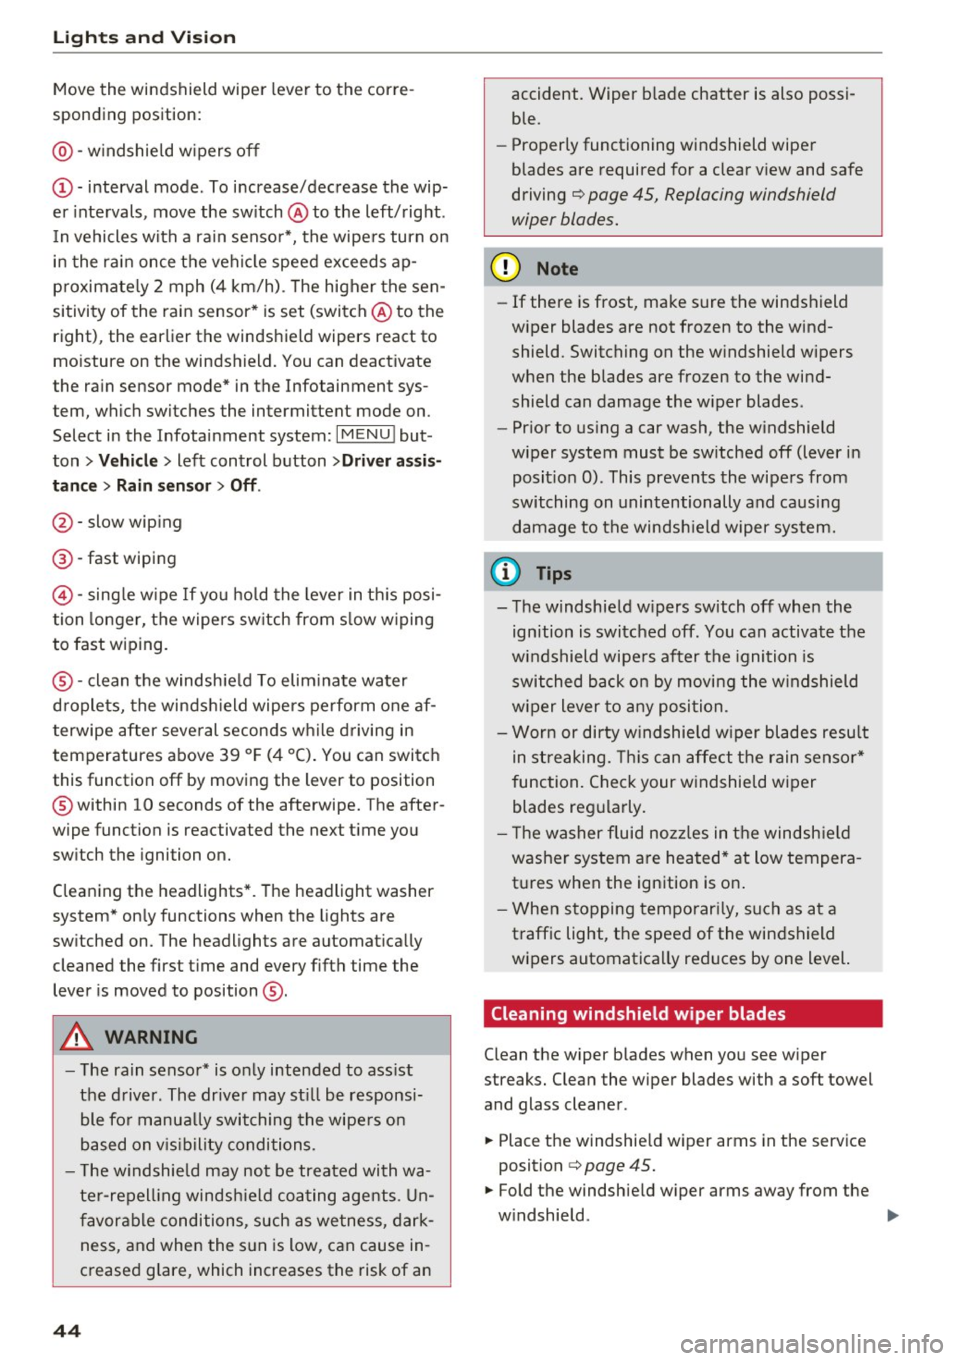
Move the windshield wiper lever to the corre
sponding position:
@ -windshield w ipers off
(D -interval mode. To increase/decrease the wip
er intervals , move the sw itch @ to the left/right .
I n vehicles with a rain sensor*, the wipe rs turn on
i n the rai n once the vehicle speed exceeds ap
p roximate ly 2 mph (4 km/h) . T he higher the sen
sitivity of the rain sensor * is set (switch @ to the
right), the earlier the windshield wipers react to
mo isture on the windshield. You can deact ivate
the rain sensor mode* in the Infotainment sys
tem, which switches the intermittent mode on .
Select in the Infotainment system:
I MENU I but
ton>
V ehicle > left control button >Dri ver a ssis
tan ce > Rain sensor> Off.
@-slow wip ing
@ -fast wiping
©-sing le w ipe If yo u ho ld the leve r in th is posi
tion longer, the wipers sw itch from s low w iping
to fast wiping .
®-clean the windsh ie ld To elim inate water
droplets, the winds hield wipers pe rform one af
terwipe after several seconds w hile driving in
temperatures above 39 °F (4 °C) . You can switch
this function off by moving the lever to position
@ within 10 seconds of the afterwipe. The after
wipe function is reactivated the next t ime you
sw itch the ignition on.
C leaning the headlights *. T he headlight washer
system* on ly functions when the lights are
sw itched on. The headlights are automat ica lly
cleaned the first t ime and every f ifth time the
lever is moved to position
® ·
A WARNING
- The rain senso r* is o nly intended to ass ist
the d river . The drive r may st ill be responsi
ble fo r manua lly switching t he wipe rs on
based on v is ibility conditions.
- T he w indshield may not be treated with wa
te r-repell ing windsh ield coa ting age nts . U n
favor able conditions, such as wetness, dark
ness, and when the s un is low, can cause in
creased g lare, which increases the risk of an
44
-
accident. Wiper b lade chatter is also possi
ble.
- Properly functioning windshield wiper
blades are required for a clear v iew and safe
driving
¢ page 45, Replacing windshield
wiper blades.
(D Note
- If there is frost, make sure the windshield
wiper blades are not frozen to the wind
shield. Switching on the w indshield w ipers
when the blades are frozen to the wind shield can damage the w iper blades .
- Pr ior to us ing a car wash, the w indshield
wiper system must be sw itched off (lever in
posit ion 0) . This prevents the wipers from
switching on unintentionally and causing
damage to the windsh ield wiper system.
('O Tips
- The windshield w ipers sw itch off when the
ignition is switched off . You can activate the
windshield wipe rs after the ignition is
switched back on by moving the windshield
wiper lever to any posi tion.
- Wor n or dirty w indshie ld w iper blades resu lt
in streaking. This can affect the rain senso r*
function. Check your w indshield wiper
blades regularly.
'
- T he washer fluid noz zles in t he windsh ie ld
washer system are heated* at low tempera
tures when the ignition is on .
- When s topping temporar ily, such as at a
traffic light, the speed of the windshield
wipers automatica lly reduces by one level.
Cleaning windshield wiper blades
Clean the wiper blades when you see w iper
streaks. Clean the wiper blades with a soft towel
and glass cleaner.
.,. Place the windshie ld wiper arms in the serv ice
position
¢ page 45.
.,. Fold the windshie ld w iper arms away from the
w indshield. ..,.
Page 48 of 314
Lights and Vision
@ Tips
To prevent inaccurate compass readings, do
not bring any remote controls, e lectr ica l dev i
ces or metall ic objects near the mirro r.
Adjusting the magnetic zone
A pp lies to: ve hicles w ith digital compass
[o::J
UiL.J ®
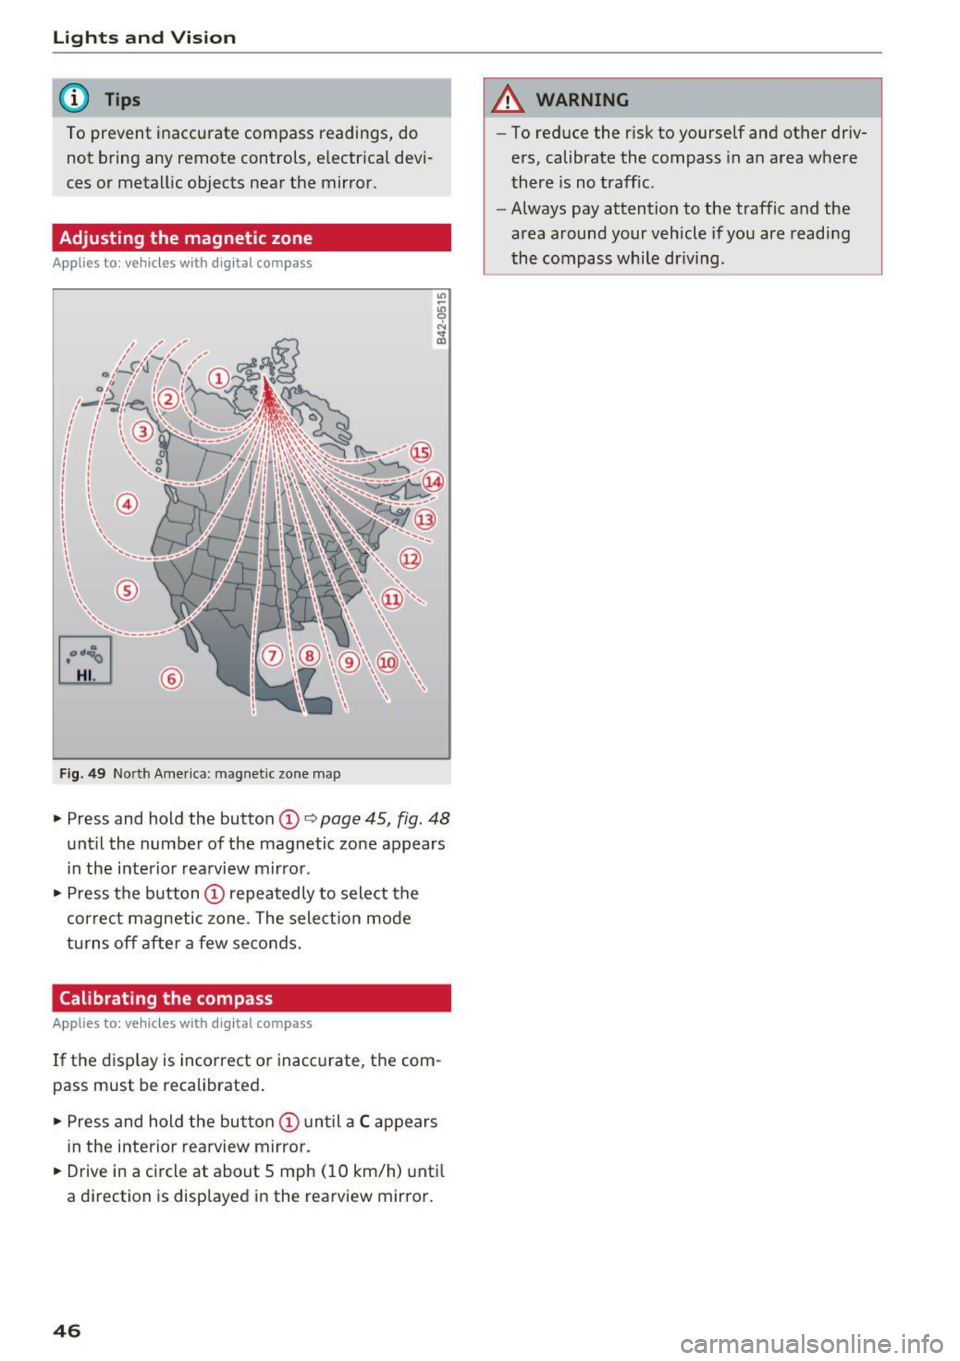
F ig . 4 9 Nort h Amer ica : ma gnetic zo ne m ap
.- Press and hold the button CD i:> page 45, fig. 48
unt il the number of the magnetic zone appears
in the interior rea rview m irro r .
.- Press t he button
CD repea tedly to select the
correc t magne tic zone . The select io n mode
turns off afte r a few seco nds.
Calibrating the compass
A pp lies to: ve hicles w ith digi tal compass
If the d isp lay is incorrect or inacc urate, t he com
pass must be recalibrated .
.- Pre ss and hold the button
CD un til a C appears
in the inte rio r rearview mirror .
.- Drive in a circle at about 5 mph ( 10 km/h) unti l
a dir ection is disp layed i n the rearvi ew mirro r.
46
A WARNING
- To reduce the r isk to yourself and other driv
ers, calibrate the compass in an area whe re
there is no traffic .
- Always pay attention to the traffic and the
area around your vehicle if you are readi ng
the compass whi le dr iv ing .
Page 55 of 314
CD
CD
.... N
" N ...... 0 r--. V, co
Automatic climate control system controls
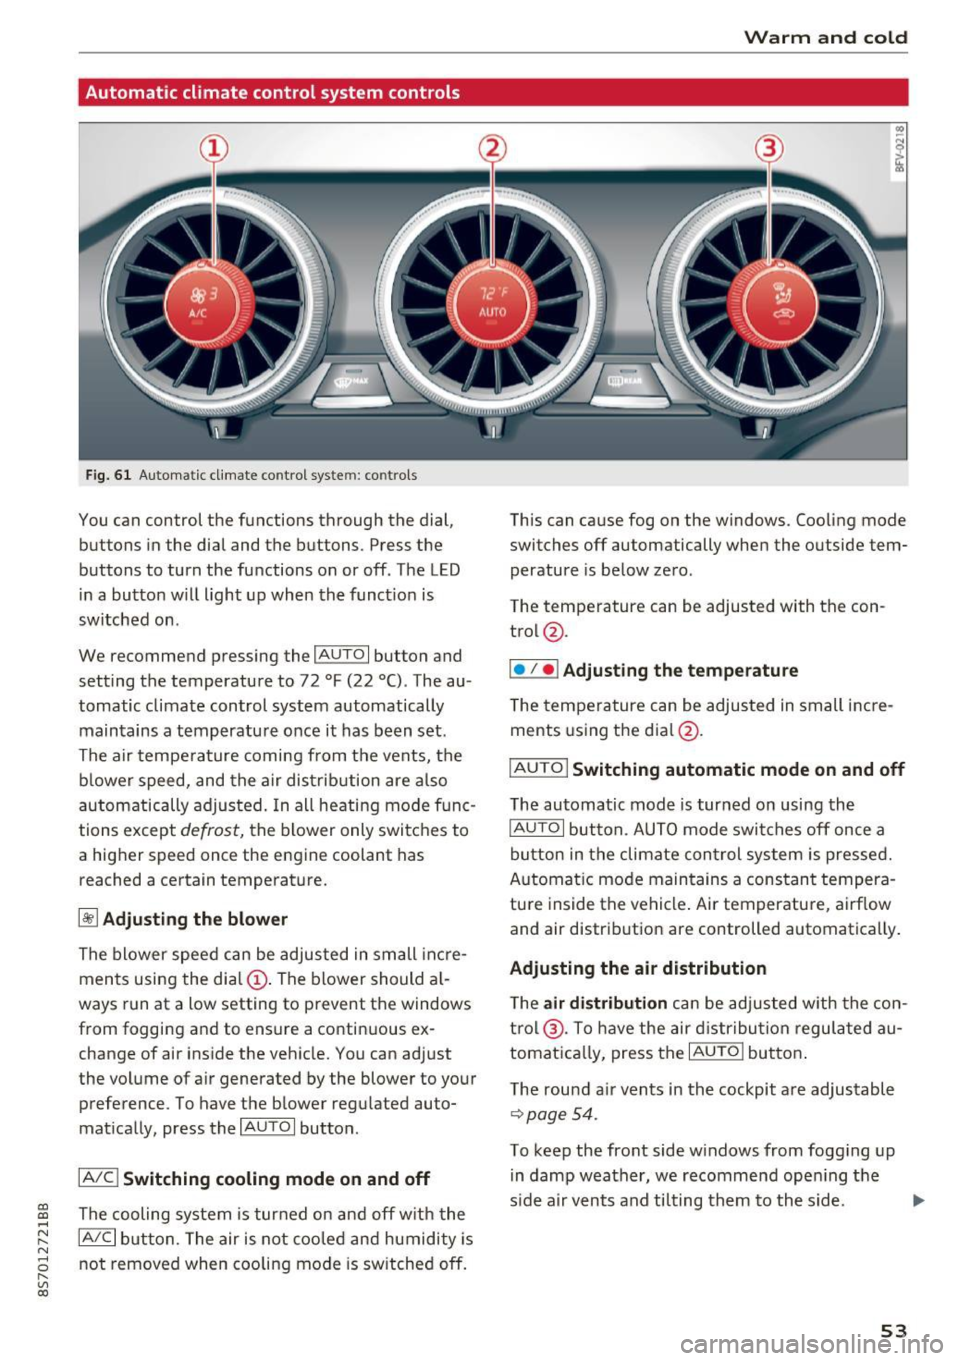
Fig. 61 Automatic climate control syste m: controls
You can control the functions through the dial,
buttons in the dial and the buttons. Press the
buttons to turn the functions on or off . The LED
in a button w ill light up when the funct ion is
switched on .
We recommend pressing the
IAUTOI button and
setting the temperature to 72 °F (22 °C). The au
tomatic climate control system automatically
maintains a temperature once it has been set .
The air tempe rature coming from the vents, the
b lower speed, and the air distribution are also
automatically adjusted. In all heating mode f unc
tions except
defrost, the b lower only switches to
a higher speed once the engine coolant has
reached a certain temperature.
~ Adjusting the blow er
The blower speed can be adjusted in small inc re
ments using the dia l
(D. The blower should a l
ways run at a low setting to prevent the windows
from fogging and to ensure a continuous ex
change of air inside the vehicle. You can adjust
the volume of air generated by the blower to your
preference. To have the blower regulated auto
mat ically, press the
IAU TOI button .
IA/Cj Switching cooling mode on and off
The cooling system is tur ned on and off w ith the
IA/C l button. The air is not cooled and humidity is
not removed when coo ling mode is sw itched off.
Warm and cold
This can cause fog on the windows. Cooling mode
switches off automatically when the outside tem
perature is be low zero .
The temperature can be adjusted with the con
trol @.
I• I • I Adjusting the temperature
T he tempe rature can be adjusted in small i ncre
ments using the dial@.
IAUTO I Switching automatic mode on and off
The automatic mode is turned on using the
IAUTOI button. AUTO mode switches off once a
button in the climate con trol system is pressed.
Automat ic mode maintains a cons tant tempera
tu re inside the vehicle . Air temperature, airf low
and air distribution are controlled automatically .
Adjusting the air distribution
The air distrib ution can be adjusted w ith the con
t rol @ . To have the air d istr ibution regulated au
tomat ica lly, press the
IAUTOI butto n.
T he rou nd a ir ven ts in the cockpit a re adjustable
~page 54.
To keep the front side w indows from fogging up
in damp weather, we recommend ope ning t he
s ide a ir vents and ti lting them to the side.
53
Page 56 of 314
Warm and cold
1- 1 Switching recirculation mode on and off
The recirculation mode can be turned on manual
ly or automat ically*.
- Switching manual recirculation mode on and
off: press
1- 1
- Automat ic* recirculation mode: auto rec ircula
tion needs to be activated in the Infotainmen t
system. Select in the Infotainment system:
IMENUI button> Vehicle> left control button
>Vehicle settings> Air conditioning > Auto re
circulation .
The air quality sensor that is de
signed for diese l and gasoline exhaust auto
matically sw itches the recirculation mode on or
off depend ing on the level of pollutants in the
outside air.
In recirculation mode, the air inside the vehicle is
circu lated and filtered. This prevents the unfil
tered a ir outside the vehicle from entering the
veh icle inter ior . We recommend switching recir
culation mode on when dr iv ing through a tunnel
or when s itting in traffic
q Le,..
Recirculation mode is switched off by pressing
the ~ button or
I AU TO I or ,..., MAX L
I@ MAX I Switching defrost on and off
The windshield and s ide windows are defrosted
or cleared of condensation as quickly as possible.
The optimum amount of air flows mainly out of the vents under the windshield. Recirculation
mode switches off . The temperature is controlled
automatically .
The
IAUTOI button switches the defroster off.
IQiil REAR ! Switching the rear window defogger
on and off
If the rear w indow defogger is activated when
the ignition is switched on, the battery manage
ment determines based on the battery charge if
it is possible to turn on. Ot he rwise, the rear win
dow defogger functions with the engine running
and switches off automatically after approxi
mately 10 - 20 minutes, depending on the out
side temperature.
To prevent the rear w indow defogger from
sw itching off automatically, press and hold the
I@ REARI button for more than two seconds. This
54
remains stored up to approximately 15 minutes
after turning off the ignition.
A WARNING
You should not use the recirculation mode for
an extended period since no fresh air is drawn
in. With the air-conditioning switched off, t he
windows can fog up, which increases the risk
of an acc ident.
Adjusting the air vents
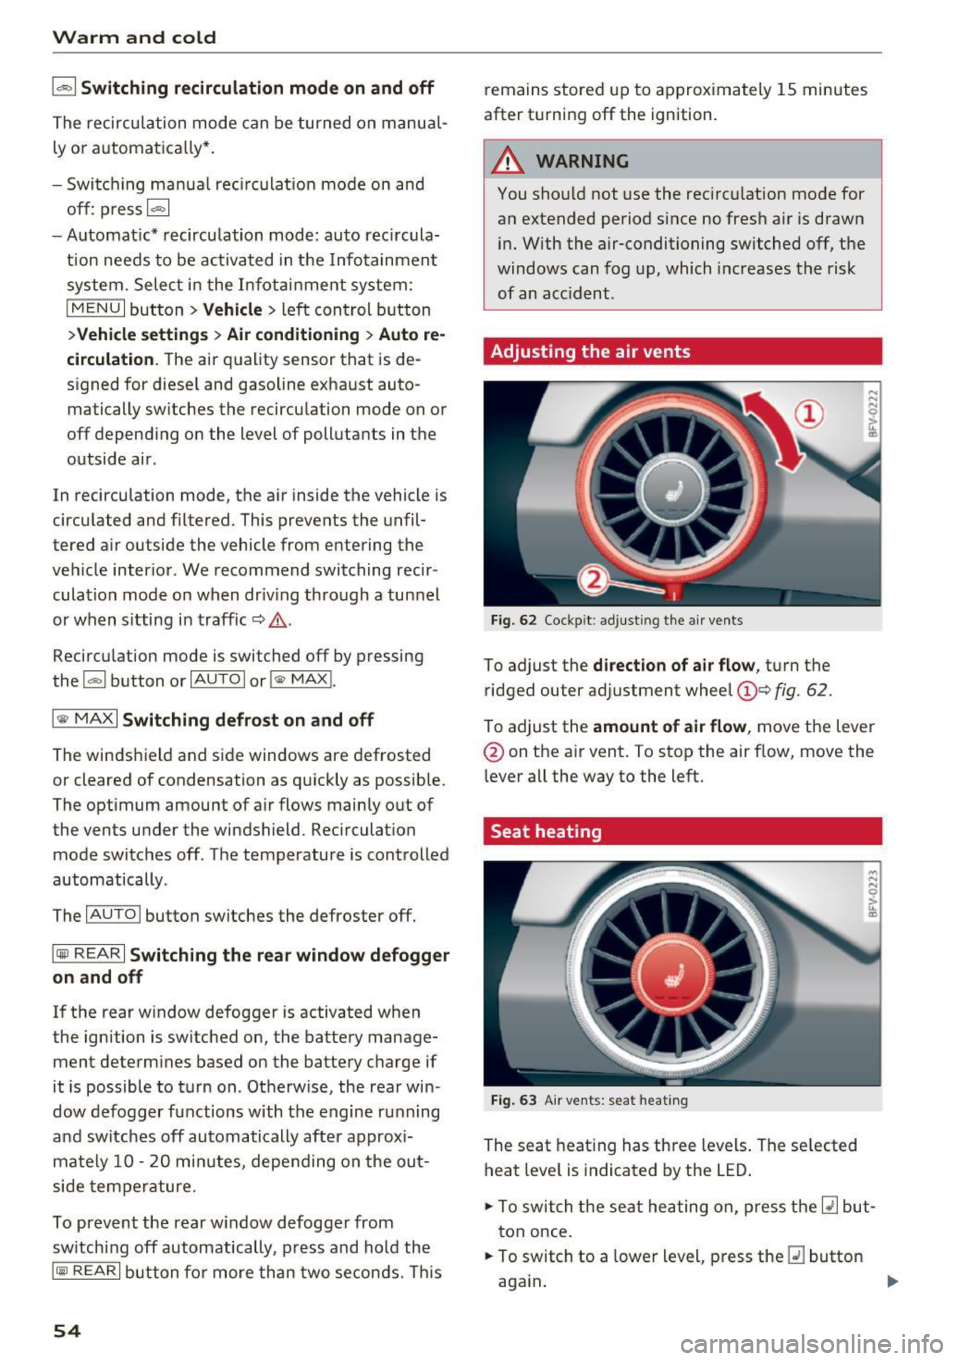
Fig. 62 Cockpit: adju sting the a ir vents
To adjust the direction of air flow, turn the
ridged outer adjustment wheel
©Q fig. 62.
To ad just the amount of air flow , move the lever
@ on the air vent . To stop the air flow, move the
l ever all the way to the left.
Seat heating
Fig. 63 Air vents: seat heat ing
The seat heating has three levels. The selected
heat level is indicated by the LED .
.. To switch the seat heating on, press the
Q] but
ton once.
.. To switch to a lower level, press the
Q] button
again .
Ill>
Page 59 of 314

co
co
.... N
" N .... 0
" "' c:o
Driving
General information
Breaking in
A new vehicle must be broken in, and the break
in distance should be 1,000 mi les ( 1,500 km). Do
not drive at speeds that w ill exceed
2/3 of the
maximum permitted engine speed
(RPM) for the
first 600 miles (1,000 km) , and avoid full accel
eration during this period . You may gradually
start increasing the
RPM and the speed between
600 miles (1,000 km) and 1,000 miles (1,500
km).
During the first hours of use, the engine has a
higher internal friction than later on when all
moving parts have settled into place with each
other.
How the vehicle is driven during the first 1,000
miles (1,500 km) also affects the engine quality.
Drive at moderate engine speeds after the initial
break-in per iod, part icularly when running a cold
engine . This will reduce engine wear and improve
the mileage .
Do not drive at too low of an engine speed (rpm).
Shift down if the engine stops running "smooth
ly" . Extremely high eng ine speeds are automati
cally reduced .
Avoid damaging the vehicle
When you are driving on poor roads, or over
curbs, steep ramps, etc., make certain that low
lying parts such as spoilers and exhaust system
parts do not bottom out and get damaged.
This is especially true for vehicles with low-slung
chassis (sports chassis)* and fully loaded
vehicles.
Driving through water on roads
Note the following to reduce the risk of vehicle
damage when driving through water, for examp le
on flooded roads :
- The wate r must not be any higher than the bot
tom of the vehicle body .
Driving
- Do not drive faster than walking speed.
A WARNING
After driv ing through water or mud, the effec
tiveness of the brakes may be reduced due to moisture on the brake rotors and brake pads.
A few careful brake applications should dry
off the brakes .
(D Note
Vehicle components such as the engine,
transmission, suspension or electrical system
can be severely damaged by driving through
water.
(D Tips
- Determine the depth before driving through
water.
- Do not stop the vehicle, drive in reverse or
switch the engine off when driving through
water.
- Keep in mind that oncoming vehicles may create waves that raise the water level and
make it too deep for your vehicle to drive
through safely.
- Avoid dr iving through salt water, because
this can cause corrosion.
Economical and environmentally-friendly
driving
T he amount of fuel consumpt ion, the environ
menta l impact and the wear to the engine,
brakes and tires depends mostly on your driving
style. With an anticipatory and economic driving
style, fuel consumption can be reduced by ap
proximately 10-15%. The following tips will help
you conserve the environment and your money at
the same time .
Anticipatory driving
A vehicle uses the most fuel when accelerating.
When you drive with anticipation, you do not
need to brake as often and so you accelerate less.
When possible, let your vehicle coast with a
gear
engaged -
for example, when you notice that the
next traff ic light is red . .,,.
57