2017 AUDI TT ROADSTER battery
[x] Cancel search: batteryPage 42 of 314
Lights and Vision
-If the battery has been discharging for a
wh ile, the parking light may switch off auto
matically. Always make sure your vehicle is
parked and adequately lit according to the
laws. Avo id using the parking lights for sev
era l hours.
- Always observe legal regulations when us ing the light ing systems described.
(D Tips
- The light sensor for the automatic head
lights* is in the rearview m irror mount. Do
not place any stickers in th is area on the
windsh ield.
- Some exterior lighting functions can be ad
ju sted
c:::;, page 40.
-If you turn off the ignition wh ile the exter ior
lights are on and open the-door, a warning
tone so unds.
- In some markets, the tail lights will sw itch
on when the daytime runn ing lights sw itch
on .
- In cool or damp weather, the inside of the
headlights, turn s ignals and tail lights can
fog over due to the tempe rature d ifference
betwee n the inside and ou ts ide. They will
clea r short ly after sw itch ing them on. This
does not affect the service life o f the light
i ng.
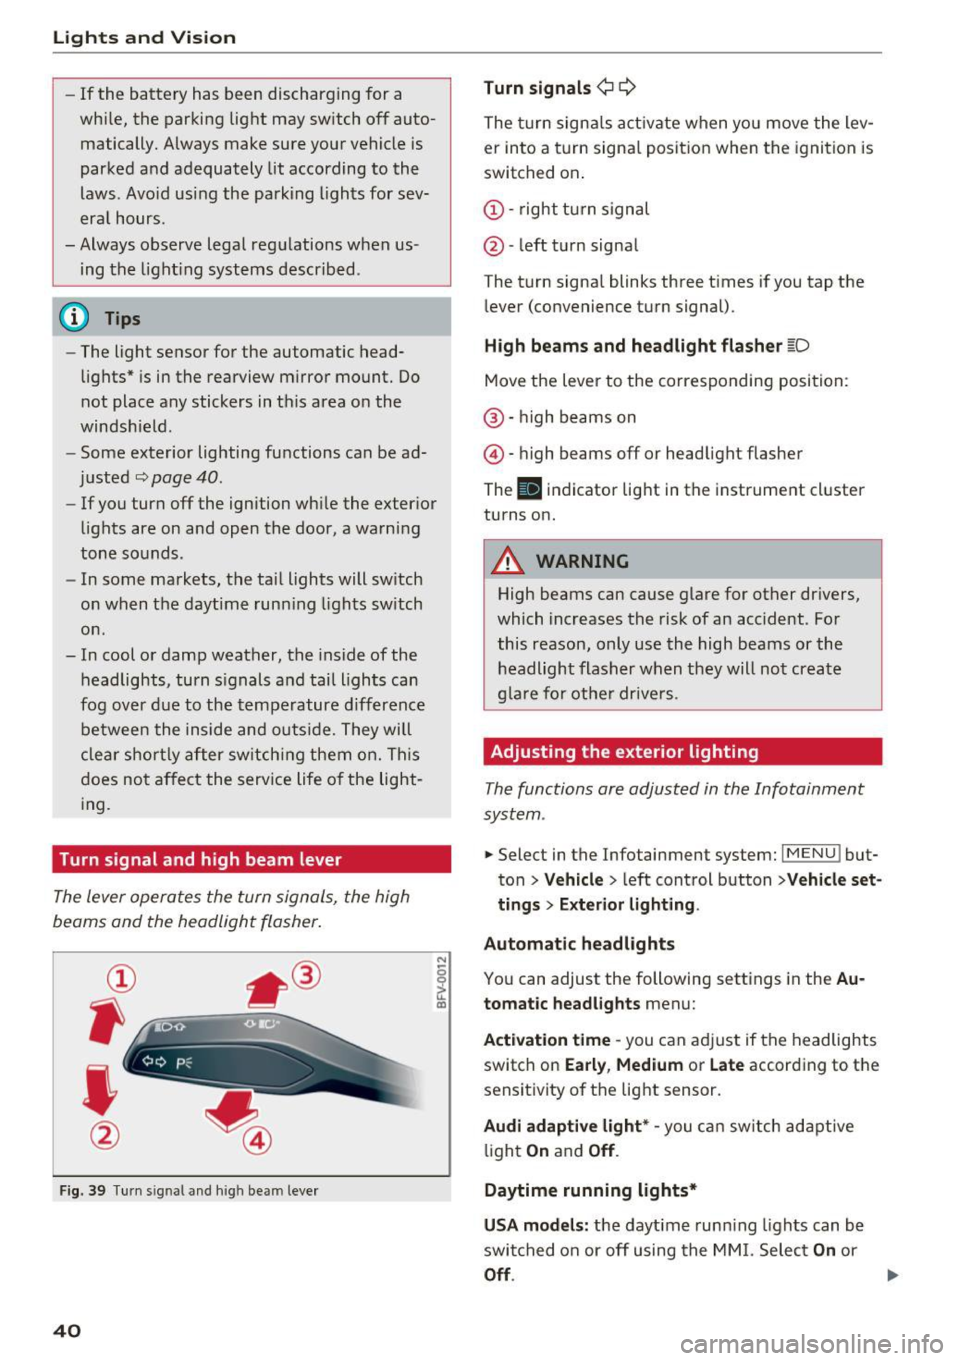
Turn signal and high beam lever
The lever operates the turn signals, the high
beams and the headlight flasher.
®
,
I
@
F ig . 39 Tu rn sig nal a nd high beam lever
40
N
c 0
ct a,
Turn signals ¢ Q
The turn sign als act ivate when yo u move the lev
er into a turn signa l posit ion when the igni tion is
switched on.
(D -right tu rn signal
@ -left t urn signa l
The tu rn signa l blinks three t imes i f you tap the
l ever (convenience t urn signal).
High beams and headlight fla sher l[D
Move the lever to the correspondin g position:
@ · high beams on
@ · high beams off or head light flasher
The
El i ndicator lig ht in the instrume nt cl uster
turns on.
_8 WARNING
High beams can cause glare for other dr ivers,
which inc reases the risk of an accident . Fo r
this reason, only use the high beams or the headlight flasher when t hey will no t create
g la re for ot he r drive rs.
Adjusting the exterior lighting
The functions are adjusted in the Infotainment
system .
.. Select in the Infotainment system: IMENU! but
ton>
Veh icle > left control button >Vehicle set
tings > Exterior light ing.
Automatic headlights
You can adjust the following sett ings in the Au
tomatic headlights
menu:
Act ivation time -you can a dju st if the headlights
switch on
Early , Medium or Late according to the
sensit ivity of th e lig ht sensor.
Audi adaptive light* -you c an switch adapt ive
li ght
On an d Off .
Daytime running lights*
USA models: the daytime runn ing lights can be
swi tched on or off using the MM I. Selec t
On or
Off.
Page 51 of 314
CD
CD
.... N
" N .... 0 r--. V, co
CD Note
-To reduce the risk of damage to the vehicle
electrical system, never attempt to charge
the veh icle battery by connect ing accesso
ries that prov ide power, such as solar panels
or battery chargers, to the 12 Volt sockets
or the cigarette lighter.
- To reduce the risk of damage to the sockets,
on ly use plugs that fit correctly .
Storage
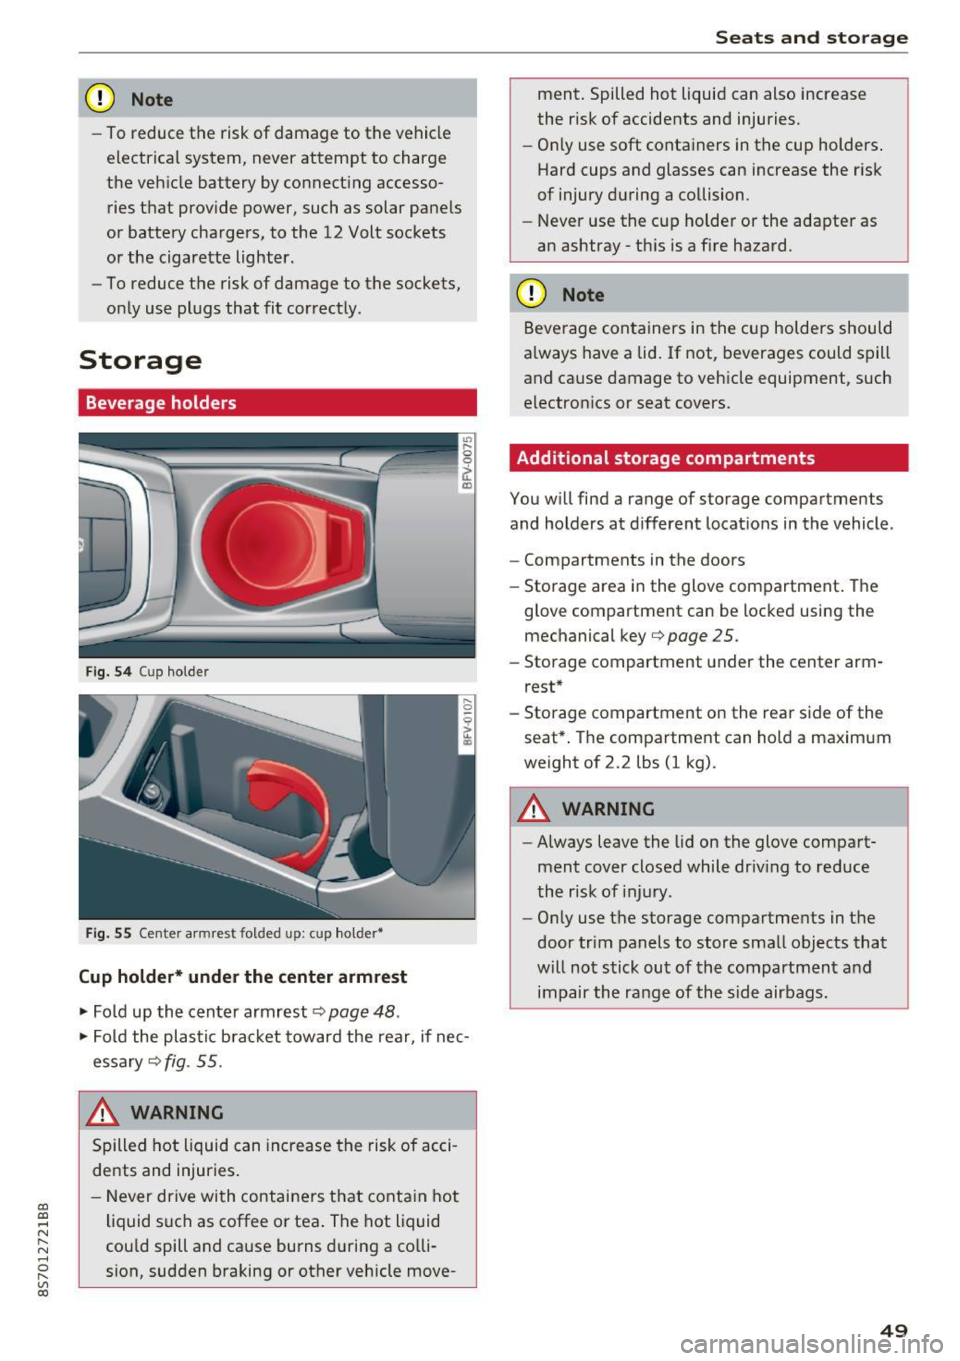
Beverage holders
Fig. 5 4 Cup holder
Fig. 55 Cente r armrest folded up: cup holder•
Cup holder* under the center armrest
~ Fold up the center armrest q page 48 .
~ Fold the plas tic bracket toward the rear, if nec
essary
q fig . 55.
,&_ WARNING
Spilled hot liquid can increase the risk of acci
de nts and injuries .
- Never drive wi th containers that contain hot
liquid such as coffee or tea . The hot liquid
cou ld spill and cause burns during a colli·
sion, sudden braking or other vehicle move -
Seats and storage
ment. Spilled hot liquid can also increase
the risk of accidents and injuries.
- On ly use soft containers in the cup holders .
Hard cups and glasses can increase the risk
of injury during a collision.
- Never use the cup holder or the adapter as
an ashtray -th is is a f ire hazard.
CD Note
Beverage containers in the cup holders should
a lways have a lid. If not, beverages could spill
and cause damage to vehicle equipment, such
electronics or seat covers.
Additional storage compartments
You w ill find a range of storage compartments
and holders at different locat ions in the vehicle .
- Compartments in the doors
- Storage area in the glove compartment . The
glove compartment can be locked using the mechanical key
qpage 25 .
-Storage compartment under the center arm
rest*
- Storage compartment on the rea r side of the
seat*. The compartment can hold a maximum
weight of 2.2 lbs (1 kg) .
A WARNING
-
-Always leave the lid on the glove compart
ment cover closed while driv ing to reduce
the risk of injury.
- Only use the storage compartments in the
door trim panels to store small objects that
will not stick out of the compartment and
impair the range of the side airbags.
-
49
Page 56 of 314
Warm and cold
1- 1 Switching recirculation mode on and off
The recirculation mode can be turned on manual
ly or automat ically*.
- Switching manual recirculation mode on and
off: press
1- 1
- Automat ic* recirculation mode: auto rec ircula
tion needs to be activated in the Infotainmen t
system. Select in the Infotainment system:
IMENUI button> Vehicle> left control button
>Vehicle settings> Air conditioning > Auto re
circulation .
The air quality sensor that is de
signed for diese l and gasoline exhaust auto
matically sw itches the recirculation mode on or
off depend ing on the level of pollutants in the
outside air.
In recirculation mode, the air inside the vehicle is
circu lated and filtered. This prevents the unfil
tered a ir outside the vehicle from entering the
veh icle inter ior . We recommend switching recir
culation mode on when dr iv ing through a tunnel
or when s itting in traffic
q Le,..
Recirculation mode is switched off by pressing
the ~ button or
I AU TO I or ,..., MAX L
I@ MAX I Switching defrost on and off
The windshield and s ide windows are defrosted
or cleared of condensation as quickly as possible.
The optimum amount of air flows mainly out of the vents under the windshield. Recirculation
mode switches off . The temperature is controlled
automatically .
The
IAUTOI button switches the defroster off.
IQiil REAR ! Switching the rear window defogger
on and off
If the rear w indow defogger is activated when
the ignition is switched on, the battery manage
ment determines based on the battery charge if
it is possible to turn on. Ot he rwise, the rear win
dow defogger functions with the engine running
and switches off automatically after approxi
mately 10 - 20 minutes, depending on the out
side temperature.
To prevent the rear w indow defogger from
sw itching off automatically, press and hold the
I@ REARI button for more than two seconds. This
54
remains stored up to approximately 15 minutes
after turning off the ignition.
A WARNING
You should not use the recirculation mode for
an extended period since no fresh air is drawn
in. With the air-conditioning switched off, t he
windows can fog up, which increases the risk
of an acc ident.
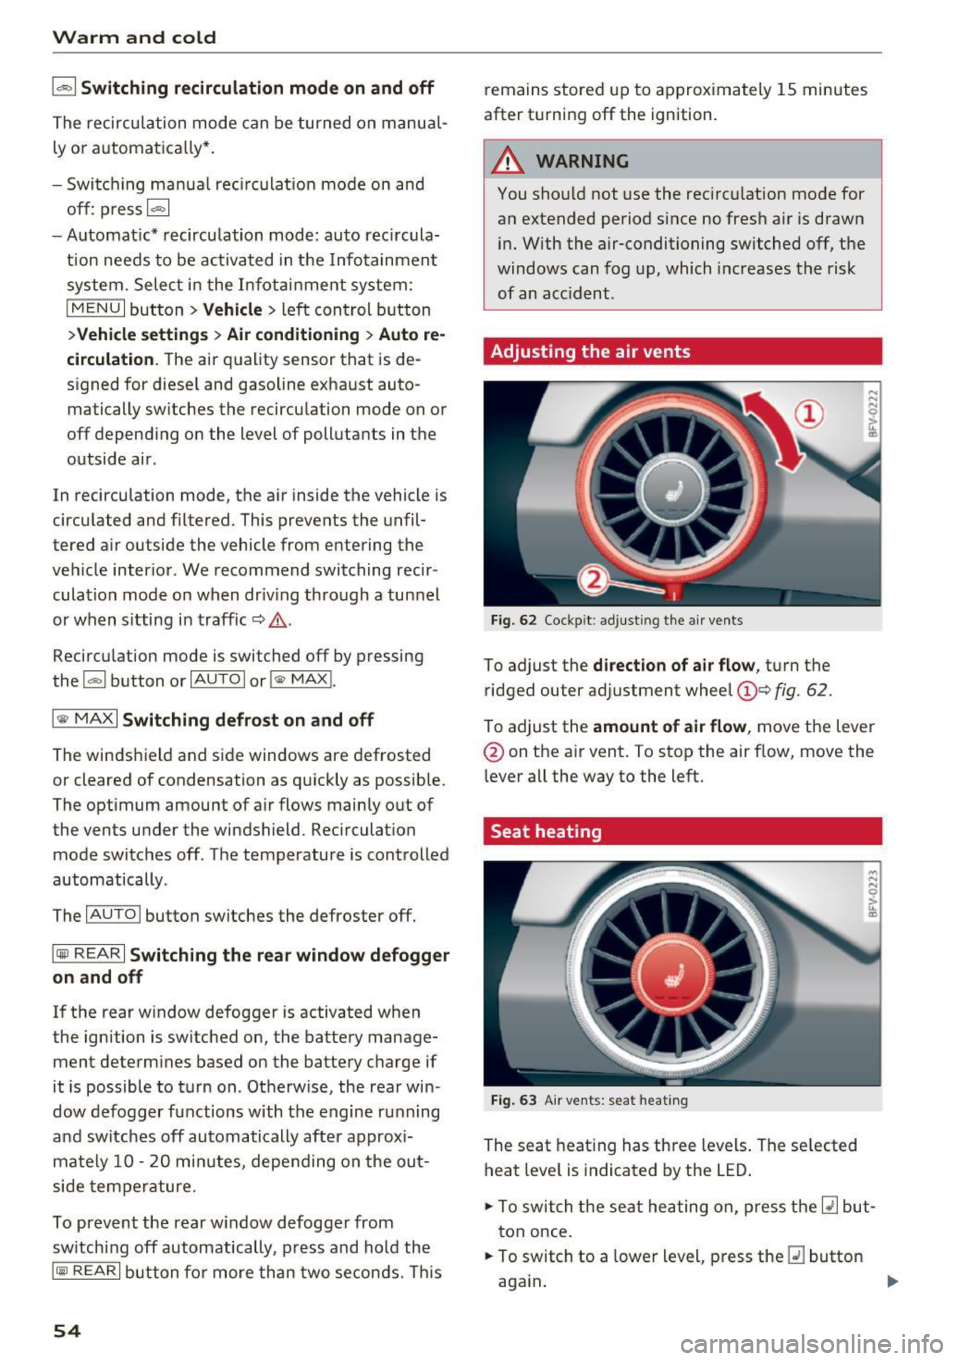
Adjusting the air vents
Fig. 62 Cockpit: adju sting the a ir vents
To adjust the direction of air flow, turn the
ridged outer adjustment wheel
©Q fig. 62.
To ad just the amount of air flow , move the lever
@ on the air vent . To stop the air flow, move the
l ever all the way to the left.
Seat heating
Fig. 63 Air vents: seat heat ing
The seat heating has three levels. The selected
heat level is indicated by the LED .
.. To switch the seat heating on, press the
Q] but
ton once.
.. To switch to a lower level, press the
Q] button
again .
Ill>
Page 58 of 314
Warm and cold
switched on. This can cause burns on unpro
tected skin exposed directly to the vents.
(D Tips
- The fan speed is always lower when the
power top is closed than when it is open.
- Energy management
qpage 93 may re
duce the heat output if the battery voltage i s too low .
56
Page 62 of 314

Driving
-Never turn off the engine before the vehicle
has come to a complete stop.
- The brake booster and power steering only
work when the engine is running. If the en
gine is
off, you have to use more force when
steering or braking. Because you cannot
steer and brake as you usually would, this
could lead to accidents and serious injuries.
(D Note
Avoid high engine speed, full throttle, and
heavy engine load if the engine has not
reached operating temperature yet. You could
damage the engine.
@ For the sake of the environment
Do not let the engine run while parked to
warm up. Begin driving immediately . This re
duces unnecessary emissions.
{D) Tips
-Some noise after starting the engine is nor
mal and is no cause for concern.
- If you leave the vehicle with the ignition
switched on, the ignition will switch
off af
ter a certain amount of time . Make sure that
electrical equipment such as the exterior
lights are switched
off.
Stopping the engine
.,. Bring the vehicle to a full stop.
.,. Move the selector lever into the P position .
... Press the
I START ENGINE STOPI button
¢ page 59, fig. 67.
Emergency off function*
If it is absolutely necessary, the engine can also
be turned
off while driving at speeds starting at
4 mph (7 km/h). To switch the engine
off, press
the
! START ENGINE STOPI button twice in a row
briefly or press and hold for longer than two sec
onds.
_&. WARNING
- Never turn off the engine before the vehicle
has come to a complete stop.
60
- Please note that the brake booster and pow
er steering only work when the engine is
running. When the engine
off, you must use
more force to steer or brake the vehicle. Be
cause the usual steering and braking capa
bility is not available, the risk of accidents or
. . . . mJunes increases.
- For safety reasons, always park the vehicle
with the selector lever in the P position.
Otherwise, there is the risk that the vehicle
could roll.
- After the engine has been switched off, the
radiator fan can continue to run for up to 10
minutes -even with the ignition switched
off. It can also switch on again after some
time if the coolant temperature rises as the
result of heat buildup or if the engine is al
ready warm and the engine compartment is
also heated by the sun's rays.
(D Note
If the engine has been under heavy load for
an extended period of time, heat builds up in
the engine compartment after th@ engine is
switched
off and there is a risk of damaging
the engine . For this reason, let the engine run
at idle for approximately two minutes before
shutting it
off.
Messages
Turn off ignition before leaving vehicle. Battery
is discharging
This message appears and a warning tone sounds
if you open the driver's door when the ignition is
switched on. Switch the ignition
off so that the
battery will not discharge.
Pressing start/stop button again will switch off
engine.
This message appears when you press the
I START ENGIN E STOP ! button while driving.
Engine start system: malfunction! Please con
tact Service
The engine automatic start system has a mal
function. Drive to an authorized Audi dealer or
autho rized Audi Service Facility immediately to
IJlo-
Page 63 of 314

CD
CD
.... N
" N ...... 0 r--. V, co
have the malfunction corrected. To start the en
gine, press and hold the
! START ENGINE STOPI
button.
DJ R emot e control key : hold b ack of key
again st the d esignated are a. See owner's man
ual
This message appea rs if the re is no convenie nce
key inside the vehicle or if the system does not
recognize the key . The conven ience key may not
be recognized, for example, if it is cove red by an
object that
disrupts the signal (such as a brief
case), or if the key battery is weak. Electronic de
vices such as cell phones can also interfere with
the signal.
To still be able to start or stop the eng ine, see
c:::> page 61, Starting the engine when there is a
malfunction .
Ill Remote control key : key not recogn ized . Is
the ke y still in th e vehi cle?
The Ill ind icator light turns on and this message
appears if the conve nience key was removed from
the vehicle when the engine was running.
If the
conven ience key is no longer in the vehicle, you
cannot switch the ign ition on or start the engine
once you stop it. You a lso cannot lock the vehicle
from the outside .
Please press brake p edal
This message appears if you do not press the
brake pedal when starting the eng ine.
Please pr ess clut ch p edal
This message appea rs in vehicles w it h manual
transmissions if you do not press the clutch pedal
when sta rting the engine . The engine can on ly be
started when t he clu tch pedal is pressed.
Pl ease select N or P
This message appea rs when starting or stopping
the eng ine if the selector lever is not in the Nor P
position . The engine will not start/stop.
Shift to P , otherw ise vehi cle can roll awa y.
Doors can be lo cked i n P only
This message appears for safety reasons a long
with a warning tone. It appears if the selector
lever for the automatic transmission is not in the
D rivi ng
P position when switch ing the ignit ion off w ith
the
I START ENGINE STOPI b utton. P lace these
l ector lever in the P position. The veh icle cou ld
roll if the lever is not in P. You also cannot lock
the vehicle using the locking sensor on the door handle or using the conven ience key .
Starting the engine when there is a
malfunction
It may not be possible to start the engine under
certain circumstances, for example if th e battery
in the vehicle key is drained, if interference is af
fected the key or if there is a system malfunc
tion.
F ig. 68 Steering column/ remote control key: starting the
e n g in e if there is
a m alfunct ion
As long as the message y >l) Remote control key :
hold back of key against the designated are a.
See owner's manual
is displayed, you can emer
gency start your vehicle.
.. Press the brake pedal
c:::> .&. in Starting the en
gine on page 59.
... Press the ~I s=T ~A ~ R~ T~ E_N _G _I _N =E - S~ T= o- P~I button .
.,. Ho ld the master key in the location ind icated as
shown in the illustrat ion
y >l) c:::, fig. 68. The engine
w ill start.
.. If the engine does not automat ica lly start,
press the
! S TART ENGINE STOPI butto n again .
(D Tips
You can view the message aga in by pressing
the
I S TA RT ENGINE S TOP I button.
61
Page 73 of 314
CD
CD
.... N
" N ,-I 0
" V, co
Selector lever emergency release
If the vehicle's power supply fails, the selector lever can be released in an emergency.
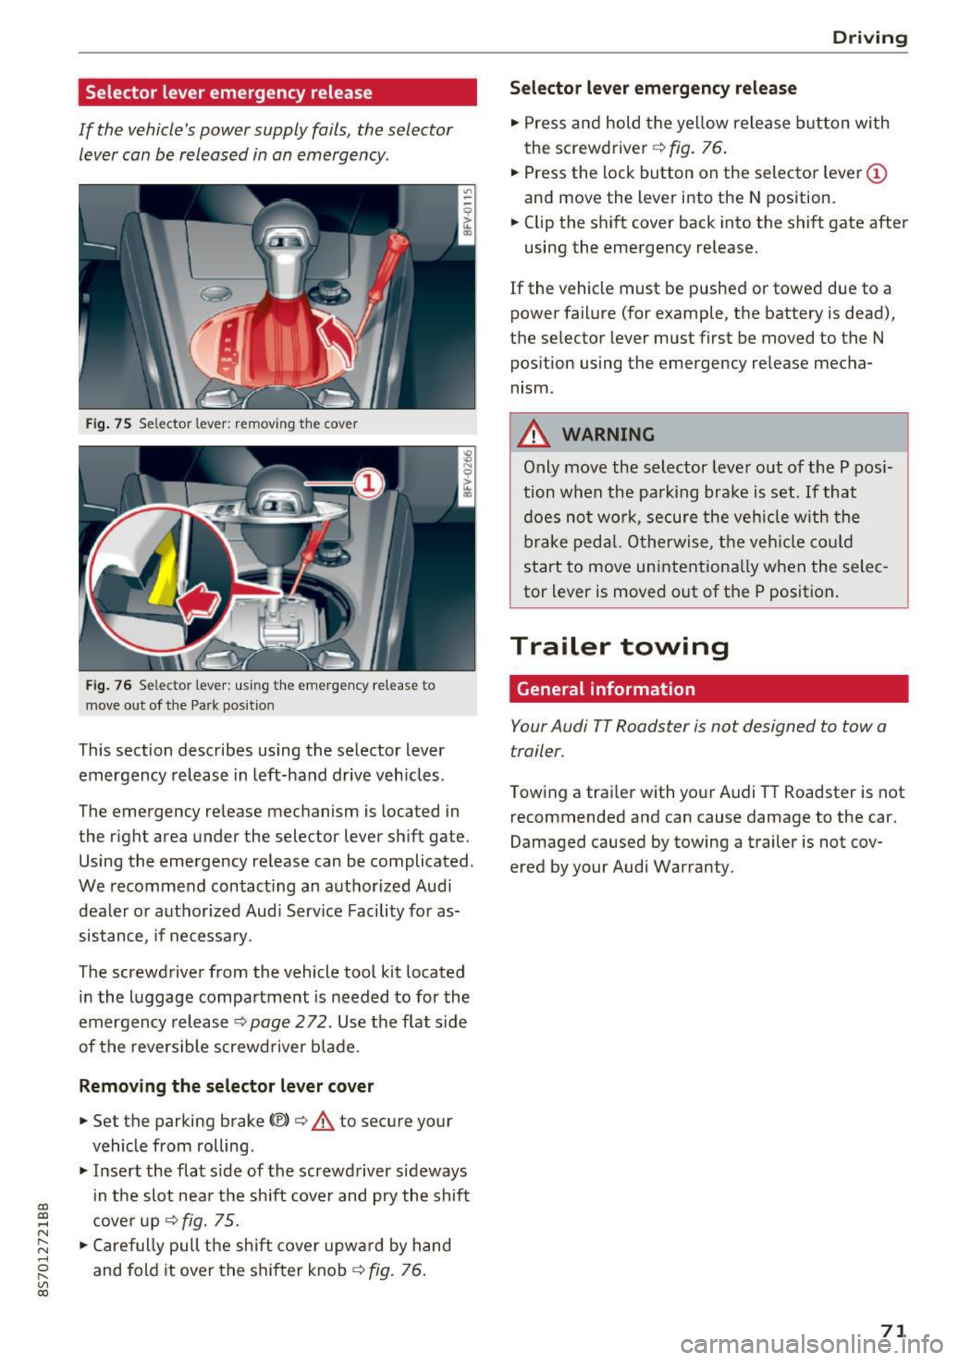
Fig . 75 Selector lever: remov ing t he cover
Fi g. 76 Selec tor lever : us ing the eme rgency re lease to
move out of t he Park pos it ion
This section describes using the selector lever
emergency release in left-hand drive veh icles .
The emergency re lease mechanism is located in
the right area under the selector lever shift gate.
Using the emergency release can be complicated.
We recommend contact ing an authorized Audi
dealer o r authorized Aud i Serv ice Facility fo r as
sistance, if necessary .
The screwdriver from the vehicle tool kit located
i n the luggage compartment is needed to for the
emergency release ¢
page 2 72. Use the flat sid e
of the revers ible screwd river b lade.
Removing the selector lever cover
.,. Set the parking brake CV)¢ A to secure your
vehicle from ro lling .
.,. In se rt the flat side of the screwdriver sideways
in the slot nea r the sh ift cover and pry the shift
c ove r up
¢fig. 75 .
.,. Caref ully pull t he shift cover upw ard by hand
and fold it over the sh ifter knob ¢
fig. 76.
Drivi ng
Selector l ever emergency release
.,. Press and hold t he ye llow release b utton with
the screwdriver ¢
fig. 76.
.,. Press the lock button on the selecto r lever
(D
and move the lever into the N position .
.,. Clip the shift cover back into the shift gate after
using the emergency re lease.
If the vehicle must be pushed or towed due to a
power failure (for example, the battery is dead),
the selector lever must first be moved to the N
pos ition using the emergency re lease mecha
nism.
A WARNING
Only move the selector lever out of the P pos i
tion when the parking bra ke is set. If that
d oes no t wo rk, secure the ve hicle w ith the
bra ke ped al. Otherwise, t he veh icle co ul d
st art to move uninte ntiona lly w hen the selec
tor lever is moved out of the P position.
Trailer towing
General information '
Your Audi TT Roadster is not designed to tow a
trailer.
Towing a trailer with you r Audi TT Roadster is not
recommended and can cause damage to the car.
Damaged caused by towing a trailer is not cov
ered by your Audi Warranty.
71
Page 81 of 314
co
co
.... N
" N .... 0
" "' c:o
Switching on and off
Applies to: vehicles with Audi side assist
The system ca n be switched on/off in the Info
t a in men t system.
"' Select in the Info tainment sys tem:
iM ENUI but
ton
> Vehicle > left contro l butto n >Driver as
sistan ce > Audi side assist
If the system is activated, the displays in the ex
ter io r mir rors wi ll turn o n briefly when the ig ni
tion is sw itched on.
Adjusting the display brightness
Applies to: vehicles with Audi side assist
The display brightness can be adjusted in the In
fotainm ent system.
"' Se lect in the Infotainment system: i MENU I but
ton
> Vehicle > left contro l butto n >Driver as
sistance > Audi side assist
The display b rightness ad justs automat ica lly to
the br ightness of the s urrou ndings, both in the
in fo rmat ion and in the warning stage . In very
da rk or ve ry br igh t sur ro u ndings, the a utomat ic
ad ju st men t will se t th e d isp lay to the mini mum
or maxim um level. In s uch cases , you m ay no tice
no change w hen adjus ting t he br ightness, o r th e
change may on ly be no tic eable o nce the su r
ro undings change .
A dju st the br ightn ess to a level where the d isp lay
i n the inform ation stage wi ll no t di srupt your
v iew ahead. If you change the brightness, the dis
p lay in the exter ior mir ror will briefly show the
b rightness level i n the information stage . The
b rightness of the warning stage is linked to the
b rightness in t he info rmat ion stage and is ad just
ed along w ith the information stage .
- Side assist is not active wh ile you are ma k
i ng the ad justment.
- Your settings are automatically stored and ass igned to the remote cont rol key being
used.
Assist
Messages
Applies to: vehicles with Audi side assist
I f the s ide ass is t swi tches off automat ically, a
mess age app ear s in t he In fota in men t sys tem dis
play.
@j Audi side assist: currently unavailable.
Sensor vision restricted due to surroundings.
See owner 's manual
The radar sensors ' v is ion is affected. Do not cover
the a rea in front of the sensors with bike whee ls,
stickers, dirt or other objects. Clean the area in
front of the sensors, if necessary
q page 77,
fig. 84.
@j Audi side a ssist: currently unavailable.
See owner's manual
S ide assist cannot be switched on at this time be
ca use there is a ma lfu nction ( for example, the
battery c harge leve l may be too low) .
@j Audi side assist: malfunction! Please
contact Service
The system cannot guarantee that it will detect
vehicles cor rect ly and it has switc hed off. The
senso rs have been move d or are fa ulty. Have the
syste m chec ked by an au tho riz ed Au di deale r or
a uthor iz e d Au di S ervice Faci lity s oon.
Audi drive select (drive
settings)
Introduction
Applies to: vehicles with Audi drive select
Dr ive select ma kes it possib le to e xper ience dif
fere nt types of ve hicl e sett ings in one ve hicle.
T he driver can sele ct from th ree mo des,
Comfort ,
Auto
and Dynamic , using the r.~;\,1 bu tton in the
center console o r by using the Infotainment sys
tem. This allows you to switch between a sporty
and a comfo rtable driv ing mode, fo r example. In
t h e
Individual mode, the sett ings can be ad just
ed to yo ur persona l pre ferences . This makes it
poss ible to com bine settings such as a sporty en-
gine sett ing wi th light s teer ing. .,._
79