2017 Alfa Romeo Giulia warning lights
[x] Cancel search: warning lightsPage 119 of 268

collisions. A higher energy output is
used for more severe collisions.
This vehicle may be equipped with a
driver and/or front passenger seat belt
buckle switch that detects whether the
driver or front passenger seat belt is
buckled. The seat belt buckle switch
may adjust the inflation rate of the
Advanced Front Air Bags.
This vehicle may be equipped with
driver and/or front passenger seat track
position sensors that may adjust the
inflation rate of the Advanced Front Air
Bags based upon seat position.
Warning!
No objects should be placed over or
near the air bag on the instrument panel or
steering wheel because any such objects
could cause harm if the vehicle is in a
collision severe enough to cause the air
bag to inflate.
Do not put anything on or around the air
bag covers or attempt to open them
manually. You may damage the air bags
and you could be injured because the air
bags may no longer be functional. The
protective covers for the air bag cushions
are designed to open only when the air
bags are inflating.
Relying on the air bags alone could lead
to more severe injuries in a collision. The air
bags work with your seat belt to restrain
you properly. In some collisions, air bags
won’t deploy at all. Always wear your seat
belts even though you have air bags.
Front Air Bag Operation
Front Air Bags are designed to provide
additional protection by supplementing
the seat belts. Front air bags are not
expected to reduce the risk of injury in
rear, side, or rollover collisions. The front
air bags will not deploy in all frontal
collisions, including some that may
produce substantial vehicle damage —
for example, some pole collisions, truck
underrides, and angle offset collisions.
On the other hand, depending on the
type and location of impact, front air
bags may deploy in crashes with little
vehicle front-end damage but that
produce a severe initial deceleration.
Because air bag sensors measure
vehicle deceleration over time, vehicle
speed and damage by themselves are
not good indicators of whether or not
an air bag should have deployed.
Seat belts are necessary for your
protection in all collisions, and also are
needed to help keep you in position,
away from an inflating air bag. When the ORC detects a collision
requiring the front air bags, it signals the
inflator units. A large quantity of
non-toxic gas is generated to inflate the
front air bags.
The steering wheel hub trim cover and
the upper right side of the instrument
panel separate and fold out of the way
as the air bags inflate to their full size.
The front air bags fully inflate in less
time than it takes to blink your eyes.
The front air bags then quickly deflate
while helping to restrain the driver and
front passenger.
Knee Impact Bolsters
The Knee Impact Bolsters help protect
the knees of the driver and front
passenger, and position the front
occupants for improved interaction with
the front air bags.
Warning!
Do not drill, cut, or tamper with the knee
impact bolsters in any way.
Do not mount any accessories to the
knee impact bolsters such as alarm lights,
stereos, citizen band radios, etc.
117
Page 123 of 268

If you do have a collision which deploys
the air bags, any or all of the following
may occur:
The air bag material may sometimes
cause abrasions and/or skin reddening
to the occupants as the air bags deploy
and unfold. The abrasions are similar to
friction rope burns or those you might
get sliding along a carpet or gymnasium
floor. They are not caused by contact
with chemicals. They are not permanent
and normally heal quickly. However, if
you haven’t healed significantly within a
few days, or if you have any blistering,
see your doctor immediately.
As the air bags deflate, you may see
some smoke-like particles. The
particles are a normal by-product of the
process that generates the non-toxic
gas used for air bag inflation. These
airborne particles may irritate the skin,
eyes, nose, or throat. If you have skin or
eye irritation, rinse the area with cool
water. For nose or throat irritation, move
to fresh air. If the irritation continues,
see your doctor. If these particles settle
on your clothing, follow the garment
manufacturer’s instructions for cleaning.
Do not drive your vehicle after the air
bags have deployed. If you are involved
in another collision, the air bags will not
be in place to protect you.
Warning!
Deployed air bags and seat belt
pretensioners cannot protect you in
another collision. Have the air bags, seat
belt pretensioners, and the seat belt
retractor assemblies replaced by an
authorized dealer immediately. Also, have
the Occupant Restraint Controller System
serviced as well.
Note:
Air bag covers may not be obvious
in the interior trim, but they will open
during air bag deployment.
After any collision, the vehicle
should be taken to an authorized
dealer immediately.
Enhanced Accident Response
System
In the event of an impact, if the
communication network remains intact,
and the power remains intact,
depending on the nature of the event,
the ORC will determine whether to have
the Enhanced Accident Response
System perform the following functions:
Cut off fuel to the engine.
Flash hazard lights as long as the
battery has power or until the hazard
light button is pressed. The hazard lights can be deactivated by pressing
the hazard light button.
Turn on the interior lights, which
remain on as long as the battery has
power or for 15 minutes from the
intervention of the Enhanced Accident
Response System.
Unlock the power door locks.
Turn off the Fuel Pump Heater
(if equipped).
Turn off the HVAC Blower Motor.
Close the HVAC Circulation Door.
Enhanced Accident Response
System Reset Procedure
After the event occurs, when the
system is active, a message regarding
fuel cutoff is displayed. Turn the ignition
switch from ignition AVV/START or
ON/RUN to ignition STOP/OFF.
Carefully check the vehicle for fuel leaks
in the engine compartment and on the
ground near the engine compartment
and fuel tank before resetting the
system and starting the engine.
Depending on the nature of the event
the left and right turn signal lights,
located in the instrument panel, may
both be blinking and will continue to
blink. In order to move your vehicle to
the side of the road, you must follow
the system reset procedure.
121
Page 124 of 268
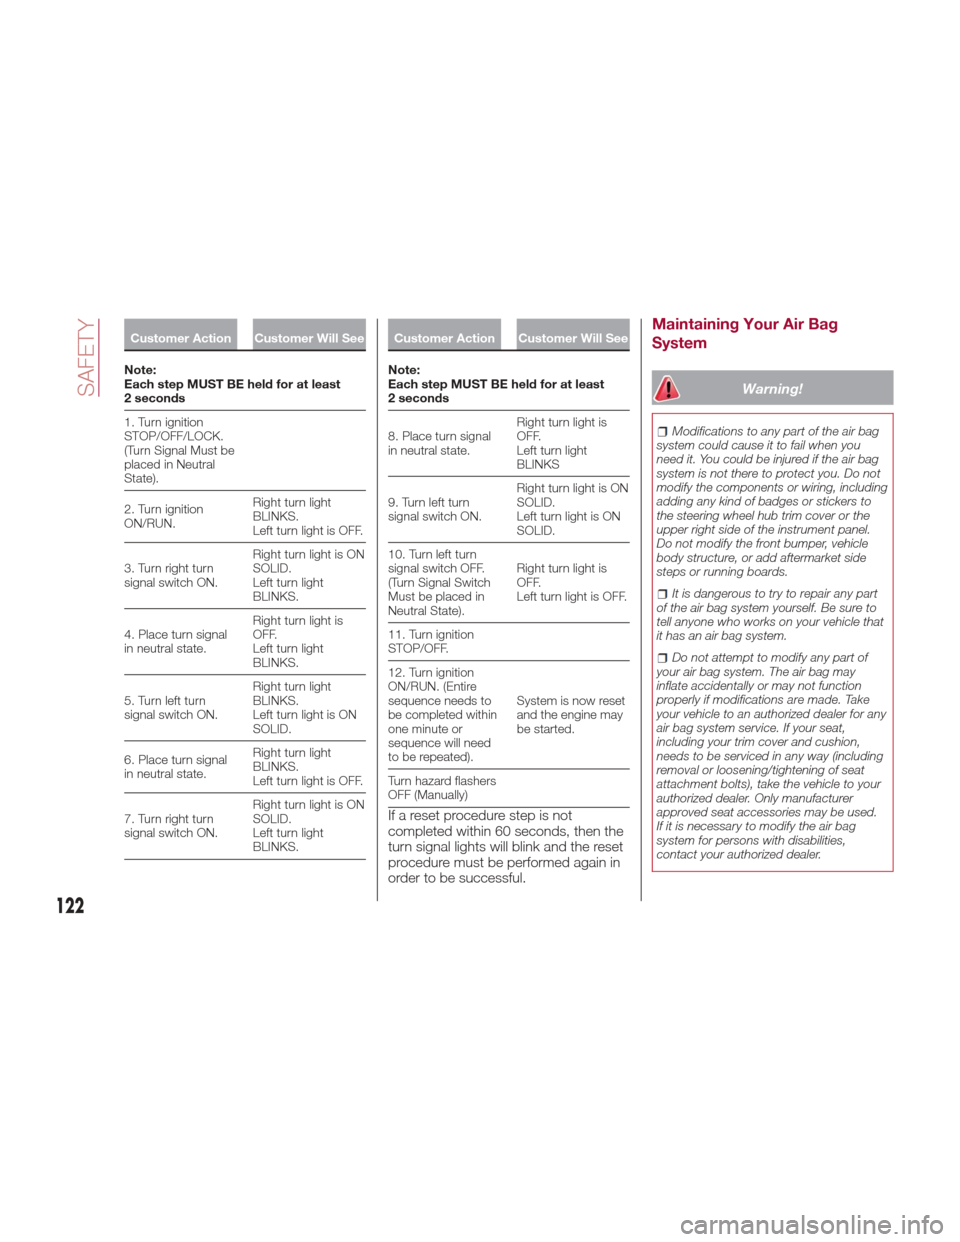
Customer Action Customer Will See
Note:
Each
step MUST BE held for at least
2 seconds
1. Turn ignition
STOP/OFF/LOCK.
(Turn Signal Must be
placed in Neutral
State).
2. Turn ignition
ON/RUN. Right turn light
BLINKS.
Left turn light is OFF.
3. Turn right turn
signal switch ON. Right turn light is ON
SOLID.
Left turn light
BLINKS.
4. Place turn signal
in neutral state. Right turn light is
OFF.
Left turn light
BLINKS.
5. Turn left turn
signal switch ON. Right turn light
BLINKS.
Left turn light is ON
SOLID.
6. Place turn signal
in neutral state. Right turn light
BLINKS.
Left turn light is OFF.
7. Turn right turn
signal switch ON. Right turn light is ON
SOLID.
Left turn light
BLINKS.
Customer Action Customer Will See
Note:
Each
step MUST BE held for at least
2 seconds
8. Place turn signal
in neutral state. Right turn light is
OFF.
Left turn light
BLINKS
9. Turn left turn
signal switch ON. Right turn light is ON
SOLID.
Left turn light is ON
SOLID.
10. Turn left turn
signal switch OFF.
(Turn Signal Switch
Must be placed in
Neutral State). Right turn light is
OFF.
Left turn light is OFF.
11. Turn ignition
STOP/OFF.
12. Turn ignition
ON/RUN. (Entire
sequence needs to
be completed within
one minute or
sequence will need
to be repeated). System is now reset
and the engine may
be started.
Turn hazard flashers
OFF (Manually)
If a reset procedure step is not
completed within 60 seconds, then the
turn signal lights will blink and the reset
procedure must be performed again in
order to be successful.
Maintaining Your Air Bag
System
Warning!
Modifications to any part of the air bag
system could cause it to fail when you
need it. You could be injured if the air bag
system is not there to protect you. Do not
modify the components or wiring, including
adding any kind of badges or stickers to
the steering wheel hub trim cover or the
upper right side of the instrument panel.
Do not modify the front bumper, vehicle
body structure, or add aftermarket side
steps or running boards.
It is dangerous to try to repair any part
of the air bag system yourself. Be sure to
tell anyone who works on your vehicle that
it has an air bag system.
Do not attempt to modify any part of
your air bag system. The air bag may
inflate accidentally or may not function
properly if modifications are made. Take
your vehicle to an authorized dealer for any
air bag system service. If your seat,
including your trim cover and cushion,
needs to be serviced in any way (including
removal or loosening/tightening of seat
attachment bolts), take the vehicle to your
authorized dealer. Only manufacturer
approved seat accessories may be used.
If it is necessary to modify the air bag
system for persons with disabilities,
contact your authorized dealer.
122
SAFETY
Page 140 of 268
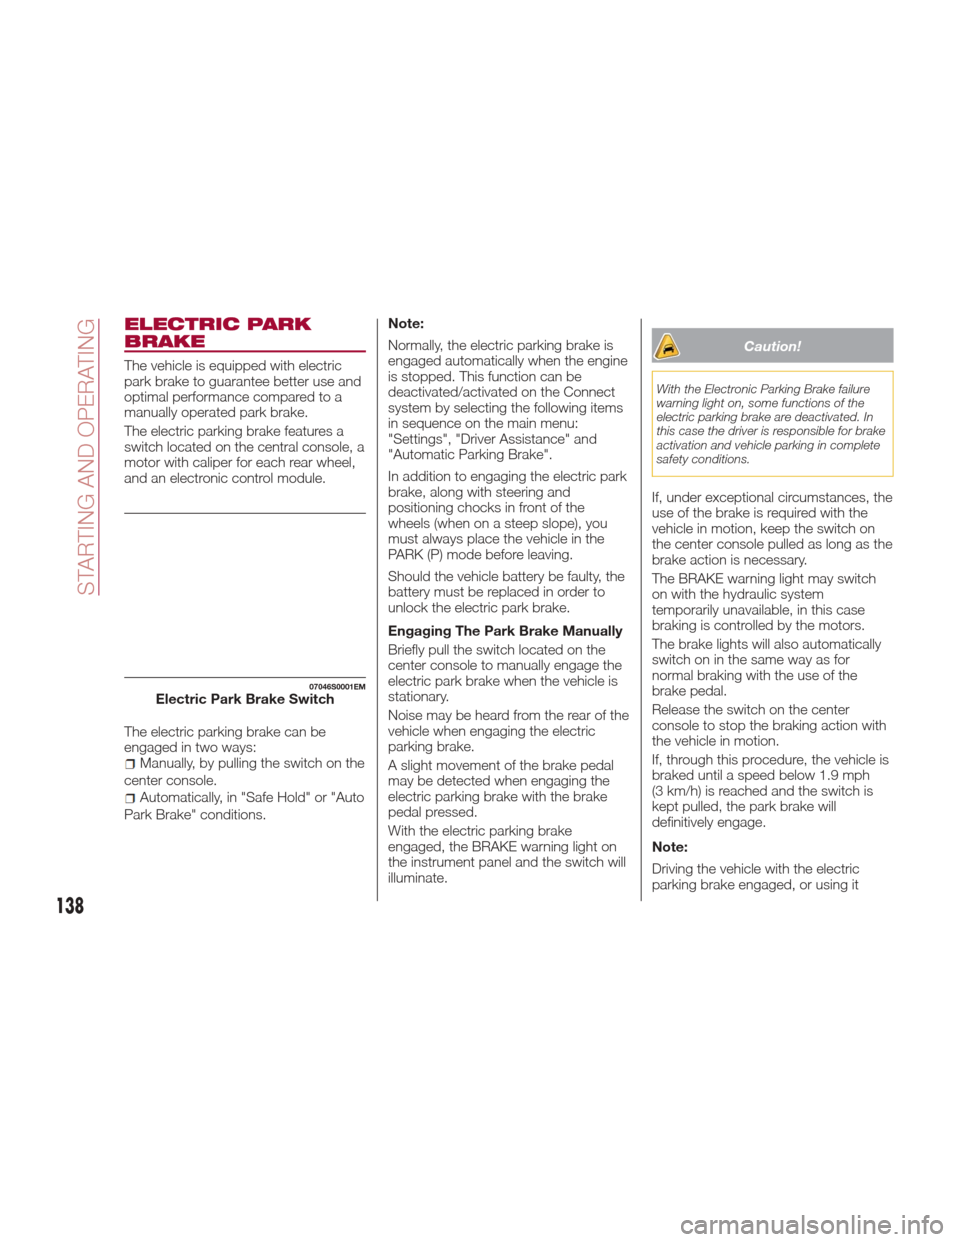
ELECTRIC PARK
BRAKE
The vehicle is equipped with electric
park brake to guarantee better use and
optimal performance compared to a
manually operated park brake.
The electric parking brake features a
switch located on the central console, a
motor with caliper for each rear wheel,
and an electronic control module.
The electric parking brake can be
engaged in two ways:
Manually, by pulling the switch on the
center console.
Automatically, in "Safe Hold" or "Auto
Park Brake" conditions. Note:
Normally, the electric parking brake is
engaged automatically when the engine
is stopped. This function can be
deactivated/activated on the Connect
system by selecting the following items
in sequence on the main menu:
"Settings", "Driver Assistance" and
"Automatic Parking Brake".
In addition to engaging the electric park
brake, along with steering and
positioning chocks in front of the
wheels (when on a steep slope), you
must always place the vehicle in the
PARK (P) mode before leaving.
Should the vehicle battery be faulty, the
battery must be replaced in order to
unlock the electric park brake.
Engaging The Park Brake Manually
Briefly pull the switch located on the
center console to manually engage the
electric park brake when the vehicle is
stationary.
Noise may be heard from the rear of the
vehicle when engaging the electric
parking brake.
A slight movement of the brake pedal
may be detected when engaging the
electric parking brake with the brake
pedal pressed.
With the electric parking brake
engaged, the BRAKE warning light on
the instrument panel and the switch will
illuminate.
Caution!
With the Electronic Parking Brake failure
warning light on, some functions of the
electric parking brake are deactivated. In
this case the driver is responsible for brake
activation and vehicle parking in complete
safety conditions.
If, under exceptional circumstances, the
use of the brake is required with the
vehicle in motion, keep the switch on
the center console pulled as long as the
brake action is necessary.
The BRAKE warning light may switch
on with the hydraulic system
temporarily unavailable, in this case
braking is controlled by the motors.
The brake lights will also automatically
switch on in the same way as for
normal braking with the use of the
brake pedal.
Release the switch on the center
console to stop the braking action with
the vehicle in motion.
If, through this procedure, the vehicle is
braked until a speed below 1.9 mph
(3 km/h) is reached and the switch is
kept pulled, the park brake will
definitively engage.
Note:
Driving the vehicle with the electric
parking brake engaged, or using it
07046S0001EMElectric Park Brake Switch
138
STARTING AND OPERATING
Page 153 of 268
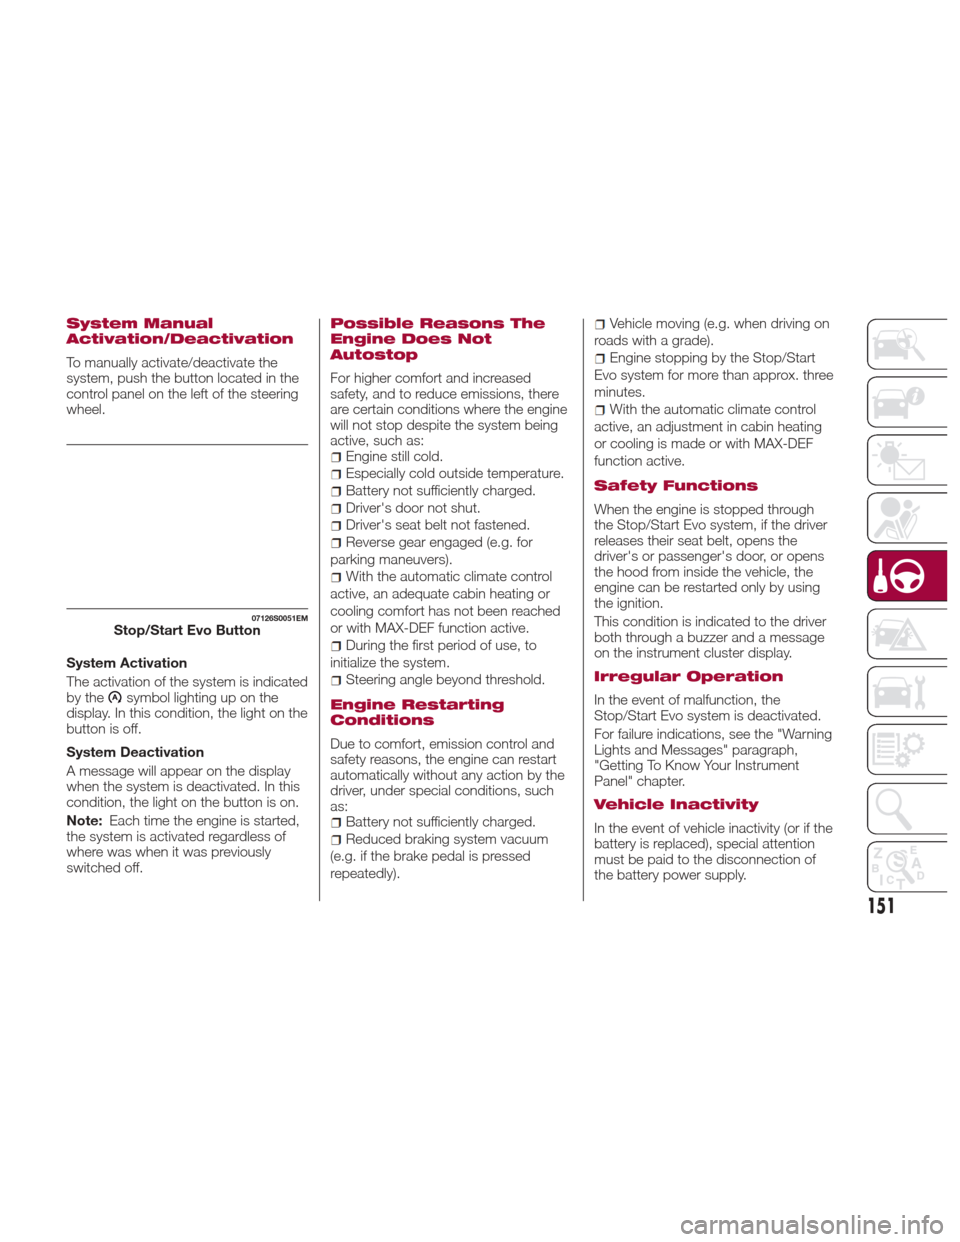
System Manual
Activation/Deactivation
To manually activate/deactivate the
system, push the button located in the
control panel on the left of the steering
wheel.
System Activation
The activation of the system is indicated
by the
symbol lighting up on the
display. In this condition, the light on the
buttonisoff.
System Deactivation
A message will appear on the display
when the system is deactivated. In this
condition, the light on the button is on.
Note: Each time the engine is started,
the system is activated regardless of
where was when it was previously
switched off.
Possible Reasons The
Engine Does Not
Autostop
For higher comfort and increased
safety, and to reduce emissions, there
are certain conditions where the engine
will not stop despite the system being
active, such as:
Engine still cold.
Especially cold outside temperature.
Battery not sufficiently charged.
Driver's door not shut.
Driver's seat belt not fastened.
Reverse gear engaged (e.g. for
parking maneuvers).
With the automatic climate control
active, an adequate cabin heating or
cooling comfort has not been reached
or with MAX-DEF function active.
During the first period of use, to
initialize the system.
Steering angle beyond threshold.
Engine Restarting
Conditions
Due to comfort, emission control and
safety reasons, the engine can restart
automatically without any action by the
driver, under special conditions, such
as:
Battery not sufficiently charged.
Reduced braking system vacuum
(e.g. if the brake pedal is pressed
repeatedly).
Vehicle moving (e.g. when driving on
roads with a grade).
Engine stopping by the Stop/Start
Evo system for more than approx. three
minutes.
With the automatic climate control
active, an adjustment in cabin heating
or cooling is made or with MAX-DEF
function active.
Safety Functions
When the engine is stopped through
the Stop/Start Evo system, if the driver
releases their seat belt, opens the
driver's or passenger's door, or opens
the hood from inside the vehicle, the
engine can be restarted only by using
the ignition.
This condition is indicated to the driver
both through a buzzer and a message
on the instrument cluster display.
Irregular Operation
In the event of malfunction, the
Stop/Start Evo system is deactivated.
For failure indications, see the "Warning
Lights and Messages" paragraph,
"Getting To Know Your Instrument
Panel" chapter.
Vehicle Inactivity
In the event of vehicle inactivity (or if the
battery is replaced), special attention
must be paid to the disconnection of
the battery power supply.
07126S0051EMStop/Start Evo Button
151
Page 166 of 268
If the obstacle is detected in the rear left
and/or right area, a single flashing arc
will be shown in the corresponding area
on the display and the system will emit
an acoustic signal, either at frequent
intervals or constantly.
In general, the vehicle is closer to the
obstacle when a single flashing arc is
shown on the display and the acoustic
signal becomes continuous.
If several obstacles are detected
simultaneously in the rear area, the
display will show all of them, regardless
of the area in which they were detected.
The color on the display depends on
the distance from and position of the
obstacle.
It is possible to exit from the display
screen by pressing the Rotary Pad,
however, the acoustic alert will remain
active.
Fault Indication
Parking sensor faults, if any, will be
indicated when REVERSE is engaged
by a message on the instrument cluster
display. Refer to "Warning Lights And
Messages" in "Getting To Know Your
Instrument Panel".
Messages On The Display
In case of system failure, a dedicated
message appears on the instrument
cluster for about 5 seconds.Cleaning The Front Sensors:Ifthe
display shows a message requiring the
sensors to be cleaned, make sure that
the outer surface and the underside of
the rear bumper is free of debris (e.g.
snow, mud, ice, etc.). Once these areas
are clear, place the ignition in STOP
mode. Then, return it to ON mode. If
the message is still displayed, contact
an authorized dealer.
Audio System Not Available :Ifthe
display shows a message that the
audio system is not available, it means
that the acoustic signal will be emitted
by the instrument panel, and not
through the vehicles speakers.
Note: Some conditions may influence
the performance of the ParkSense
system:
Reduced sensor sensitivity could
be due to the presence of ice, snow,
mud, or thick paint on the surface of
the sensor.
The sensors may detect a false
obstacle (echo interference) due to
mechanical interference, for example
when washing the vehicle or in
extreme weather.
The signals sent by the sensors can
be altered by the presence of
ultrasonic systems (e.g. pneumatic
brake systems of trucks or pneumatic
drills) near the vehicle.
System performance can be
influenced by the position of the
sensors. For example, due to a change
in the ride setting (caused by wear to
the shock absorbers or suspension),
by changing tires, overloading the
vehicle or operations that require the
vehicle to be lowered.
Be sure not to place bumper
stickers or other adhesives over the
sensors as this will affect system
performance.
Warning!
Drivers must be careful when backing up
even when using the Parking Sensor
system. Always check carefully behind your
vehicle, and be sure to check for
pedestrians, animals, other vehicles,
obstructions, or blind spots before backing
up. You are responsible for the safety of
your surroundings and must continue to
pay attention while backing up. Failure to
do so can result in serious injury or death.
164
STARTING AND OPERATING
Page 168 of 268
Note:If the sensors detect several
front and rear obstacles, the closest
obstacle is considered. An intermittent
signal will sound if the obstacles are at
the same distance (front and rear).
When the system emits an acoustic
signal, the volume of the Connect
system, if activated, is automatically
lowered.
Indication On Display
The driver can select the type of
warning they would like to be displayed
through the Connect system. To access
the function on the main menu, select in
the following order:
1. “Settings”
2. “Driver assistance”
3. “Park Sensors”
4. “Mode”
5. “Sound-Display”
Visual Indications
The system indicates the presence of
an obstacle by displaying a single arc in
the detected areas, in relation to the
distance of the object and the position
of the vehicle.
If the obstacle is detected in the front or
rear central area, a single arc will be
displayed as the obstacle approaches,
first constant, then flashing, in addition
to an acoustic signal. If the obstacle is detected in the front or
rear left and/or right area, a single
flashing arc will be shown in the
corresponding area on the display and
the system will emit an acoustic signal,
either at frequent intervals or constantly.
If several obstacles are detected
simultaneously in the front and rear
area, the display will show all of them,
regardless of the area in which they
were detected.
In general, the vehicle is closer to the
obstacle when a single or several
flashing arcs are shown on the display
and the acoustic signal becomes
continuous. The color on the display
depends on the distance from and
position of the obstacle.
It is possible to exit from the display
screen by pressing the Rotary Pad,
however, the acoustic alert will remain
active.
Fault Indication
Parking sensor faults, if any, will be
indicated by a message on the display
on the instrument cluster. Refer to
"Warning Lights And Messages" in
"Getting To Know Your Instrument
Panel".
Messages On The Display
In case of system failure, a dedicated
message appears on the instrument
cluster for about 5 seconds.Cleaning the front or rear
sensors: If the display shows a
message requiring the sensors to be
cleaned, make sure that the outer
surface and the underside of the front
and rear bumpers are free of debris
(e.g. snow, mud, ice, etc.). Once these
areas are clear, place the ignition in
STOP mode. Then, return it to ON
mode. If the message is still displayed,
contact an authorized dealer.
Audio system not available :Ifthe
display shows a message that the
audio system is not available, it means
that the acoustic signal will be emitted
by the instrument panel, and not
through the vehicles speakers.
Note: Some conditions may influence
the performance of the ParkSense
system:
Reduced sensor sensitivity could
be due to the presence of ice, snow,
mud, or thick paint on the surface of
the sensor.
The sensors may detect a false
obstacle (echo interference) due to
mechanical interference, for example
when washing the vehicle or in
extreme weather.
The signals sent by the sensors can
be altered by the presence of
ultrasonic systems (e.g. pneumatic
brake systems of trucks or pneumatic
drills) near the vehicle.
166
STARTING AND OPERATING
Page 178 of 268

Max. Speed
Fuel consumption considerably
increases as speed increases. Maintain
a constant speed, avoiding
unnecessary braking and acceleration,
which cost in terms of both fuel
consumption and emissions.
Acceleration
Accelerating violently severely affects
consumption and emissions:
acceleration should be gradual and
should not exceed the maximum
torque.
Conditions Of Use
Cold Starting
Short trips and frequent cold starts will
not allow the engine to reach optimum
operating temperature. This results in a
significant increase in consumption
levels (from +15 to +30% in city driving)
and emissions.
Traffic And Road Conditions
High fuel consumption is caused by
heavy traffic, for instance when
travelling in traffic with frequent use of
low gears or in cities with many traffic
lights. Winding mountain roads and
rough road surfaces also adversely
affect consumption.
Stops In Traffic
During prolonged stops (e.g. railway
crossings) switch off the engine.
Transporting
Passengers
Warning!
It is extremely dangerous to leave
children in a parked vehicle when the
temperature outside is very high. The heat
inside the passenger compartment may
have serious, or even fatal, consequences.
Never travel in the trunk of the vehicle. In
the event of an accident, anyone inside the
trunk would be at greater risk of serious or
even fatal injury.
Ensure that all the occupants of the
vehicle wear their seat belts correctly and
that any children are positioned correctly
on the dedicated child restraint systems.
Transporting Animals
The intervention of the airbags may be
dangerous for an animal on the front
seat. It is therefore advised to arrange
animals on the rear seat inside
dedicated cages restrained by the
vehicle’s seat belts.
Keep in mind that, in the event of a
sudden braking or an accident, an
inadequately restrained animal may be
projected within the passenger
compartment, risking injury to the
animal itself and the other occupants of
the vehicle.
Exhaust Gas
Exhaust emissions are very dangerous,
and may be lethal. They contain carbon
monoxide, a colorless, odorless gas
which can cause fainting and poisoning
if inhaled.
To avoid inhaling carbon monoxide,
take the following measures:
Do not keep the engine running in
closed spaces.
If, for some reason (e.g. transporting
bulky loads), it is necessary to drive
with the trunk open, close all the
windows and run the climate control fan
at maximum speed. DO NOT activate
air recirculation mode.
Should it be necessary to stay in the
stationary vehicle with engine running,
adjust the ventilation/heating system
and operate the fan in such a way that
outside air will enter the passenger
compartment. Activate the maximum
fan speed.
Maintenance of the exhaust system
provides the best protection against
leaks of carbon monoxide into the
passenger compartment.
Should an unusual noise from the
exhaust system or the presence of
exhaust gas in the passenger
compartment be identified, or if the
underbody or rear section of the vehicle
is damaged, have the entire exhaust
system and bodywork areas checked
to identify any components which are
176
STARTING AND OPERATING