2017 Acura NSX wheel
[x] Cancel search: wheelPage 35 of 116

64 || 65
VEHICLE CONTROLSVEHICLE CONTROLS
Intermittent (INT) wipers
When you move the lever to the INT position, the wipers operate based on the wiper delay.
Rotate the adjustment ring to adjust the wiper delay.
Intermittent time adjusting ringLower speed,
fewer sweeps
Higher speed,
more sweeps
Adjusting the Seats
Make seat adjustments before driving to ensure the best comfort and safety.
n
Adjusting the Driver
’s seat
Adjust the driver’s seat as far back as possible while allowing
you to maintain full control of the vehicle. You should be able
to sit upright and well back in the seat, adequately press the
pedals without leaning forward, and grip the steering wheel
comfortably. The passenger’s seat should be adjusted so that
it is as far back from the front airbag in the dashboard as
possible.
Allow suf�cient
space.
Move
back.
The National Highway Traffic Safety Administration and Transport Canada recommend that
drivers allow at least 10 inches (25 cm) between the center of the steering wheel and their
chest.
Page 38 of 116

70 || 71
VEHICLE CONTROLSVEHICLE CONTROLS
n Adjusting the Steering Wheel
The steering wheel height and distance
from your body can be adjusted so that you can
comfortably grip the steering wheel in an appropriate driving posture.
1.
Pull up the steering wheel adjustment lever
.
2.
Move the steering
wheel up or down, and in or out.
3.
Push down the steering wheel adjustment lev
er to lock
the steering wheel in position.
To adjust
To lock
Lever
Adjusting the steering wheel position while driving may cause you to lose control
of the vehicle and be seriously injured in a crash.
Adjust the steering wheel only when the vehicle is stopped.
WARNING
Driving Position Memory System*
You can store two driver’s seat and door mirror positions into memory when the vehicle is
on. When you unlock and open the driver’s door with a remote transmitter, the seat and door
mirrors adjust automatically to the corresponding preset positions.
Adjust the seat and mirrors to your preferred positions.
1.
Press SET.
2.
Press and hold memory button 1 or 2. Y
ou will
hear two beeps when the memory is set.
Press one of the memory buttons to recall previously stored
positions. Lumbar positions cannot be stored.
SET Button
Memory
Button
1
Memory
Button 2
*if equipped
Page 44 of 116

82 || 83
AUDIO AND CONNECTIVITYAUDIO AND CONNECTIVITY
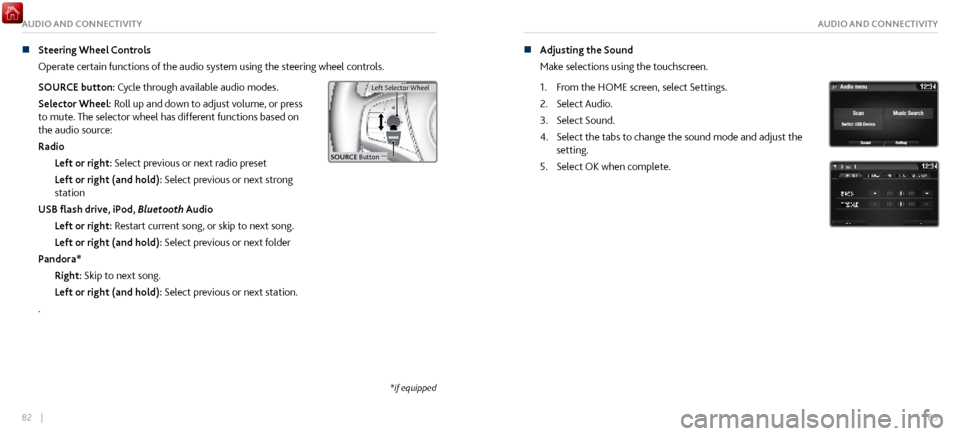
n Steering Wheel Controls
Operate certain
functions of the audio system using the steering wheel controls.
SOURCE button: Cycle through available audio modes.
Selector Wheel: Roll up and down to adjust volume, or press
to mute. The selector wheel has different functions based on
the audio source:
Radio Left or right: Select previous or next radio preset
Left or right (and hold): Select previous or next strong
station
USB flash drive, iPod, Bluetooth Audio
Left or right: Restart current song, or skip to next song.
Left or right (and hold): Select previous or next folder
Pandora* Right: Skip to next song.
Left or right (and hold): Select previous or next station.
.
Left Selector Wheel
SOURCE Butto n
Left Selector Wheel
n Adjusting the Sound
Make selections
using the touchscreen.
1.
From the HOME scr
een, select Settings.
2.
Select Audio.
3.
Select Sound.
4.
Select the tabs to change the sound mode
and adjust the
setting.
5.
Select OK when complete.
*if equipped
Page 48 of 116

90 || 91
AUDIO AND CONNECTIVITYAUDIO AND CONNECTIVITY
Android Auto™
Connect a compatible Android phone to the system. You can use the touchscreen to make a
phone call, listen to music, and more. Visit the Android Auto website for more information.
Park in a safe place before connecting your smartphone and launching any compatible apps.
1.
Download the Android Auto
app to your phone.
2.
Connect the phone to
the USB port (see page 80).
The phone is automatically paired. A tutorial also appears.
3.
From the HOME scr
een, select Android Auto.
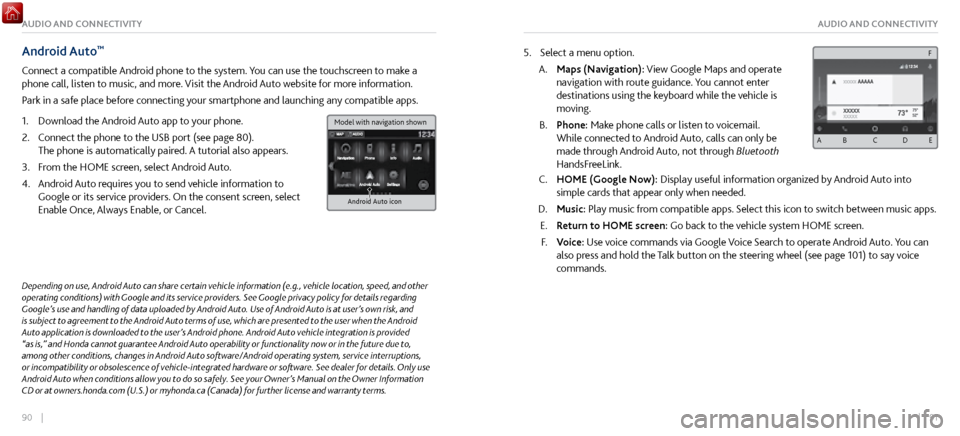
4.
Android Auto r
equires you to send vehicle information to
Google or its service providers. On the consent screen, select
Enable Once, Always Enable, or Cancel.
Android Auto icon
5. Select a menu option.
A.
Maps (Navigation): View Google Maps and
operate
navigation with route guidance. You cannot enter
destinations using the keyboard while the vehicle is
moving.
B.
Phone: Make phone calls or listen
to voicemail.
While connected to Android Auto, calls can only be
made through Android Auto, not through Bluetooth
HandsFreeLink.
C. HOME (Google Now): Display useful information organiz ed by Android Auto into
simple cards that appear only when needed.
D.
Music: Play music from compatible apps.
Select this icon to switch between music apps.
E.
Return to HOME screen:
Go back to the vehicle system HOME screen.
F.
Voice: Use
voice commands via Google Voice Search to operate Android Auto. You can
also press and hold the Talk button on the steering wheel (see page 101) to say voice
commands.
Depending on use, Android Auto can share certain vehicle information (e.g., vehicle location, speed, and other
operating conditions) with Google and its service providers. See Google privacy policy for details regarding
Google’s use and handling of data uploaded by Android Auto. Use of Android Auto is at user’s own risk, and
is subject to agreement to the Android Auto terms of use, which are presented to the user when the Android
Auto application is downloaded to the user’s Android phone. Android Auto vehicle integration is provided
“as is,” and Honda cannot guarantee Android Auto operability or functionality now or in the future due to,
among other conditions, changes in Android Auto software/Android operating system, service interruptions,
or incompatibility or obsolescence of vehicle-integrated hardware or software. See dealer for details. Only use
Android Auto when conditions allow you to do so safely. See your Owner’s Manual on the Owner Information
CD or at owners.honda.com (U.S.) or myhonda.ca (Canada) for further license and warranty terms.
A B C D E
F
Model with navigation shown
Page 53 of 116

| 101100 |
AUDIO AND CONNECTIVITY
n Searching for Music
Use the touchscreen to search for tracks stored on the device.
1.
From the audio scr
een, press MENU.
2.
Select Music Search.
3.
Select a search category.
4.
Select the track you want to play
.
Music Search works with many but not all devices.BLUETOOTH® HANDSFREELINK®
Learn how to operate the vehicle’s hands-free calling system.
Basic HFL Operation
Make and receive phone calls using the vehicle’s audio system, without handling your phone.
Visit www.acura.com/handsfreelink (U.S.) or www.handsfreelink.ca (Canada) to check phone
compatibility.
n
HFL Displays and Controls
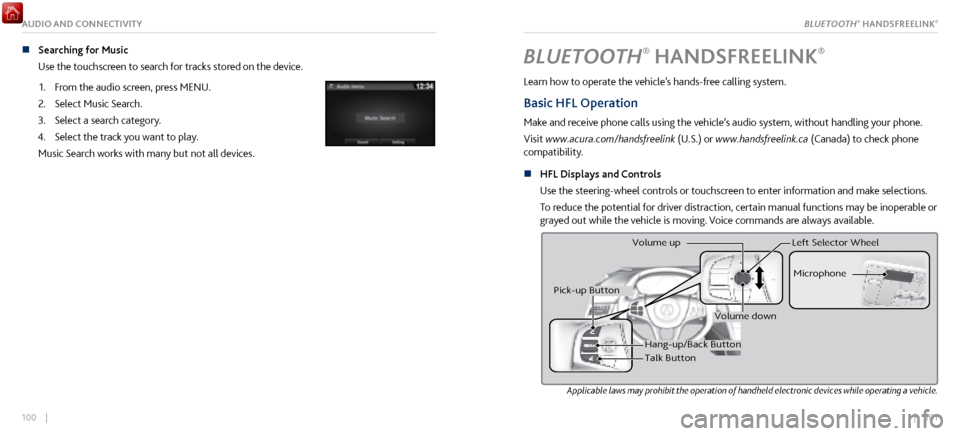
Use
the steering-wheel controls or touchscreen to enter information and make selections.
To reduce the potential for driver distraction, certain manual functions may be inoperable or
grayed out while the vehicle is moving. Voice commands are always available.
Applicable laws may prohibit the operation of handheld electronic devices while operating a vehicle.
Hang-up/Back Butto n
Talk Button Microphone
Pick-up Button
Volume up
Volume down
Left Selector Wheel
BLUETOOTH® HANDSFREELINK®
Page 60 of 116

114 || 115
NAVIGATIONNAVIGATION
NAVIGATION*
Learn how to enter a destination and operate the navigation system.
Basic Navigation Operation
A real-time navigation system uses GPS and a map database to show your current location and
help guide you to a desired destination. You can operate the system using voice commands or
the system controls.
To reduce the potential for driver distraction, certain manual functions may be inoperable or
grayed out while the vehicle is moving. Voice commands are always available.
n
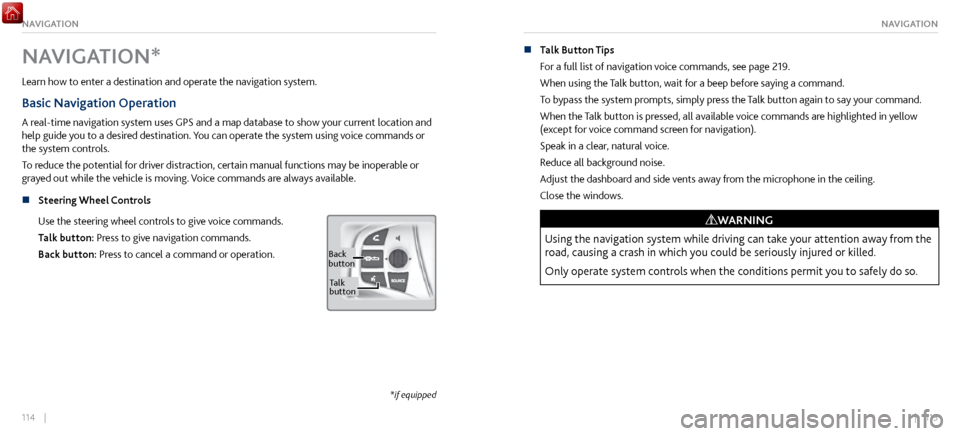
Steering Wheel Controls
Use
the steering wheel controls to give voice commands.
Talk button: Press to give navigation commands.
Back button: Press to cancel a command or operation.
Back
button
Ta lk
button
*if equipped
n Talk Button Tips
For a full list
of navigation voice commands, see page 219.
When using the Talk button, wait for a beep before saying a command.
To bypass the system prompts, simply press the Talk button again to say your command.
When the Talk button is pressed, all available voice commands are highlighted in yellow
(except for voice command screen for navigation).
Speak in a clear, natural voice.
Reduce all background noise.
Adjust the dashboard and side vents away from the microphone in the ceiling.
Close the windows.
Using the navigation system while driving can take your attention away from the
road, causing a crash in which you could be seriously injured or killed.
Only operate system controls when the conditions permit you to safely do so.
WARNING
Page 66 of 116

126 || 127
DRIVINGDRIVING
If the doors are frozen shut, use warm water around the door edges to melt any ice. Do not
try to force them open, as this can damage the rubber trim around the doors. When done,
wipe dry to avoid further freezing.
NOTICE
n
Interior Checks
Store or secure all items
on board properly.
Do not pile items higher than the seat height.
Do not place anything in the footwells. Make sure to secure the floor mats.
If you have any animals on board, do not let them move freely in the vehicle.
Securely close and lock both doors.
Adjust your seating position, mirrors, and steering wheel properly.
Everyone in the vehicle must fasten their seat belt.
Make sure that the indicators in the instrument panel come on when you start the vehicle,
and go off soon after.
Improper accessories or modifications can affect your vehicle’s handling,
stability, and performance, and cause a crash in which you can be seriously hurt
or killed.
Follow all instructions in the vehicle owner’s manual regarding accessories and
modifications.
WARNING
Maximum Load Limit
Carrying too much cargo or improperly storing it can affect your vehicle’s handling, stability,
stopping distance, and tires, and make it unsafe.
The maximum load for your vehicle is 507 lbs (230 kg). See the Tire and Loading Information
label on the driver’s doorjamb. The maximum load in the trunk is 100 lbs (45 kg).
The vehicle maximum load includes the total weight of all occupants, cargo,
accessories, and the tongue load if you are towing a trailer. Below are the steps for
determining the correct load limit:
1. Locate the statement “The combined weight of occupants and cargo should never exceed
XXX kg or XXX lbs.” on your vehicle’s placard.
2.
Determine the combined weight of the driver
and passengers that will be riding in your
vehicle.
3.
Subtract the combined weight of the driver
and passengers from XXX kg or XXX lbs.
4.
The resulting figure equals
the available amount of cargo and luggage load capacity. For
example, if the “XXX” amount equals 1,400 lbs. and there will be five 150 lb. passengers in
your vehicle, the amount of available cargo and luggage load capacity is 650 lbs. (1,400 -
750 (5 x 150) = 650 lbs.)
High Voltage Battery Maintenance
All batteries discharge if not used. For best battery life and capacity, drive your vehicle for at
least 30 minutes, at least once every three months. Try to avoid parking under direct summer
sun. For battery maintenance while storing the vehicle, see page 207.
Page 69 of 116

132 || 133
DRIVINGDRIVING
Shifting
Change your vehicle’s gears to begin driving.
n
Electronic Gear Selector
Park (P):
Used when parking or starting the power system.
Reverse (R): Used for reversing.
Neutral (N): Used to disengage the transmission from the
engine and motor.
Drive (D/M): Toggles between Drive and Manual modes.
Drive is for automatic gear selection. Manual is for the driver
to shift gears sequentially.
The vehicle can roll away if left unattended without confirming that Park is
engaged.
Always keep your foot on the brake pedal until you have confirmed that (P) is
shown on the gear position indicator.
WARNING
When you change from D/M to R or vice versa, come to a complete stop and keep the
brake pedal depressed. Do not press the accelerator. Otherwise, you may damage the
transmission.
NOTICE n
Sequential Shift Mode
Use the paddle shifters to change gears
without removing your hands from the steering
wheel.
(-) Paddle shifter:
Pull to shift down to
a lower gear. (+) Paddle shifter:
Pull to shift up to a
higher gear.
Gear position indicator