Page 144 of 369
143
Audio SystemUSB Ports
Audio
USB Ports
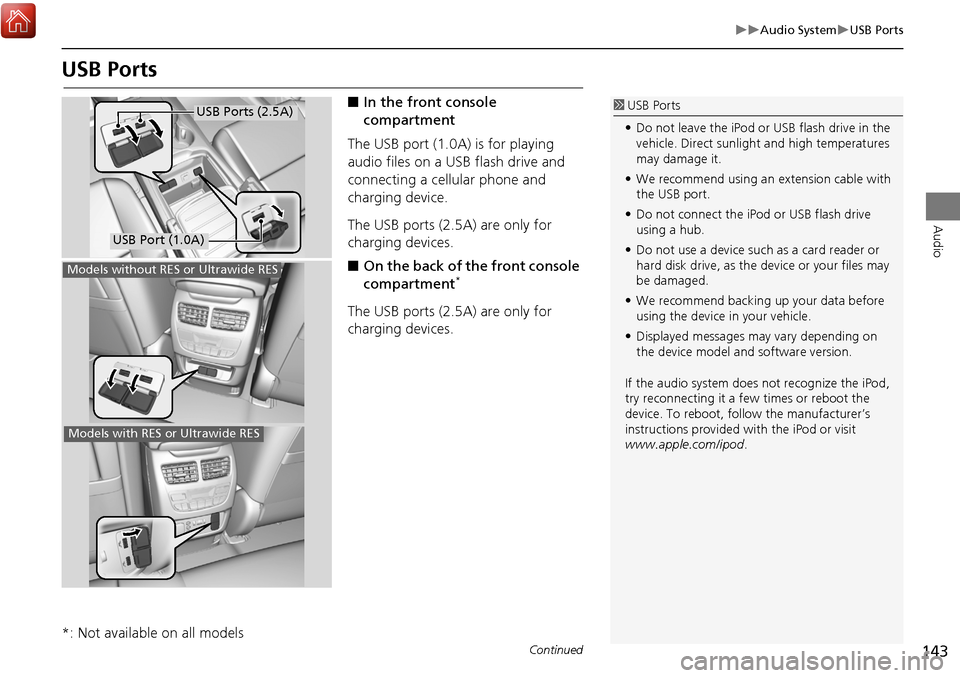
■In the front console
compartment
The USB port (1.0A) is for playing
audio files on a USB flash drive and
connecting a cellular phone and
charging device.
The USB ports (2.5A) are only for
charging devices.
■ On the back of the front console
compartment
*
The USB ports (2.5A) are only for
charging devices.
*: Not available on all models
1 USB Ports
• Do not leave the iPod or USB flash drive in the
vehicle. Direct sunlight and high temperatures
may damage it.
• We recommend using an extension cable with
the USB port.
• Do not connect the iPod or USB flash drive
using a hub.
• Do not use a device such as a card reader or
hard disk drive, as the device or your files may
be damaged.
• We recommend backing up your data before
using the device in your vehicle.
• Displayed messages may vary depending on
the device model a nd software version.
If the audio system does not recognize the iPod,
try reconnecting it a few times or reboot the
device. To reboot, foll ow the manufacturer’s
instructions provided with the iPod or visit
www.apple.com/ipod.
USB Port (1.0A)
USB Ports (2.5A)
Models without RES or Ultrawide RES
Models with RES or Ultrawide RES
Continued
Page 176 of 369
175
Playing SiriusXM® RadioAudio Menu
Audio
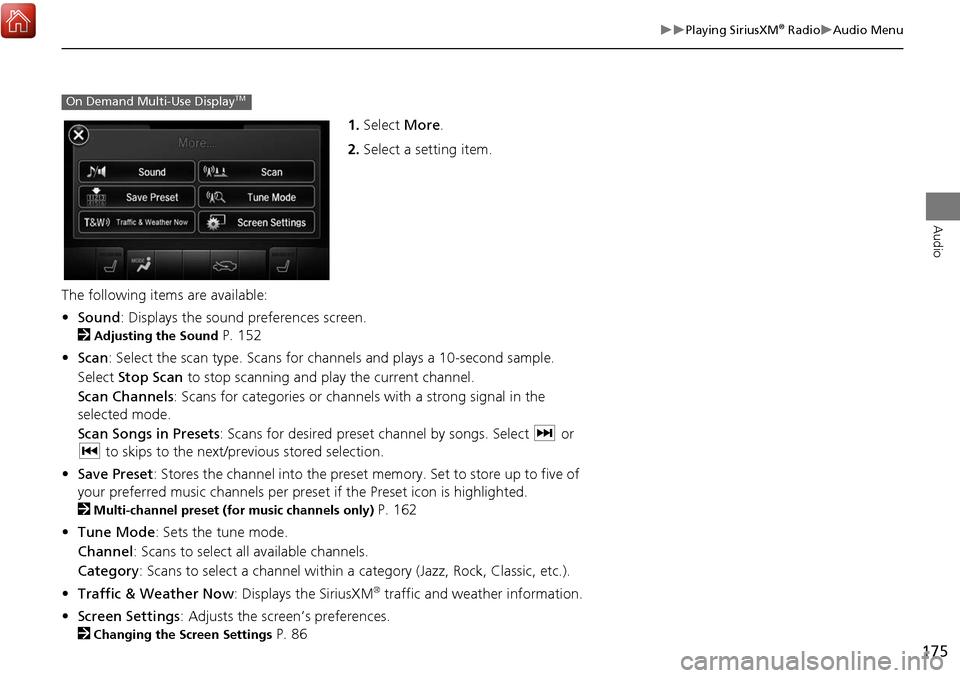
1.Select More.
2. Select a setting item.
The following items are available:
• Sound : Displays the sound preferences screen.
2
Adjusting the Sound P. 152
• Scan : Select the scan type. Scans for cha nnels and plays a 10-second sample.
Select Stop Scan to stop scanning and play the current channel.
Scan Channels : Scans for categories or channels with a strong signal in the
selected mode.
Scan Songs in Presets : Scans for desired preset channel by songs. Select x or
c to skips to the next/previous stored selection.
• Save Preset : Stores the channel into the preset memory. Set to store up to five of
your preferred music channels per preset if the Preset icon is highlighted.
2
Multi-channel preset (for music channels only) P. 162
• Tune Mode : Sets the tune mode.
Channel: Scans to select all available channels.
Category : Scans to select a channel within a category (Jazz, Rock, Classic, etc.).
• Traffic & Weather Now : Displays the SiriusXM
® traffic and weather information.
• Screen Settings : Adjusts the screen’s preferences.
2
Changing the Screen Settings P. 86
On Demand Multi-Use DisplayTM
Page 184 of 369
183
Playing a DiscRecommended CDs
Audio
■Protecting CDs
Follow these precautions when handling or storing CDs:
• Store a CD in its case when it is not being played.
• When wiping a CD, use a soft clean cloth from the center to the outside edge.
• Handle a CD by its edge. Never touch either surface.
• Never insert foreign objects into the CD player.
• Keep CDs out of direct sunlight and extreme heat.
• Do not place stabilizer rings or labels on the CD.
• Avoid fingerprints, liquids, and felt-tip pens on the CD.1Protecting CDs
Do not insert a damaged CD. It may be stuck
inside and damage the audio unit.
NOTICE
Examples:
• Damaged CDsBubbled/
Wrinkled
With Label/
Sticker Using
Printer Label
Kit
Sealed With Plastic Ring •Poor quality
CDs
Chipped/
Cracked Warped Burrs
• Small CDs
3 in
(80 mm)
CD
•
Bubbled, wrinkled, labeled, and
excessively thick CDs
Page 185 of 369
184
Audio
Playing Hard Disc Drive (HDD) Audio
The Hard Disc Drive (HDD) Audio functi on plays tracks from music CDs that have
been recorded onto the built-in HDD. You can arrange the tracks in playlists or play
the tracks using various search methods.
Selecting HDD Mode
1. Press the MENU button. (in AUDIO mode)
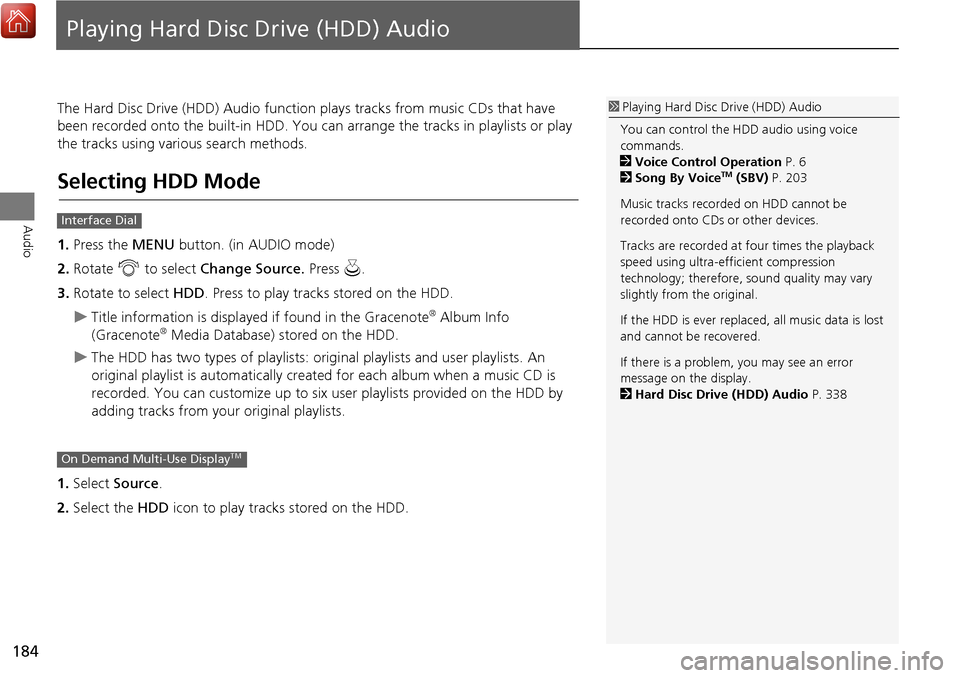
2. Rotate i to select Change Source. Press u.
3. Rotate to select HDD. Press to play tracks stored on the HDD.
Title information is displayed if found in the Gracenote® Album Info
(Gracenote® Media Database) stored on the HDD.
The HDD has two types of playlists: origin al playlists and user playlists. An
original playlist is automatically creat ed for each album when a music CD is
recorded. You can customiz e up to six user playlists provided on the HDD by
adding tracks from your original playlists.
1. Select Source .
2. Select the HDD icon to play tracks stored on the HDD.
1Playing Hard Disc Drive (HDD) Audio
You can control the HDD audio using voice
commands.
2 Voice Control Operation P. 6
2 Song By Voice
TM (SBV) P. 203
Music tracks recorded on HDD cannot be
recorded onto CDs or other devices.
Tracks are recorded at four times the playback
speed using ultra-efficient compression
technology; therefore, sound quality may vary
slightly from the original.
If the HDD is ever replaced, all music data is lost
and cannot be recovered.
If there is a problem, you may see an error
message on the display.
2 Hard Disc Drive (HDD) Audio P. 338
Interface Dial
On Demand Multi-Use DisplayTM
Page 271 of 369
270
AcuraLink®Security Features
AcuraLink
®
Security Features
Your subscribed telematics service provider can track your vehicle’s location, remotely
lock or unlock doors, and help you find your vehicle.
To use these features, you need your user ID and personal identification number (PIN).
■ Stolen vehi cle tracking
This feature searches and tracks down your ve hicle position even if it is on the move.
If you believe that your vehicle has been stolen, contact the pol ice as well as the
provider.
■ Remote door lock/unlock
The provider can remotely lock or unlock doors upon your request.
■ Vehicle finder
This feature is convenient to use when try ing to locate your vehicle in large areas,
such as a crowded parking lot. If you ca nnot locate your vehicle after using the
remote transmitter’s answerback function , you can contact the provider which can
then flash your vehicle’s exterior lights and sound the horn.
■ Security ala rm notification
If the security system in your vehicle dete cts an abnormal condition, such as someone
tampering with the lock on your vehicle, the provider notifies you by your preferred
method.1 Security Features
The contact information of your provider, your
user ID and PIN will be given when you subscribe
to AcuraLink
®. If you forget any of the above,
contact a dealer or visit www.acura.ca/owners/
acuralink .
You can also activate the remote door lock/
unlock and vehicle finder features from the
Internet or using your smartphone app. Ask a
dealer or visit www.acura.ca/owners/acuralink .
1Vehicle finder
The lights will stop fl ashing and horn will stop
sounding under the following conditions:
•When 30 seconds have elapsed.•You unlock the doors using the remote
transmitter.
•You unlock the doors us ing the keyless access
system.
•You unlock the doors using the built-in key.
•The power mode is set to ACCESSORY or ON.
Page 299 of 369
298
Wireless HeadphonesReplacing the Batteries
Rear Entertainment System
Replacing the Batteries
1.Insert a coin in the slot and twist it
slightly to pry the cover away from
the earpiece.
2. Pull the cover outward, and pivot it
out of the way.
3. Remove the battery.
4. Install the new battery in the
earpiece as shown in the diagram
next to the battery slot.
Battery Type: AAA battery
5. Slide the cover back into place on
the earpiece, then press down on
the back edge to lock it in place.
1Replacing th e Batteries
The battery is under the cover on the left
earpiece.
An improperly disposed of battery can hurt the
environment. Always c onfirm local regulations
for battery disposal.
If static is heard in th e headphones, try replacing
the battery.
Coin
Cover
Battery
Page 305 of 369
304
Other Features
Multi-view Rear Camera*
About Your Multi-View Rear Camera
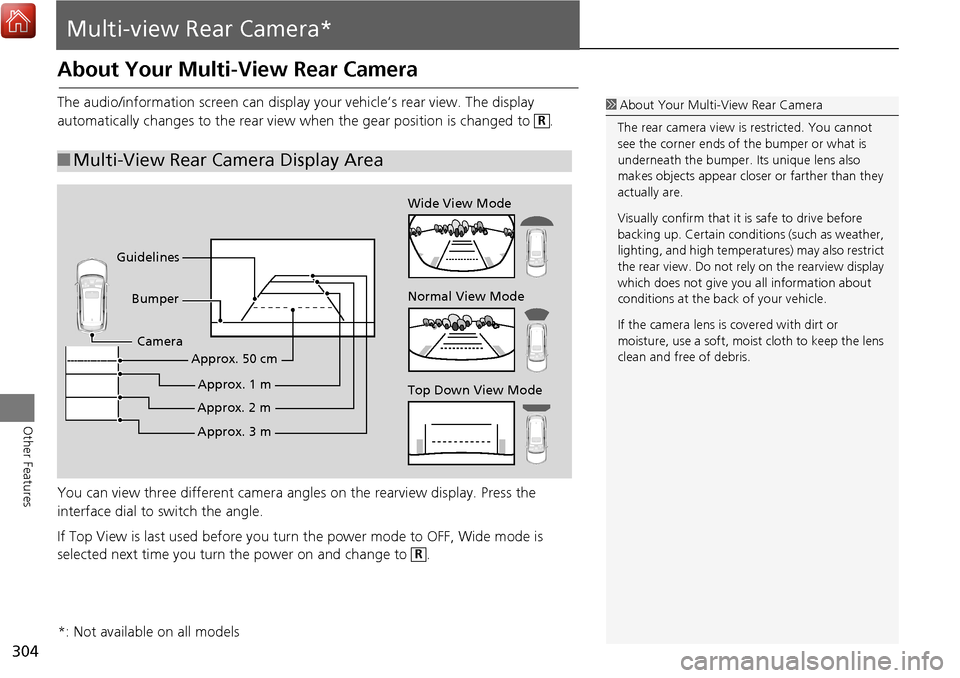
The audio/information screen can display your vehicle’s rear view. The display
automatically changes to the rear view wh en the gear position is changed to .
You can view three different camera angl es on the rearview display. Press the
interface dial to switch the angle.
If Top View is last used before you turn the power mode to OFF, Wide mode is
selected next time you turn the power on and change to .
■ Multi-View Rear Camera Display Area
1 About Your Multi- View Rear Camera
The rear camera view is restricted. You cannot
see the corner ends of the bumper or what is
underneath the bumper. Its unique lens also
makes objects appear closer or farther than they
actually are.
Visually confirm that it is safe to drive before
backing up. Certain conditi ons (such as weather,
lighting, and high temperat ures) may also restrict
the rear view. Do not rely on the rearview display
which does not give you all information about
conditions at the back of your vehicle.
If the camera lens is covered with dirt or
moisture, use a soft, moist cloth to keep the lens
clean and free of debris.R
Top Down View Mode Normal View Mode Wide View Mode
Guidelines Bumper
Camera
Approx. 3 m
Approx. 2 m
Approx. 1 m
Approx. 50 cm
R
*: Not available on all models
Page 329 of 369
328
TroubleshootingAbout camera view image
Other Features
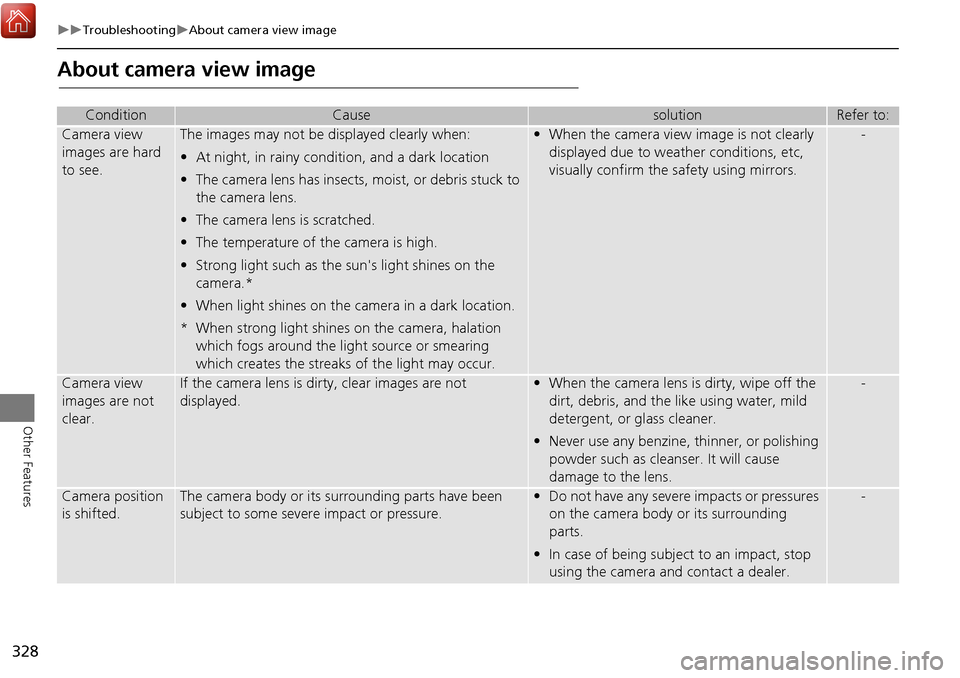
About camera view image
ConditionCausesolutionRefer to:
Camera view
images are hard
to see.The images may not be displayed clearly when:
•At night, in rainy condition, and a dark location
• The camera lens has insects, moist, or debris stuck to
the camera lens.
• The camera lens is scratched.
• The temperature of the camera is high.
• Strong light such as the sun's light shines on the
camera.*
• When light shines on the camera in a dark location.
* When strong light shines on the camera, halation which fogs around the light source or smearing
which creates the streaks of the light may occur. • When the camera view image is not clearly
displayed due to weather conditions, etc,
visually confirm the safety using mirrors.-
Camera view
images are not
clear.If the camera lens is dirty, clear images are not
displayed.•When the camera lens is dirty, wipe off the
dirt, debris, and the like using water, mild
detergent, or glass cleaner.
• Never use any benzine, thinner, or polishing
powder such as cleanser. It will cause
damage to the lens.-
Camera position
is shifted.The camera body or its surrounding parts have been
subject to some severe impact or pressure.•Do not have any severe impacts or pressures
on the camera body or its surrounding
parts.
• In case of being subject to an impact, stop
using the camera and contact a dealer.-