Page 33 of 192
 To stop the opening: press the
button 1 while the soft top is opening.
Press it again to continue opening.
Opening fully: from the spoiler
position, press the button 1 again. If
one of the two buttons")
To stop the opening: press the
button 1 while the soft top is opening.
Press it again to continue opening.
Opening fully: from the spoiler
position, press the button 1 again. If
one of the two buttons 1 or 2 is
pressed before reaching the final
position, the top will stop and
movement will be reversed to the initial
position (spoiler position).
Closing the soft top:
Closing from the fully open position:
press the button 2 fig. 32 once. If one
of the two buttons is pressed before
the spoiler position is reached, the soft
top will stop and movement will be
reversed, moving to the initial position
(fully open).
Closing from the spoiler position:
press the button 2 to bring the soft top
automatically to the safety position
(approximately 25 cm from fully closed
position). If one of the two buttons is
pressed before the stop position is
reached, the top may stop in an
intermediate horizontal opening
position.
Press and hold the button 2 with the
soft top in the safety position. The top
will stop instantly if the button is
released before the fully closed position
is reached.
OPERATION BY MEANS OF
REMOTE CONTROL
The remote control can only be used
with the engine off and the doors
closed.
NOTE The remote control can be used
to open the top to the horizontal open
position (spoiler position).
Continuously pressing the "release"
button 1 fig. 33, the soft top opens and
stops in any position when the button
is released.IMPORTANT NOTES
The horizontal and vertical parts of
the soft top can be operated at any
speed lower than 100 and 80 km/h
respectively.
The top can be operated at any
temperature in the range from -18 to
+80.
It is recommended to have the
engine running always when opening or
closing the soft top.
If required, remove the battery with
open or closed soft top, but NOT when
the soft top is moving.
Do not fix luggage transport devices
to the soft top and do not travel with
objects resting on the open top.
32AB0A0287C
1
33AB0A0332C
31
Page 34 of 192
 If requested by the user, the heated
rear window is only turned on if the
soft top is fully closed. If the soft top is
closed incorrectly, the heated rear
window does not operate and
the relevant warn")
If requested by the user, the heated
rear window is only turned on if the
soft top is fully closed. If the soft top is
closed incorrectly, the heated rear
window does not operate and
the relevant warning light does not
come on.
Do not remove ice from the soft top
with a sharp item.
To prevent damage, do not use
scrapers or sprays to remove ice from
the heated rear window.
Do not put objects on the soft top:
they could fall if the it is operated,
causing damage and injury.
It is advisable to cover the soft top
with a protective sheet if the car is
left parked in the open for a long time.
Do not keep the soft top folded for a
long time: this could cause folds and
creases in the fabric.
Before moving the soft top, check
that there is enough room to carry
out the operation and that there are no
hindrances or people close to the
moving parts of the soft top.
The cooled air flow into the
passenger compartment may decrease
if the automatic climate control system
is on and the top is not completely
closed.
With the soft top open and the car
travelling, the voice recognition system
may not recognise voice commands
because of the background noise: with
the soft top closed and at a high speed,
the voice function for number dialling
may not be recognised.
EMERGENCY OPERATION
If the switches fail, the soft top can be
moved manually proceeding as
described below:
take the key 1 fig. 34 provided and
located in the boot together with the
tool box or the Fix&Go Automatic kit;
fit the key in position, visible from
inside the luggage compartment
beneath the parcel shelf in the point 1
shown in fig. 35;
turn: clockwise to open the soft top;
anticlockwise to close it.If the tailgate fails to open due to the
battery being flat, or following a of the
tailgate’s electric lock, perform an
emergency tailgate opening as
described in the “luggage
compartment” paragraph of the
“Knowing your car” chapter, the
manually move the soft top as
described above.
To restore automatic movement,
contact an Abarth Dealership.
INITIALISATION
PROCEDURE
The soft top must be re-initialised after
disconnecting the battery or if the
relevant protection fuse is blown.
Proceed as follows:
before carrying out any other
operation, make sure the engine is on
during the whole initialisation
procedure;
1
34AB0A0327C
35AB0A0295C
32
KNOWING YOUR CAR
Page 35 of 192
 keep the opening button pressed
until the soft top is completely open;
when the soft top is completely
open, keep the button pressed for at
least 2 seconds;
keep the closing button pressed
until the s")
keep the opening button pressed
until the soft top is completely open;
when the soft top is completely
open, keep the button pressed for at
least 2 seconds;
keep the closing button pressed
until the soft top is completely closed;
when the soft top is completely
closed, keep the button pressed for at
least 2 seconds.
When the procedure is terminated, the
soft top will automatically carry out a
complete opening and closing cycle (up
to 25 cm from the completely closed
position) to inform the driver that
correct operation has been restored.
If the soft top is already initialised,
proceed as follows:
before carrying out any other
operation, make sure the engine is on
during the whole initialisation
procedure;
keep the opening button pressed
until the soft top is completely open;
when the soft top is completely
open, keep the button pressed for at
least 10 seconds;
keep the closing button pressed
until the soft top is completely closed;
when the soft top is completely
closed, keep the button pressed for at
least 2 seconds.When the procedure is terminated, the
soft top will automatically carry out a
complete opening and closing cycle (up
to 25 cm from the completely closed
position) to inform the driver that
correct operation has been restored.
WIND STOP
The Wind Stop fig. 36 is designed to
improve driving comfort, by reducing air
turbulence in the passenger
compartment when travelling with the
soft top down.
To use it:
Release the backrest of the rear seat
(single or split).
Attach the Wind Stop by inserting
the central part inside the rear screen
guard, with the concave part in the
direction of the passenger, as shown in
the figure fig. 36;
re-position the backrest correctly;
the Wind Stop is locked between
the seat and parcel shelf.
FRONT SPOILER
The car is provided with a front spoiler
which can be raised to improve
aerodynamic comfort inside the
passenger compartment.
To lift the spoiler, release the catch by
means of the slider 1 moving it to
position B as shown in fig. 37.
Be careful not to move the slider 1 from
position B to position A with the spoiler
up.
To lower the spoiler, press and move
the slider to position A fig. 37 to lock it
once the slider’s catch is positioned
inside its housing fig. 38.
It is advisable to raise the spoiler when
the horizontal segment of the top is
open and at speeds faster than 50
km/h.
36AB0A0328C
37AB0A0329C
33
Page 36 of 192
 With the top completely open, it is
advisable to keep the spoiler lowered to
limit wind noise inside the passenger
compartment.
Raising the spoiler will reduce the flow
of air to the rear seats.
WARNI")
With the top completely open, it is
advisable to keep the spoiler lowered to
limit wind noise inside the passenger
compartment.
Raising the spoiler will reduce the flow
of air to the rear seats.
WARNING
22)Keep hands away from the top
mechanism while opening and closing the
top or if the top stops in a position before
completing the cycle to prevent damage
and injury.
23)Keep children away from the area in
which the top is folding during opening or
closing operations.24)When leaving the car, always remove
the key from the ignition device to avoid the
risk of injury due to accidental operation
of the soft top: improper use of the roof
can be dangerous. Before and during
operation, always check that no-one is at
risk of being injured by the moving soft top
roof or by objects getting caught and
dragged by it.
WARNING
9)Never open the top in presence of snow
or ice to prevent damage.
10)Do not place objects on the rear
window shelf to prevent damage while the
top is closing.
11)Loads may not be secured on the
vehicle roof.
ENGINE BONNET
OPENING
Proceed as follows:
pull lever 1 fig. 39 in the direction
indicated by the arrow;
move the lever 2 fig. 40 to the right
as shown in the figure;
lift the bonnet and, at the same time,
release the supporting rod 3 fig. 41
from its catch 4, then insert the end of
the rod into housing 5 in the bonnet
(large hole) and push to safety position
(small hole), as shown in the figure.
25) 26) 27) 29)
38AB0A0330C
39AB0A0051C
34
KNOWING YOUR CAR
Page 37 of 192
 CLOSING
Proceed as follows:
hold the bonnet up with one hand
and with the other remove the stay
3 fig. 41 from the housing 5 and put it
back in its locking device 4;
lower the bonnet to approximately")
CLOSING
Proceed as follows:
hold the bonnet up with one hand
and with the other remove the stay
3 fig. 41 from the housing 5 and put it
back in its locking device 4;
lower the bonnet to approximately
20 centimetres above the engine
compartment and let it come down.
Make sure that the bonnet is
completely closed and not just secured
in safety position. If it is not perfectly
closed, do not try to press the bonnet
down but open it and repeat the
procedure.
28)
WARNING
25)The bonnet may drop suddenly if the
supporting rod is not positioned correctly.
Only perform these operations when the
car is stationary.
26)Be careful working inside engine
compartment when the engine is hot to
avoid burning yourself. Do not place your
hands near the engine fan as it may be
activated even when the key is removed.
Wait until the engine has cooled.
27)Be very careful not to allow scarves,
neckties and other loose articles of clothing
from touching, even accidentally, any
moving parts. This may cause the clothing
to be pulled into the part, resulting in
serious injury to the wearer.28)For safety reasons, the bonnet must
always be properly closed while the car is
travelling. Therefore, always make sure that
it is closed properly and that the lock is
engaged. If you notice when driving that
the bonnet has not been properly locked,
stop immediately and close the bonnet
correctly.
29)Use both hands to lift the bonnet.
Before lifting, check that the windscreen
wiper arms are not raised from the
windscreen, that the vehicle is stationary
and that the handbrake is engaged.
2
40AB0A0052C
5
3
4
41AB0A0053C
35
Page 38 of 192
 LUGGAGE
COMPARTMENT
30) 31)
OPENING THE TAILGATE
WITH THE REMOTE
CONTROL
Press button
on the key with the
remote control.
The direction indicators will blink twice
when the tailgate is opened.
On some")
LUGGAGE
COMPARTMENT
30) 31)
OPENING THE TAILGATE
WITH THE REMOTE
CONTROL
Press button
on the key with the
remote control.
The direction indicators will blink twice
when the tailgate is opened.
On some versions, opening the tailgate
will switch the luggage compartment
light on: the light will switch off
automatically when the tailgate is
closed.
12)
32)
ELECTRIC HANDLE
(SOFT TOUCH)
The tailgate (if unlocked) can be opened
from the outside by using the electric
opening handle 1 fig. 42 located under
the large handle.
The activation of the
symbol on
the display indicates that the tailgate
is not shut properly.CLOSING
To close, lower the tailgate by pressing
near the lock until you hear it click.
EMERGENCY TAILGATE
OPENING
To open the tailgate from the passenger
compartment if the car battery is flat
or the electric tailgate lock is faulty,
proceed as follows (see "Extending the
luggage compartment" in this chapter):
extract the rear head restraints
fold the backrests over
to unlock the tailgate mechanically,
working from the inside of the luggage
compartment, use lever 1 fig. 43.EXTENDING THE
LUGGAGE
COMPARTMENT
The luggage compartment can be
partially (50/50) or totally extended by
splitting the rear seat.
See the descriptions in “Rear seats” for
how to expand the luggage
compartment.
REMOVING THE PARCEL
SHELF
To remove the parcel shelf, release it
from its two side pins and pull it out.
1
42AB0A0045C
1
43AB0A0047C
36
KNOWING YOUR CAR
Page 39 of 192
WARNING
30)Never exceed the maximum allowed
load in the luggage compartment, see
chapter “Technical specifications”. Also
make sure that the objects you place in the
luggage compartment have been properly
secured, to avoid them from being thrown
forward consequent to sudden braking
and injuring your passengers.
31)If you are travelling in areas with few
filling stations and you want to transport
fuel in a spare tank, comply with the law by
using only an approved, suitably secured
tank. In the event of a collision the fire
risk is increased all the same.
32)Do not drive with the tailgate open as
exhaust fumes may enter the vehicle.
WARNING
12)Be careful not to hit objects on the
storage shelf when you open the tailgate.
37
Page 40 of 192
 KNOWING THE INSTRUMENT PANEL
This section of the handbook gives you
all the information you need to
understand, interpret and use the
instrument panel correctly.CONTROL PANEL AND
ON-BOARD INSTRUMENTS")
KNOWING THE INSTRUMENT PANEL
This section of the handbook gives you
all the information you need to
understand, interpret and use the
instrument panel correctly.CONTROL PANEL AND
ON-BOARD INSTRUMENTS ........... 39
MENU OPTIONS ............................. 41
TRIP COMPUTER ........................... 42
WARNING LIGHTS AND
MESSAGES .................................... 45
-SEAT BELTS NOT FASTENED ........... 45
-EBD FAILURE .................................... 45
-AIRBAG FAILURE ............................... 46
-LOW BRAKE FLUID/HANDBRAKE
ENGAGED........................................... 46
-“DUALDRIVE” ELECTRIC POWER
STEERING FAILURE ............................ 47
-BRAKE PAD WEAR ............................ 47
-ESC SYSTEM .................................... 48
-INJECTION / EOBD SYSTEM
FAILURE .............................................. 48
-REAR FOG LIGHT .............................. 49
-ABS FAILURE..................................... 49
-iTPMS ................................................ 49
-SIDE LIGHTS AND DIPPED BEAM
HEADLIGHTS/FOLLOW ME HOME ..... 50
-FRONT FOG LIGHTS ......................... 50
- LEFT DIRECTION INDICATOR ........... 50
-RIGHT DIRECTION INDICATOR ......... 50
-MAIN BEAM HEADLIGHTS ................ 50
-DOORS/BONNET/LUGGAGE
COMPARTMENT OPEN ...................... 51
- LOW BATTERY CHARGE .................. 51
-INSUFFICIENT ENGINE OIL
PRESSURE/ENGINE OIL
DETERIORATED .................................. 51
-ENGINE COOLANT TEMPERATURE
TOO HIGH........................................... 52
- ROBOTISED SEQUENTIAL
GEARBOX FAILURE ............................ 52
-SPEED LIMIT EXCEEDED .................. 52- POSSIBLE ICE ON ROAD ................. 53
-PARKING SENSOR FAILURE ............. 53
-SERVICE (SCHEDULED SERVICING)
EXPIRED ............................................. 53
-ASR SYSTEM .................................... 53
-HILL HOLDER FAILURE ..................... 53
-FUEL CUT-OFF SYSTEM.................... 53
-FUEL CUT-OFF SYSTEM FAILURE ..... 54
-EXTERIOR LIGHTS FAILURE .............. 54
-BRAKE LIGHT FAILURE ..................... 54
-FIAT CODE SYSTEM FAILURE ........... 54
- FUEL RESERVE - LIMITED RANGE ... 55
-ENGINE OIL PRESSURE SENSOR
FAILURE INDICATOR........................... 55
-OIL CHANGE ..................................... 55
-PRESS THE CLUTCH PEDAL TO
START ................................................. 55
-FUEL LEVEL SENSOR FAILURE......... 55
-HEADLIGHT ALIGNMENT
CORRECTOR ...................................... 55
38
KNOWING THE INSTRUMENT PANEL
 1
1 2
2 3
3 4
4 5
5 6
6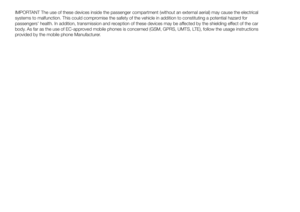 7
7 8
8 9
9 10
10 11
11 12
12 13
13 14
14 15
15 16
16 17
17 18
18 19
19 20
20 21
21 22
22 23
23 24
24 25
25 26
26 27
27 28
28 29
29 30
30 31
31 32
32 33
33 34
34 35
35 36
36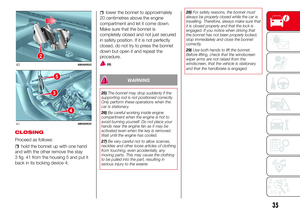 37
37 38
38 39
39 40
40 41
41 42
42 43
43 44
44 45
45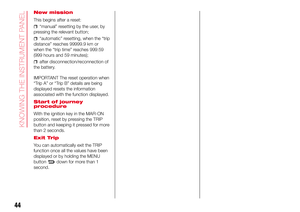 46
46 47
47 48
48 49
49 50
50 51
51 52
52 53
53 54
54 55
55 56
56 57
57 58
58 59
59 60
60 61
61 62
62 63
63 64
64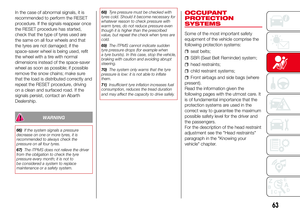 65
65 66
66 67
67 68
68 69
69 70
70 71
71 72
72 73
73 74
74 75
75 76
76 77
77 78
78 79
79 80
80 81
81 82
82 83
83 84
84 85
85 86
86 87
87 88
88 89
89 90
90 91
91 92
92 93
93 94
94 95
95 96
96 97
97 98
98 99
99 100
100 101
101 102
102 103
103 104
104 105
105 106
106 107
107 108
108 109
109 110
110 111
111 112
112 113
113 114
114 115
115 116
116 117
117 118
118 119
119 120
120 121
121 122
122 123
123 124
124 125
125 126
126 127
127 128
128 129
129 130
130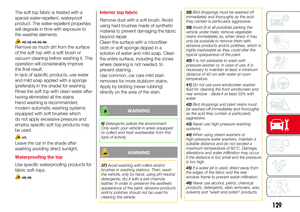 131
131 132
132 133
133 134
134 135
135 136
136 137
137 138
138 139
139 140
140 141
141 142
142 143
143 144
144 145
145 146
146 147
147 148
148 149
149 150
150 151
151 152
152 153
153 154
154 155
155 156
156 157
157 158
158 159
159 160
160 161
161 162
162 163
163 164
164 165
165 166
166 167
167 168
168 169
169 170
170 171
171 172
172 173
173 174
174 175
175 176
176 177
177 178
178 179
179 180
180 181
181 182
182 183
183 184
184 185
185 186
186 187
187 188
188 189
189 190
190 191
191 WARNING
30)Never exceed the maximum allowed
load in the luggage compartment, see
chapter “Technical specifications”. Also
make sure that the objects you place in the
luggage compartment have been")