Page 169 of 200
8-51
8
EBU35200Pedal lubricationThe pivoting parts of the brake, clutch, and
accelerator pedals should be lubricated peri-
odically to prevent rust and ensure smooth
operation.
EBU32582Checking the stabilizer bushesThe stabilizer bushes must be checked for
cracks or damage at the intervals specified in
the periodic maintenance and lubrication
chart.
Have a Yamaha dealer replace the stabilizer
bushes if necessary.
Front
Recommended lubricant: Lithium-soap-based grease
U2HC7LE0.book Page 51 Wednesday, October 7, 2015 12:09 PM
Page 170 of 200
8-52
8
RearEBU35211Upper and lower arm pivot lubrication
(left and right)
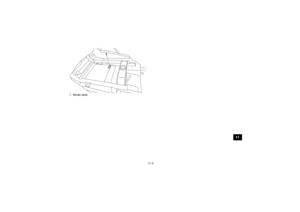
Lubricate the upper and lower arm pivots with
a grease gun.Front
Rear
Recommended lubricant:
Lithium-soap-based grease
U2HC7LE0.book Page 52 Wednesday, October 7, 2015 12:09 PM
Page 171 of 200
8-53
8
EBU32590Rear knuckle upper and lower pivot lu-
brication (left and right)Lubricate the knuckle upper and lower pivots
with a grease gun.EBU35220Drive shaft universal joint lubricationLubricate the drive shaft universal joint with a
grease gun.
EBU32600Steering shaft lubricationLubricate the pivot points.
Recommended lubricant:Lithium-soap-based grease
Recommended lubricant: Lithium-soap-based grease
U2HC7LE0.book Page 53 Wednesday, October 7, 2015 12:09 PM
Page 172 of 200
8-54
8
EBU32610Wheel removal1. Loosen the wheel nuts.
2. Elevate the vehicle and place a suitablestand under the frame.
3. Remove the nuts from the wheel.
4. Remove the wheel.
EBU32620Tire replacementAlways use the same size and type of tires
recommended in this owner’s manual. The
tires that came with your Yamaha YXZ1000R
were designed to match the performance ca-
pabilities and to provide the best combination
of handling, braking, and comfort. It is best to
replace all four tires at the same time. If that is
not possible, you must replace the tires in1. Wheel nut
1 1
U2HC7LE0.book Page 54 Wednesday, October 7, 2015 12:09 PM
Page 173 of 200

8-55
8
pairs (front or rear) with tires of the same size
and type as the originals. Never replace just
one tire.
WARNING
EWB03390Installing improper tires on your Yamaha
YXZ1000R can affect handling and stabili-
ty. This can cause a loss of control. The tires listed below have been approved by
Yamaha Motor Manufacturing Corporation of
America for this model.
EBU33090Wheel installation1. Install the wheel and the nuts.
2. Lower the vehicle so that the wheel is on the ground.
3. Tighten the wheel nuts in a crisscross pattern to the specified torque.
WARNING
EWB03400Do not reverse the rims on your Yamaha
YXZ1000R to widen the track width. In-
stalling wheels improperly increases the
risk of wheel failure and accidents. EBU35230BatteryThe battery is located under panel A. (See
page 8-10.)
Front tire:Size:27 x 9.00R-14NHS
Manufacturer/model: MAXXIS/MU09
Rear tire: Size:27 x 11.00R-14NHS
Manufacturer/model: MAXXIS/MU10
Tightening torques: Front wheel nut:75 Nm (7.5 m·kgf, 54 ft·lbf)
Rear wheel nut: 75 Nm (7.5 m·kgf, 54 ft·lbf)
U2HC7LE0.book Page 55 Wednesday, October 7, 2015 12:09 PM
Page 174 of 200

8-56
8
This model is equipped with a VRLA (Valve
Regulated Lead Acid) battery. There is no
need to check the electrolyte or to add dis-
tilled water. However, the battery lead con-
nections need to be checked and, if
necessary, tightened.
WARNING
EWB03410Avoid battery contact with skin, eyes, or
clothing. Shield eyes when working near
batteries. Keep out of reach of children.
You could be poisoned or severely burned
by the sulfuric acid in battery electrolyte. In
case of accidental contact with battery
electrolyte:
EXTERNAL: Flush with water.
INTERNAL: Drink large quantities of water
or milk. Follow with milk of magnesia,
beaten egg, or vegetable oil. Get prompt
medical attention.
EYES: Flush with water for 15 minutes and
get prompt medical attention.
WARNING
EWB03420Batteries may produce explosive gases.
Ventilate when charging or using in a
closed space. Keep batteries away from
sparks, flames, cigarettes, or other sourc-
es of ignition. To remove the battery
1. Turn the key to “ ” (off).
2. Remove panel A. (See page 8-10.)
3. Remove the battery holding plate by re- moving the bolts.
U2HC7LE0.book Page 56 Wednesday, October 7, 2015 12:09 PM
Page 175 of 200
8-57
8
4. Disconnect the negative battery lead first,then the positive battery lead by remov-
ing their bolt. NOTICE: When removing
the battery, the main switch must be
off, and the negative lead must be dis-
connected before the positive lead.
[ECB01002]
5. Pull the battery out of its compartment.
To charge the battery
Have a Yamaha dealer charge the battery as
soon as possible if it seems to have dis-
charged. Keep in mind that the battery tends
to discharge more quickly if the vehicle is
equipped with optional electrical accessories.
1. Battery holding plate
2. Bolt
1 2
2
1. Positive battery lead (red)
2. Negative battery lead (black)
3. Battery
1
2
3
U2HC7LE0.book Page 57 Wednesday, October 7, 2015 12:09 PM
Page 176 of 200

8-58
8
NOTICEECB00932To charge a VRLA (Valve Regulated Lead
Acid) battery, a special (constant-voltage)
battery charger is required. Using a con-
ventional battery charger will damage the
battery. To store the battery
If the vehicle will not be used for more than
one month, remove the battery, fully charge
it, and then place it in a cool, dry place.
If the battery will be stored for more than
two months, check it at least once a month
and fully charge it if necessary.NOTICEECB00941Always keep the battery charged. Storing
a discharged battery can cause perma-
nent battery damage.
To install the batteryTIPBe sure the battery is fully charged. 1. Place the battery in its compartment.
2. Connect the positive battery lead first,
then the negative battery lead by install-
ing their bolt. NOTICE: When installing
the battery, the main switch must be
off, and the positive lead must be con-
nected before the negative lead.
[ECB01111]
1. Positive battery lead (red)
2. Negative battery lead (black)
3. Battery
1
2
3
U2HC7LE0.book Page 58 Wednesday, October 7, 2015 12:09 PM