Page 167 of 546
INSTRUMENTS AND CONTROLS
}}
* Option/accessory, for more information, see Introduction.165
2.
Press and release the M button. The indica-
tor light in the button will illuminate.
3. Press button 1, 2 or 3 within 3 seconds to
store the current position of the seat/ mirrors/head-up display in the selected but-ton.
> When the position has been stored in the selected button, an audible signal will sound and the indicator light in the M but-
ton will go out.
If none of the buttons (1, 2 or 3) is pressedwithin 3 seconds, the indicator light in the M but-
ton will go out and the position will not be stored.
The seat/mirrors/head-up display must be moved before a new position can be stored.
Using a stored positionA stored position can be used when one of thefront doors is opened or closed:
Front door open
–Press one of the bottons ( 1–3 ) briefly. The
seat, door mirrors and head-up display will move to the positions stored in that button.
Front door closed
–Press and hold one of the buttons ( 1–3 ) until
the seat, door mirrors and head-up display have moved to the positions stored in thatbutton. The seat, door mirrors and head-up display willstop automatically if the button is released beforethe they have reached the stored positions.
WARNING
•
Because the driver's seat can be adjusted with the ignition off, children should neverbe left unattended in the vehicle.
• Movement of the seat can be STOPPEDat any time by pressing any button on thepower seat control panel.
• Do not adjust the seat while driving. Theseat should be adjusted so that the brakepedal can be depressed fully. In addition,position the seat as far rearward as com-fort and control allow.
• The seat rails on the floor must not beobstructed in any way when the seat is inmotion.
Related information
•
Adjusting power front seats
* (p. 163)
• Power front seats
* (p. 163)
Multifunctional front seats *
In addition to the adjustment settings offered by the power seat controls, the multifunction controlprovides additional possibilities for convenienceand comfort.
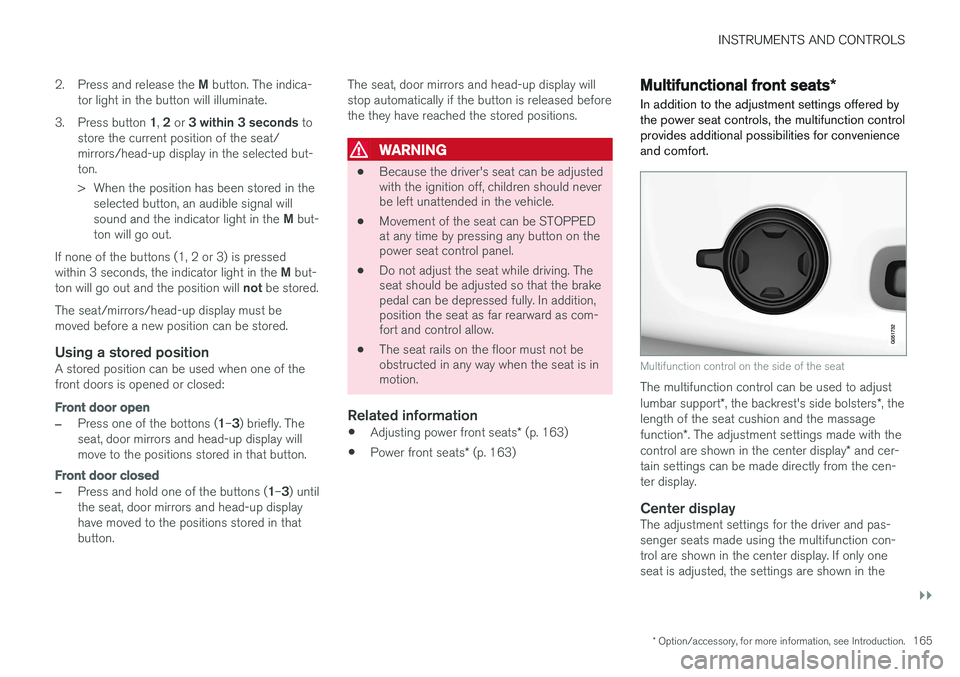
Multifunction control on the side of the seat
The multifunction control can be used to adjust lumbar support *, the backrest's side bolsters *, the
length of the seat cushion and the massagefunction *. The adjustment settings made with the
control are shown in the center display * and cer-
tain settings can be made directly from the cen- ter display.
Center displayThe adjustment settings for the driver and pas-senger seats made using the multifunction con-trol are shown in the center display. If only oneseat is adjusted, the settings are shown in the
Page 169 of 546
INSTRUMENTS AND CONTROLS
}}
* Option/accessory, for more information, see Introduction.167
3. Select massage settings by tapping the cen-
ter display or by moving the cursor up/down using the multifunction control's upper/lowerbuttons. Change a setting in the selectedfunction by tapping the arrows on the centerdisplay or by using the multifunction control'sfront/rear buttons.
Massage settings
The following massage settings are available:
•
On/Off.
•
Program 1-5: There are 5 preset massage
programs. Select Swell, Tread, Advanced,Lumbar or Shoulder.
•
Intensity: Select Low, Normal or High.
•
Speed: Select Slow, Normal or Fast.
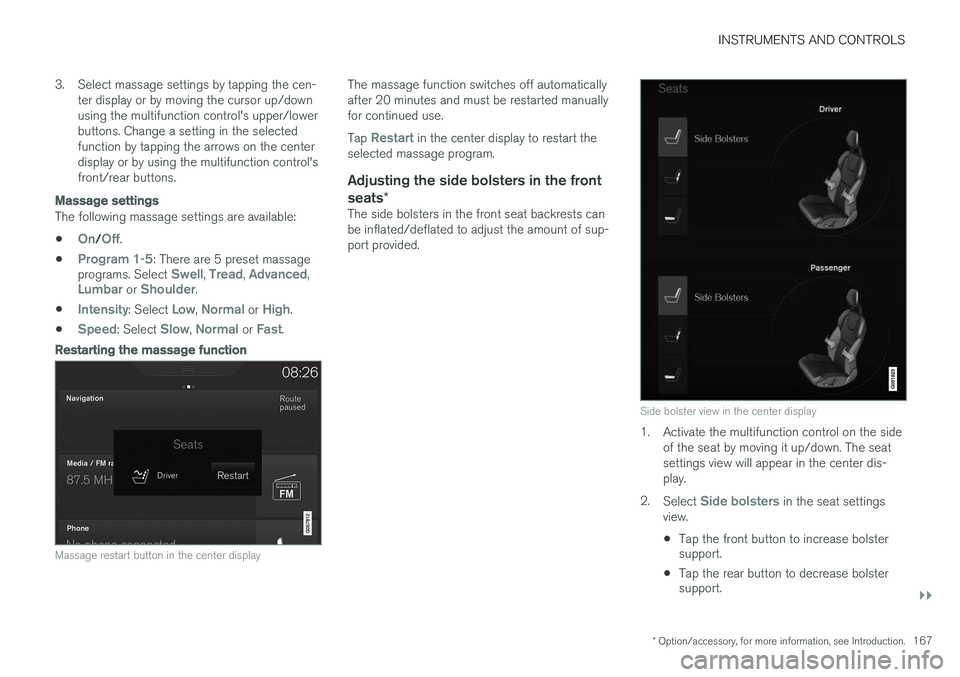
Restarting the massage function
Massage restart button in the center display
The massage function switches off automatically after 20 minutes and must be restarted manuallyfor continued use. Tap
Restart in the center display to restart the
selected massage program.
Adjusting the side bolsters in the front seats *
The side bolsters in the front seat backrests can be inflated/deflated to adjust the amount of sup-port provided.
Side bolster view in the center display
1. Activate the multifunction control on the side
of the seat by moving it up/down. The seat settings view will appear in the center dis-play.
2. Select
Side bolsters in the seat settings
view.
• Tap the front button to increase bolster support.
• Tap the rear button to decrease bolstersupport.
Page 170 of 546
||
INSTRUMENTS AND CONTROLS
* Option/accessory, for more information, see Introduction.
168
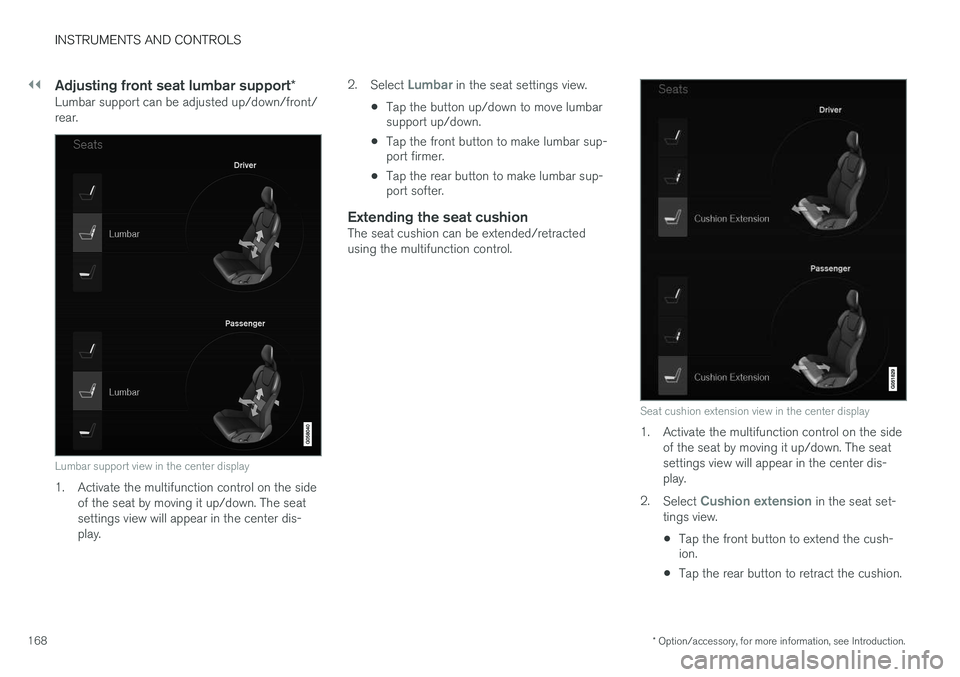
Adjusting front seat lumbar support *Lumbar support can be adjusted up/down/front/ rear.
Lumbar support view in the center display
1. Activate the multifunction control on the side
of the seat by moving it up/down. The seat settings view will appear in the center dis-play. 2.
Select
Lumbar in the seat settings view.
• Tap the button up/down to move lumbar support up/down.
• Tap the front button to make lumbar sup-port firmer.
• Tap the rear button to make lumbar sup-port softer.
Extending the seat cushionThe seat cushion can be extended/retracted using the multifunction control.
Seat cushion extension view in the center display
1. Activate the multifunction control on the side
of the seat by moving it up/down. The seat settings view will appear in the center dis-play.
2. Select
Cushion extension in the seat set-
tings view.
• Tap the front button to extend the cush- ion.
• Tap the rear button to retract the cushion.
Page 171 of 546
INSTRUMENTS AND CONTROLS
}}
* Option/accessory, for more information, see Introduction.169
Related information
•Multifunctional front seats
* (p. 165)
Rear seats
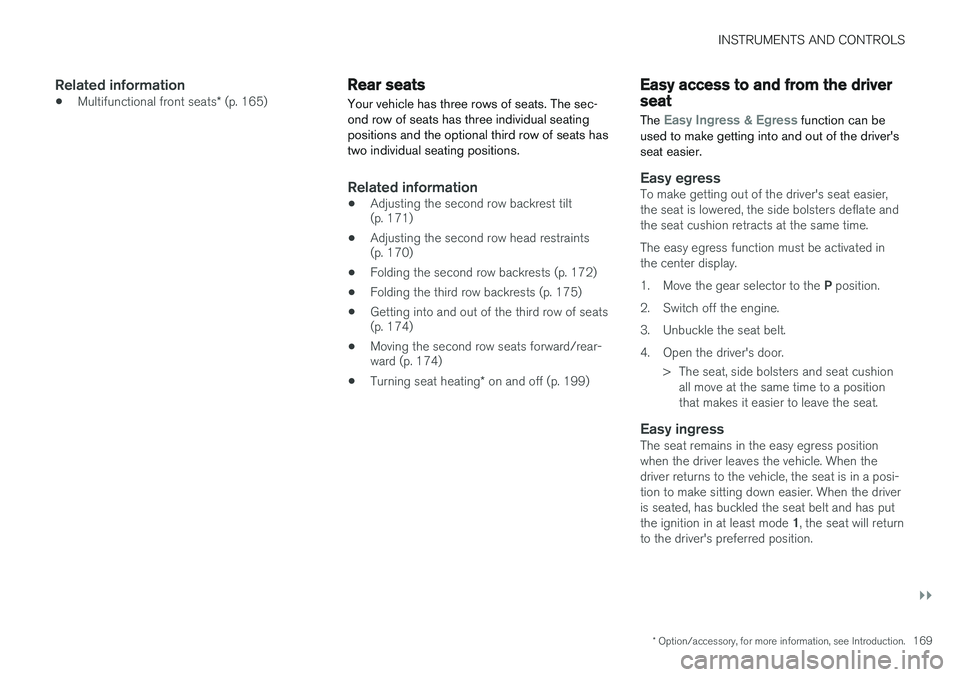
Your vehicle has three rows of seats. The sec- ond row of seats has three individual seatingpositions and the optional third row of seats hastwo individual seating positions.
Related information
• Adjusting the second row backrest tilt (p. 171)
• Adjusting the second row head restraints(p. 170)
• Folding the second row backrests (p. 172)
• Folding the third row backrests (p. 175)
• Getting into and out of the third row of seats(p. 174)
• Moving the second row seats forward/rear-ward (p. 174)
• Turning seat heating
* on and off (p. 199)
Easy access to and from the driver seat
The
Easy Ingress & Egress function can be
used to make getting into and out of the driver's seat easier.
Easy egressTo make getting out of the driver's seat easier, the seat is lowered, the side bolsters deflate andthe seat cushion retracts at the same time. The easy egress function must be activated in the center display. 1. Move the gear selector to the P position.
2. Switch off the engine.
3. Unbuckle the seat belt.
4. Open the driver's door. > The seat, side bolsters and seat cushionall move at the same time to a position that makes it easier to leave the seat.
Easy ingressThe seat remains in the easy egress positionwhen the driver leaves the vehicle. When thedriver returns to the vehicle, the seat is in a posi-tion to make sitting down easier. When the driveris seated, has buckled the seat belt and has put the ignition in at least mode 1, the seat will return
to the driver's preferred position.
Page 172 of 546

||
INSTRUMENTS AND CONTROLS
* Option/accessory, for more information, see Introduction.
170
Activating/deactivating the function1.
In the center display, select SettingsMy
Car
Seats.
2. Activate/deactivate the function by select- ing/deselecting the
Easy Ingress & Egressbox.
Related information
• Power front seats
* (p. 163)
• Ignition modes (p. 370)
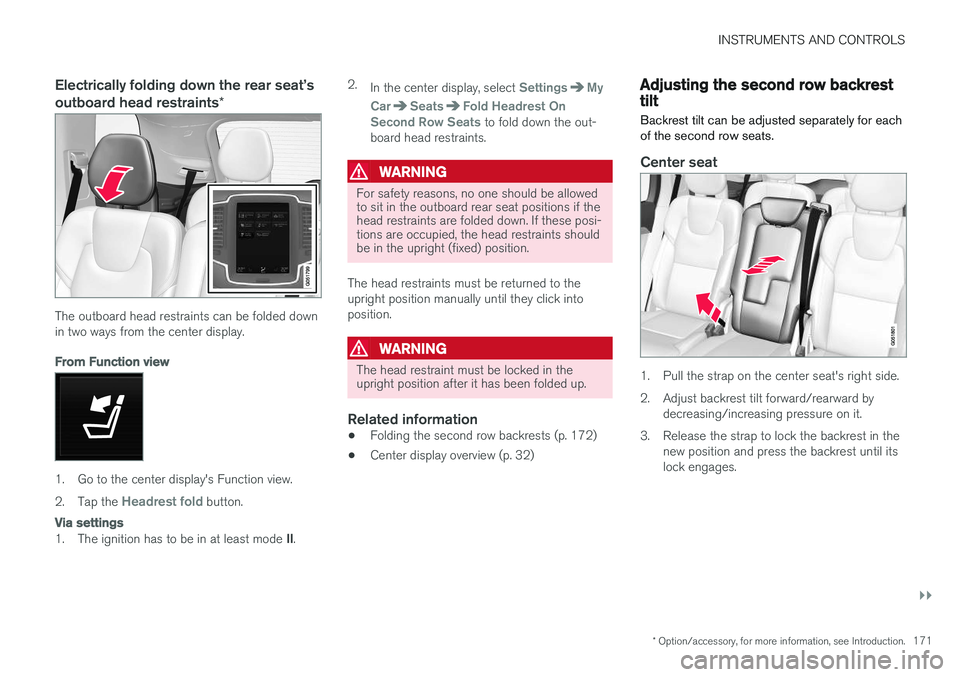
Adjusting the second row head restraints
The center head restraint in the second row of seats can be adjusted to suit the height of theseat's occupant. The outboard head restraints can be folded down * for a better rear view.
Adjusting the center head restraint
Center head restraint button
The center head restraint should be adjusted up or down according to the passenger's height. Therestraint should be carefully adjusted to supportthe occupant's head. To lower the head restraint, press and hold the button (see the illustration) and push the headrestraint down carefully.
WARNING
The center rear seat head restraint should only be in its lowest position when this seat isNOT occupied. When the center position isoccupied, the head restraint should be cor-rectly adjusted to the passenger
Page 173 of 546
INSTRUMENTS AND CONTROLS
}}
* Option/accessory, for more information, see Introduction.171
Electrically folding down the rear seat
Page 174 of 546
||
INSTRUMENTS AND CONTROLS
* Option/accessory, for more information, see Introduction.
172
Outboard seats
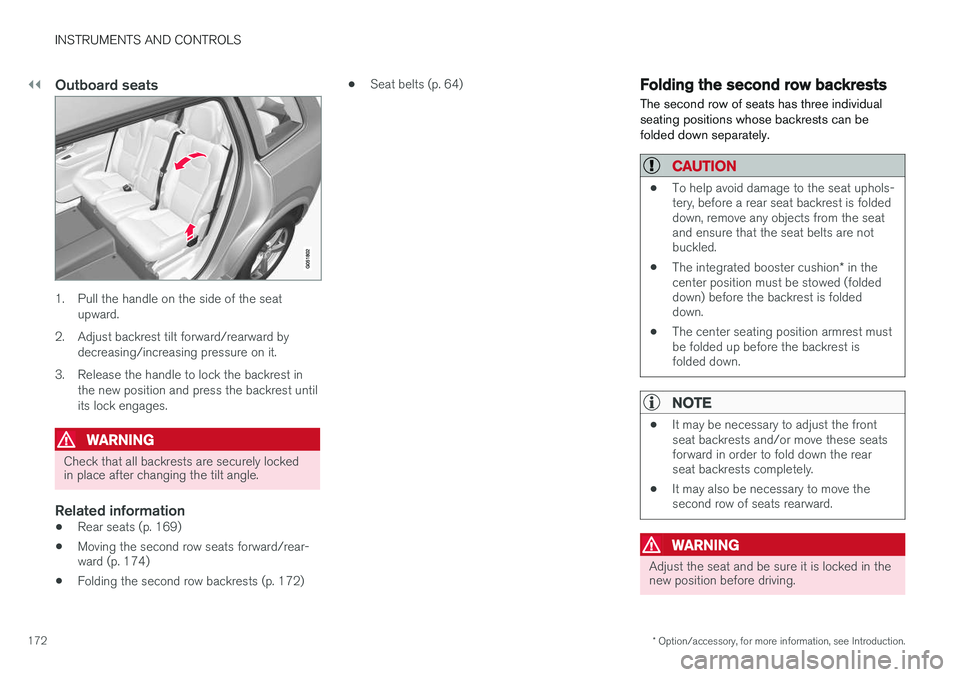
1. Pull the handle on the side of the seat
upward.
2. Adjust backrest tilt forward/rearward by decreasing/increasing pressure on it.
3. Release the handle to lock the backrest in the new position and press the backrest until its lock engages.
WARNING
Check that all backrests are securely locked in place after changing the tilt angle.
Related information
• Rear seats (p. 169)
• Moving the second row seats forward/rear- ward (p. 174)
• Folding the second row backrests (p. 172) •
Seat belts (p. 64)
Folding the second row backrests
The second row of seats has three individual seating positions whose backrests can befolded down separately.
CAUTION
• To help avoid damage to the seat uphols- tery, before a rear seat backrest is foldeddown, remove any objects from the seatand ensure that the seat belts are notbuckled.
• The integrated booster cushion
* in the
center position must be stowed (foldeddown) before the backrest is foldeddown.
• The center seating position armrest mustbe folded up before the backrest isfolded down.
NOTE
•It may be necessary to adjust the front seat backrests and/or move these seatsforward in order to fold down the rearseat backrests completely.
• It may also be necessary to move thesecond row of seats rearward.
WARNING
Adjust the seat and be sure it is locked in the new position before driving.
Page 175 of 546
INSTRUMENTS AND CONTROLS
173
Center seat
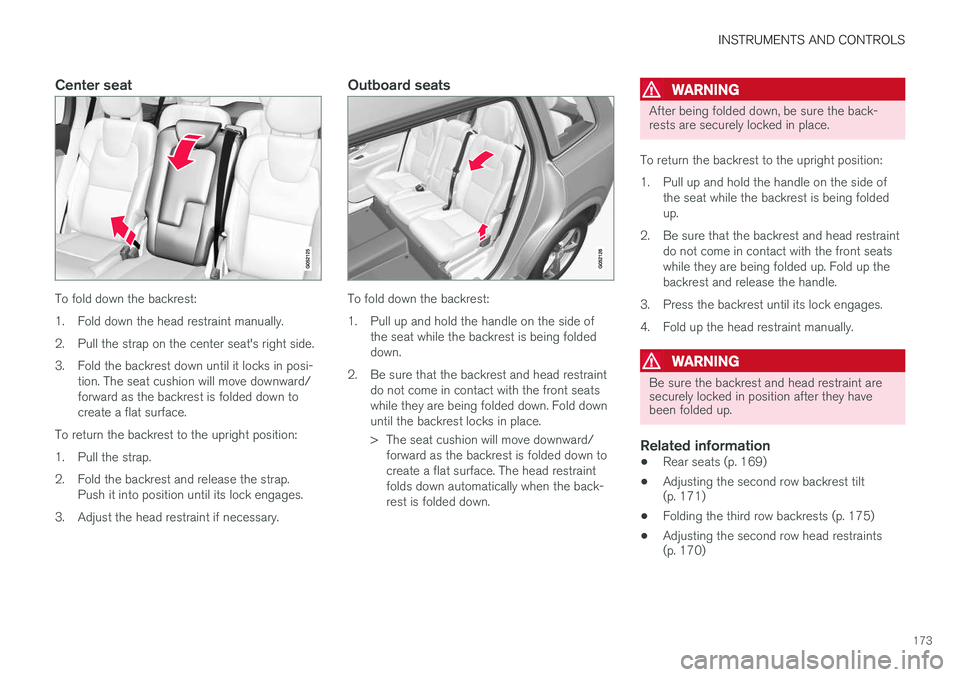
To fold down the backrest:
1. Fold down the head restraint manually.
2. Pull the strap on the center seat's right side.
3. Fold the backrest down until it locks in posi-tion. The seat cushion will move downward/ forward as the backrest is folded down tocreate a flat surface.
To return the backrest to the upright position:
1. Pull the strap.
2. Fold the backrest and release the strap. Push it into position until its lock engages.
3. Adjust the head restraint if necessary.
Outboard seats
To fold down the backrest:
1. Pull up and hold the handle on the side of the seat while the backrest is being folded down.
2. Be sure that the backrest and head restraint do not come in contact with the front seatswhile they are being folded down. Fold downuntil the backrest locks in place.
> The seat cushion will move downward/forward as the backrest is folded down to create a flat surface. The head restraintfolds down automatically when the back-rest is folded down.
WARNING
After being folded down, be sure the back- rests are securely locked in place.
To return the backrest to the upright position:
1. Pull up and hold the handle on the side of the seat while the backrest is being folded up.
2. Be sure that the backrest and head restraint do not come in contact with the front seatswhile they are being folded up. Fold up thebackrest and release the handle.
3. Press the backrest until its lock engages.
4. Fold up the head restraint manually.
WARNING
Be sure the backrest and head restraint are securely locked in position after they havebeen folded up.
Related information
• Rear seats (p. 169)
• Adjusting the second row backrest tilt (p. 171)
• Folding the third row backrests (p. 175)
• Adjusting the second row head restraints(p. 170)