2016 VOLVO XC90 T8 reset
[x] Cancel search: resetPage 118 of 546

INSTRUMENTS AND CONTROLS
116
Resetting user data when the vehicle changes ownersWhen the vehicle changes owners, all user set- tings should be reset to the factory defaults.
When the vehicle changes owners, it is essential to reset all user data and system settings to theirfactory defaults, including Volvo On Call.
Related information
• Resetting the settings view (p. 115)
• Volvo ID (p. 31)
Ambient temperature sensor
The ambient temperature sensor displays the temperature outside the vehicle in the instrumentpanel.
Location of the ambient temperature sensor in 12" (upper) and 8" (lower) instrument panels (temperatureshown here in degrees Celsius)
NOTE
When the ambient temperature is between 23° and 36 °F (–5° and +2 °C), a snowflakesymbol will be displayed next to the tempera-ture. This symbol serves as a warning for pos-sible slippery road surfaces. Please note that this symbol does not indicate a fault with your
vehicle. At low speeds or when the vehicle is not mov- ing, the temperature readings may be slightlyhigher than the actual ambient temperature.
SettingsChanging measurement standard in the center display:
1. Pull down the center display's Top view and
tap
Settings.
2. Tap
SystemUnits.
3. Select measurement standard,
Metric,Imperial or US.
Related information
• Instrument panel (p. 127)
• Climate system sensors (p. 179)
Page 169 of 546

INSTRUMENTS AND CONTROLS
}}
* Option/accessory, for more information, see Introduction.167
3. Select massage settings by tapping the cen-
ter display or by moving the cursor up/down using the multifunction control's upper/lowerbuttons. Change a setting in the selectedfunction by tapping the arrows on the centerdisplay or by using the multifunction control'sfront/rear buttons.
Massage settings
The following massage settings are available:
•
On/Off.
•
Program 1-5: There are 5 preset massage
programs. Select Swell, Tread, Advanced,Lumbar or Shoulder.
•
Intensity: Select Low, Normal or High.
•
Speed: Select Slow, Normal or Fast.
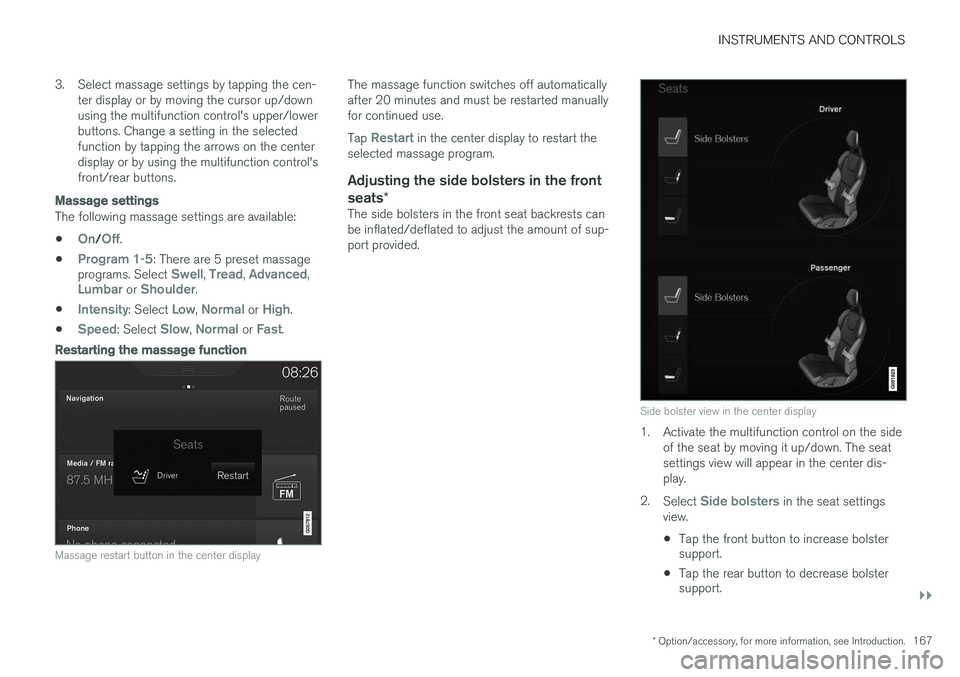
Restarting the massage function
Massage restart button in the center display
The massage function switches off automatically after 20 minutes and must be restarted manuallyfor continued use. Tap
Restart in the center display to restart the
selected massage program.
Adjusting the side bolsters in the front seats *
The side bolsters in the front seat backrests can be inflated/deflated to adjust the amount of sup-port provided.
Side bolster view in the center display
1. Activate the multifunction control on the side
of the seat by moving it up/down. The seat settings view will appear in the center dis-play.
2. Select
Side bolsters in the seat settings
view.
• Tap the front button to increase bolster support.
• Tap the rear button to decrease bolstersupport.
Page 184 of 546

CLIMATE
182
NOTE
•If there is not sufficient residual engine heat available, this function cannot bestarted
• This function will be turned off if the vehi-cle is locked from the outside in order toavoid using residual engine heat unnec-essarily. This function is primarilyintended for use when the engine is notrunning but someone remains in the vehi-cle
Preconditioning timer
The timer can be set to start preconditioning at a predetermined time.
The timer can store up to 8 preset times for:
• A time on a particular date
• A time on one or more days of the week, with or without the repeat function.
NOTE
Full preconditioning is only possible when the vehicle's charging cable is connected. In other cases, the passenger compartment can be cooled for 3 minutes in warm weather. This function is started from the
Parking
climate tab in the center display's Climate
view.
Related information
• Parking climate (preconditioning) (p. 179)
Setting the parking climate (preconditioning) timer
The parking climate (preconditioning) timer can be activated or deactivated at any time. How-
ever, the vehicle's changing cable must beconnected.
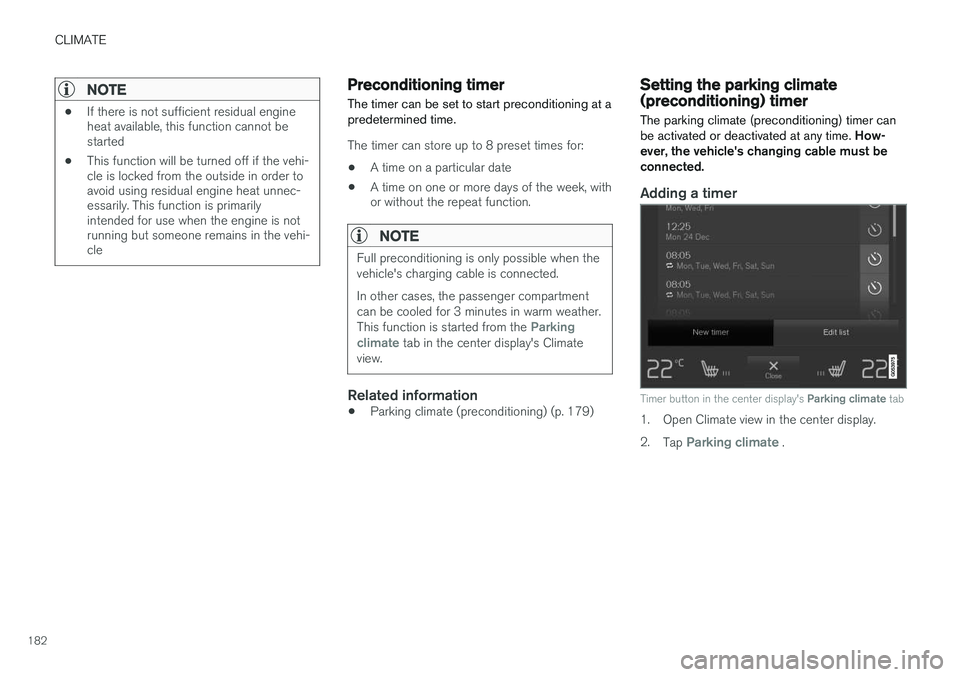
Adding a timer
Timer button in the center display's Parking climate tab
1. Open Climate view in the center display. 2.
Tap
Parking climate .
Page 187 of 546

CLIMATE
185
Preconditioning symbols and messages
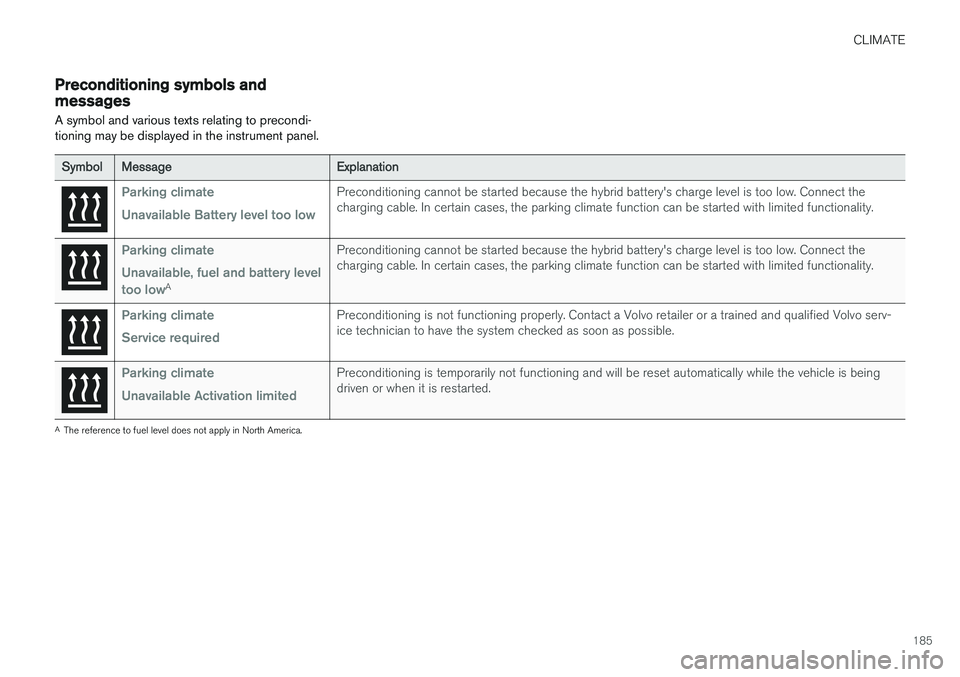
A symbol and various texts relating to precondi- tioning may be displayed in the instrument panel.
SymbolMessageExplanation
Parking climate Unavailable Battery level too lowPreconditioning cannot be started because the hybrid battery's charge level is too low. Connect the charging cable. In certain cases, the parking climate function can be started with limited functionality.
Parking climate Unavailable, fuel and battery level too low
A
Preconditioning cannot be started because the hybrid battery's charge level is too low. Connect the charging cable. In certain cases, the parking climate function can be started with limited functionality.
Parking climate Service requiredPreconditioning is not functioning properly. Contact a Volvo retailer or a trained and qualified Volvo serv- ice technician to have the system checked as soon as possible.
Parking climate Unavailable Activation limitedPreconditioning is temporarily not functioning and will be reset automatically while the vehicle is being driven or when it is restarted.
A The reference to fuel level does not apply in North America.
Page 211 of 546

LOADING AND STORAGE
}}
209
Third row of seats
Storage space and cup holder in the side panel and the storage space between the seats
WARNING
Always stow loose items such as cell phones, cameras, remote controls, etc. in the glovecompartment or other storage spaces to helpkeep them from becoming projectiles in theevent of sudden braking, etc.
Related information
•Tunnel console (p. 210)
• Using the glove compartment (p. 209)
• Electrical sockets (p. 212)
• Sun visors (p. 211)
Using the glove compartment
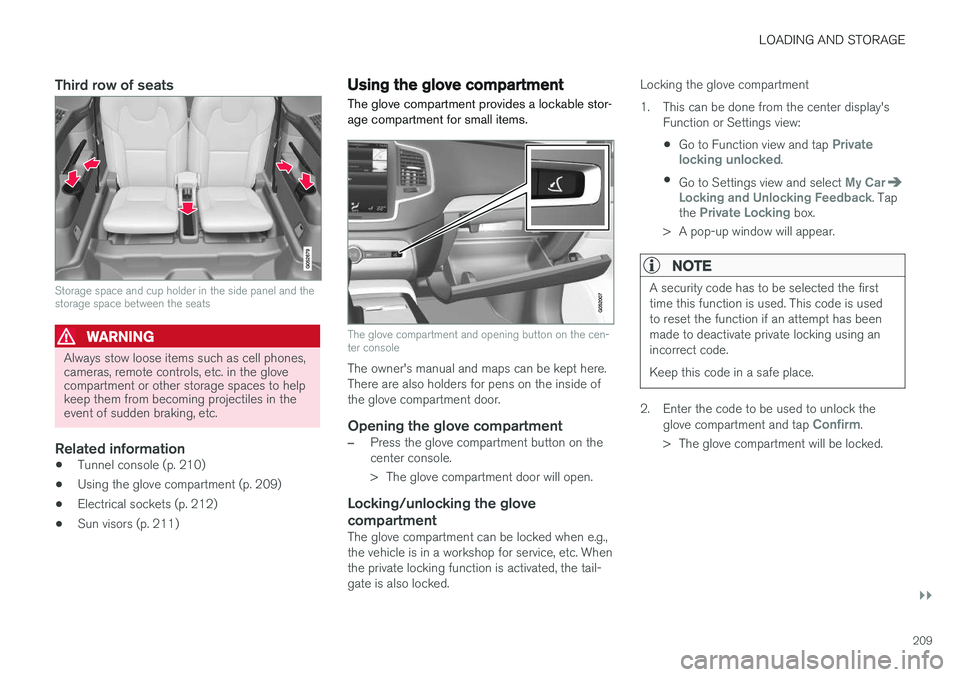
The glove compartment provides a lockable stor- age compartment for small items.
The glove compartment and opening button on the cen- ter console
The owner's manual and maps can be kept here. There are also holders for pens on the inside ofthe glove compartment door.
Opening the glove compartment
–Press the glove compartment button on the center console.
> The glove compartment door will open.
Locking/unlocking the glove compartment
The glove compartment can be locked when e.g., the vehicle is in a workshop for service, etc. Whenthe private locking function is activated, the tail-gate is also locked. Locking the glove compartment
1. This can be done from the center display's
Function or Settings view:
• Go to Function view and tap
Private
locking unlocked.
• Go to Settings view and select
My CarLocking and Unlocking Feedback. Tap
the Private Locking box.
> A pop-up window will appear.
NOTE
A security code has to be selected the first time this function is used. This code is usedto reset the function if an attempt has beenmade to deactivate private locking using anincorrect code. Keep this code in a safe place.
2. Enter the code to be used to unlock the glove compartment and tap Confirm.
> The glove compartment will be locked.
Page 249 of 546

LOCKS AND ALARM
}}
* Option/accessory, for more information, see Introduction.247
–Press the button14
on the lower edge of
the tailgate.
> The tailgate will close automatically but will not be locked .
–Press the button14
on the lower edge of
the tailgate.
> The tailgate will close automatically. The tailgate and doors will also be locked and
the alarm will be armed.
If the remote key is not close enough to the tail- gate, automatic locking/unlocking/opening/clos-ing will not be possible. Three short audible sig-nals will sound.
Interrupting opening/closing
–This can be done in five ways: • Press the button on the lighting panel
• Press the button on the remote key
• Press either of the buttons on the lower edge of the tailgate
• Press lightly on the rubber-covered buttonunder the tailgate's outside handle
• Move your foot under a sensor beneath the rear bumper
*
> The tailgate will stop moving
Programming the tailgate's maximum opening angle
The tailgate's maximum opening angle can be programmed, for example, if the tailgate has to beopened in a garage with a low ceiling. Programming the opening angle:
–Open the tailgate manually to the desired angle and press and hold the closing buttonon the tailgate's lower edge for at least 3seconds. Release the tailgate.
> Two audible signals will sound to indicate that the selected opening angle has been stored.
Erasing tailgate programming
–Open the tailgate manually to its highest position and press and hold the closing but-ton on the tailgate's lower edge for at least 3seconds. Release the tailgate.
> Two audible signals will sound to indicate that the programmed opening angle has been erased.
NOTE
If the tailgate has been opened and closed continuously too long, the automatic functionwill be deactivated to avoid overloading theelectrical system. The automatic function canbe used again after approximately 2 minutes. If the vehicle's battery has been discharged or disconnected, or if the tailgate has been openfor more than 24 hours, the tailgate must beopened and closed once manually to resetthe system.
Pinch protectionIf the tailgate is obstructed when being opened/ closed, a pinch protection mechanism is acti-vated.
• While opening: the tailgate will stop moving and an audible signal will sound.
• While closing: the tailgate will stop andreturn to the maximum programmable open-ing position. An audible signal will sound.
WARNING
Be sure that no one is near the tailgate when it is opened or closed automatically. The tail-gate should never be obstructed in any waywhen it is operated.
14
Models equipped with the optional Passive Entry system have a button to close the tailgate and a button to close and lock the tailgate.
Page 257 of 546

DRIVER SUPPORT
}}
255
CauseAction
There is dirt between the inside of the windshield and the camera/radar sensor.Have the area of the windshield cleaned by a trained and qualified Volvo service technician.
Strong backlightingNo action required. The came will reset automatically when lighting conditions improve.
High temperaturesIf the temperature in the passenger compartment is very high, the camera and radar sensor may betemporarily turned off for approx. 15 minutesafter the engine has been started to protect theirelectronic components. When the temperaturehas cooled sufficiently, the camera and radarsensor will restart automatically.Damaged windshield
CAUTION
•Service and maintenance on City Safety may only be carried out by a trained andqualified Volvo service technician.
• If a crack, scratch or stone chip shouldoccur in the section of the windshield infront the camera/radar sensor, contact atrained and qualified Volvo service techni-cian to repair or replace the windshield.Failing to do so may result in reducedCity Safety functionality.
To help prevent limited or reduced functional- ity, please also observe the following:
• Volvo recommends that cracks, scratches or stone chips on the windshield in front of the camera/radar sensor should
not
be repaired; in such cases, the entire windshield should be replaced.
• Before the windshield is replaced, con-tact a Volvo retailer to ensure that thecorrect windshield is ordered and instal-led. If the wrong type of windshield is
used, this may cause City Safety to func- tion improperly or not at all.
• Volvo recommends the use of only Genu-ine Volvo Replacement Windshields.
• When replacing windshield wipers, usethe same type or ones approved by Volvo.
After the windshield has been replaced, the camera/radar sensor will have to be recalibra-ted by a trained and qualified Volvo servicetechnician to help ensure proper function ofall of the vehicle's camera-/radar-based sys-tems.
MaintenanceIn order for camera and radar sensor to function properly, the area of the windshield must be keptfree of dirt, ice, snow, etc. and should be washedregularly with a suitable car washing detergent.
Related information
• City Safety
™ (p. 287)
• Radar sensor limitations (p. 258)
• Driver support systems (p. 252)
Page 276 of 546

||
DRIVER SUPPORT
274
WARNING
•Pilot Assist is designed to be a supple- mentary driving aid and cannot cover alldriving situations, traffic, weather and/orroad conditions.
• The driver should be familiar with all ofthe information in this article regardingPilot Assist, including its limitations.
• Pilot Assist is not intended to replace thedriver's attention and judgement.
• Pilot Assist must only be used wherethere are clearly visible traffic lane sidemarker lines on both sides of the currenttraffic lane. In other circumstances thereis an increased risk of collision with sur-rounding obstacles that are not detectedby the system.
• The driver is always responsible for steer-ing the vehicle and maintaining a suitablespeed and distance to the vehicle aheadand must intervene if necessary, even ifPilot Assist is being used.
Pilot Assist is designed to regulate speed smoothly but in situations calling for fast braking,the driver must apply the brakes. This applies tosituations where there are considerable differen-ces in speed or if the vehicle ahead brakes sud-denly. Due to the limitations of the camera andradar sensor, the system may apply the brakes inyour vehicle suddenly or not at all. The default speed for Pilot Assist is preset toapprox. 30 mph (50 km/h) and cannot bechanged. If the vehicle ahead increases speed toover 30 mph (50 km/h) and pulls away from yourvehicle, Pilot Assist will go into standby mode.
NOTE
•
Pilot Assist maintenance should only be carried out by a trained and qualifiedVolvo service technician.
• Pilot Assist regulates your vehicle'sspeed using the accelerator pedal andthe brakes. Please be aware that theremay be a faint sound from the brakeswhen the system is using them.
WARNING
•Pilot Assist does not react to people or animals, or small vehicles such as bicy-cles and motorcycles. It also does notreact to low trailers, slow moving, parkedor approaching vehicles, or stationaryobjects.
• Do not use Pilot Assist in demandingdriving conditions such as city driving orother heavy traffic situations, in slipperyconditions, when there is a great deal ofwater or slush on the road, during heavyrain or snow, in poor visibility, on windingroads or on highway on- or off-ramps.
Pilot Assist overview
Controls
Function buttons and symbols
[]: Press to activate Pilot Assist or put it
in standby mode
Arrow key [ < ]: change from Pilot Assist to
Adaptive Cruise Control (symbol (6) will also change)
Reduce the distance (time interval) to the vehicle ahead
Arrow key [ > ]: change from Adaptive Cruise
Control to Pilot Assist (symbol (6) will also change)
Increase the distance (time interval) to the vehicle ahead
Function symbols