2016 VOLVO XC90 T8 air condition
[x] Cancel search: air conditionPage 193 of 546
CLIMATE
}}
* Option/accessory, for more information, see Introduction.191
Setting the blower speed The blower can be set to five different automatic speeds plus
Off and Max. The blower speed
can be set separately for the front and rear seats.
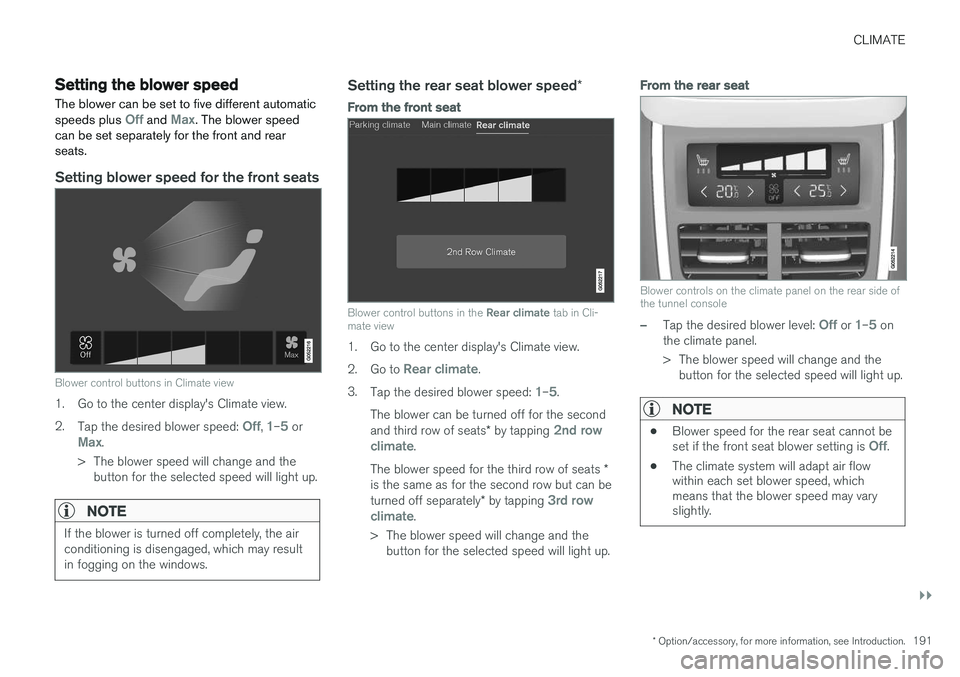
Setting blower speed for the front seats
Blower control buttons in Climate view
1. Go to the center display's Climate view. 2. Tap the desired blower speed:
Off, 1–5 orMax.
> The blower speed will change and the button for the selected speed will light up.
NOTE
If the blower is turned off completely, the air conditioning is disengaged, which may resultin fogging on the windows.
Setting the rear seat blower speed *
From the front seat
Blower control buttons in the Rear climate tab in Cli-
mate view
1. Go to the center display's Climate view. 2. Go to
Rear climate.
3. Tap the desired blower speed:
1–5.
The blower can be turned off for the second and third row of seats * by tapping
2nd row
climate.
The blower speed for the third row of seats *
is the same as for the second row but can be turned off separately * by tapping
3rd row
climate.
> The blower speed will change and the button for the selected speed will light up.
From the rear seat
Blower controls on the climate panel on the rear side of the tunnel console
–Tap the desired blower level: Off or 1–5 on
the climate panel.
> The blower speed will change and the button for the selected speed will light up.
NOTE
• Blower speed for the rear seat cannot be set if the front seat blower setting is Off.
• The climate system will adapt air flow within each set blower speed, whichmeans that the blower speed may varyslightly.
Page 198 of 546
||
CLIMATE
* Option/accessory, for more information, see Introduction.
196
From the center display's Climate view
Activate/deactivate max. defroster
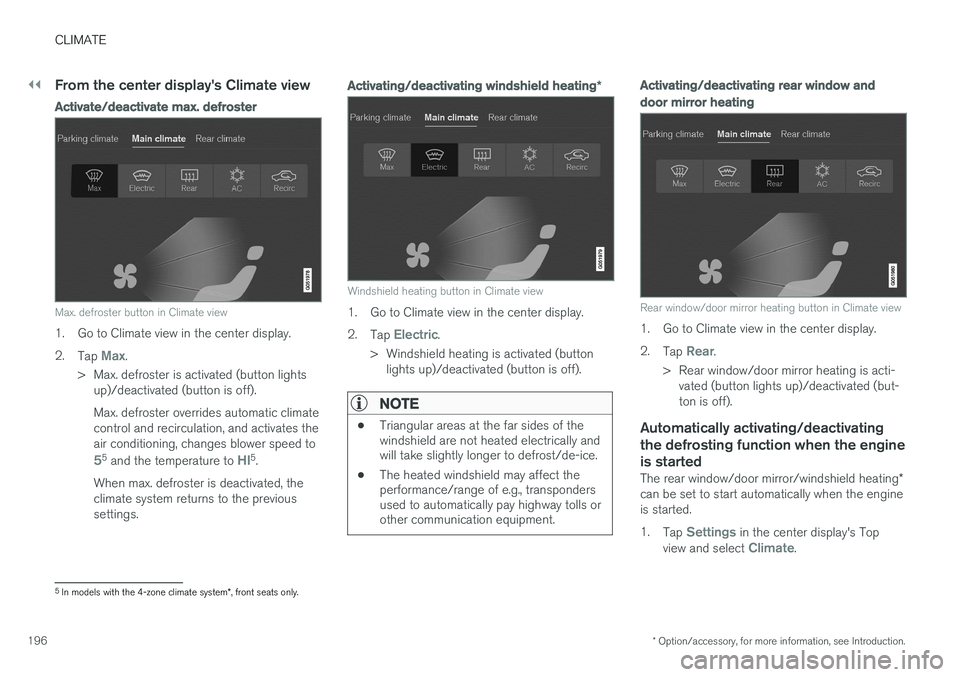
Max. defroster button in Climate view
1. Go to Climate view in the center display. 2.
Tap
Max.
> Max. defroster is activated (button lights up)/deactivated (button is off). Max. defroster overrides automatic climate control and recirculation, and activates theair conditioning, changes blower speed to
55 and the temperature to HI5.
When max. defroster is deactivated, the climate system returns to the previoussettings.
Activating/deactivating windshield heating *
Windshield heating button in Climate view
1. Go to Climate view in the center display. 2.
Tap
Electric.
> Windshield heating is activated (button lights up)/deactivated (button is off).
NOTE
• Triangular areas at the far sides of the windshield are not heated electrically andwill take slightly longer to defrost/de-ice.
• The heated windshield may affect theperformance/range of e.g., transpondersused to automatically pay highway tolls orother communication equipment.
Activating/deactivating rear window and door mirror heating
Rear window/door mirror heating button in Climate view
1. Go to Climate view in the center display. 2.
Tap
Rear.
> Rear window/door mirror heating is acti- vated (button lights up)/deactivated (but- ton is off).
Automatically activating/deactivating the defrosting function when the engineis started
The rear window/door mirror/windshield heating *
can be set to start automatically when the engine is started. 1. Tap
Settings in the center display's Top
view and select Climate.
5 In models with the 4-zone climate system *, front seats only.
Page 199 of 546
CLIMATE
* Option/accessory, for more information, see Introduction.197
2. Activate/deactivate the respective defroster
functions when the engine is started by selecting/deselecting the boxes for
Auto
Electric Front Defroster and Auto Electric
Rear Defroster.
The heating function will switch off automatically when the window/mirror is sufficiently warm andthe ice/condensation has disappeared.
Related information
• Climate system controls (p. 188)
• Climate system controls in the center display (p. 189)
• Defrosting windows and mirrors (p. 195)
• Air conditioning (p. 198)
• Turning recirculation on and off (p. 194)
• Adjusting air distribution (p. 202)
• Setting the blower speed (p. 191)
• Automatic climate control (p. 187)
• Turning front seat ventilation
* on and off
(p. 200)
• Turning steering wheel heating
* on and off
(p. 197)
Turning steering wheel heating * on
and off
The steering wheel can be heated electrically for added comfort in cold weather.
Activating/deactivating steering wheel
heating
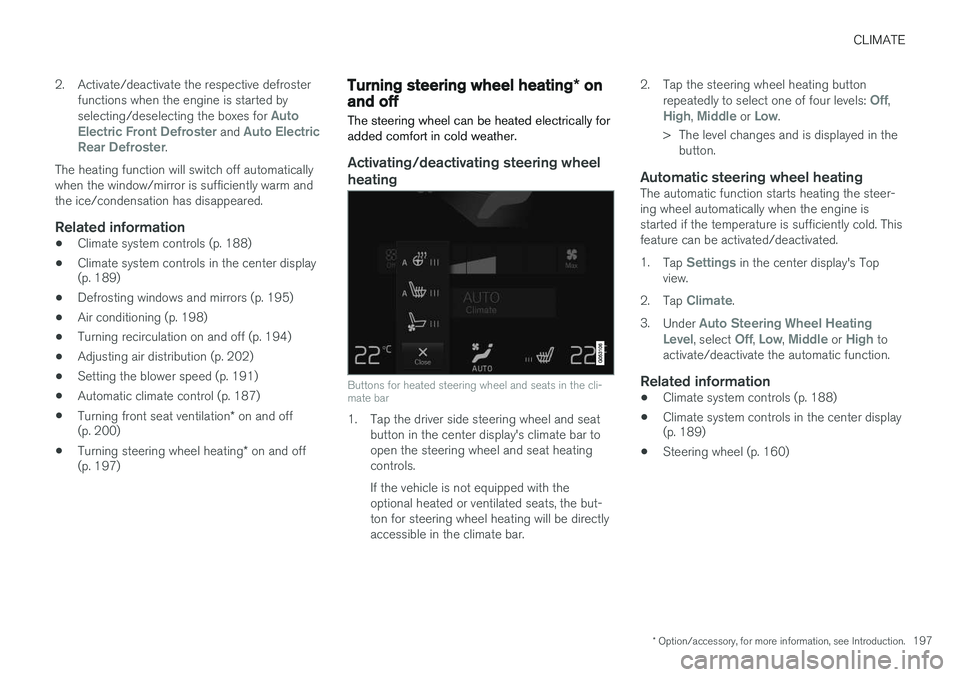
Buttons for heated steering wheel and seats in the cli- mate bar
1. Tap the driver side steering wheel and seat button in the center display's climate bar to open the steering wheel and seat heatingcontrols. If the vehicle is not equipped with the optional heated or ventilated seats, the but-ton for steering wheel heating will be directlyaccessible in the climate bar. 2. Tap the steering wheel heating button
repeatedly to select one of four levels:
Off,High, Middle or Low.
> The level changes and is displayed in the button.
Automatic steering wheel heatingThe automatic function starts heating the steer- ing wheel automatically when the engine isstarted if the temperature is sufficiently cold. Thisfeature can be activated/deactivated. 1. Tap
Settings in the center display's Top
view.
2. Tap
Climate.
3. Under
Auto Steering Wheel Heating
Level, select Off, Low, Middle or High to
activate/deactivate the automatic function.
Related information
• Climate system controls (p. 188)
• Climate system controls in the center display (p. 189)
• Steering wheel (p. 160)
Page 200 of 546
CLIMATE
* Option/accessory, for more information, see Introduction.
198
Air conditioning
The air conditioning cools and dehumidifies the air in the passenger compartment.
Activating/deactivating the main air conditioning unit
1. For the air conditioning to function optimally, close the side windows and laminated panor- amic roof *.
Air conditioning button in Climate view
2. Go to Climate view in the center display. 3.
Tap
AC.
> The air conditioning is activated (button lights up)/deactivated (button is off).
NOTE
• For the air conditioning to function opti- mally, close the side windows and lamina- ted panoramic roof
*
• The air conditioning cannot be activated if the blower is set to
Off.
Activating/deactivating the air conditioning unit for the third row seats
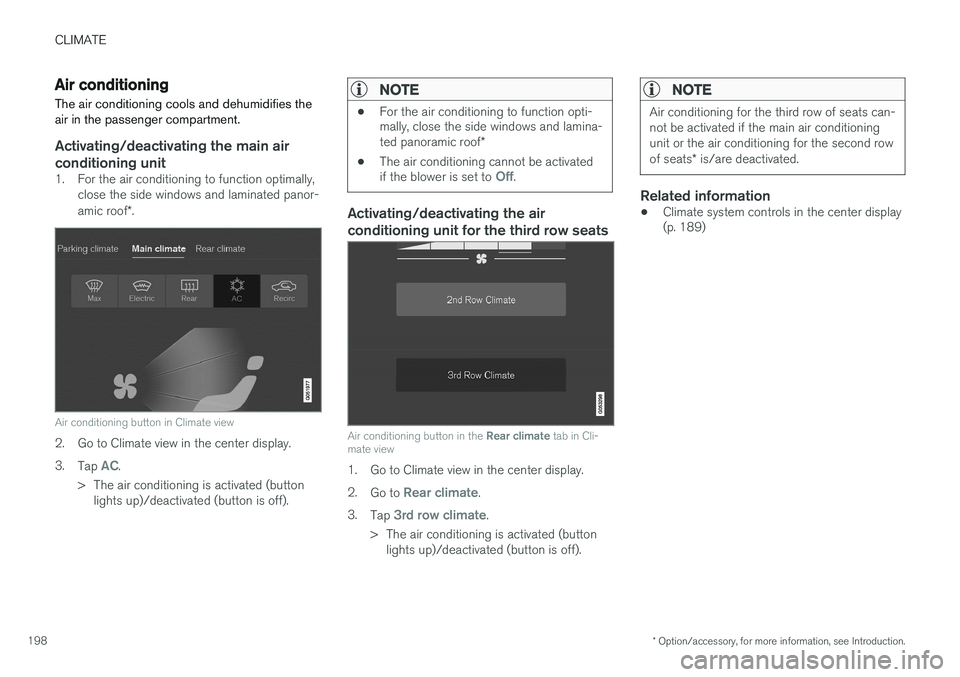
Air conditioning button in the
Rear climate tab in Cli-
mate view
1. Go to Climate view in the center display. 2. Go to
Rear climate.
3. Tap
3rd row climate.
> The air conditioning is activated (button lights up)/deactivated (button is off).
NOTE
Air conditioning for the third row of seats can- not be activated if the main air conditioningunit or the air conditioning for the second row of seats * is/are deactivated.
Related information
• Climate system controls in the center display (p. 189)
Page 228 of 546

LOCKS AND ALARM
* Option/accessory, for more information, see Introduction.
226
Locks and remote keys
The vehicle can be locked and unlocked in vari- ous ways and there are several types of remotekeys that can be used.
Locking/unlocking/opening/closingThe vehicle can be locked/unlocked from the passenger compartment, using the buttons onthe remote key or by using the optional PassiveEntry system where it is only necessary to have akey in your possession to lock or unlock thedoors. On models equipped with a power tailgate *, the
tailgate can be opened/closed by moving your foot under a sensor * beneath the rear bumper.
If for any reason a remote key does not function properly, it may be necessary to replace its bat-teries but the vehicle can always be locked orunlocked manually using the remote key'sdetachable key blade.
Remote keyThe remote key does not have to be physicallyhandled in order to start the engine because thevehicle is equipped with the standard PassiveStart system (the key only needs to be in thefront part of the passenger compartment). If thevehicle is equipped with the optional PassiveEntry system that enables keyless entry and start,the key can be anywhere in the vehicle when theengine is started. Models with Passive Entry
* also have an extra,
smaller key without buttons called a Key Tag. Additional keys can be ordered from a Volvo retailer.
Related information
• Immobilizer (p. 231)
• Alarm (p. 226)
• Child safety locks (p. 228)
• Remote key (p. 235)
• Foot movement tailgate operation
* (p. 238)
• Locking/unlocking from inside the vehicle (p. 242)
• Locking/unlocking from outside the vehicle(p. 243)
• Locking/unlocking the tailgate (p. 244)
• Starting the engine (p. 372)
Alarm
The alarm system provides a warning if an attempt is made to break into the vehicle.
The following conditions will trigger the alarm:
• a door/hood/tailgate are opened
• the battery is disconnected
• the alarm siren is disconnected
If a problem is detected in the alarm system, a message will be displayed in the instrumentpanel. Do not attempt to repair any of the components in the alarm system yourself; this could affect theinsurance policy on the vehicle. Contact a trainedand qualified Volvo service technician.
NOTE
One of the alarm sensors, which is sensitive to metallic objects, is located under the tunnelconsole cup holders. Avoid leaving coins,keys, etc., in the cup holders because theymay inadvertently trigger the alarm.
Page 256 of 546
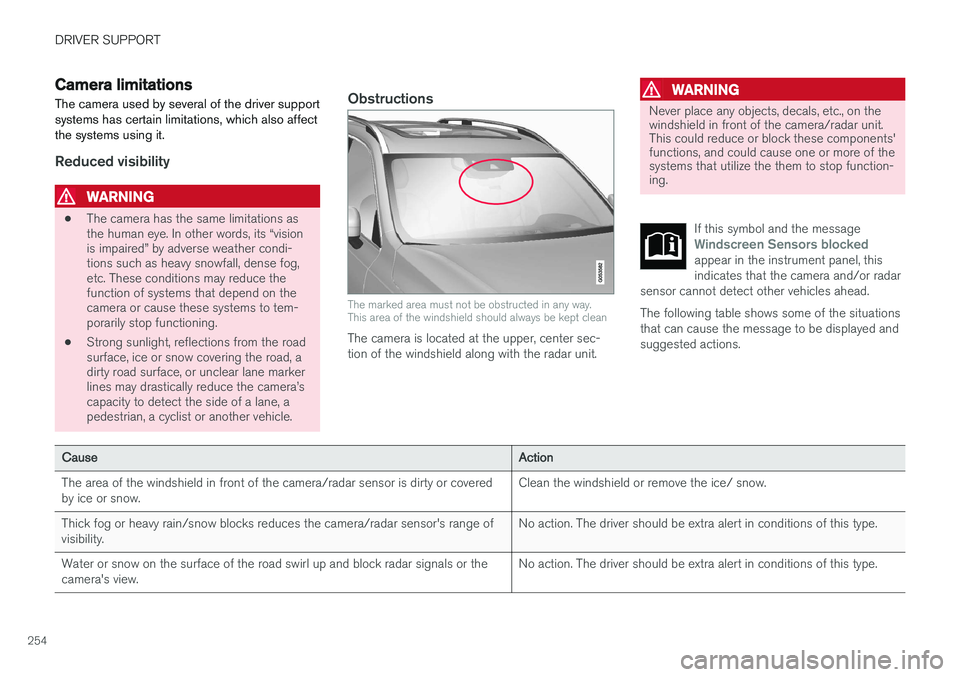
DRIVER SUPPORT
254
Camera limitations
The camera used by several of the driver support systems has certain limitations, which also affectthe systems using it.
Reduced visibility
WARNING
• The camera has the same limitations as the human eye. In other words, its “visionis impaired” by adverse weather condi-tions such as heavy snowfall, dense fog,etc. These conditions may reduce thefunction of systems that depend on thecamera or cause these systems to tem-porarily stop functioning.
• Strong sunlight, reflections from the roadsurface, ice or snow covering the road, adirty road surface, or unclear lane markerlines may drastically reduce the camera
Page 257 of 546

DRIVER SUPPORT
}}
255
CauseAction
There is dirt between the inside of the windshield and the camera/radar sensor.Have the area of the windshield cleaned by a trained and qualified Volvo service technician.
Strong backlightingNo action required. The came will reset automatically when lighting conditions improve.
High temperaturesIf the temperature in the passenger compartment is very high, the camera and radar sensor may betemporarily turned off for approx. 15 minutesafter the engine has been started to protect theirelectronic components. When the temperaturehas cooled sufficiently, the camera and radarsensor will restart automatically.Damaged windshield
CAUTION
•Service and maintenance on City Safety may only be carried out by a trained andqualified Volvo service technician.
• If a crack, scratch or stone chip shouldoccur in the section of the windshield infront the camera/radar sensor, contact atrained and qualified Volvo service techni-cian to repair or replace the windshield.Failing to do so may result in reducedCity Safety functionality.
To help prevent limited or reduced functional- ity, please also observe the following:
• Volvo recommends that cracks, scratches or stone chips on the windshield in front of the camera/radar sensor should
not
be repaired; in such cases, the entire windshield should be replaced.
• Before the windshield is replaced, con-tact a Volvo retailer to ensure that thecorrect windshield is ordered and instal-led. If the wrong type of windshield is
used, this may cause City Safety to func- tion improperly or not at all.
• Volvo recommends the use of only Genu-ine Volvo Replacement Windshields.
• When replacing windshield wipers, usethe same type or ones approved by Volvo.
After the windshield has been replaced, the camera/radar sensor will have to be recalibra-ted by a trained and qualified Volvo servicetechnician to help ensure proper function ofall of the vehicle's camera-/radar-based sys-tems.
MaintenanceIn order for camera and radar sensor to function properly, the area of the windshield must be keptfree of dirt, ice, snow, etc. and should be washedregularly with a suitable car washing detergent.
Related information
• City Safety
™ (p. 287)
• Radar sensor limitations (p. 258)
• Driver support systems (p. 252)
Page 279 of 546

DRIVER SUPPORT
}}
* Option/accessory, for more information, see Introduction.277
•the lane's side market lines are missing, badly faded or cross each other.
• the division of lanes is not clear, e.g.,when a line divides or merges withanother, at exits or if there are many roadsigns/markers.
• if there are edges or other lines on ornear the lane, e.g., curbs, cracks, repairedareas, sharp shadows, etc.
• the lane is narrow or winding.
• the weather conditions (rain, snow, fog,slush, poor visibility, backlighting, etc).
The driver should also be aware that Pilot Assist has the following limitations: • High curbs, barriers and temporary obsta- cles (cones, barriers etc) may not bedetected or could be detected incorrectlyas side marker lines, which may create arisk of collision. The driver must ensure asafe distance to these obstacles.
• The camera or radar sensor may not beable to detect objects if there are pot-holes or if there are stationary objectspartially or completely blocking the road.
• Pilot Assist does not "see" pedestrians,animals, etc.
• Pilot Assist's steering capacity is limitedand may not always be able to help thedriver keep the vehicle in the lane.Hands on the steering wheel
Pilot Assist only functions when the driver's hands are on the steering wheel
, which is con-
tinuously monitored by the system. If this is notthe case, the driver will be alerted by a text mes-sage in the instrument panel. If the driver's handsare not returned to the steering wheel, an audiblesignal will sound. If the driver does not return his/her hands to the steering wheel after the audible signal, PilotAssist will go into standby mode and must be reactivated by pressing
.
Related information
• Pilot Assist
* (p. 273)
Deactivating/resuming Pilot Assist
Putting Pilot Assist in standby mode
Function buttons and symbols
1.
Press the button (1).
> Pilot Assist will go into standby mode.
2. Press the ◀ button (2).
> Pilot Assist will be turned off and shift to ACC in standby mode.
or
–Press the ◀ button (2).
> Pilot Assist will be turned off and switch to ACC in active mode.